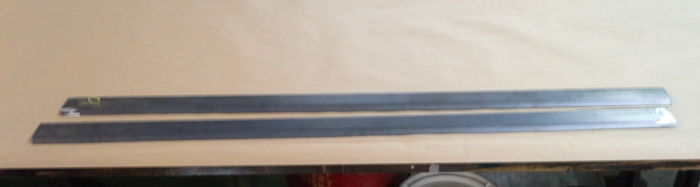
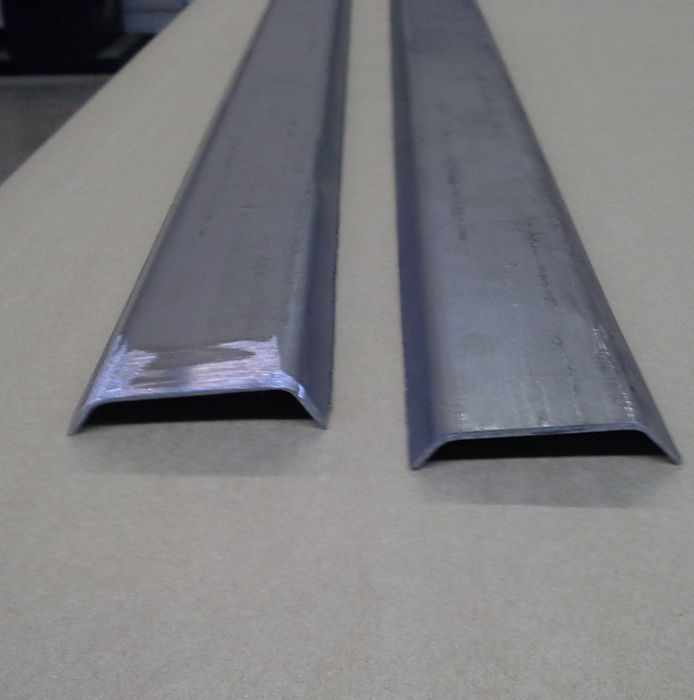
If this is your first visit, be sure to
check out the FAQ by clicking the
link above. You may have to register
before you can post: click the register link above to proceed. To start viewing messages,
select the forum that you want to visit from the selection below.
Thank you. I had never used a TIG before last May but it is so easy to use. I like it much better than the MIG I bought. I grew up doing a lot of stick and gas welding, the TIG is a lot like welding with a torch so it was an easy transition, although I do often have a problem with keeping the heat on the parts a little too long.
The other day I began welding in the right wheel well and after about 3 inches of welding ran out of wire My plan was to run up to Lowe's and buy another roll but didn't get around to it for a few days because I'm off work and the number one and two things on my to-do list are napping and being lazy 
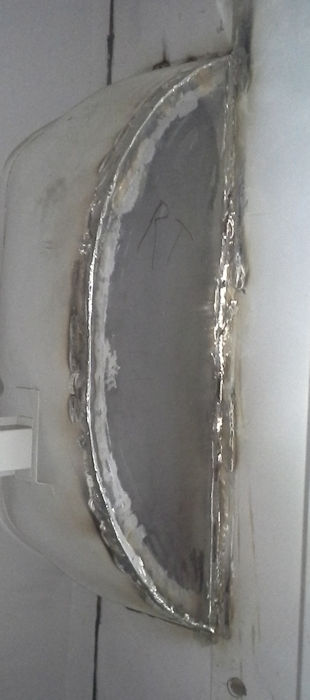
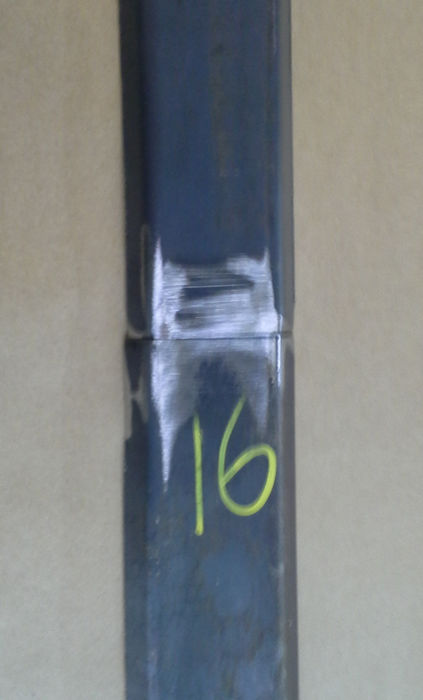
Unfortunately things need to get done and since "Eat huge breakfasts" is the number three thing on my to-do list and I used up all of the eggs making creme brulee we had to go to the store. We also had to do the last of the Christmas shopping and somehow our route took us right past Airgas. So instead of going to Lowe's I whipped in there and picked up a couple of spools of wire, which were actually cheaper than Lowe's. So today after a big breakfast and a nap I set to work once again on welding in the RH wheel well. That is actually going extremely well. I'm doing full seam welds instead of spot welds so it is taking a bit more time and effort than tack welds.
Shortly after posting yesterday I was working on the wheel well and getting close to finished when I ran out of shielding gas and since by the time I ran out Airgas was closed I now have to wait til Monday to get a new bottle. In the mean time today I ground down the welds I did yesterday. There are still some areas that need welded but it isn't coming out too badly.
So here are some pictures of how it looks today
Top side
Bottom side
and a close up of one of the welds on the bottom side
Now the plan for tomorrow is to eventually find my way to Airgas, get a new bottle of shielding gas then Tuesday or Wednesday finish with the Right wheel well and start on the left. Once that is done I can build the paint booth around the bed and hopefully shoot the under side.
Thank you. I think my welding isn't too bad considering I haven't MIG welded in 30 years and am using the cheapest Lincoln MIG you can buy.
I didn't manage to get to Airgas yesterday and likely won't today, so there won't be any progress for a few more days. I go back to work the 26th so I will probably just bring the bottle with me and exchange it after work then,
Last Friday I made it to Airgas to refill my little bottle. Santa is still on the back of the truck and it's hilarious to watch other drivers around me. Most of them are scared of it and hang way back until one of them gets brave and decides to take a chance and pass me, then a whole bunch of them tear around me as fast as they can. Some wait until they get to a light to dare to go around and some just laugh and give me a thumbs up 
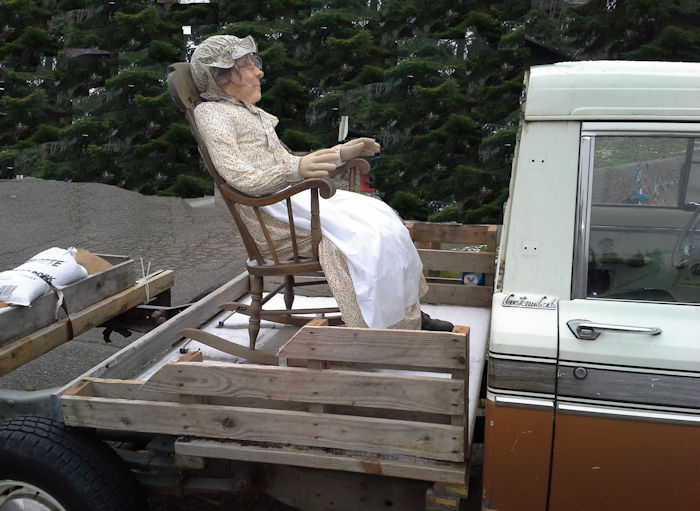
Santa will be coming off tomorrow.
Anyway. Friday I made it to air gas and they asked me if I would like to upgrade my bottle from the 20 cubic ft bottle to the 40. I told him I'd like to but can't afford it. He said it is only $15 plus the gas. My wife had made the mistake of giving me a hundred dollar bill a couple days before so I whipped that out and said "sounds good to me". So now I can weld twice as long and only go back half as often.
With my new gas bottle I finished the right wheel well and began prepping the left. Today I started welding the left one in. That has gone much smoother than the right and is about 75% complete. Hopefully soon I will get the primer and under coat on and get ready for the bedliner.
Happy new year everybody! Welcome to 2020, I can see clearly now
Santa is no longer in the back of the truck...wasn't that a scene in Scrooge? The ghost of Christmas future tells scrooge "...If things don't change I see a vacant chair on the back of a Jeep pickup..."
Don't worry I have other hilarious things planned for the chair
On Dec 30th I ran out of welding gas again 
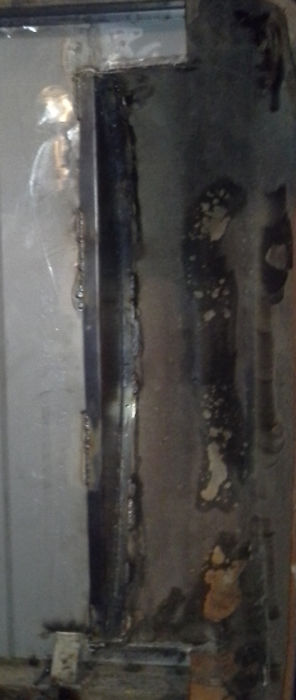
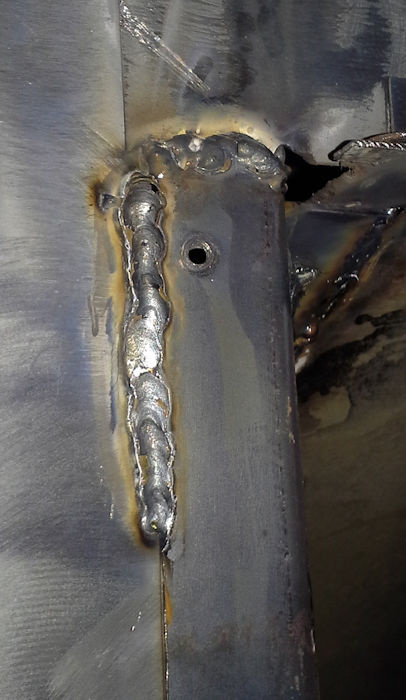
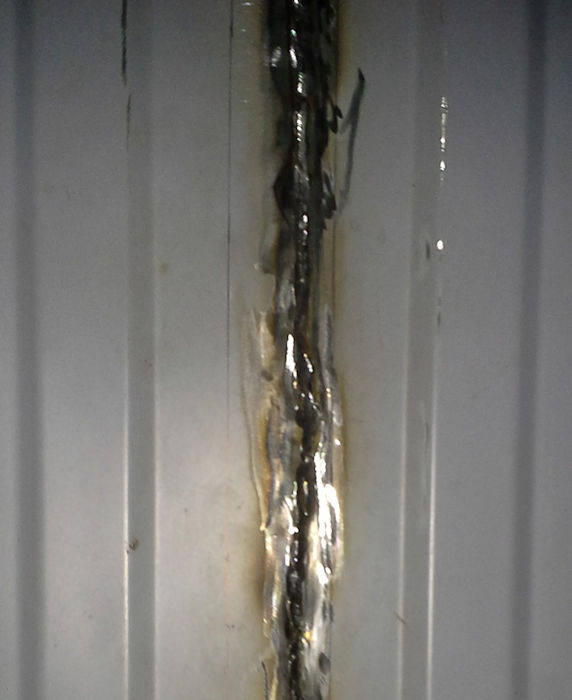
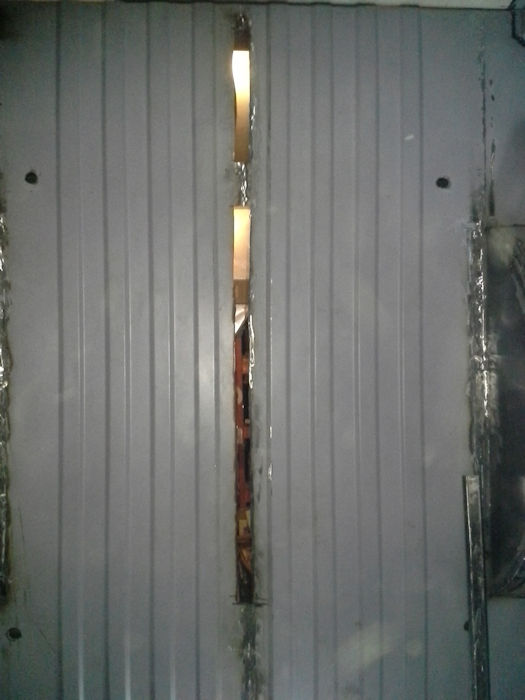
So another trip to airgas was in order on new years eve. I got that and finished all the welding and began grinding down the welds.
Then my cheap harbor freight grinder that I got in a box lot of grinders at an auction decided to quit. This doesn't sound like a big deal and in truth it shouldn't have been but like everything in my life it had to turn into one
I have several other grinders that came in the box lot but each one has a different kind of wheel. One has a cutting wheel, another a finer, thinner grinding wheel and a third is set up with sanding discs. The disc on the grinder that broke is thick with a curved edge that is the exact curve I want for the inside where the wheel well meets the floor. So I kind of needed to get this wheel off and put it on another onehgfdsawq so everything matches what I've already done. Of course it couldn't a simple matter of push the button, take the mandrel loose and remove the disc. To begin with since the gears stripped out now the button that locks the mandrel wouldn't hold it so I tried a pair of vice grips which seemed to work OK, except the last person to install the disc was a gorilla and I couldn't get it loose. So yesterday I wound up taking the grinder to work, using a one sided chisel, intended for cutting the heads off of rivets, to cut the heads off the screws holding the grinder head on, then clamping the shaft into a vice and using a big pipe wrench to unscrew the mandrel. I now have the disc on a different grinder and am all ready to go, as soon as I find the time.
Just a little more welding and a lot more grinding, sanding and cleaning and I will be ready to prime and under coat the bed and bedliner the inside.
That will be awesome, great work on the bed so far and love the rocking chair+santa LOL!
I recently did the floor of my truck on my back scraping and brushing the floor clean then painting it. Dont really want to do it that way next time. I have from the back of the cab to the front of the truck done but i think i will do like you have done and take off the box to pain the underside of it and do the rear frame and axle
1968 Jeep Gladiator J-3000 327 Vigilante V8, T-18 transmission, Dana 20 Transfer Case (Twin Stick), Dana 44 full float in the front and semi float 53 in the rear. 4.09 axles
1972 GMC 1500 basket-case (300$ buy )
That will be awesome, great work on the bed so far and love the rocking chair+santa LOL!
I recently did the floor of my truck on my back scraping and brushing the floor clean then painting it. Dont really want to do it that way next time. I have from the back of the cab to the front of the truck done but i think i will do like you have done and take off the box to pain the underside of it and do the rear frame and axle
Thank you.
Removing the bed really isn't very hard and it makes it so much easier to access everything.
The wheel wells are all done and ready for paint but something else has been eating at me for a long time now. As much work as I have in it I just can't accept that center floor seam, it looks terrible and is uneven and I don't think bedliner will fill it in enough that I will be happy. It's been eating away at me ever since I got the truck back.
So here is what it looked like this morning, it might be hard to tell but the seam in in a low section (valley) that is a little less than double the width of the rest of the valleys.
You can't really see it in the picture but from the low point on the left going right it raises up over the top of the piece on the right and makes a hump then a sudden drop at the weld down probably 1/4 of an inch. I tried to save it and convince myself that it was good enough but it isn't and I didn't know what to do.
Then last night an idea came out of nowhere and I think I have a solution. I realized I still had a section of 16ga steel 4 ft long and about 12" wide left over from doing the wheel wells. I figured this would be enough to fabricate a single raised section 8ft long. So I made a cardboard template of what a ridge and valley measure as well as the seam valley. I then subtracted the length of one chamfer (Legs? or whatever they are called) and divided that into 3 equal parts. This gave me 2 equal valleys and one ridge in the middle. I then carefully cut the metal on a band saw, measured for the chamfers and bent them in the break we have at work. That gave me this
That is actually a pretty close match to the proper ridges only slightly narrower but not enough that it is really noticeable. They are also close enough to each other that welding the two 4ft pieces together to make an 8ft piece will be easy.
At that point I had to consider how I am going to attach it. I considered just welding it over the top of the seam as a cover but it would be difficult to treat inside, not impossible but I would worry about hidden rust. The lap seam was also problematic so I figured the best thing to do was just cut out that whole lap seam. So after checking the fit and making sure it will look right I marked where it will be welded in and set to work with a cutoff wheel...until the wheel wore out. Then I resorted to the sawzall...until I broke my last blade for that. So then I resorted to a grinder which didn't work as well but did work. Now it looks like this
The cutouts get rid of the unevenness and let me get to the back side to prime and paint. I still have one more section to cut out but that shouldn't be a problem once I get some new cutoff wheels, then I can weld the new ridge in and it should look like it belongs there.
I just spent my weekend doing very little truck wise. My wife and I binge watched Good Omans on Amazon, it's a great movie/series. I read the book so many years ago that I can barely remember it but it seemed to match what little I do remember.
Just about the time the movie was over the door bell rang with a delivery of an old lady mask my wife had ordered
So we went to work making my new rocking chair passenger.
Over the past week or two she has ordered a dummy
and a dress as well as the mask so today we had the final piece to make a Granny so we did and put her in the rocker. We did have to add the PVC spine, shoulders, and hips I had made for Santa but that was easy enough.
For shoes I simply used an old worn out pair of my work boots and Granny was complete
Comment