Howell TBI / EFI Installation How-To for CARB E.O. #D-452-2

Collapse
X
 
  • Filter
  • Time
  • Show
Clear All
new posts
  • MysticRob
    350 Buick
    • Nov 26, 2019
    • 819

    #16
    Part of the Howell kit involves rerunning some evap lines to the charcoal canister, so during inspection found I needed to replace some. Hard to tell but these are the evap hoses for the fuel tank and transmission, which were so brittle they had turned to powder, and one had a huge hole burned thru it at some point due to it resting on the passenger exhaust manifold. I cut new hoses and ran them differently than they were originally to keep away from hot areas:
    PXL_20210501_171632035 by Robert Stone, on Flickr

    Took forever to get the evap hoses out since I had to jack the passenger side up to get to the bolt that held the lines to the transmission. Once I got that bolt out I was able to wrangle the lines lower to remove the perma-clamps. Measured out new lengths, a bit longer to run them differently up the inner fender, and hose-clamped them to to the lines:
    PXL_20210501_172147069 by Robert Stone, on Flickr

    Took forever to get the passenger side #4 cylinder air injection hole drilled out and retapped to screw in the new manifold plug, but it's done now:
    PXL_20210430_020316927 by Robert Stone, on Flickr

    Part of the new fuel injection kit was getting a new O2 sensor hole drilled, bung welded up, and sensor screwed in. Local shop got that done for me. Was the first time I'd driven the beast on public roads more than a couple hundred feet. Placement was per Howell, in front of driver side pipe:
    PXL_20210504_015137752 by Robert Stone, on Flickr

    Also had the shop inspect the cat and as I figured it had been gutted and was useless, so had the shop weld up a new Magnaflow cat. Exhaust smells much better now!!:
    PXL_20210503_222825088 by Robert Stone, on Flickr

    Shop also removed the air injection pipe that went from driver side down to the original cat, with its custom water hose job. Unseen here was a large hole worn into the bottom of the pipe, making this thing useless even if everything else was good (which it wasn't!):
    PXL_20210503_225117107 by Robert Stone, on Flickr

    Discovered the distributor advance was set at only 5* with vacuum disconnected and plugged. I timed it for ~15* due to higher Boise elevation, but anywhere near the stock 12* put the nipple far too close to the power steering belt for comfort. Now I know why it was at only 5*!!:
    PXL_20210503_232046930 by Robert Stone, on Flickr

    Had to remove the dizzy after accounting for which cylinder the rotor was pointing at, then repositioned so I could get a better nipple location. More toward the power steering proved adequate for adjustment:
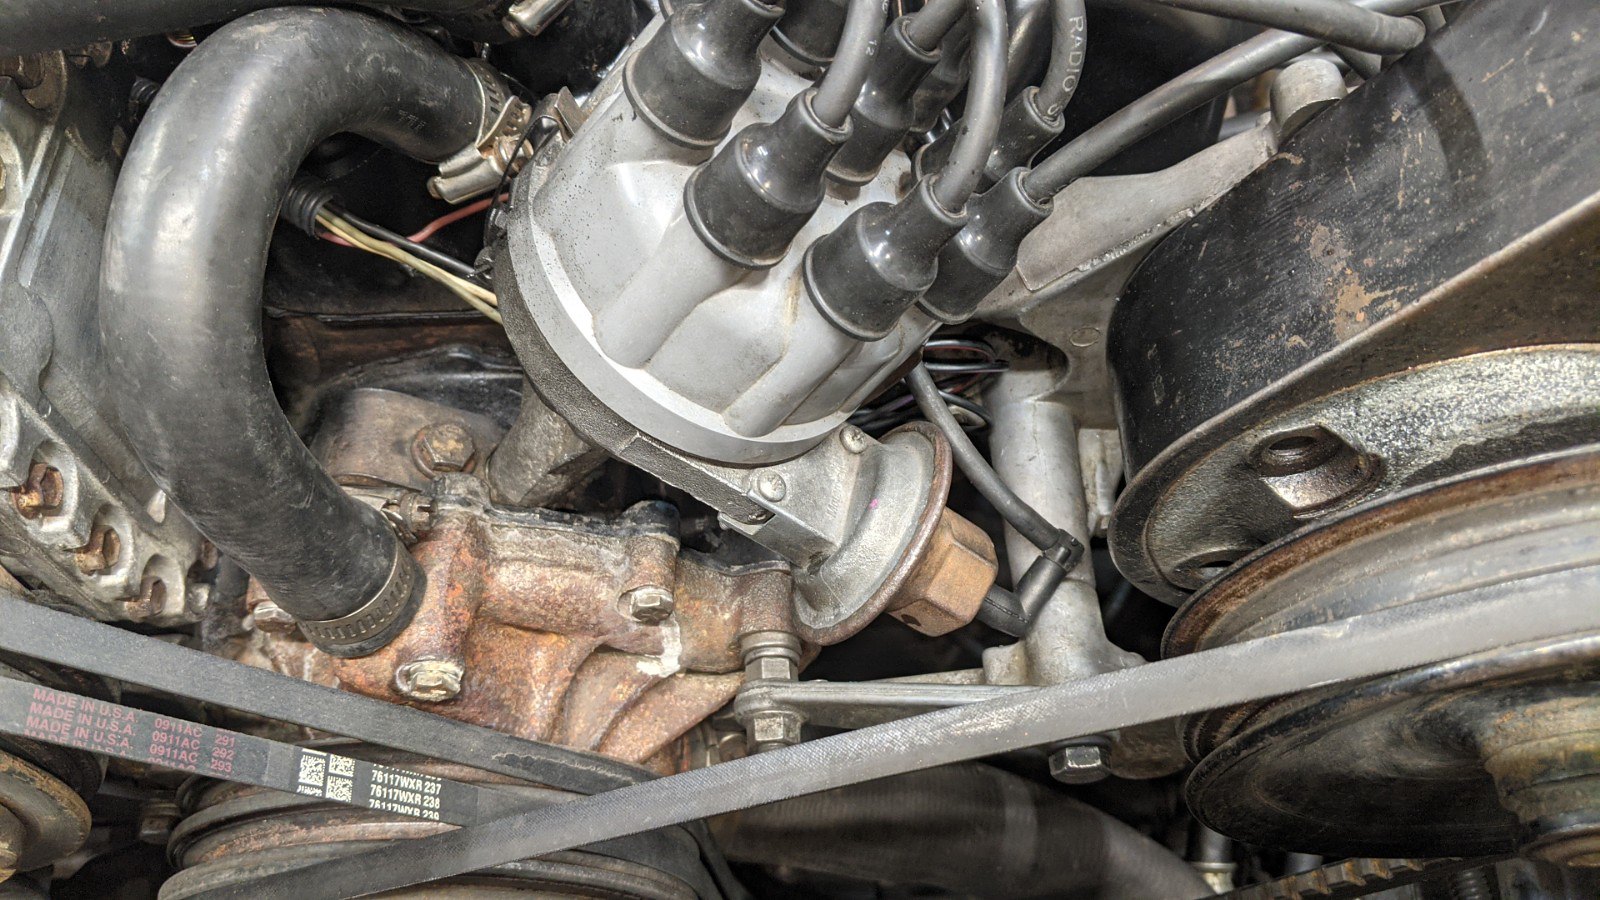
    PXL_20210504_022731914 by Robert Stone, on Flickr

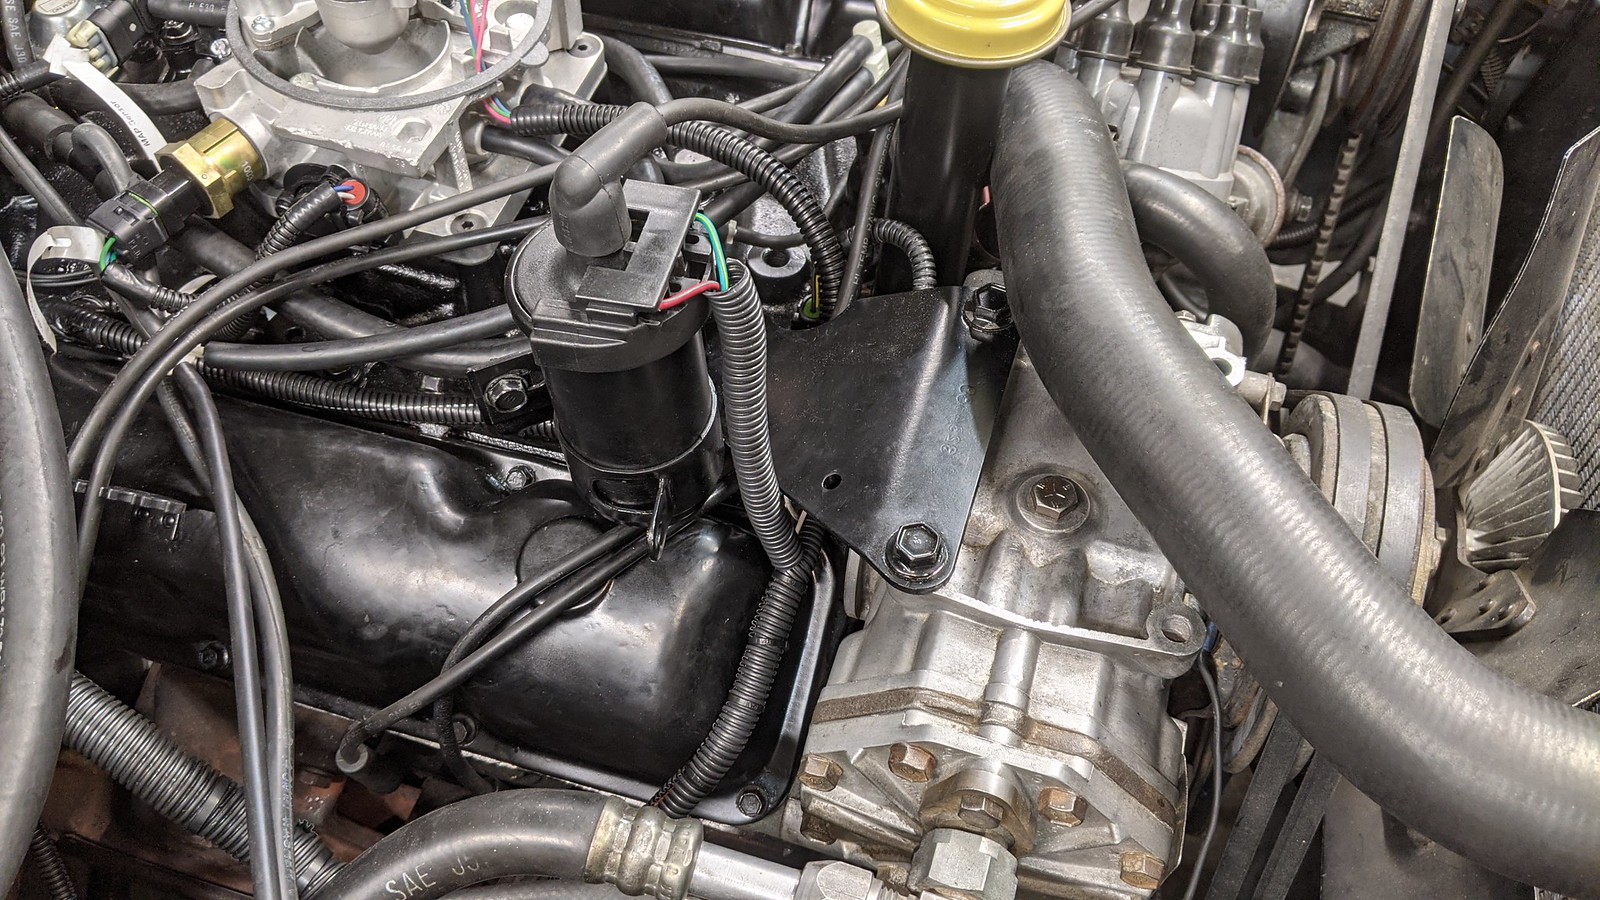
    I reused the air cleaner assembly but will leave the vacuum hose off the end diaphragm since the flap inside closes when vacuum is applied, and that the fuel injection system doesn't need it.
    EDITED THE FOLLOWING AFTER CONVERSATION LOWER IN THE THREAD:
    The diaphragm closer to the air cleaner lid only opens when vacuum is connected, but since wide open throttle may cause it to close I decided to just wire it open permanently and leave the vacuum hose off it:
    PXL_20210503_222746419 by Robert Stone, on Flickr
    Last edited by MysticRob; 09-10-2021, 08:49 PM.
    --Rob--
    1988 Jeep Grand Wagoneer / Baltic Blue & Tan

    My build thread:
    https://forums.ifsja.org/forum/tire-...er-restoration

    My Howell TBI Install How-To:
    https://forums.ifsja.org/forum/tire-...rb-e-o-d-452-2

    Comment

    • rang-a-stang
      Administrator
      • Oct 31, 2016
      • 5505

      #17
      FANTASTIC THREAD!!! GREAT pics!!!
      Chuck McTruck 71 J4000
      (Chuck McTruck Build Thread)
      (8.1L swap questions - PerformanceTrucks.net Forums​)
      79 Cherokee Chief (SOLD, goodbye old buddy)
      (Cherokee Build Thread)
      11 Nissan Pathfinder Silver Edition 4x4
      09 Mazdaspeed3 Grand Touring
      00 Baby Cherokee

      Comment

      • babywag
        out of order
        • Jun 08, 2005
        • 10286

        #18
        Bust out inner flap or wire it open all time.
        WOT or even heavy load vacuum drops and it can close resulting in HUGE air restriction.
        Tony
        88 GW, 67 J3000, 07 Magnum SRT8

        Comment

        • MysticRob
          350 Buick
          • Nov 26, 2019
          • 819

          #19
          Originally posted by rang-a-stang
          FANTASTIC THREAD!!! GREAT pics!!!
          Thanks, mister. Hopefully I can get into more detail once I work on a few other things. The manual sucks for instructions, so might do detailed pics of the vacuum routing too.

          Originally posted by babywag
          Bust out inner flap or wire it open all time.
          WOT or even heavy load vacuum drops and it can close resulting in HUGE air restriction.
          I hadn't even thought of that, good idea. I'll rig something up and just leave the intake vacuum port capped.
          Last edited by MysticRob; 05-04-2021, 04:52 PM.
          --Rob--
          1988 Jeep Grand Wagoneer / Baltic Blue & Tan

          My build thread:
          https://forums.ifsja.org/forum/tire-...er-restoration

          My Howell TBI Install How-To:
          https://forums.ifsja.org/forum/tire-...rb-e-o-d-452-2

          Comment

          • MysticRob
            350 Buick
            • Nov 26, 2019
            • 819

            #20
            Not much to report other than I had to phone Howell's support guys due to a cold start low / hunting idle issue (~400RPM to almost dying, occasionally dying) I had from initial startup, obviously during open loop operation. Closed loop seemed to work well once the vehicle was warmed up and was obvious when it kicked over to closed loop since it idled so much better.

            Anyway, their support guy was quick to answer, and he walked me thru which direction the T20 screw needed to be turned to speed up the cold start idle using the following steps in the manual (which again, is pretty pathetic since it doesn't provide anywhere near enough info).

            I borrowed a portable tach and verified 650-700 RPM after screwing in (aka clockwise) that T20 torx screw about 2.5 turns from where it was originally out of the box.

            Cold start is now quick and painless, though I have now diagnosed a couple exhaust leaks on the rear of both manifolds, as well as what sounds like lifter tick on the #1 cylinder, which is causing a misfire and subsequent RPM drop of 50-100 RPMs every few seconds. Will troubleshoot that soon as I need it running perfectly to smog it!

            Lifter valley didn't look like a stuck lifter would be an issue when I had the intake off way back when, but then again, there's no telling what can get stuck in things:
            IMG_20200423_122346 by Robert Stone, on Flickr

            Support guy verified I already had vacuum routed correctly (again, the manual wording sucks, and has no pics), and timing at about 15* for Boise altitude sounded good to him. I've used all new vacuum hoses, capped unneeded ports, and used a new EGR and PCV valve.

            Idle Air Adjustment Instructions
            Before beginning adjustment, grind the throttle stop screw plug, flat and drill into the plug or punch out the cup plug (on some TBI models) to allow a T-20 Torx driver to access the screw.
            1. Jumper A&B terminals in the ALDL connector (scanner connector)
            2. Turn ignition key on but do not start engine.
            3. Disconnect 4-pin idle air control connector from the TBI unit.
            4. Remove jumper from ALDL connector.
            5. Start engine.
            6. While idling, adjust throttle stop screw to increase base idle rpm as desired.
            7. Turn engine off.
            8. Reconnect idle air control connector.
            9. This will complete the adjustment.
            Last edited by MysticRob; 09-10-2021, 09:00 PM.
            --Rob--
            1988 Jeep Grand Wagoneer / Baltic Blue & Tan

            My build thread:
            https://forums.ifsja.org/forum/tire-...er-restoration

            My Howell TBI Install How-To:
            https://forums.ifsja.org/forum/tire-...rb-e-o-d-452-2

            Comment

            • PlumCrazyChris
              258 I6
              • Jun 03, 2002
              • 385

              #21
              Great writeup Bob, I can't believe GWs didn't come with these from the factory, at least in their last few years. I hope it tunes up nice for you. I had one on my 83 Cherokee 258, and had plenty of power. Very similar to the 360 in my previous Cherokee. I had problems with my distributor though, I was getting way to much vacuum advance and ended up having to put a stop in the advance plate.

              Hope you took to time to replace your water pump and ensure your cooling system is up to scratch before heading to Arizona. Wait til you get there to address the A/C. You can get R12 across the border at La Autozona, for a few bucks a can. or at least you could a few years ago. I had the a/c on my 79 Cherokee repaired over in Progresso one afternoon while a couple friends and I had lunch for $60. It literally froze us out on the way back to Austin.

              I've gone through your other thread, and you've really done some great work. I love the seats and door panels etc. and spent money where it does the most good.

              Nice job!
              PlumCrazyChris
              Round Rock, TX
              1979 Cherokee Chief 360/T18
              1990 Grand Wagoneer - sold
              1983 Cherokee Laredo Limited - sold, and want it back!
              1979 Cherokee Chief - sold
              1976 Cherokee Chief - sold

              Comment

              • babywag
                out of order
                • Jun 08, 2005
                • 10286

                #22
                Originally posted by MysticRob
                Not much to report other than I had to phone Howell's support guys due to a cold start low / hunting idle issue (~400RPM to almost dying, occasionally dying) I had from initial startup, obviously during open loop operation. Closed loop seemed to work well once the vehicle was warmed up and was obvious when it kicked over to closed loop since it idled so much better.

                Anyway, their support guy was quick to answer, and he walked me thru which direction the T20 screw needed to be turned to speed up the cold start idle using the following steps in the manual (which again, is pretty pathetic since it doesn't provide anywhere near enough info).

                I borrowed a portable tach and verified 650-700 RPM after screwing in (aka clockwise) that T20 torx screw about 2.5 turns from where it was originally out of the box.

                Cold start is now quick and painless, though I have now diagnosed a couple exhaust leaks on the rear of both manifolds, as well as what sounds like lifter tick on the #1 cylinder, which is causing a misfire and subsequent RPM drop of 50-100 RPMs every few seconds. Will troubleshoot that soon as I need it running perfectly to smog it!

                Support guy verified I already had vacuum routed correctly (again, the manual wording sucks, and has no pics), and timing at about 15* for Boise altitude sounded good to him. I've used all new vacuum hoses, capped unneeded ports, and used a new EGR and PCV valve.

                Idle Air Adjustment Instructions
                Before beginning adjustment, grind the throttle stop screw plug, flat and drill into the plug or punch out the cup plug (on some TBI models) to allow a T-20 Torx driver to access the screw.
                1. Jumper A&B terminals in the ALDL connector (scanner connector)
                2. Turn ignition key on but do not start engine.
                3. Disconnect 4-pin idle air control connector from the TBI unit.
                4. Remove jumper from ALDL connector.
                5. Start engine.
                6. While idling, adjust throttle stop screw to increase base idle rpm as desired.
                7. Turn engine off.
                8. Reconnect idle air control connector.
                9. This will complete the adjustment.
                You must also check(and correct if needed) TPS base voltage when adjusting minimum idle speed. Needs to be ~.54v
                When adjusting for the minimum idle it should be set ~100RPM below the commanded idle speed in .bin

                Exhaust leaks will mess with TBI the o2 sensor will read leaner than actual conditions. This causes the ecm to add fuel unnecessarily.
                Tony
                88 GW, 67 J3000, 07 Magnum SRT8

                Comment

                • MysticRob
                  350 Buick
                  • Nov 26, 2019
                  • 819

                  #23
                  Originally posted by PlumCrazyChris
                  Great writeup Bob, I can't believe GWs didn't come with these from the factory, at least in their last few years. I hope it tunes up nice for you. I had one on my 83 Cherokee 258, and had plenty of power. Very similar to the 360 in my previous Cherokee. I had problems with my distributor though, I was getting way to much vacuum advance and ended up having to put a stop in the advance plate.

                  Hope you took to time to replace your water pump and ensure your cooling system is up to scratch before heading to Arizona. Wait til you get there to address the A/C. You can get R12 across the border at La Autozona, for a few bucks a can. or at least you could a few years ago. I had the a/c on my 79 Cherokee repaired over in Progresso one afternoon while a couple friends and I had lunch for $60. It literally froze us out on the way back to Austin.

                  I've gone through your other thread, and you've really done some great work. I love the seats and door panels etc. and spent money where it does the most good.

                  Nice job!
                  You and me both, on lack of TBI/EFI in later years. Carbs suck (and used till 1991!), and just too analog and difficult to dial in for both performance and drivability. I'm waiting to get the cash together for a new HEI coil-on-dizzy from ProForm or the like to avoid relying on the antiquated Motorcraft brains and stock dizzy in it now. No idea how old the coil is either, but it looked stock.

                  Not sure on the water pump age, but it works well enough for now. Trying not to sink too much into it right now, considering I now need to resolve that misfire. I likely won't have enough time to get the A/C working before I head down to AZ, but am hopeful. Won't be much infrastructure where we're headed. Thanks for the kind words on my build, it's coming along slowly, but I'm pretty happy with it now. Seems like it's 2 steps forward, 1 step back lately, considering I'm neck deep in the mechanicals now.
                  --Rob--
                  1988 Jeep Grand Wagoneer / Baltic Blue & Tan

                  My build thread:
                  https://forums.ifsja.org/forum/tire-...er-restoration

                  My Howell TBI Install How-To:
                  https://forums.ifsja.org/forum/tire-...rb-e-o-d-452-2

                  Comment

                  • MysticRob
                    350 Buick
                    • Nov 26, 2019
                    • 819

                    #24
                    Originally posted by babywag
                    You must also check(and correct if needed) TPS base voltage when adjusting minimum idle speed. Needs to be ~.54v
                    When adjusting for the minimum idle it should be set ~100RPM below the commanded idle speed in .bin

                    Exhaust leaks will mess with TBI the o2 sensor will read leaner than actual conditions. This causes the ecm to add fuel unnecessarily.
                    Yeah, Tony, funny how I thought this was going to be a quick and painless install!

                    With the instruction manual sucking like it does, I'll need to research that TPS base voltage check and adjustment then, unless you can point to something for me.

                    Marc PM'd me some improved steps for setting the idle earlier today, but I figure I need to get those exhaust leaks and lifter/rocker tick diagnosed and resolved before I can get everything dialed in completely.

                    Hey, it's running way better than it did with that old suspect carb though!
                    --Rob--
                    1988 Jeep Grand Wagoneer / Baltic Blue & Tan

                    My build thread:
                    https://forums.ifsja.org/forum/tire-...er-restoration

                    My Howell TBI Install How-To:
                    https://forums.ifsja.org/forum/tire-...rb-e-o-d-452-2

                    Comment

                    • babywag
                      out of order
                      • Jun 08, 2005
                      • 10286

                      #25
                      tps should be adjustable,key on engine off, loosen screws rotate tps to desired voltage tighten screws.

                      to read voltage you'll need an aldl cable & software.
                      you can buy one(overpriced imho) or grab a $8 usb board.
                      i recently sent Marc info on cheap usb stuff he may have info handy?

                      regardless what anybody claims...no such thing as slap it on and go/self tuning blah blah.
                      It may work, but it won't be 100% and they ALL benefit from "tuning" be it old school burning a chip or changing parameters via touchscreen on the more modern stuff.

                      once it's dialed in you'll never regret going efi.
                      Tony
                      88 GW, 67 J3000, 07 Magnum SRT8

                      Comment

                      • MysticRob
                        350 Buick
                        • Nov 26, 2019
                        • 819

                        #26
                        Originally posted by babywag
                        tps should be adjustable,key on engine off, loosen screws rotate tps to desired voltage tighten screws.

                        to read voltage you'll need an aldl cable & software.
                        you can buy one(overpriced imho) or grab a $8 usb board.
                        i recently sent Marc info on cheap usb stuff he may have info handy?

                        regardless what anybody claims...no such thing as slap it on and go/self tuning blah blah.
                        It may work, but it won't be 100% and they ALL benefit from "tuning" be it old school burning a chip or changing parameters via touchscreen on the more modern stuff.

                        once it's dialed in you'll never regret going efi.
                        Between you and Marc I should know a lot more about this than I thought I would after I get it all done. Thanks again!
                        I'm still waiting on my new BJ's 17-8516 Remflex Exhaust Gaskets to arrive, but should get them before I head to CA for a six-week job.
                        I still need to get into my driver side valve cover to check for obvious issues with what sounds like the #1 cylinder lifter tick and misfire.
                        Last edited by MysticRob; 05-11-2021, 06:07 AM.
                        --Rob--
                        1988 Jeep Grand Wagoneer / Baltic Blue & Tan

                        My build thread:
                        https://forums.ifsja.org/forum/tire-...er-restoration

                        My Howell TBI Install How-To:
                        https://forums.ifsja.org/forum/tire-...rb-e-o-d-452-2

                        Comment

                        • MysticRob
                          350 Buick
                          • Nov 26, 2019
                          • 819

                          #27
                          Marc has sent me an adapter he made so I'm looking forward to getting that. I'll run TunerPro and log once I get the exhaust leaks and what I've now identified as a sloppy rocker arm on the #1 cylinder intake valve fixed. The valve ticking is no longer audible past ~1000 RPM, so I'm hoping I can resolve it without tearing down anything else.

                          I've discovered some other odd things with that diagnosis that I've described in this new thread:

                          https://ifsja.org/forums/vb/showthread.php?t=189937

                          I may try to change the exhaust manifold gaskets myself today, just hoping I don't break any bolts off in the heads!
                          Last edited by MysticRob; 09-10-2021, 09:00 PM.
                          --Rob--
                          1988 Jeep Grand Wagoneer / Baltic Blue & Tan

                          My build thread:
                          https://forums.ifsja.org/forum/tire-...er-restoration

                          My Howell TBI Install How-To:
                          https://forums.ifsja.org/forum/tire-...rb-e-o-d-452-2

                          Comment

                          • MysticRob
                            350 Buick
                            • Nov 26, 2019
                            • 819

                            #28
                            Hadn't been able to update this thread due to a misfire caused by a dished lifter. I replaced that bad lifter and did some other valvetrain work to hopefully fix that problem.
                            As part of the Howell install there's a white tach signal wire that needs wired into the negative side of the coil. Since my coil was pretty mickey-moused I decided to get a new coil wiring bracket and clean things up. Here's a look at the old coil wiring, lovely as it is. It had a broken positive-side bracket with 2 separate yellow wires being badly wired into it, with the 2nd wire end just hanging unconnected to anything -- real quality work! The negative side just had a single loose spade connector on it that I temporarily had wound the white tach signal wire around just to get it started and iron out some bugs (and subsequently discover valvetrain issues):
                            PXL_20210503_222746419 by Robert Stone, on Flickr

                            I ordered the new coil connector from TGW and it's very nice. Here's a pic of the mock-up prior to wiring everything together the right way:
                            PXL_20210517_032538113 by Robert Stone, on Flickr

                            Everything wired up and loomed to hide the ugliness. While I was in here I also repaired the A/C compressor wiring that someone had butchered:
                            PXL_20210517_152532038 by Robert Stone, on Flickr

                            I'd discovered upon starting it that it had bad exhaust leaks on both sides of the block so thought it best to resolve those before trying to dial in the system using Marc and Tony's advice. Thankfully the exhaust manifold bolts weren't very tight so I was able to remove them without too much trouble or broken bolts. Got the new BJ's exhaust manifold gaskets and they're much thicker at ~3/16" than the crap that was on there:
                            PXL_20210516_202013849 by Robert Stone, on Flickr

                            Old passenger side gaskets:
                            PXL_20210516_221848515 by Robert Stone, on Flickr
                            Last edited by MysticRob; 09-10-2021, 09:07 PM.
                            --Rob--
                            1988 Jeep Grand Wagoneer / Baltic Blue & Tan

                            My build thread:
                            https://forums.ifsja.org/forum/tire-...er-restoration

                            My Howell TBI Install How-To:
                            https://forums.ifsja.org/forum/tire-...rb-e-o-d-452-2

                            Comment

                            • rang-a-stang
                              Administrator
                              • Oct 31, 2016
                              • 5505

                              #29
                              Looking good! Make sure to post us up some Videos!!!
                              Chuck McTruck 71 J4000
                              (Chuck McTruck Build Thread)
                              (8.1L swap questions - PerformanceTrucks.net Forums​)
                              79 Cherokee Chief (SOLD, goodbye old buddy)
                              (Cherokee Build Thread)
                              11 Nissan Pathfinder Silver Edition 4x4
                              09 Mazdaspeed3 Grand Touring
                              00 Baby Cherokee

                              Comment

                              • MysticRob
                                350 Buick
                                • Nov 26, 2019
                                • 819

                                #30
                                Originally posted by rang-a-stang
                                Looking good! Make sure to post us up some Videos!!!
                                I took a 30sec video of her running very well now, but it's 80MB and I'll have to manually offload it from my phone to my laptop before posting.

                                I still have to button a few things up, and figure out where exactly to place the brain box, but I feel much better about tuning the IAC and TPS once I get that usb cable you sent. Post office still shows it in transit, so hopefully it arrives tomorrow. I'll cap this thread off with interior pics and how I terminated power too, plus offer up some tips on things learned, etc.
                                Last edited by MysticRob; 05-18-2021, 02:12 PM.
                                --Rob--
                                1988 Jeep Grand Wagoneer / Baltic Blue & Tan

                                My build thread:
                                https://forums.ifsja.org/forum/tire-...er-restoration

                                My Howell TBI Install How-To:
                                https://forums.ifsja.org/forum/tire-...rb-e-o-d-452-2

                                Comment

                                Working...
                                X