4350 Rebuild - Ristow

Collapse
X
 
  • Filter
  • Time
  • Show
Clear All
new posts
  • Ristow
    • Jan 20, 2006
    • 17292

    4350 Rebuild - Ristow

    puttin' a carb together for a pal. thought someone may find it helpful if i showed my work.

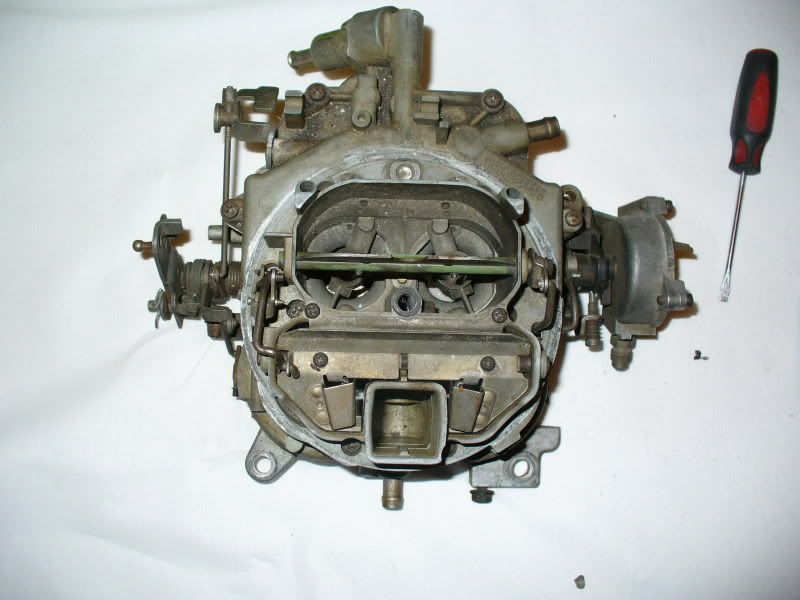
    4350 motorcraft off a FSJ.

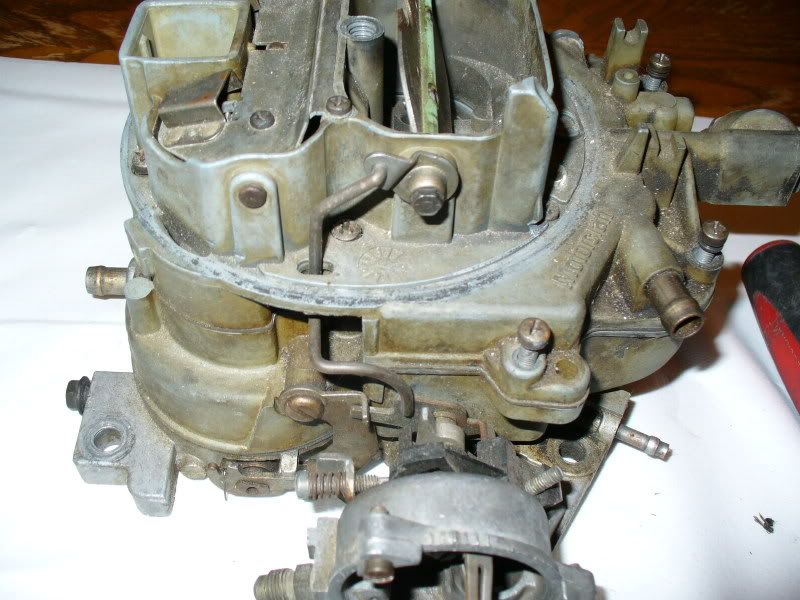
    first,remove the top cover screws. 10 of them. they are the larger phillips headed screws. i forgot to snap a pic of the float removal,but pretty simple.pull the pin.


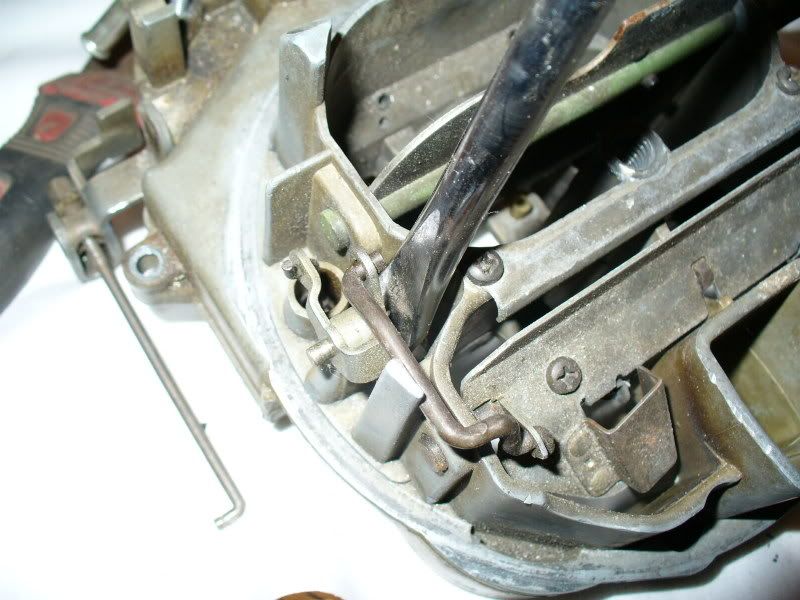
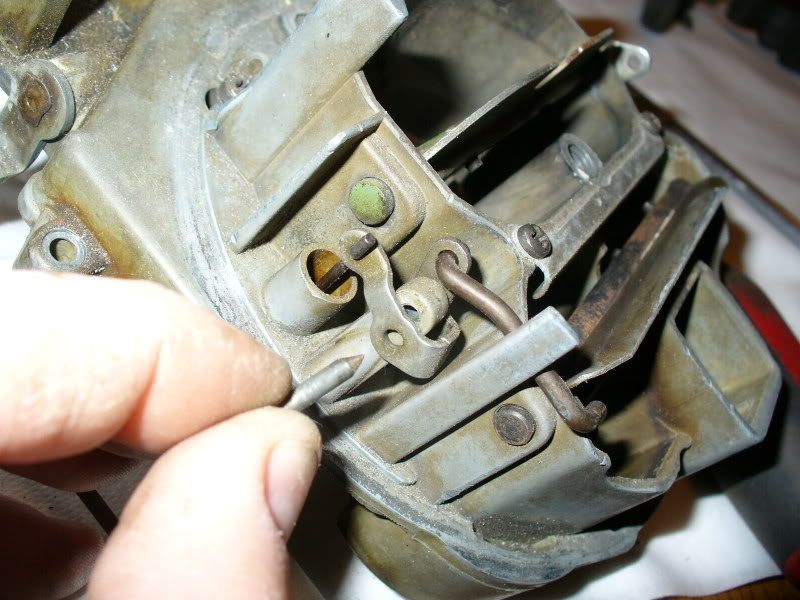
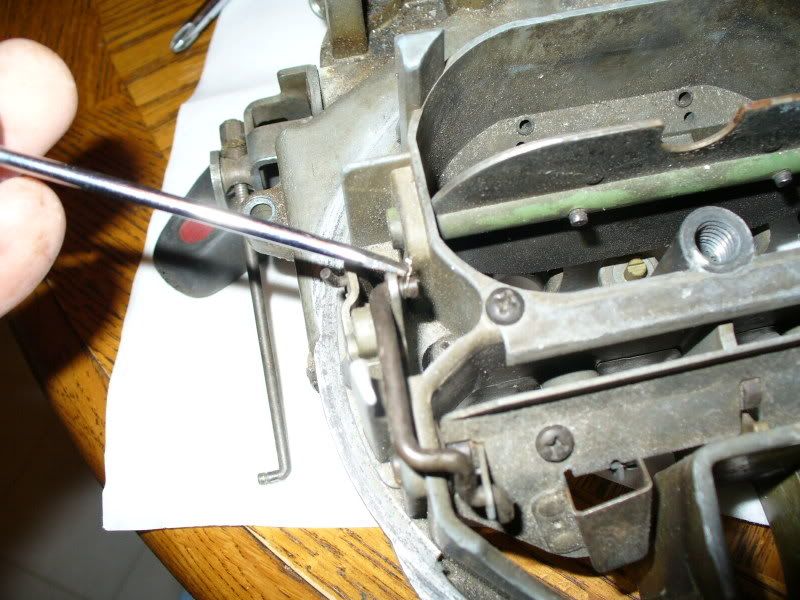
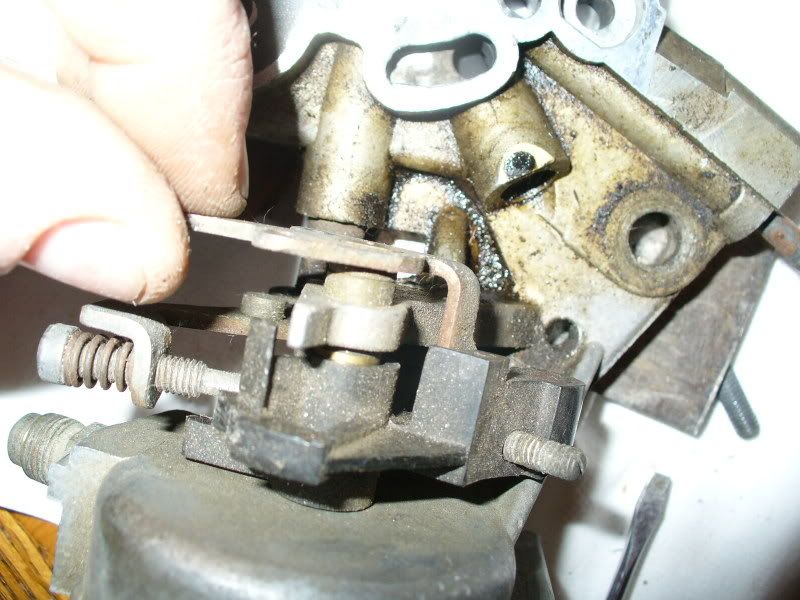
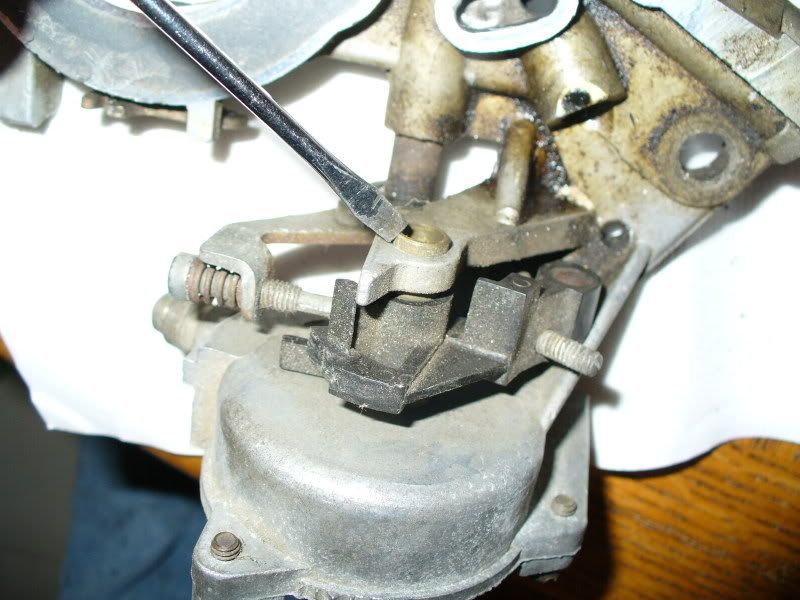
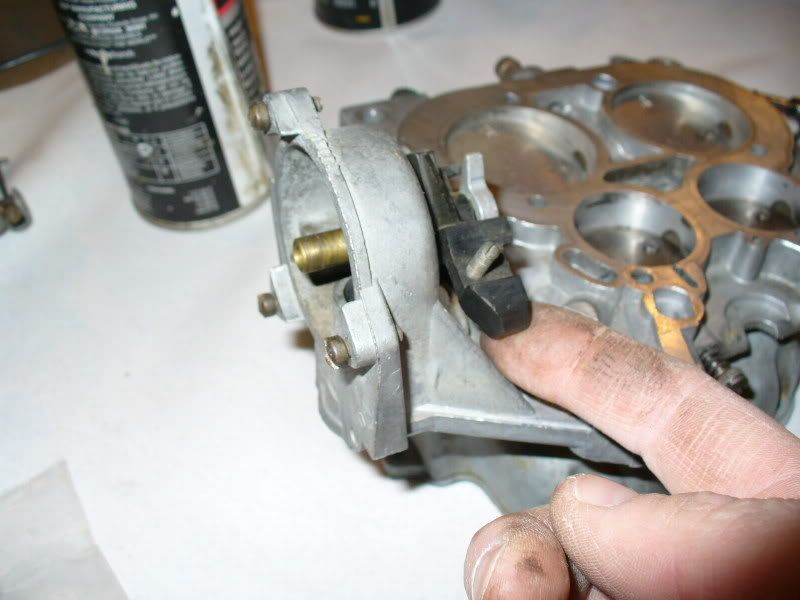
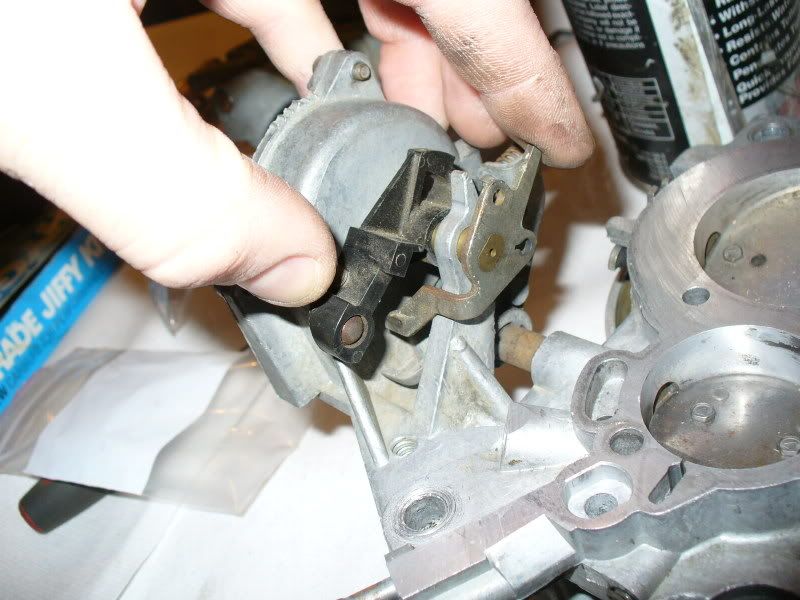
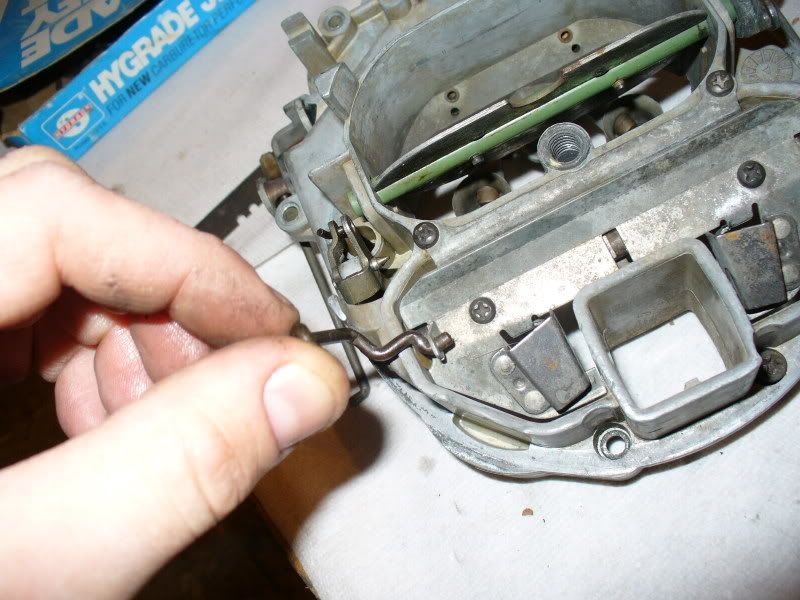
    next,remove the clip from the accelerator pump link,at the throttle arm.


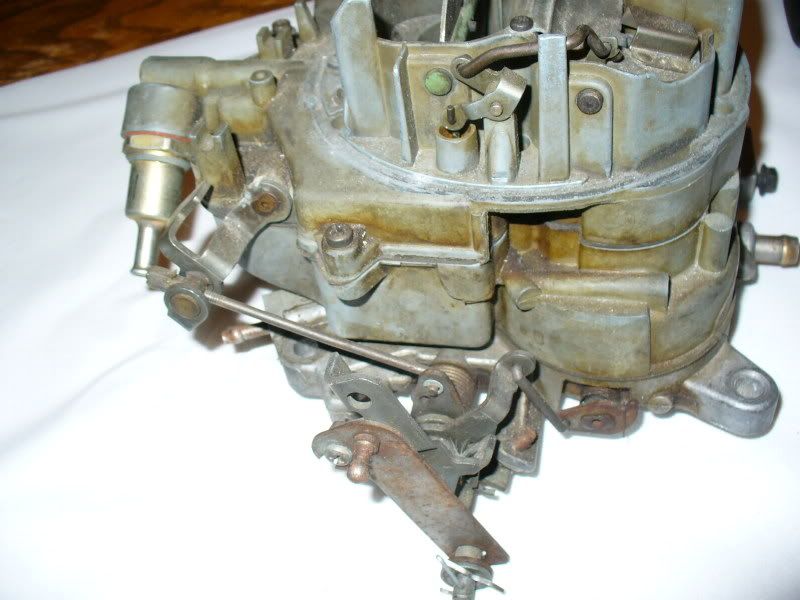
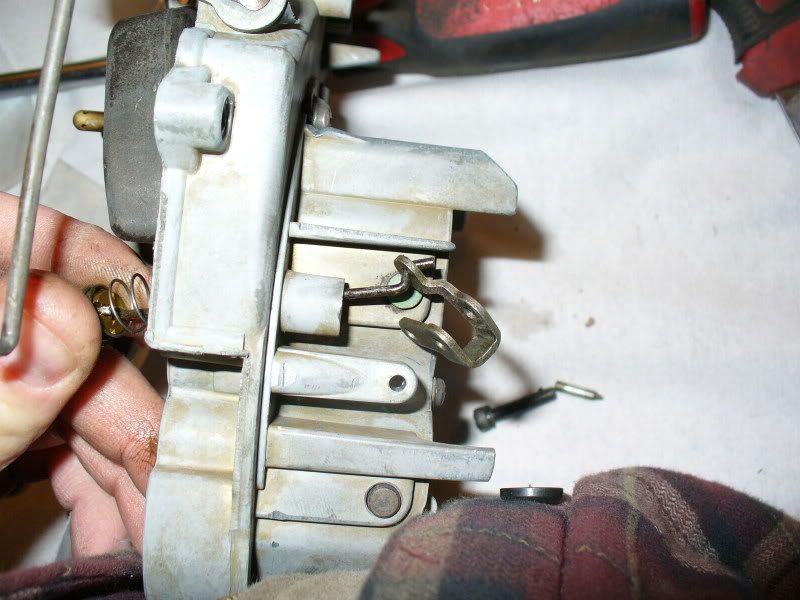
    there is also a clip on the lower choke link,remove it,to remove the link from the lower arm.


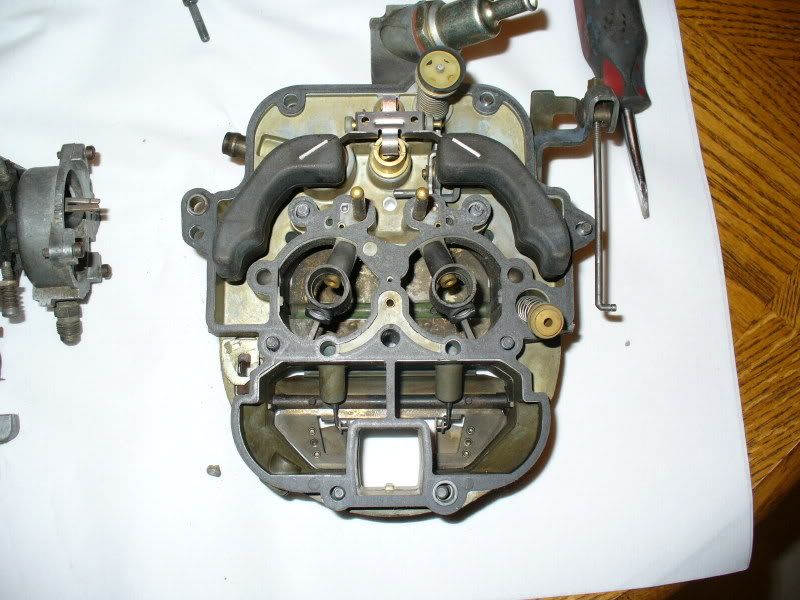
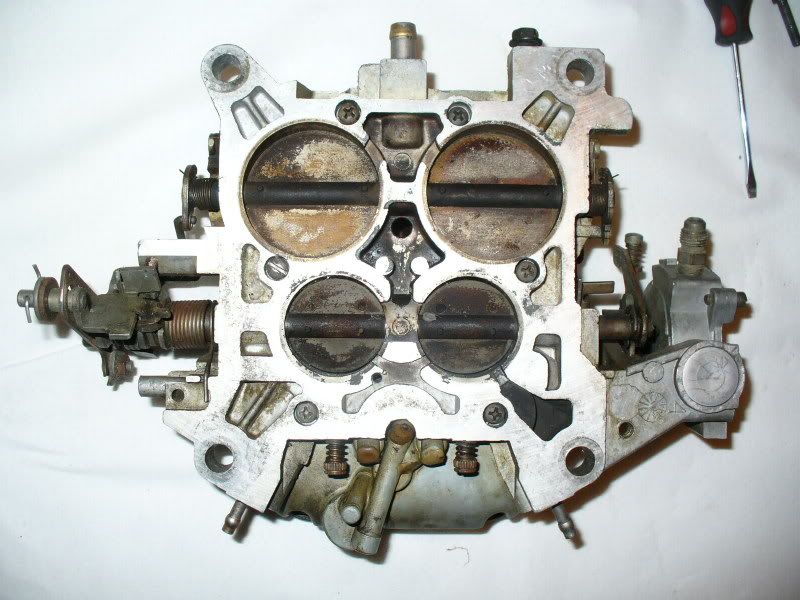
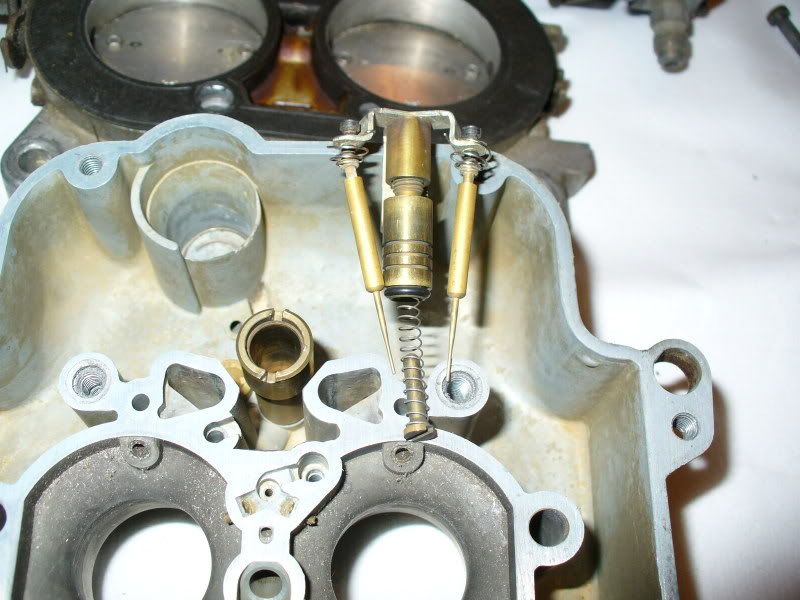
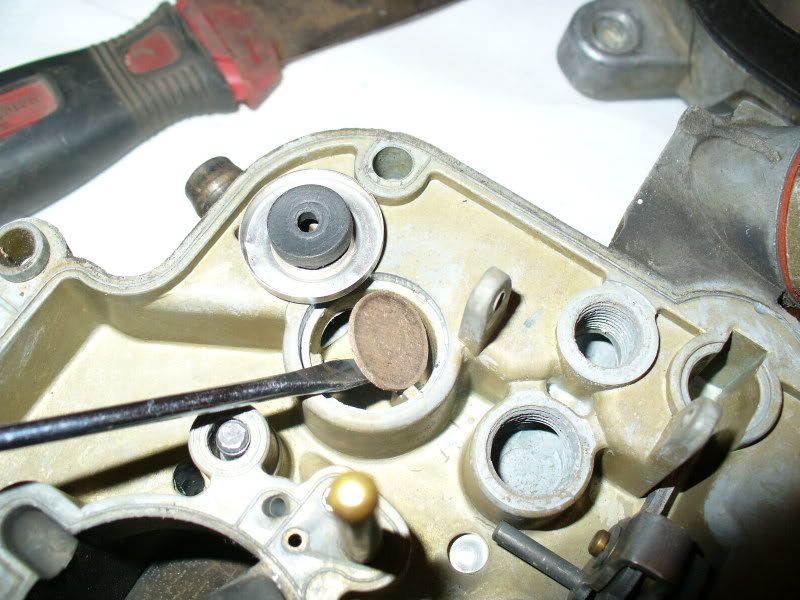
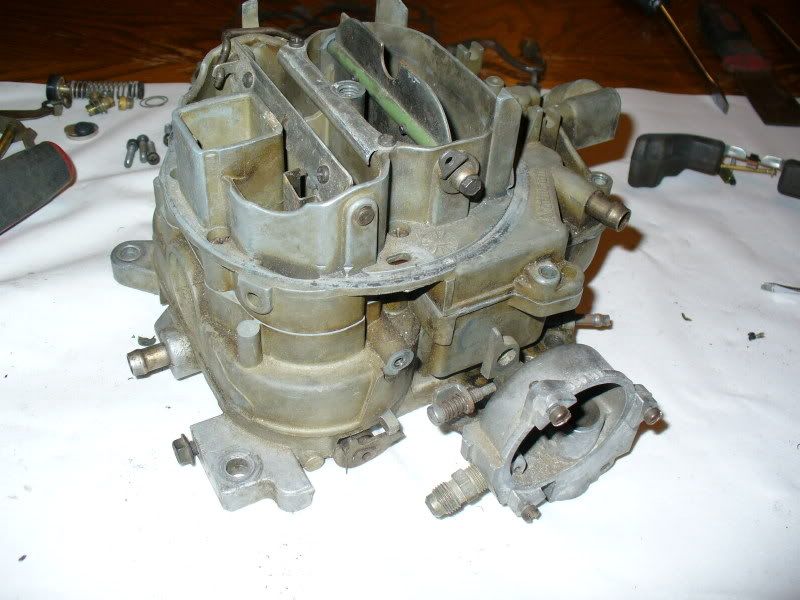
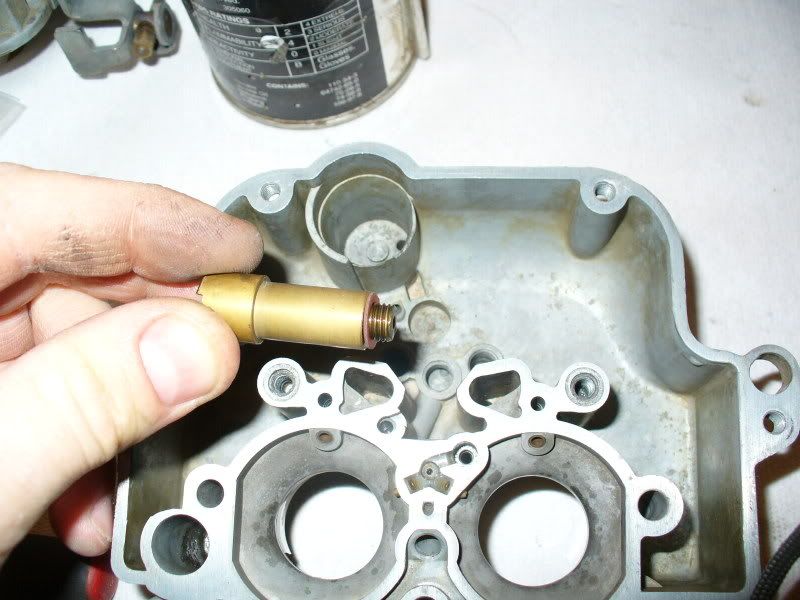
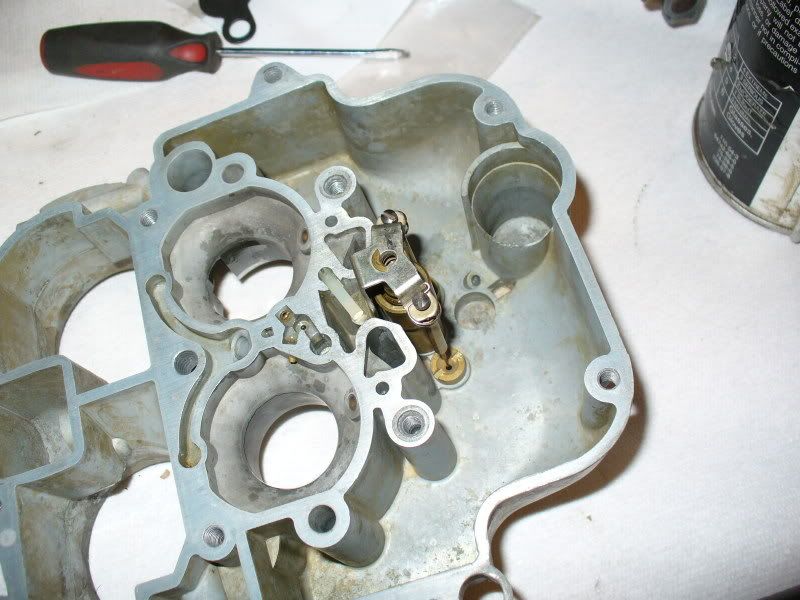
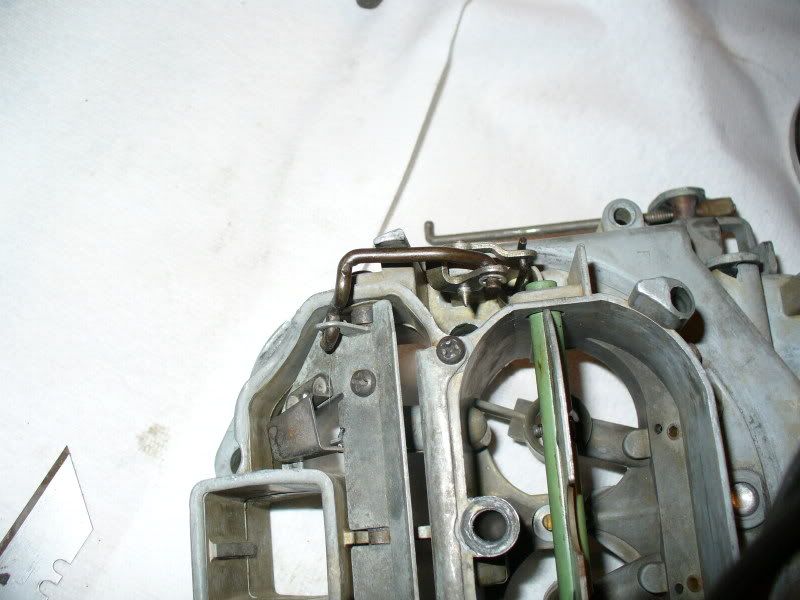
    and the top will lift off. this is the underside-what's inside the carb.


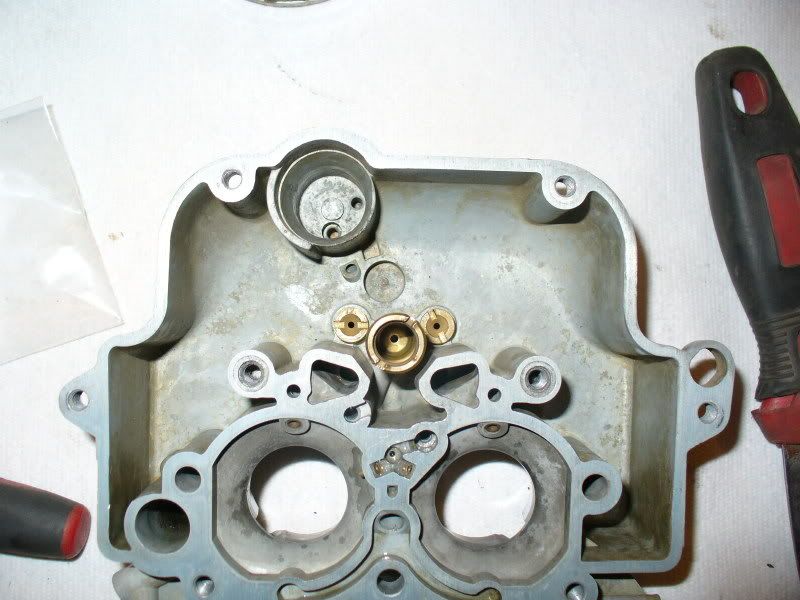
    here is the main body with the top off.


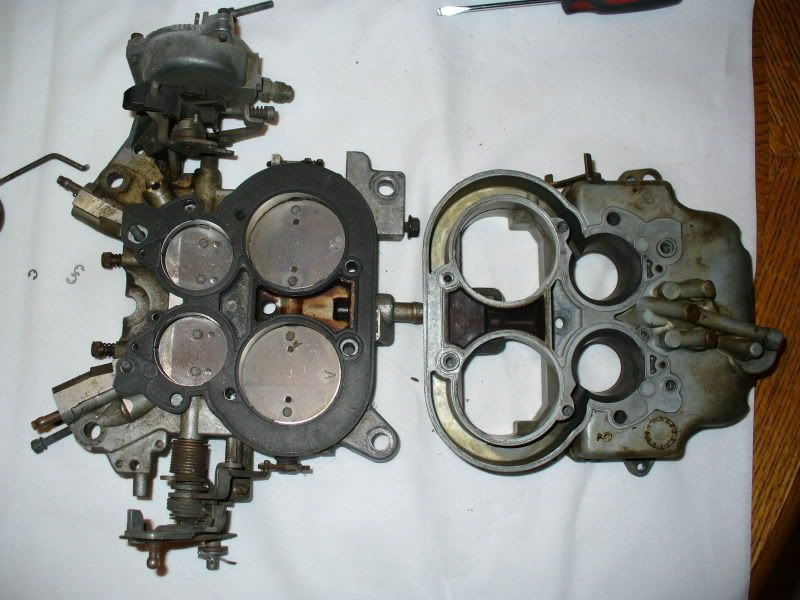
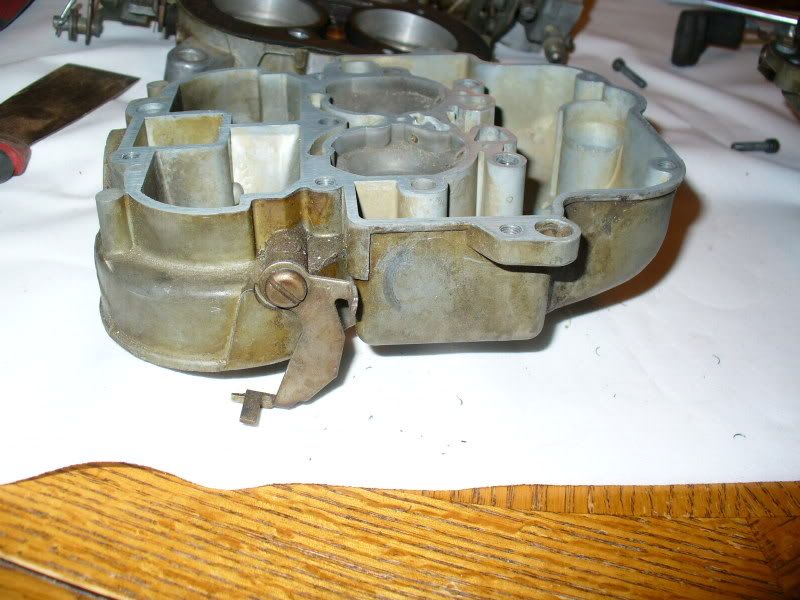
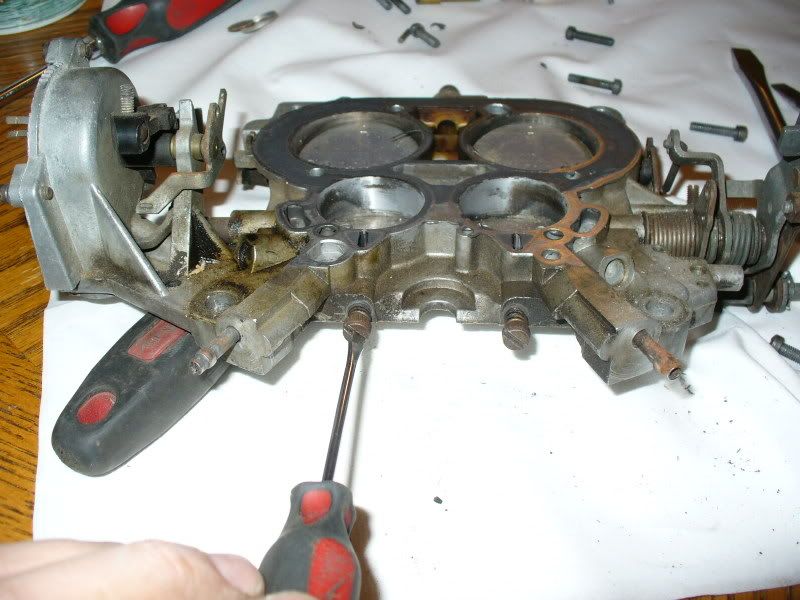
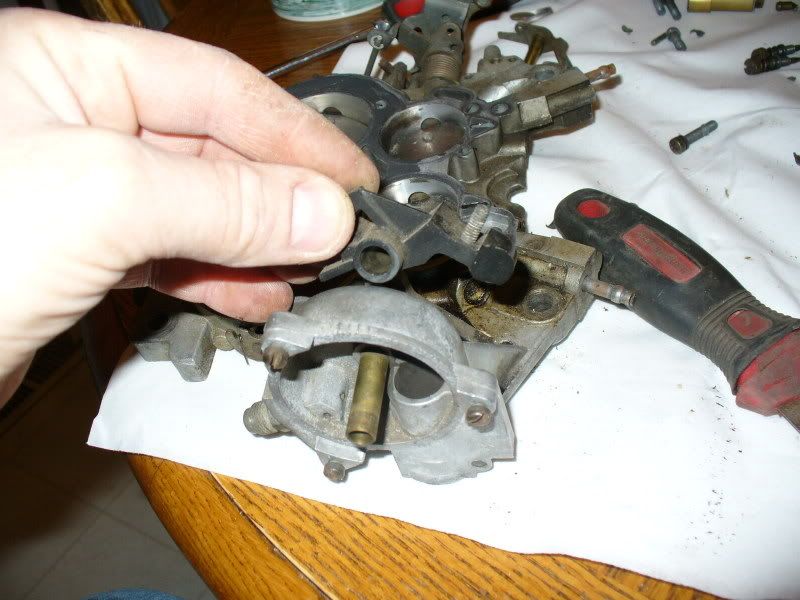
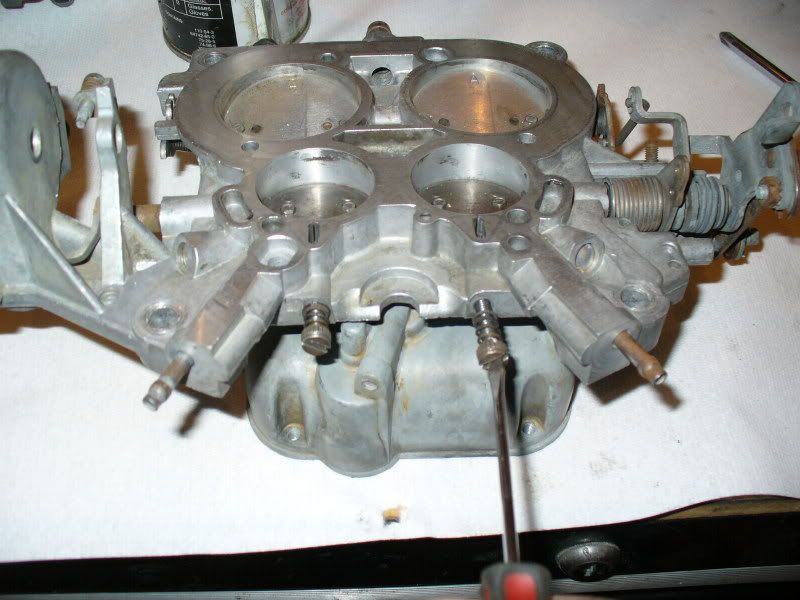
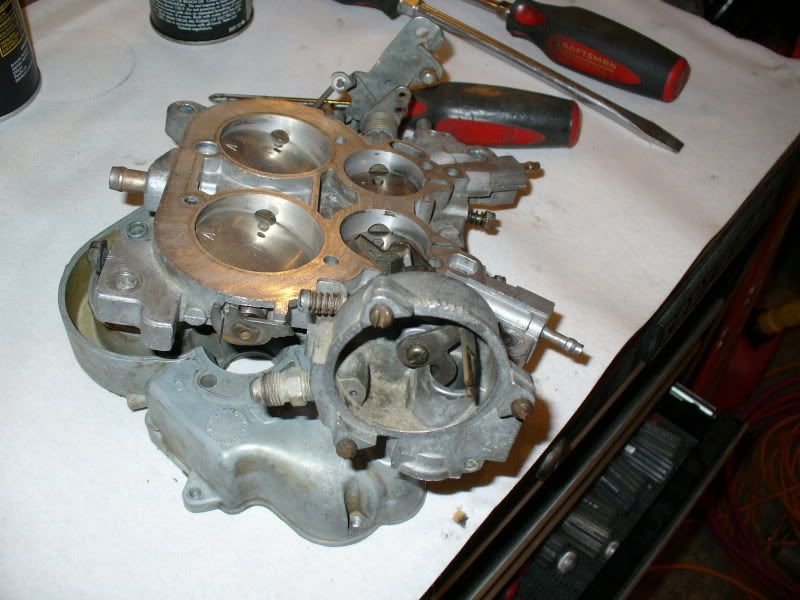
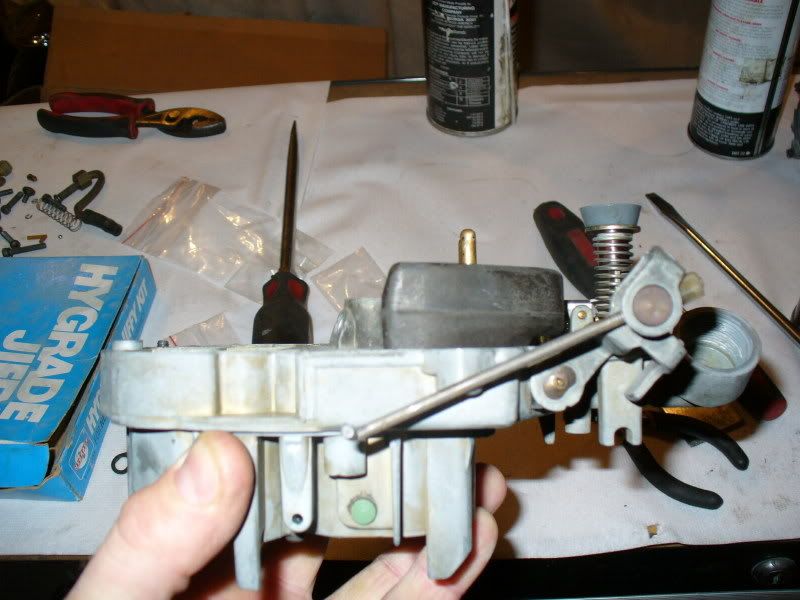
    next,remove the 6 screws holding the throttle body to the bottom of the main body.
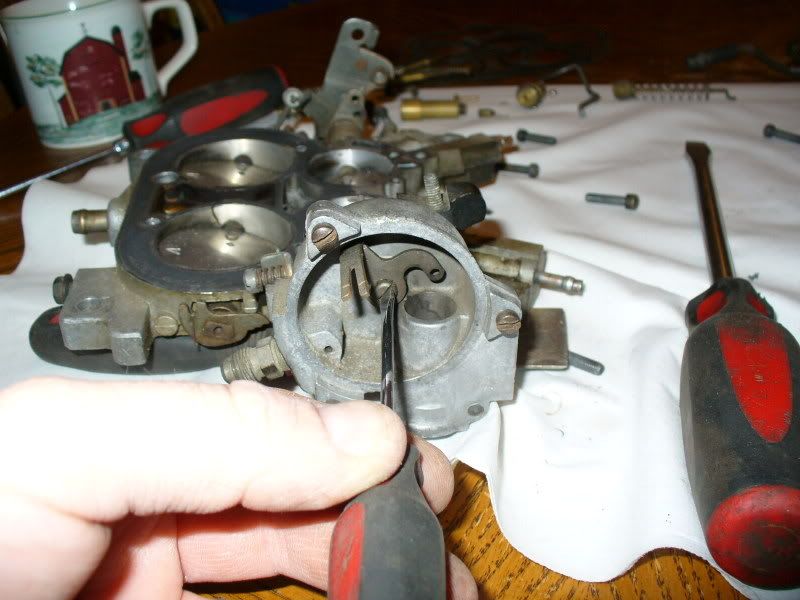


    and separate them.


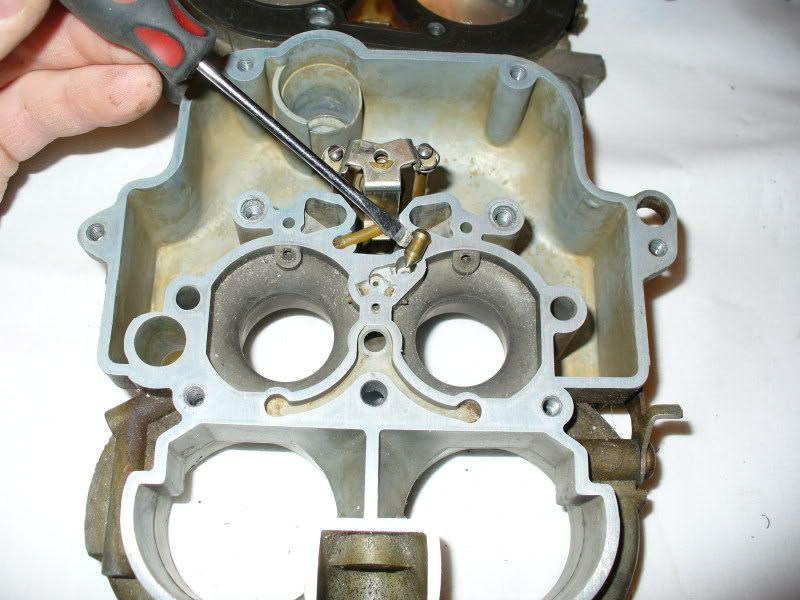
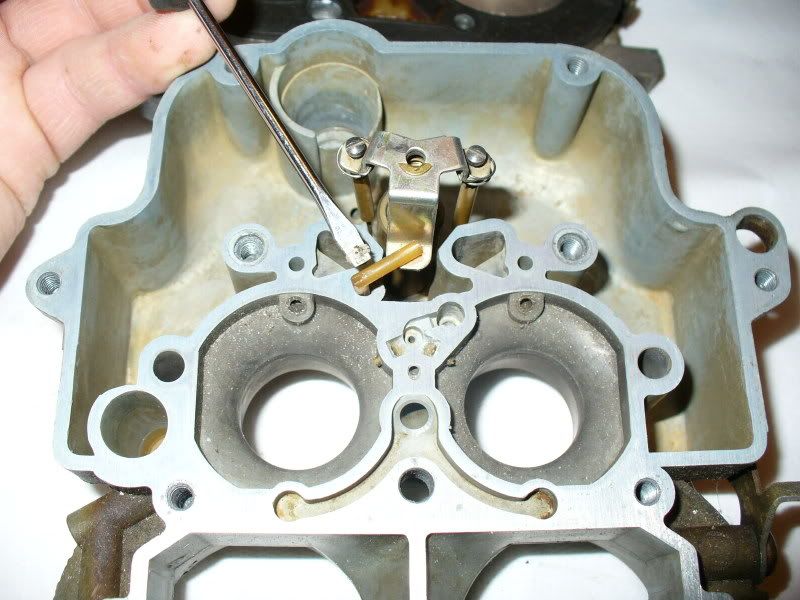
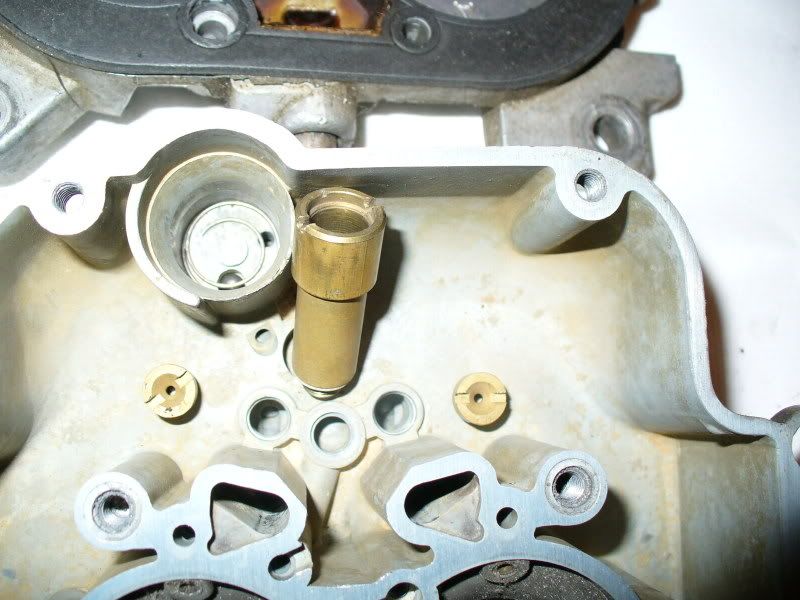
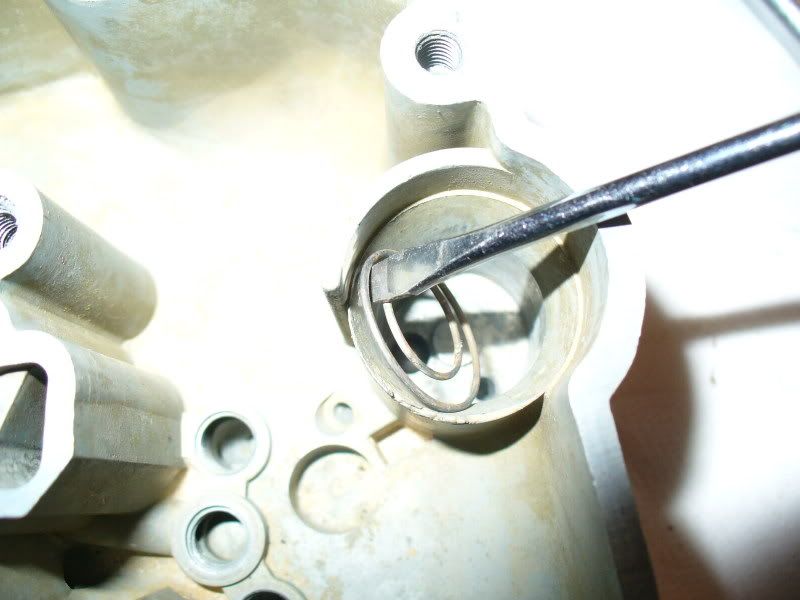
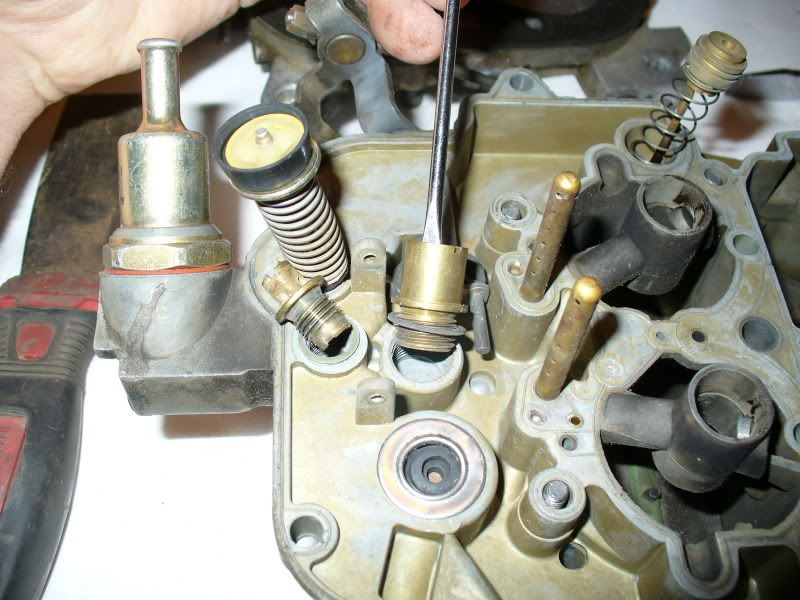
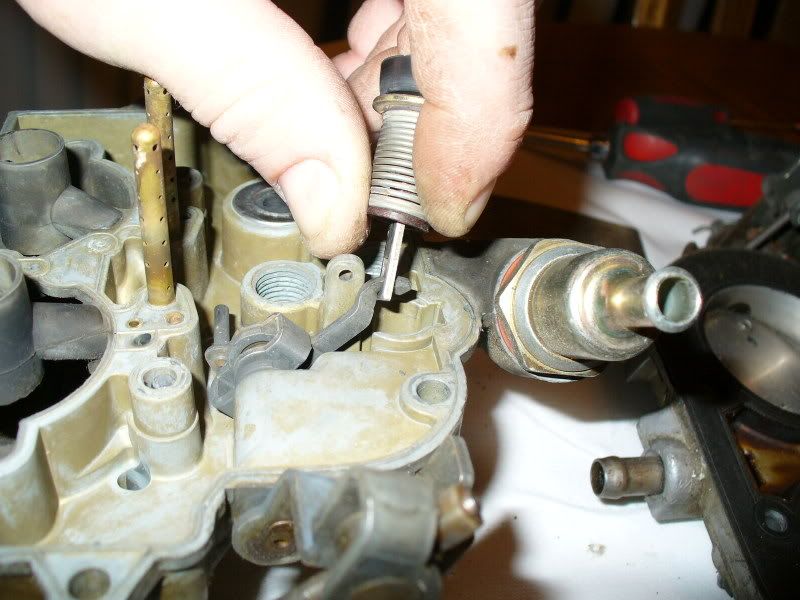
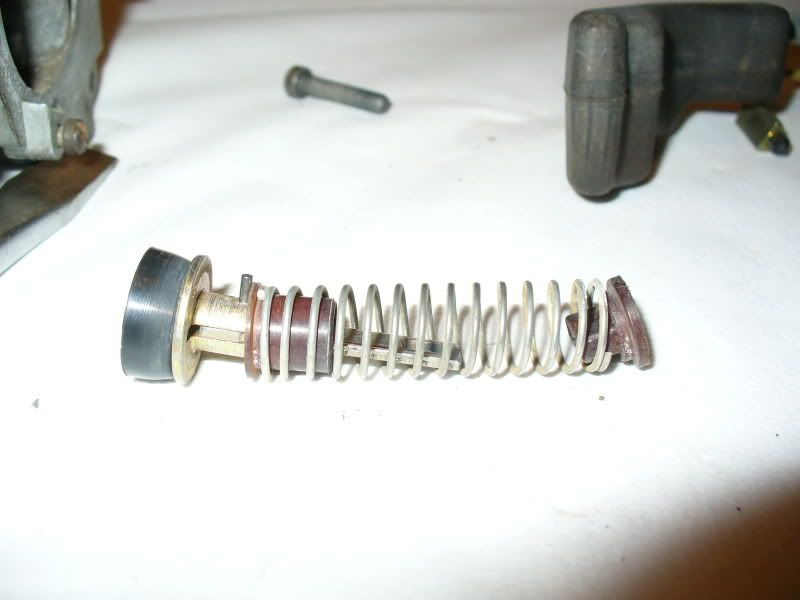
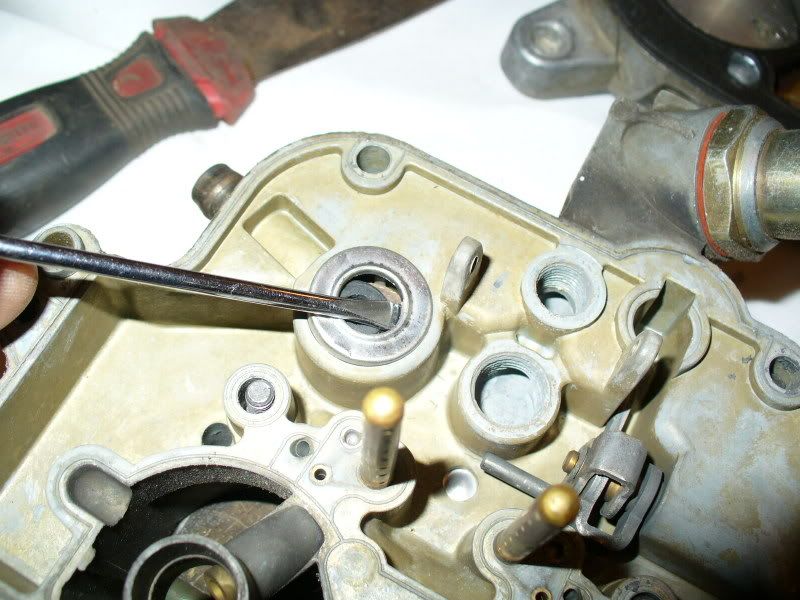
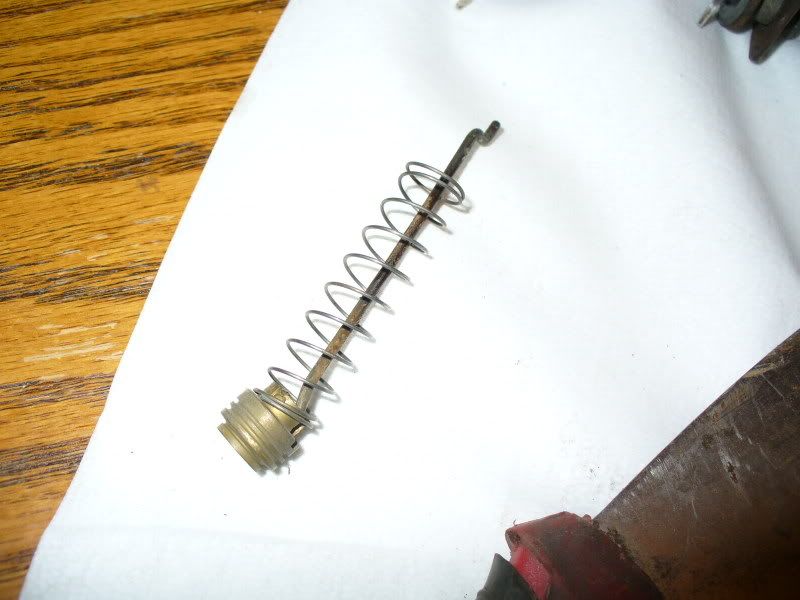
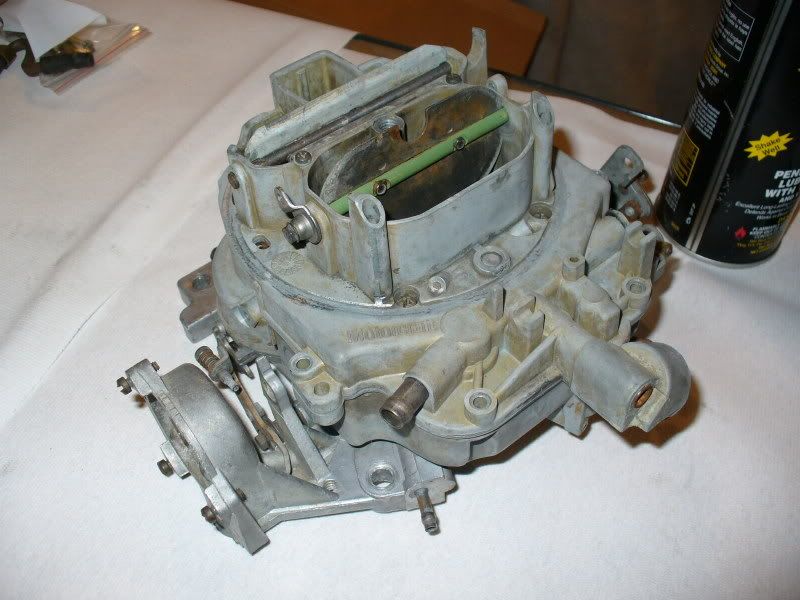
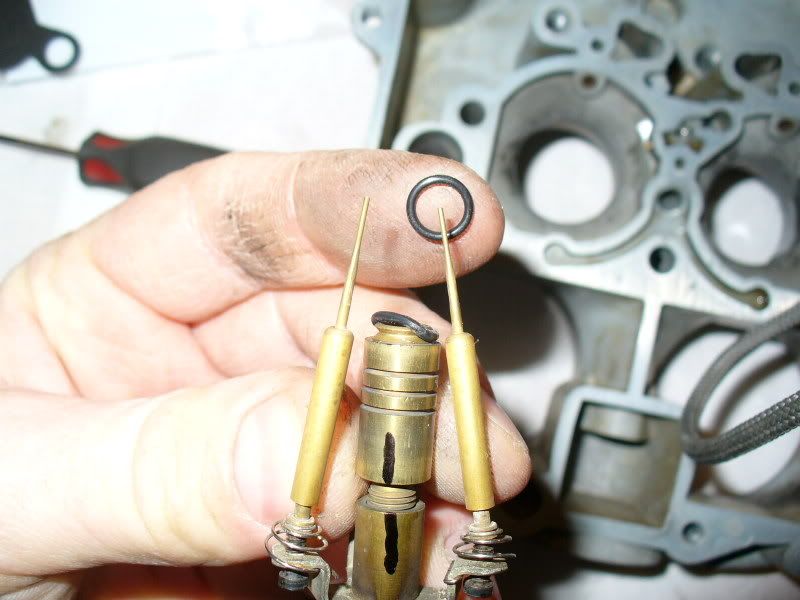
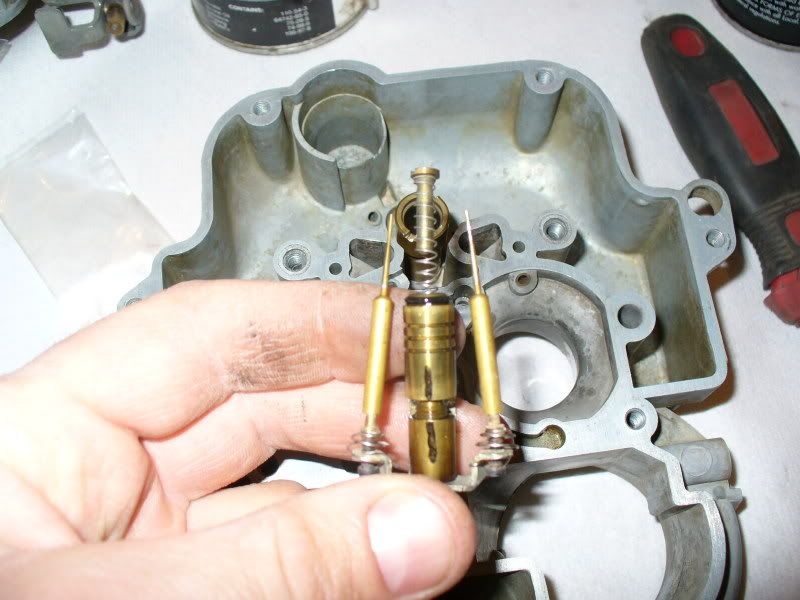
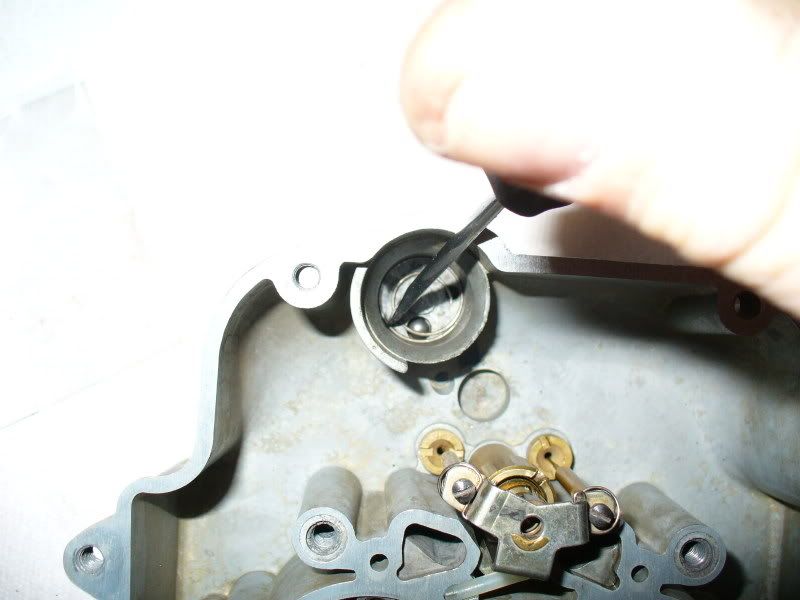
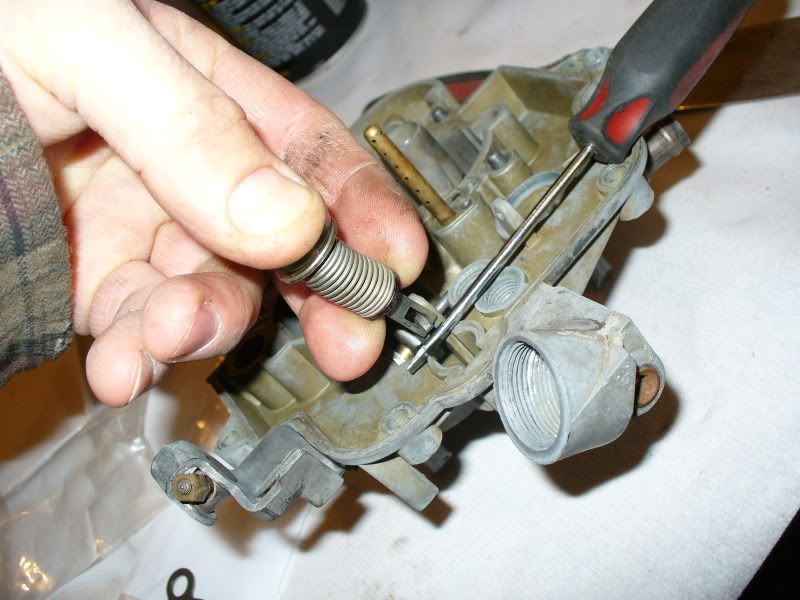
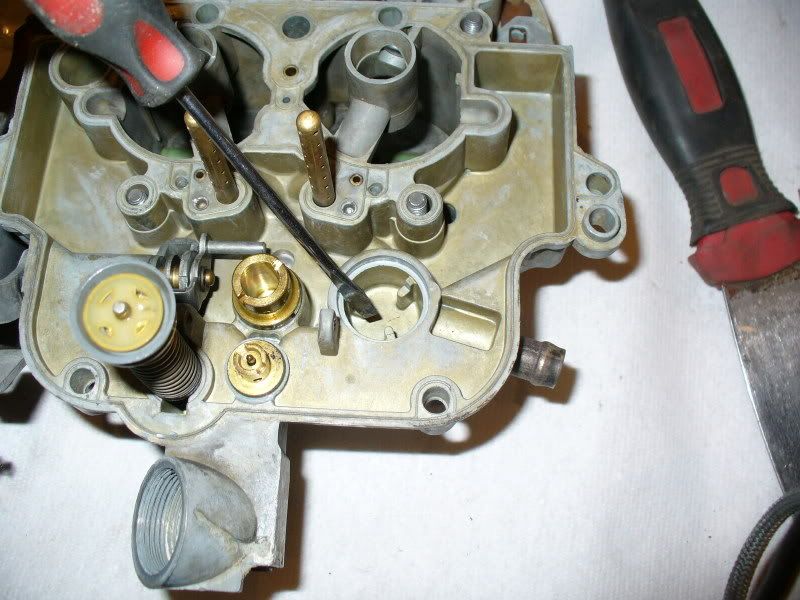
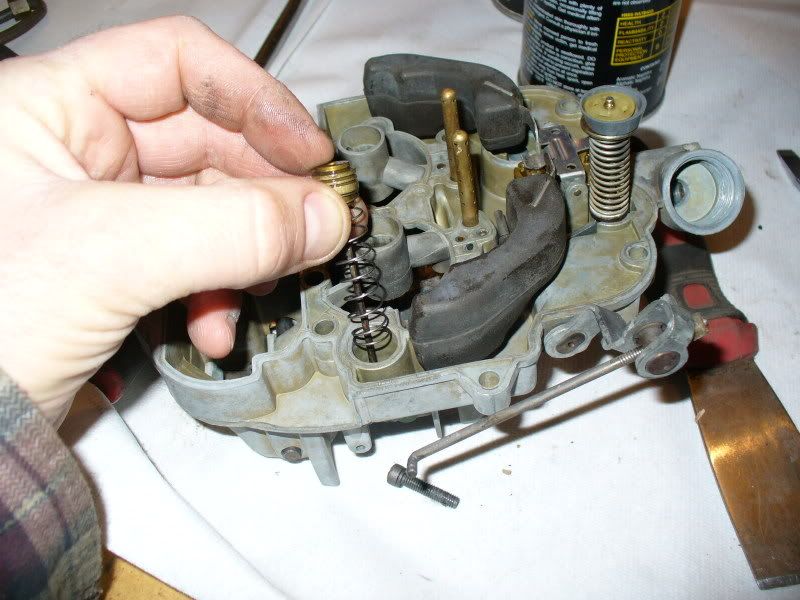
    next,we'll move to internal dis-assembly.
    Last edited by Ristow; 01-09-2008, 07:31 PM.
    Originally posted by Hankrod
    Ristows right.................again,


    Originally posted by Fasts79Chief
    ... like the little 'you know what's' that you are.


    Originally posted by Fasts79Chief
    I LOVE how Ristow has stolen my comment about him ... "Quoted" it ... and made himself famous for being an ***hole to people. Hahahahahahahahahha!

    It's like you're unraveling a big cable-knit sweater that someone keeps knitting...and knitting...and knitting...and knitting...
  • Ristow
    • Jan 20, 2006
    • 17292

    #2
    on the internals,first we'll remove the brass plug,shown here near it's bore,it falls out.note there was a small steel ball next to it,look in the above pic,in the main dis-assembly part,and you'll see it.


    next we gently pry the plastic retainer for the needle assy. out to release the needles.


    next,the main jets,and needle plunger tube.i used a putty knife as a screwdriver on the tube,it's pretty wide.


    accelerator pump ball retainer and check ball...


    this is optional to remove.


    next...top cover.
    Originally posted by Hankrod
    Ristows right.................again,


    Originally posted by Fasts79Chief
    ... like the little 'you know what's' that you are.


    Originally posted by Fasts79Chief
    I LOVE how Ristow has stolen my comment about him ... "Quoted" it ... and made himself famous for being an ***hole to people. Hahahahahahahahahha!

    It's like you're unraveling a big cable-knit sweater that someone keeps knitting...and knitting...and knitting...and knitting...

    Comment

    • Ristow
      • Jan 20, 2006
      • 17292

      #3
      on the top cover,we remove the large inlet needle seat,and the smaller plug,i do not know it's purpose.


      the accelerator pump plunger,removed by pulling the spring back,and un-hooking from its' arm.


      her's the plunger. note the little pin,used to set the pump stroke,that pin is retained by the collar,slid over it when the desired setting is established.


      gently pry this cover off,exposing the vent baffle.


      the pin for the secondary bell-crank is gently pried out.


      this should be an E-clip. remove it,and the secondary linkage in freed...


      ..releasing the secondarry plunger from the bottom side..


      next...throttle body.
      Originally posted by Hankrod
      Ristows right.................again,


      Originally posted by Fasts79Chief
      ... like the little 'you know what's' that you are.


      Originally posted by Fasts79Chief
      I LOVE how Ristow has stolen my comment about him ... "Quoted" it ... and made himself famous for being an ***hole to people. Hahahahahahahahahha!

      It's like you're unraveling a big cable-knit sweater that someone keeps knitting...and knitting...and knitting...and knitting...

      Comment

      • Ristow
        • Jan 20, 2006
        • 17292

        #4
        on the bottom plate. the throttle body. remove the 2 idle screws.


        remove the choke arm..


        releasing the pull-off cam.


        this brass tube will tap out of the choke housing,releasing the fast idle cam.


        leaving the 3 main pieces dis-assembled,ready for dip. i like to loosly re-assemble the main parts before dipping in carb cleaner.....


        TO BE CONTINUED.
        Originally posted by Hankrod
        Ristows right.................again,


        Originally posted by Fasts79Chief
        ... like the little 'you know what's' that you are.


        Originally posted by Fasts79Chief
        I LOVE how Ristow has stolen my comment about him ... "Quoted" it ... and made himself famous for being an ***hole to people. Hahahahahahahahahha!

        It's like you're unraveling a big cable-knit sweater that someone keeps knitting...and knitting...and knitting...and knitting...

        Comment

        • scantar
          AMC 4 OH! 1
          • Jul 16, 2005
          • 4296

          #5
          Dang, Mike...great pics!

          You should do one for a 2150 too...not for me...I'm just asking for a friend.
          '76 Waggy, TH400, Quadratrac and a fourOH!one Sold

          My other car is a Viner Pro Team...no wait, my other car is a Masi Speciale...nonono, my other car is a Bianchi 928SL

          Comment

          • Gambler68
            Rabble Rouser
            • Feb 29, 2004
            • 14083

            #6
            this needs to be archived pronto!
            1979 Chero S "Sundog" 1979 Chero S "Hammer"
            1968 327 J3000 1978 J10SWB
            The Edge... there is no honest way to explain it because the only people who really know where it is are the ones who have gone over.
            Hunter S. Thompson .

            Comment

            • mathman
              350 Buick
              • Sep 12, 2007
              • 785

              #7
              Nice job. Have a couple of questions/additions:

              Originally posted by Ristow
              first,remove the top cover screws. 10 of them. they are the larger phillips headed screws.
              Did you find that one of the screws was longer than the rest? When I did mine recently one was longer and it had a regular slot screw head. The instructions with the kit I used indicated that one should be longer (but the same instructions had an incorrect number of screws.)

              Originally posted by Ristow
              on the top cover,we remove the large inlet needle seat,and the smaller plug,i do not know it's purpose.
              I think it's an extra inlet needle and seat - supplies extra fuel under certain situations if I recall correctly.

              Originally posted by Ristow
              gently pry this cover off,exposing the vent baffle.
              How necessary is it to remove this? Is it because you dunked it in the carb cleaner? Didn't remove that on mine and wondering if I missed something important.

              Originally posted by Ristow
              this brass tube will tap out of the choke housing,releasing the fast idle cam.
              The service manual advises to use caution removing and installing that tube as it is easily damaged. When tapping it out/in having a support rod in the middle of the tube will help keep it from collapsing.

              Looking forward to seeing the assembly process - be interesting to find out what I screwed up in assembling mine (it's still not quite "right")...

              David
              '78 J-10
              '78 J-20
              '50 $WD Pickup
              David
              '78 J-10; '78 J-20 8400GVW
              '79 Cherokee
              '50 Willys (not Willy's) 4WD Pickup

              Comment

              • janie
                • Aug 11, 2001
                • 8270

                #8
                Excellent write-up and pic's Mike. This definitely needs to be archived.
                He is your friend, your partner, your defender, your dog. Faithful and true to the last beat of his heart. You owe it to him to be worthy of such devotion.

                Comment

                • olemisst
                  232 I6
                  • Dec 09, 2007
                  • 36

                  #9
                  Thanks

                  I wish you would have posted this about 4 days ago. I've can already tell I did something wrong.

                  Do you think if the springs on the Accelarator Pump and Secondary Plunger are switch if it will create a problem? I know one is much beefer than the other.

                  Travis '76 401 Cherokee S
                  Build Thread
                  Check Out The Pics


                  Comment

                  • Ristow
                    • Jan 20, 2006
                    • 17292

                    #10
                    Originally posted by olemisst
                    I wish you would have posted this about 4 days ago. I've can already tell I did something wrong.

                    Do you think if the springs on the Accelarator Pump and Secondary Plunger are switch if it will create a problem? I know one is much beefer than the other.

                    yes,it is a problem. it will give you a weak pump shot on the accelerator pump,and cause your air door on the secondaries to open very late.


                    mathman,
                    yes,one longer screw. on that vent,i removed for the carb dip solution. i think i will blank that fitting off,as this carb will be used in a non-emissions application.
                    Originally posted by Hankrod
                    Ristows right.................again,


                    Originally posted by Fasts79Chief
                    ... like the little 'you know what's' that you are.


                    Originally posted by Fasts79Chief
                    I LOVE how Ristow has stolen my comment about him ... "Quoted" it ... and made himself famous for being an ***hole to people. Hahahahahahahahahha!

                    It's like you're unraveling a big cable-knit sweater that someone keeps knitting...and knitting...and knitting...and knitting...

                    Comment

                    • caionneach
                      350 Buick
                      • Aug 19, 2003
                      • 1022

                      #11
                      Warpage?

                      Did you detect any warpage between the upper and bottom halves of the carb once apart?

                      I have a 4350 to install to my 401, and a search of the 4350 on this site revealed that many have had a problem with the pieces being warped after they were separated. In other words, the carb ran fine but needed a rebuild due to age, and after the rebuild the carburetor was warped and did not perform well with the kind of leakage the warping introduced. Several seemed to have this specific problem.

                      Kenneth
                      1982 Cherokee
                      258 cid/T-5 $15 Sunpro Voltmeter gauge
                      replacement; Quadratec Trailmax Thermal Pro
                      Seats! 4 inch SKYJACKER suspension lift, 33X12.5 in
                      BFG Mud Terrain Tires on 15X10 in ProComp Rims.
                      New BJ's chrome-moly rear axle shafts, 3.73:1 diffs and ARB Air Locker!

                      Comment

                      • fulsizjeep
                        Señor Jackhead
                        • Aug 21, 2002
                        • 22496

                        #12
                        I suspect some of the warpage to be caused by over zealous hands twisting body screws too tight or with uneven torque.

                        Nice work Mike!
                        I agree, this does need to be archived.
                        Flint
                        Ran when parked.
                        http://jubileejeeps.org/quadratrac
                        88 GW, 401/727/208, 5" lift, D44s/4.10s/locked up, 35s with a few Evil Twin & TT's Fabworks mods
                        76 401 Wag, 77 401 Wag, 77 401 J20
                        http://eviltwinfab.com http://www.ttsfabworks.com

                        Comment

                        • Ristow
                          • Jan 20, 2006
                          • 17292

                          #13
                          re-assembly begins. there are a few issues i need to deal with before i can fully assemble this,few tattered bolt holes,looks like i don't have the choke pull-off diaphragm,or can't find it anyhow....

                          but,here is the main assy,from the carb dip.


                          we'll start with the lower throttle body. putting both idle jets in,3 turn out from gently bottomed.


                          then,the fast idle cam spindle,and cam. put in as shown. tap spindle fully in,from choke cap side.


                          then the choke unloader..


                          put the choke actuating arm on,in relation to the cam and unloader,seen behind.


                          that takes care of the throttle body for now...
                          Originally posted by Hankrod
                          Ristows right.................again,


                          Originally posted by Fasts79Chief
                          ... like the little 'you know what's' that you are.


                          Originally posted by Fasts79Chief
                          I LOVE how Ristow has stolen my comment about him ... "Quoted" it ... and made himself famous for being an ***hole to people. Hahahahahahahahahha!

                          It's like you're unraveling a big cable-knit sweater that someone keeps knitting...and knitting...and knitting...and knitting...

                          Comment

                          • Ristow
                            • Jan 20, 2006
                            • 17292

                            #14
                            main body next. first,the needle cluster tube,and main jets. put a new gasket on the tube.no gasket on the main jets.


                            install the tube and jets,firmly,but keep in mind these are soft metals.


                            next,the needle assy. this o-ring gets replaced. also,see the line on the piston i drew?so i retained factory setting. that is adjustable,for height,with alters when the carb goes to power (rich) mode. those needles replace the power valve enrichment system. low vacuum,the spring pushes the needles up,withdrawing the thick part of the needles from the main jets,reducing flow restriction through them.


                            insert the spring and plunger...


                            and install into the body. the needles stick into the holes of the main jets.i have also installed the plastic retainer.


                            install check ball and ball retainer into the accelerator well.this will be the larger of the 2 steel balls the carb uses.


                            that takes care of the main body for now...
                            Originally posted by Hankrod
                            Ristows right.................again,


                            Originally posted by Fasts79Chief
                            ... like the little 'you know what's' that you are.


                            Originally posted by Fasts79Chief
                            I LOVE how Ristow has stolen my comment about him ... "Quoted" it ... and made himself famous for being an ***hole to people. Hahahahahahahahahha!

                            It's like you're unraveling a big cable-knit sweater that someone keeps knitting...and knitting...and knitting...and knitting...

                            Comment

                            • Ristow
                              • Jan 20, 2006
                              • 17292

                              #15
                              onto the top cover. the air horn.


                              remove the old umbrella from the accelerator plunger. this one was so hard i needed to cut it off.


                              fit the new umbrella,folding it in half as shown,and putting it on the plunger from the side,then rolling it on the rest of the way.


                              here the pin is installed,i used the middle hole,and the retaining collar is ready to be slid over it.


                              re-assemble the plunger as shown in the dis-assembly pic,compress the spring,and re-install on its' actuator as shown.


                              there are 2 inlets,the main needle,and an aux. inlet for high fuel flow situations. this carb had the aux. inlet soldered shut. i'll put the new piece in it's place.


                              here is both the smaller,aux. inlet,and the larger,needle valve installed,firmly tightened.the accelerator plunger is to the left,installed. the hole i'm pointing the screwdriver at is the emissions vent i'm going to blank off on this carb.


                              install needle and float.at the moment,i don't have the specific float setting,so i'll use the old standby "parallel with the cover upside down" for now.


                              next is the secondary air door plunger. take the spring-similar in size to the accelerator pump spring,but much lighter-put the plunger rod through it,then put the rod through the slot in the cover,up towards the top of the carb...


                              install the bellcrank,starting as shown,it fits one way only.


                              install the pin,tap into place,then put the link on the door...


                              then put the other end on the bellcrank,and install e-clip.


                              getting close to the end now! tha't the primary assembly of the 3 main parts.next we put 'em all together.

                              TO BE CONTINUED.
                              Originally posted by Hankrod
                              Ristows right.................again,


                              Originally posted by Fasts79Chief
                              ... like the little 'you know what's' that you are.


                              Originally posted by Fasts79Chief
                              I LOVE how Ristow has stolen my comment about him ... "Quoted" it ... and made himself famous for being an ***hole to people. Hahahahahahahahahha!

                              It's like you're unraveling a big cable-knit sweater that someone keeps knitting...and knitting...and knitting...and knitting...

                              Comment

                              Working...
                              X