
 Tweet
Tweet
Wow. Very sorry to hear about your mom, and about your own health issues. Take care of yourself. Vehicles are a distant second priority...or third...or maybe farther down the chain.
-
'85 J20 Old Man Truck, bought @ 65K miles - not great, but better than walking.
Member, FSJ Prissy Restoration Association
High quality junk here: intro thread and slow build thread
Did you know? Willys is just Willis spelled differently, but pronounced the same. Neither Willy nor his apostrophe are involved. -
Back at it!
To say last year was abysmal for me would be a understatement. Looking forward to a fresh start this year. With that being said I will catch this tread up over the next few days.
Found out that I did not tighten the the transmission pan bolts. I installed the studs and was in such a hurry that I had only snugged them down. Unbelievably the leak was really small.
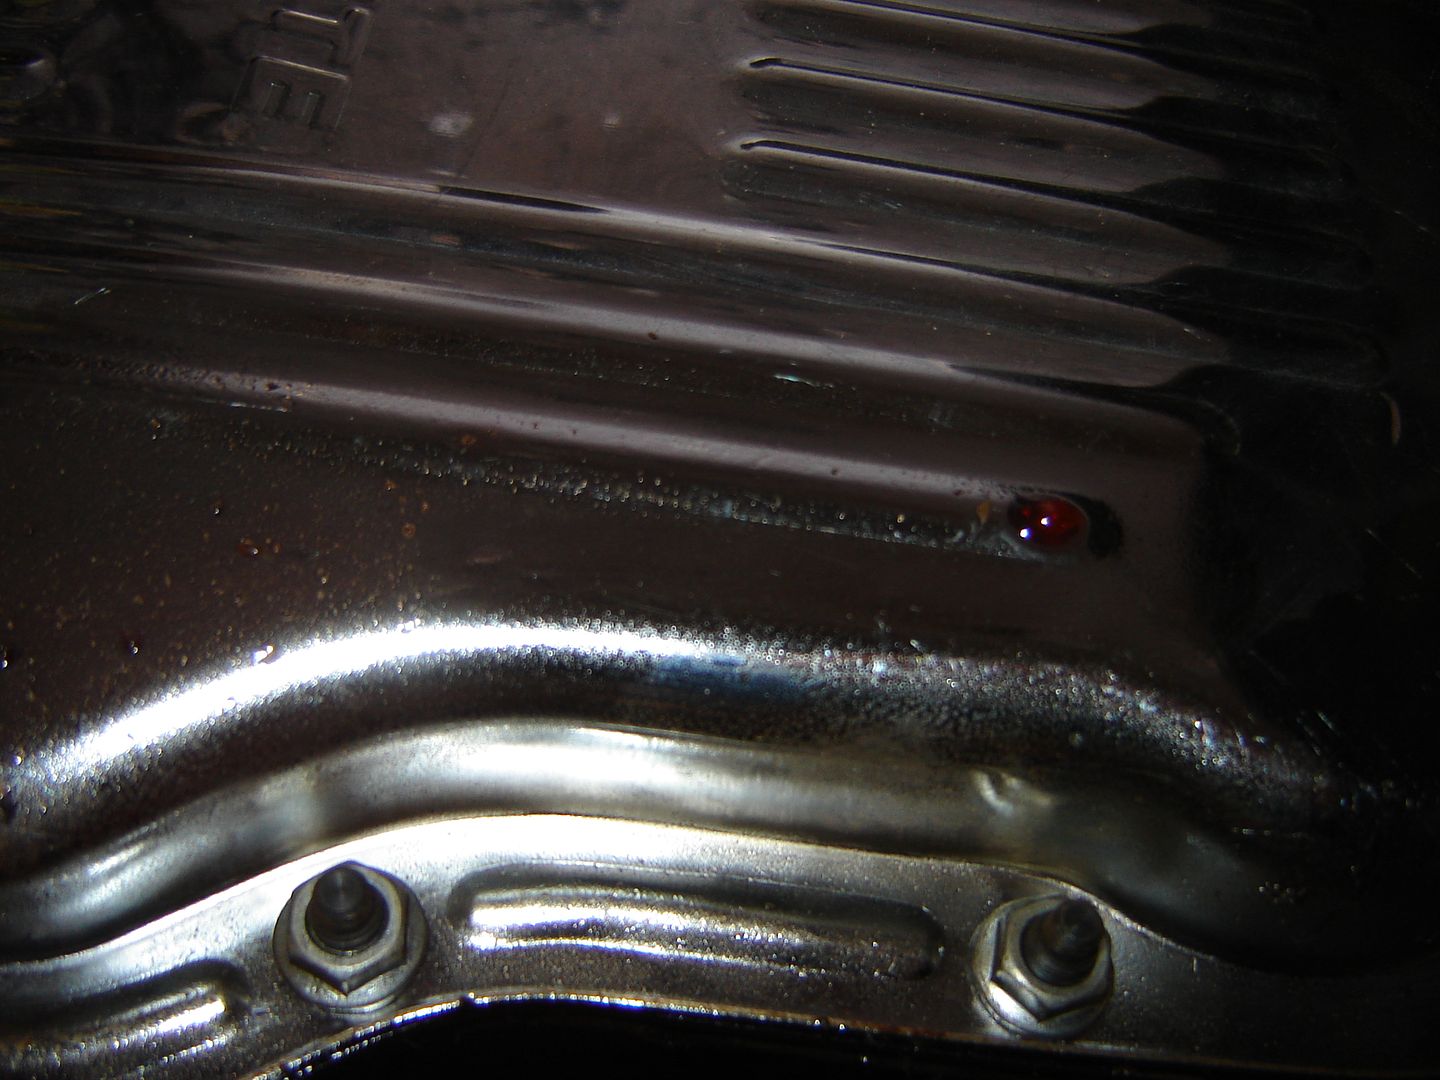
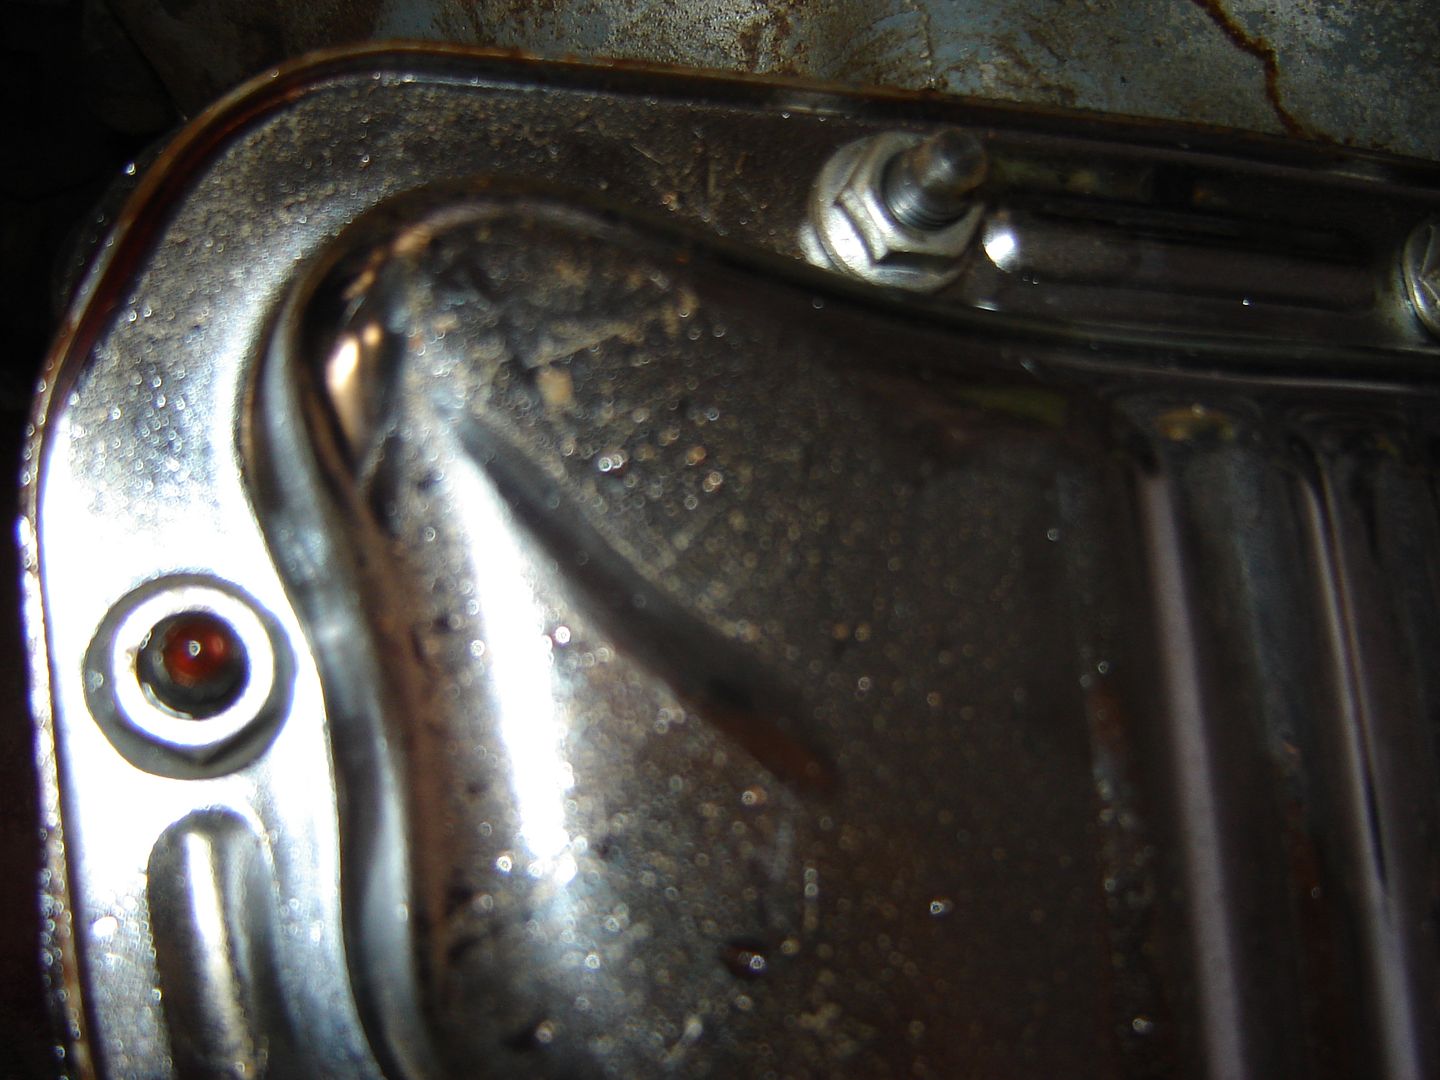
Got it all buttoned up.Life happens while you are making plans...............
1983 Wagoneer Limeted, 169k 360 AMC, NP 229, 727,
MODS: 2003 Durango bucket seats:
http://www.ifsja.org/forums/vb/showthread.php?t=159286
Build Thread: http://www.ifsja.org/forums/vb/showthread.php?t=174925Comment
-
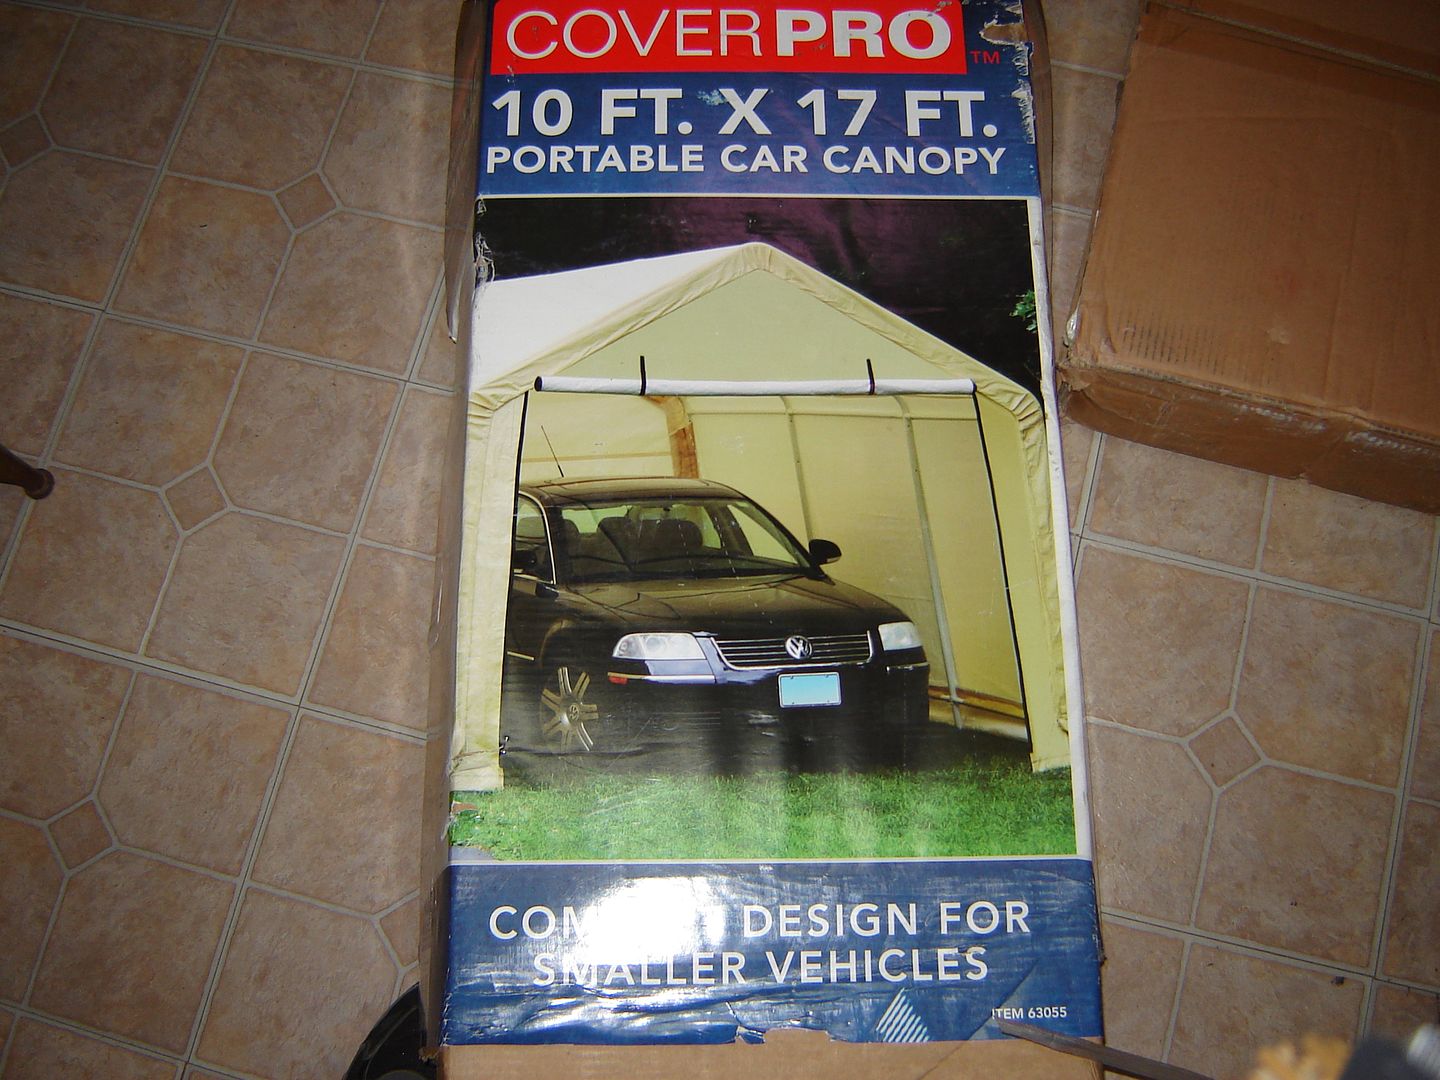
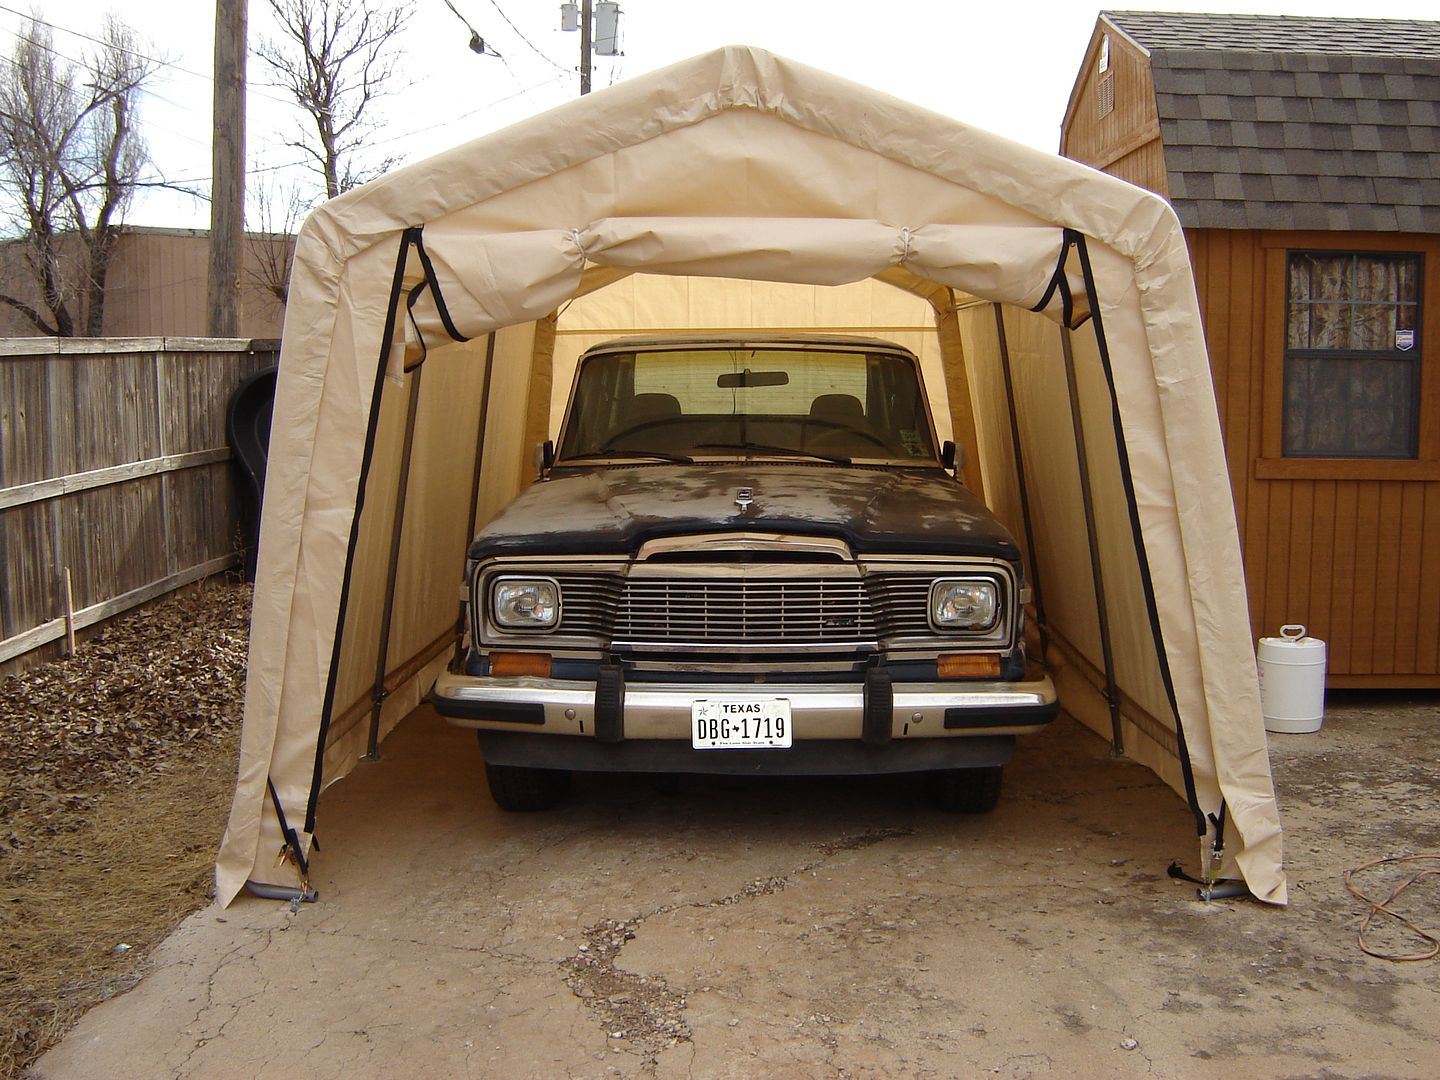
Got tired of putting the tarp on the jeep. So I went to Harbor Freight and purchased one of the portable garages. It worked out really well, the Wagoneer is a little snug in there but it fits. There is just enough room around it so I can work somewhat comfortably in there out of the weather if need be. It has held up to the serve South Plains of Texas winds and snow. I am happy with the purchase.
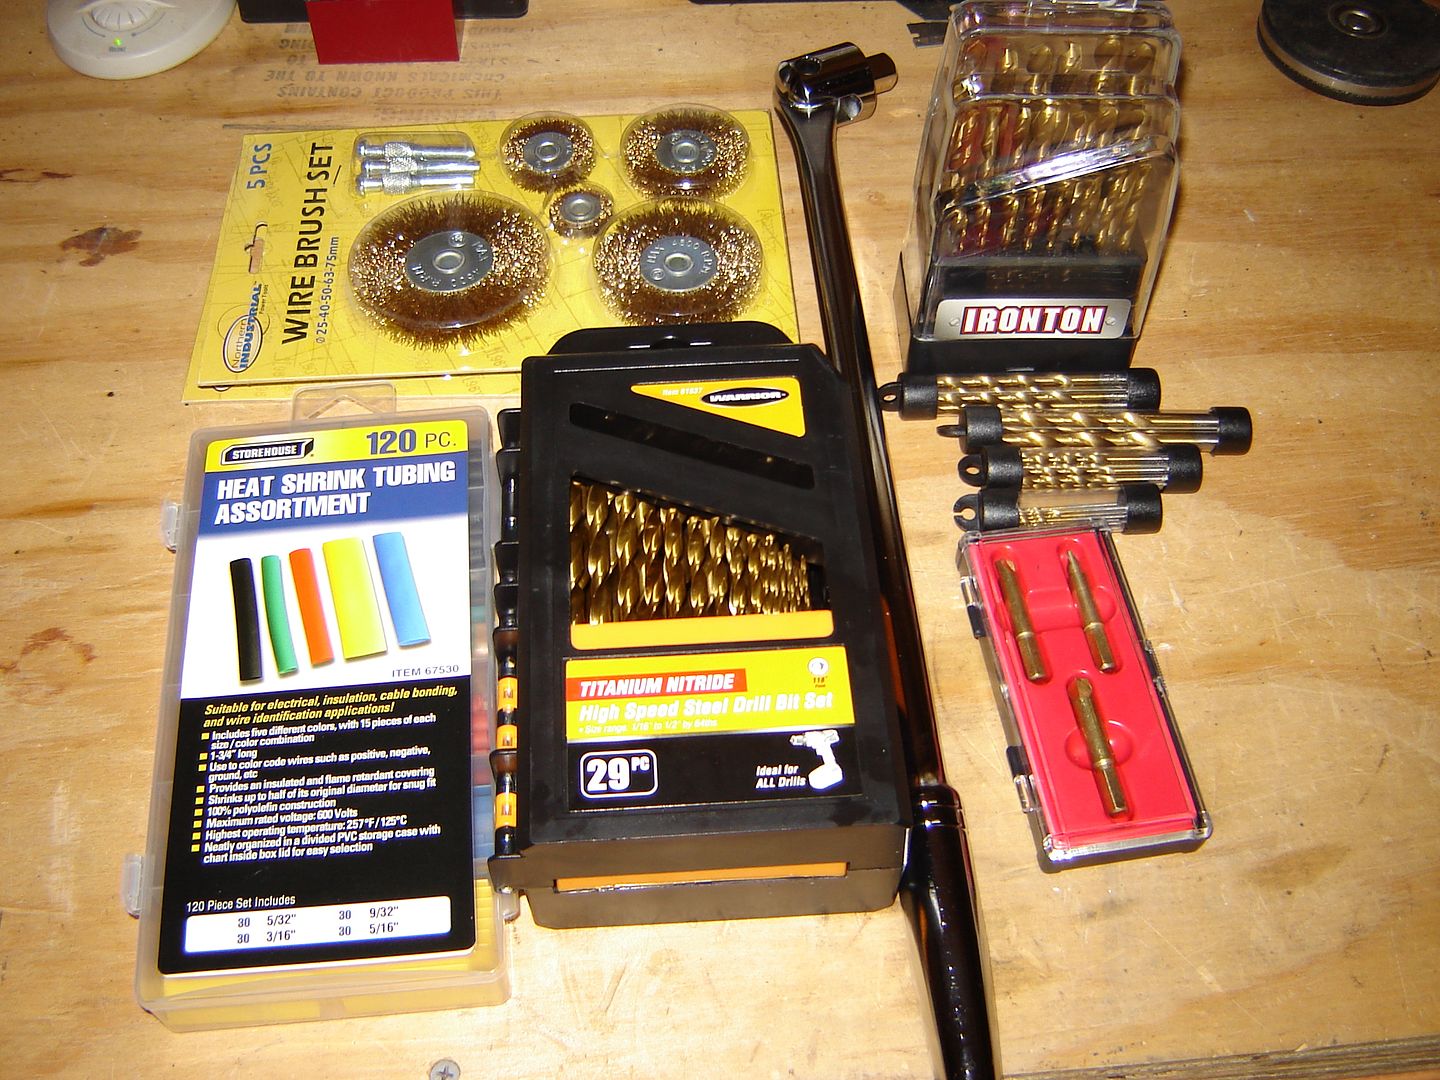
I hit up Northern Tool and HF for some supplies.
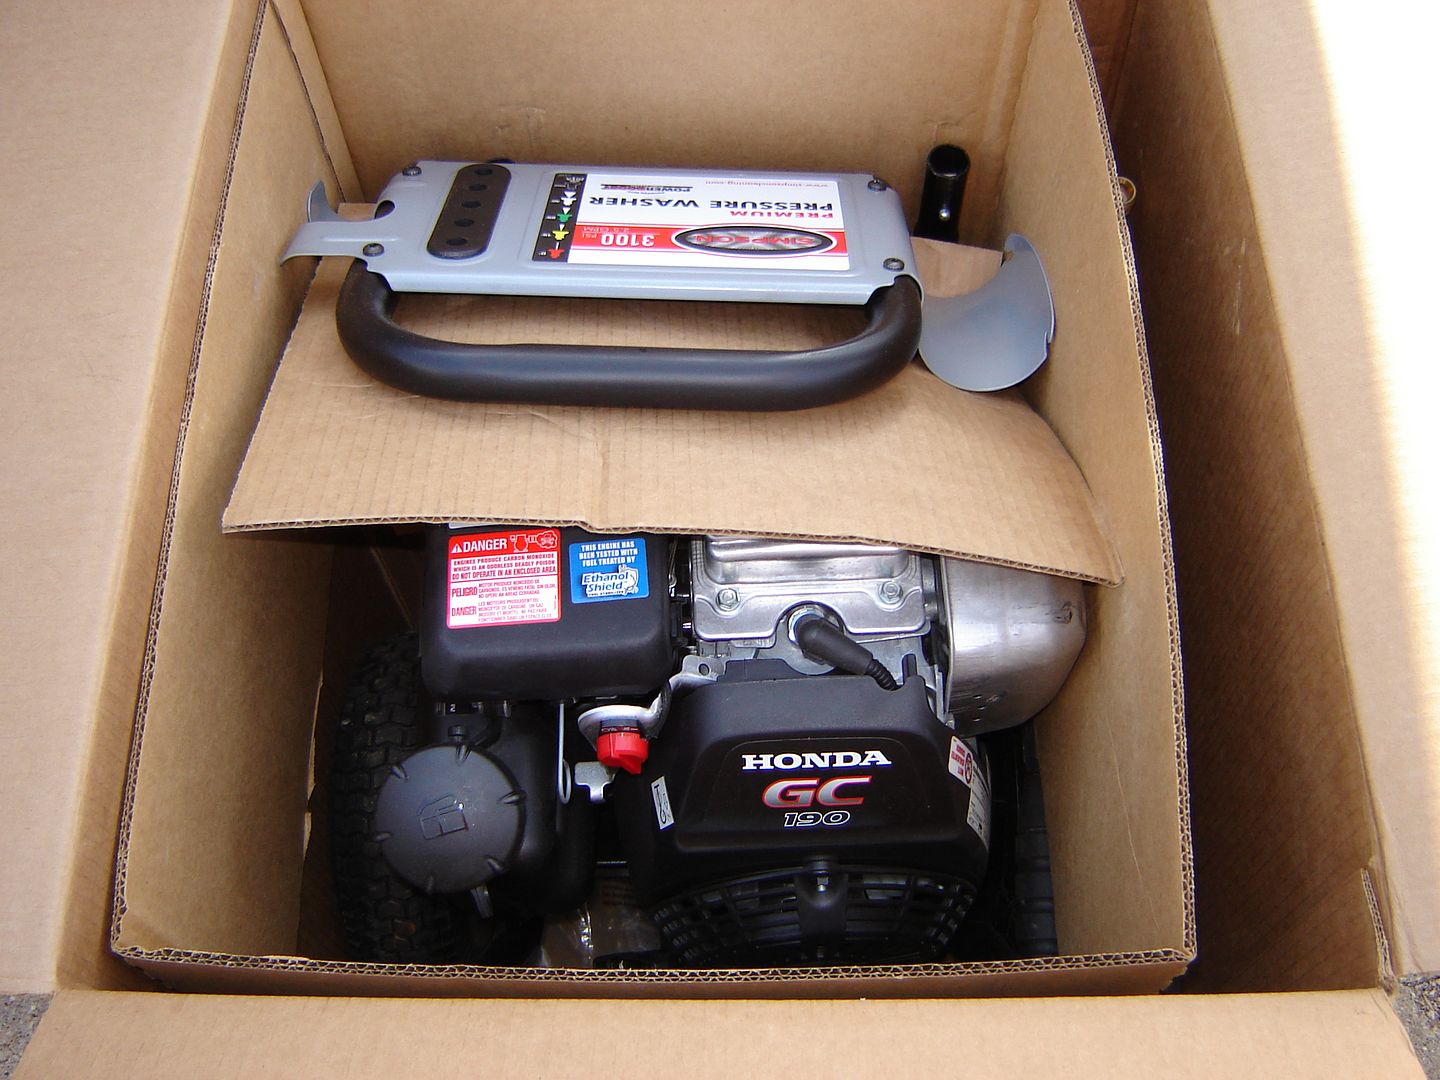
Scored a pressure washer off of Woot. This was a cluster, but I came out on top.
Ready to get back to work weather permitting.Life happens while you are making plans...............
1983 Wagoneer Limeted, 169k 360 AMC, NP 229, 727,
MODS: 2003 Durango bucket seats:
http://www.ifsja.org/forums/vb/showthread.php?t=159286
Build Thread: http://www.ifsja.org/forums/vb/showthread.php?t=174925Comment
-
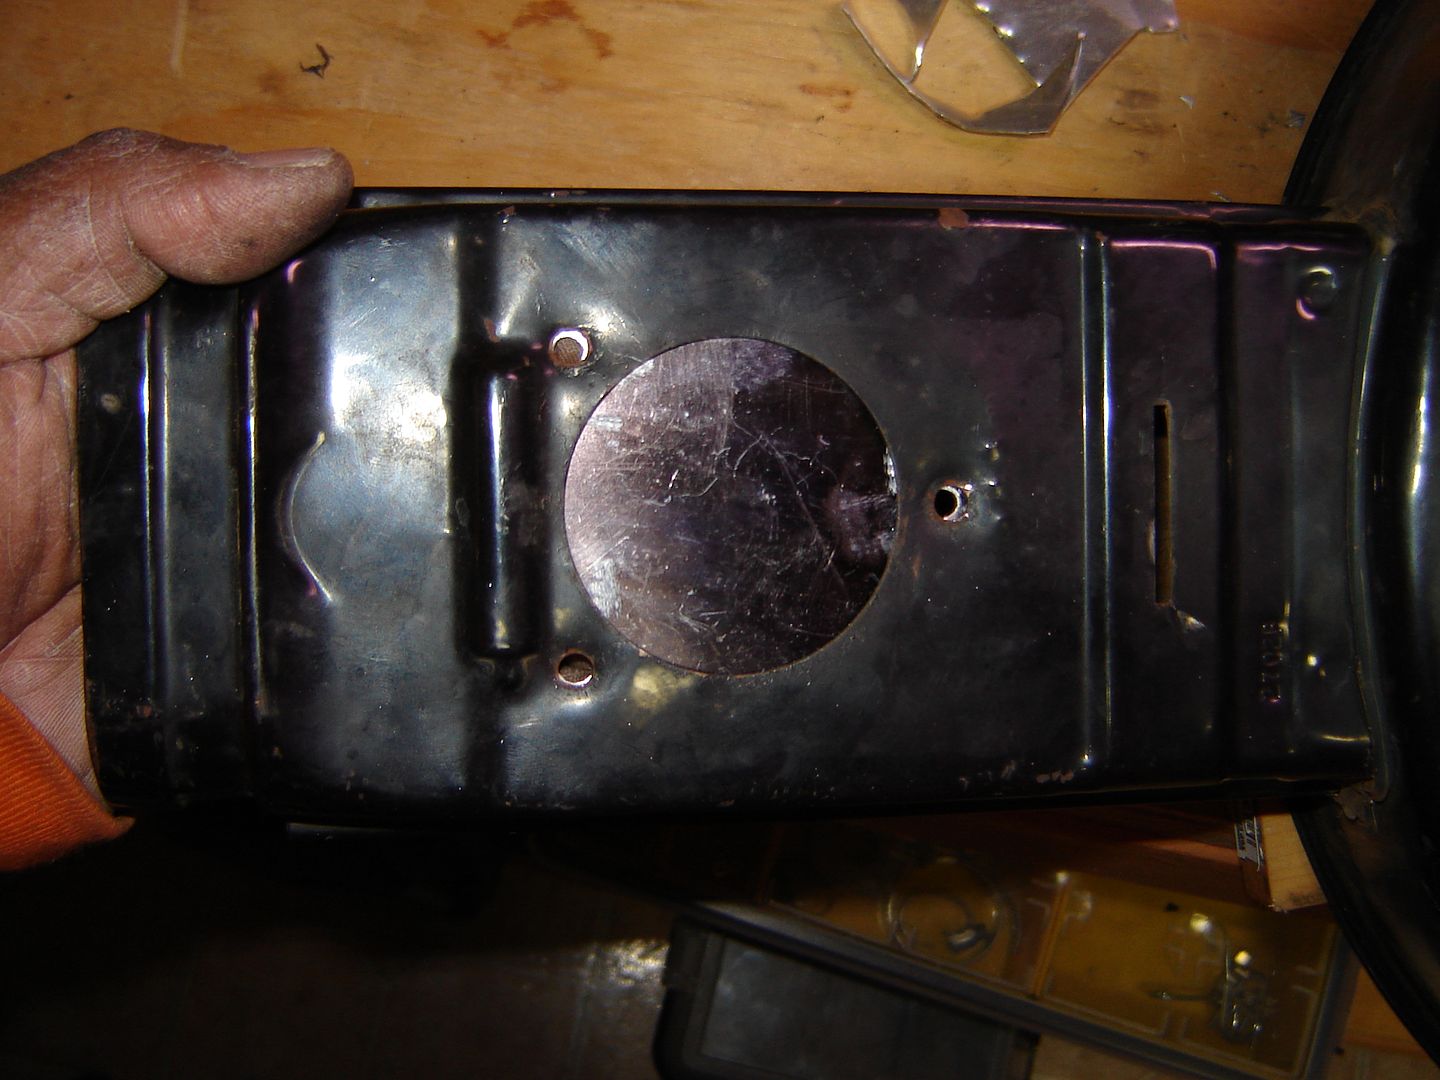
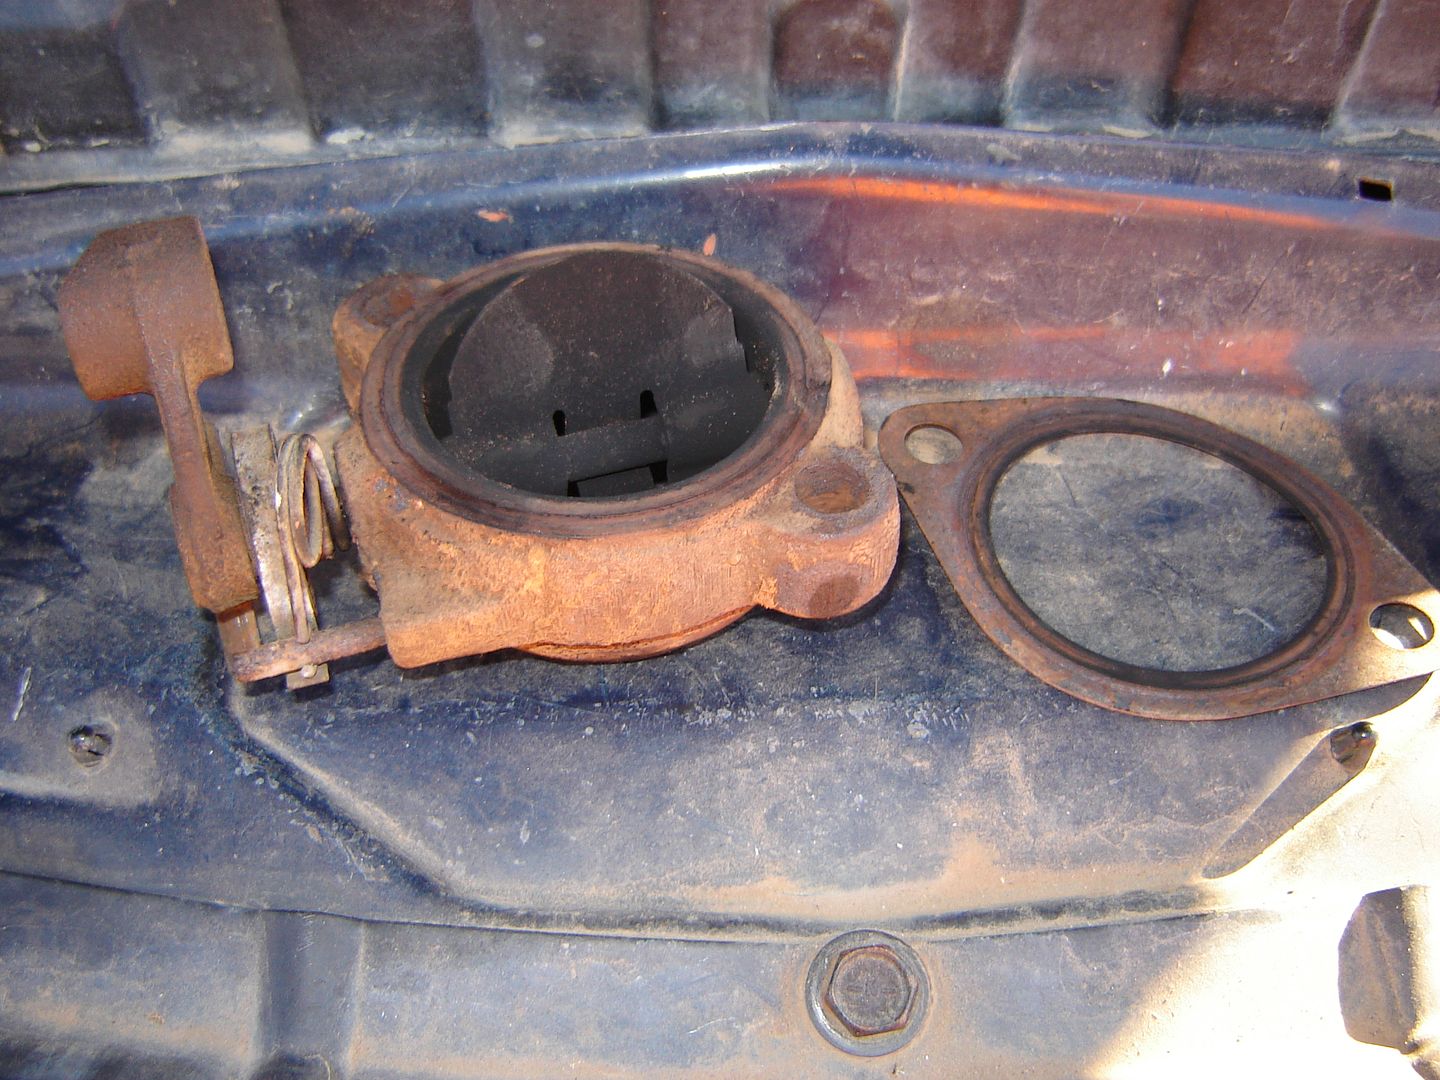
Started working on air cleaner housing after I found a issue with it.
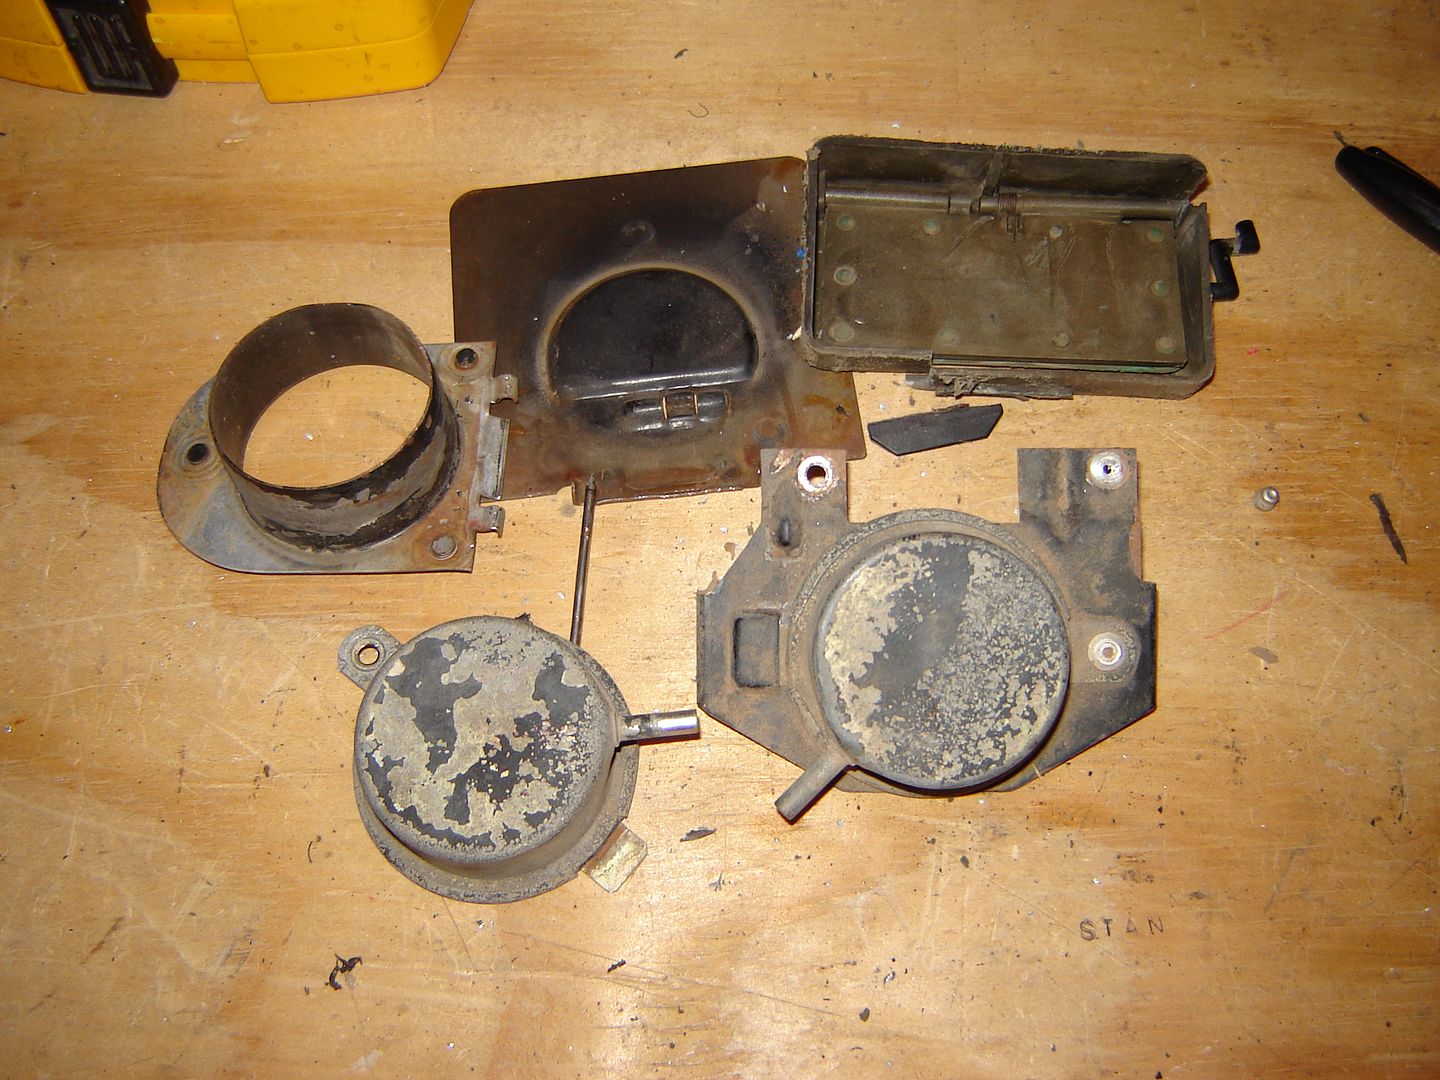
Pulled off all the vacuum/motor emission stuff since the majority of it is long gone.
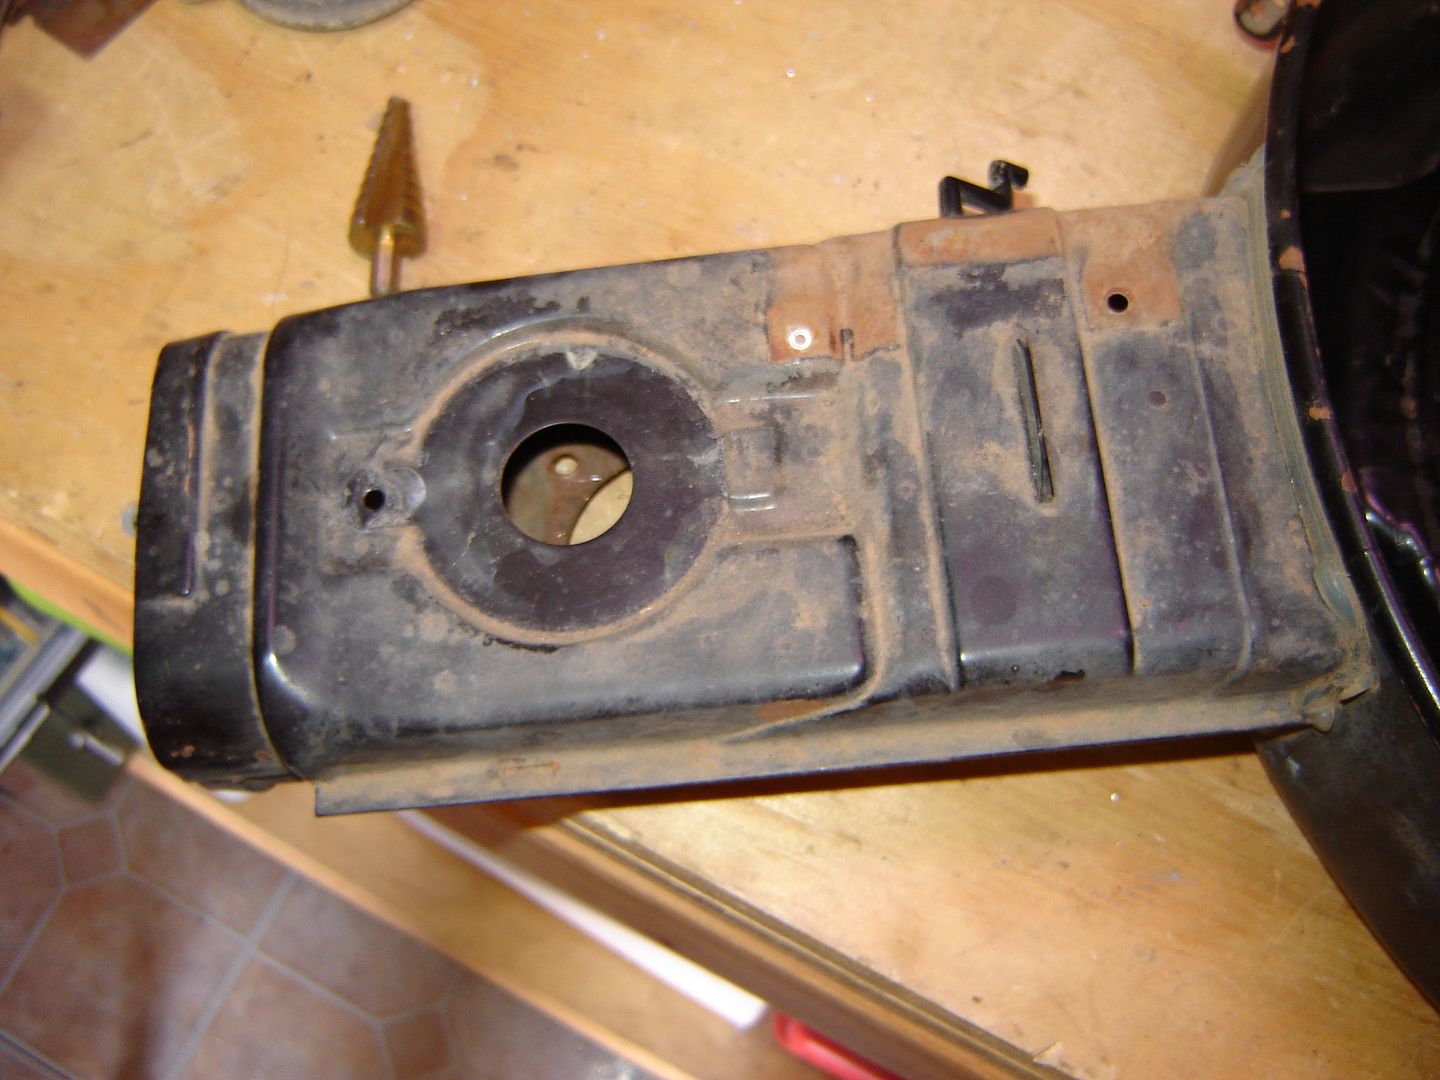
This is why I started working on the air cleaner housing. This was wedged almost shut inside the air horn.
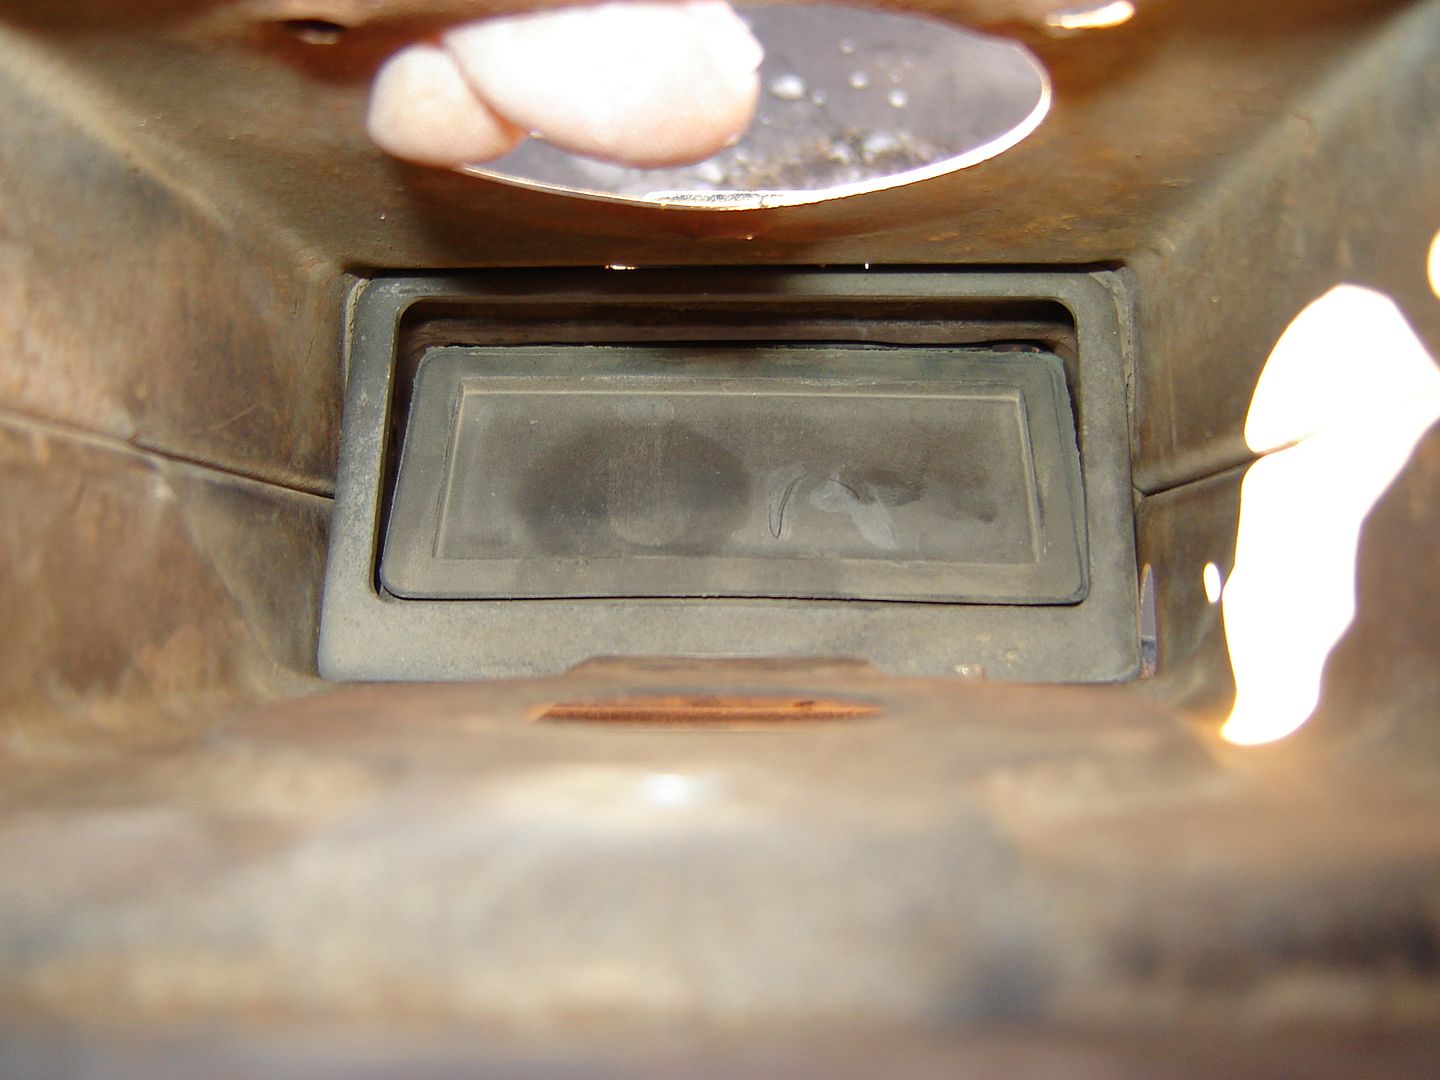
After some Dremel work and a little persuasion with a long punch and a hammer I had it out. It was wedged pretty good.

All the other stuff is out and off. Today's carnage:
 Life happens while you are making plans...............
1983 Wagoneer Limeted, 169k 360 AMC, NP 229, 727,
MODS: 2003 Durango bucket seats:
http://www.ifsja.org/forums/vb/showthread.php?t=159286
Build Thread: http://www.ifsja.org/forums/vb/showthread.php?t=174925Comment
-
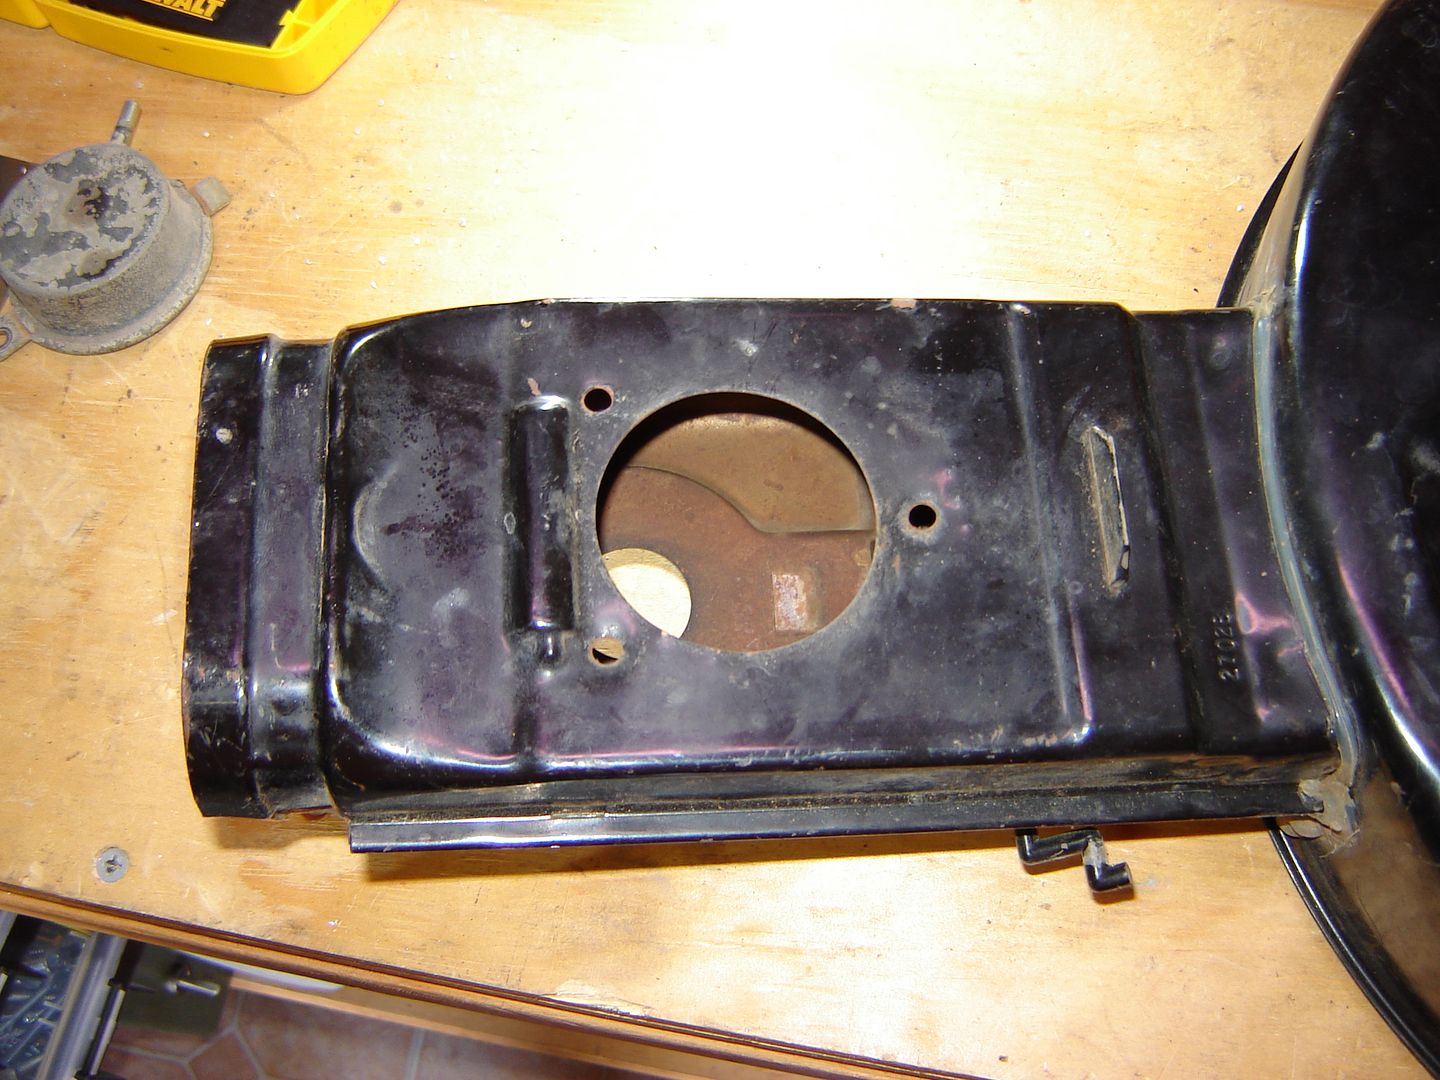
I made patches for all the holes in the air cleaner housing.
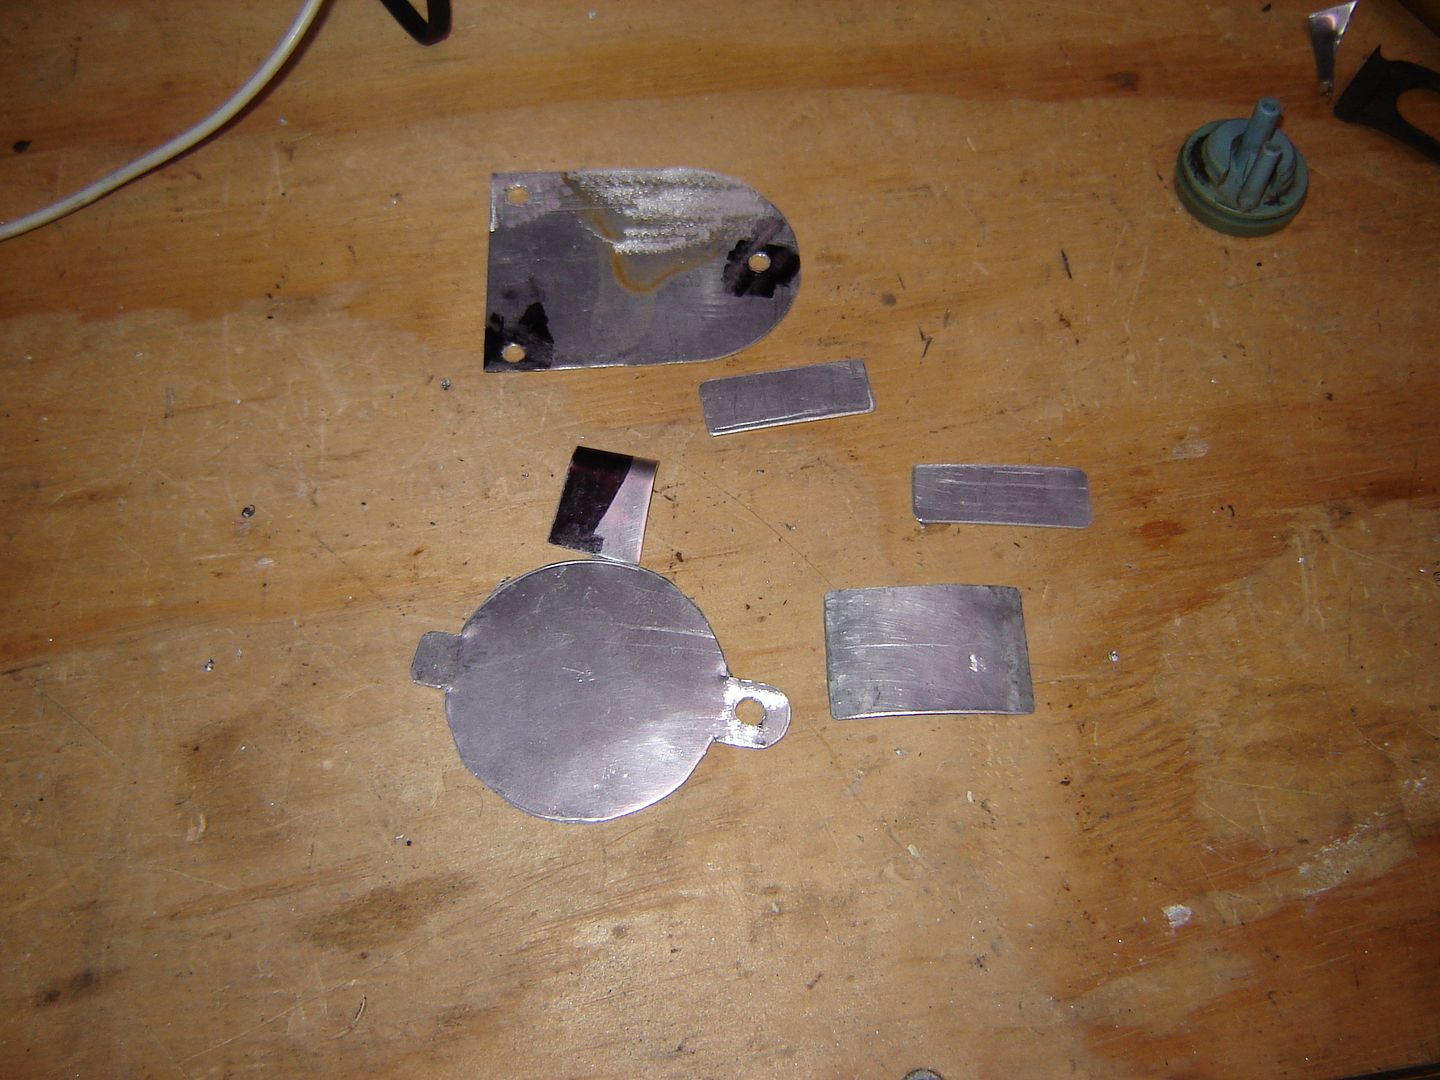
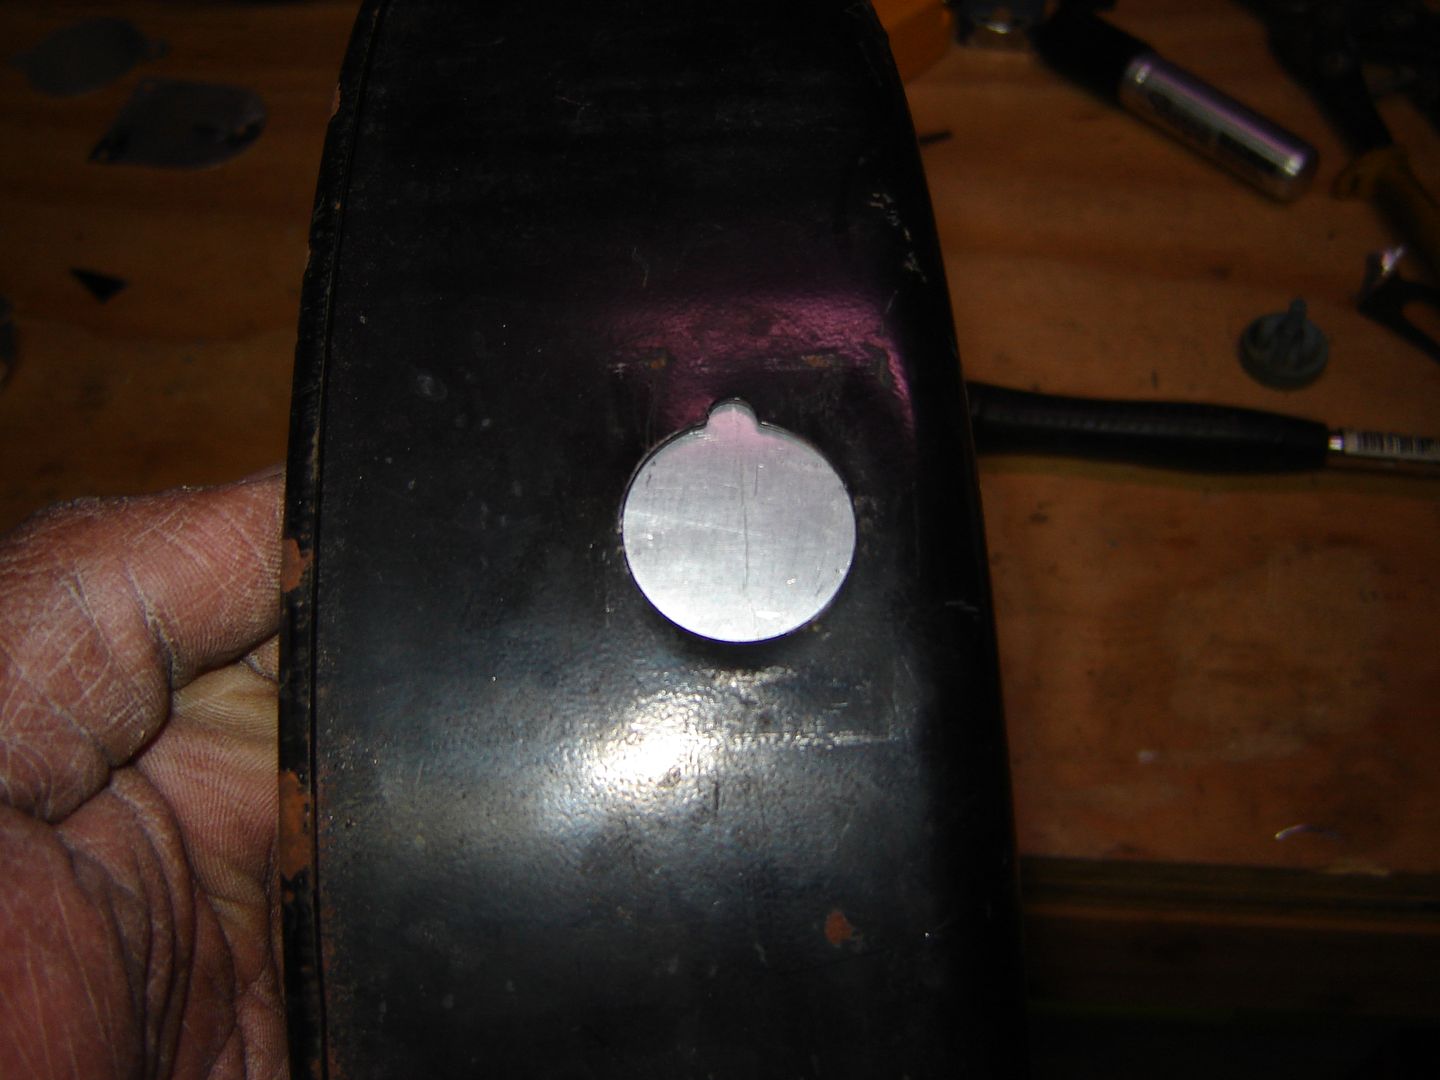
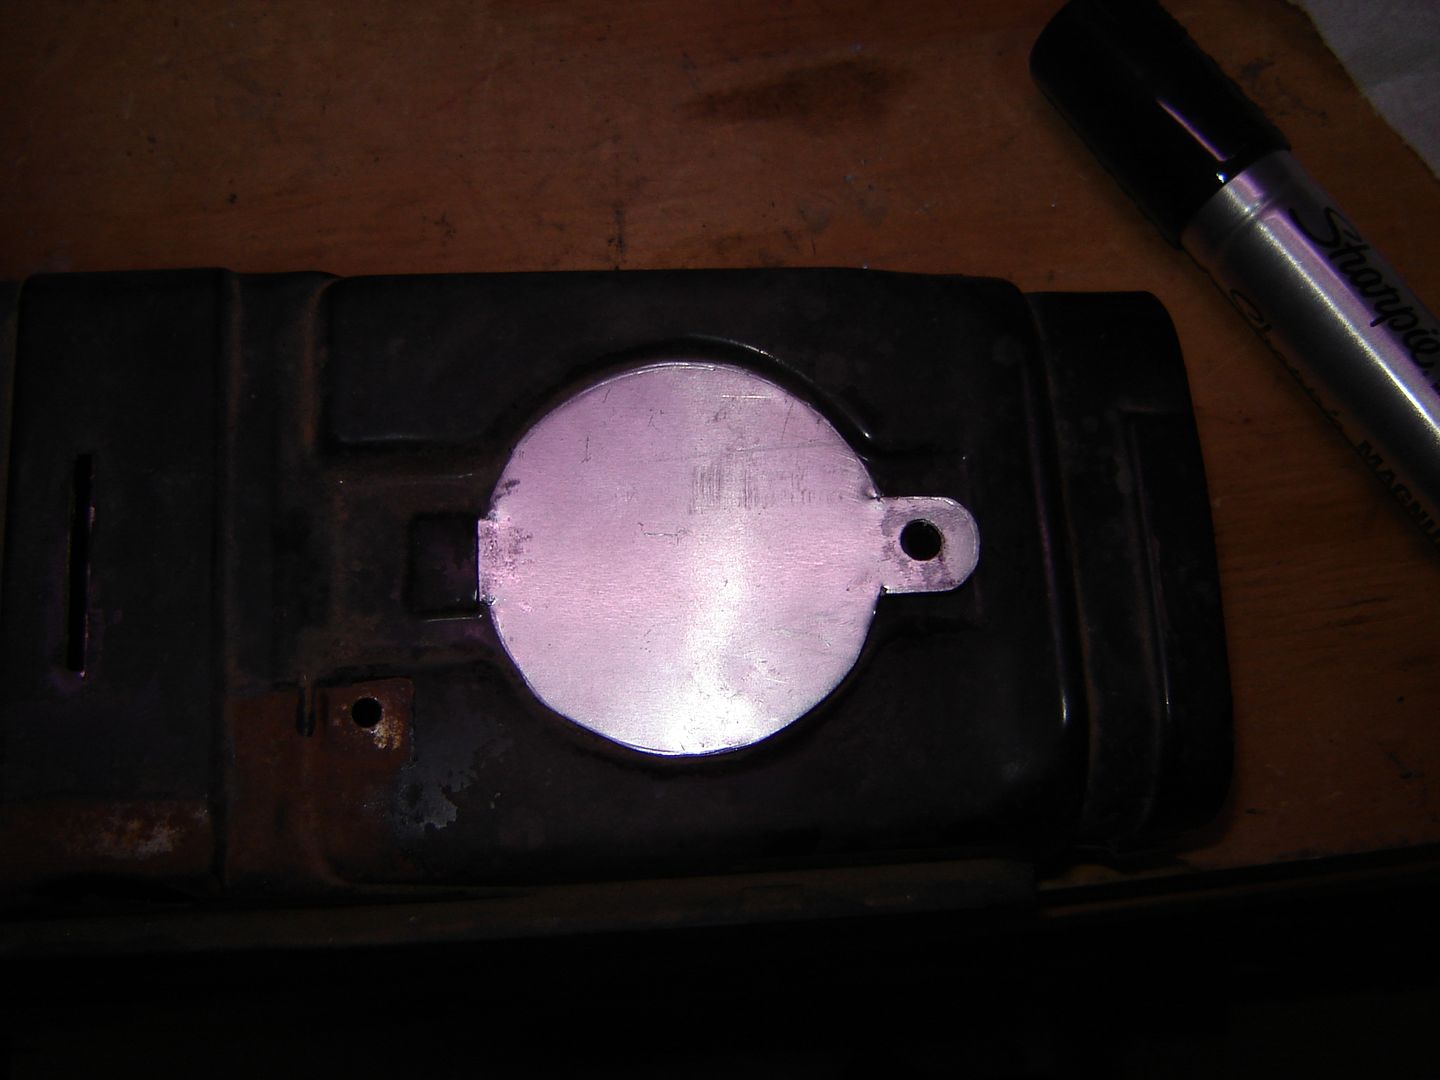
All I have to do now is clean it up install the patches and get it painted up. Cost was free as I had all the materials used on hand and I reused a part to help keep my jeep looking stock. This get me current through 1-8-2017.Life happens while you are making plans...............
1983 Wagoneer Limeted, 169k 360 AMC, NP 229, 727,
MODS: 2003 Durango bucket seats:
http://www.ifsja.org/forums/vb/showthread.php?t=159286
Build Thread: http://www.ifsja.org/forums/vb/showthread.php?t=174925Comment
-
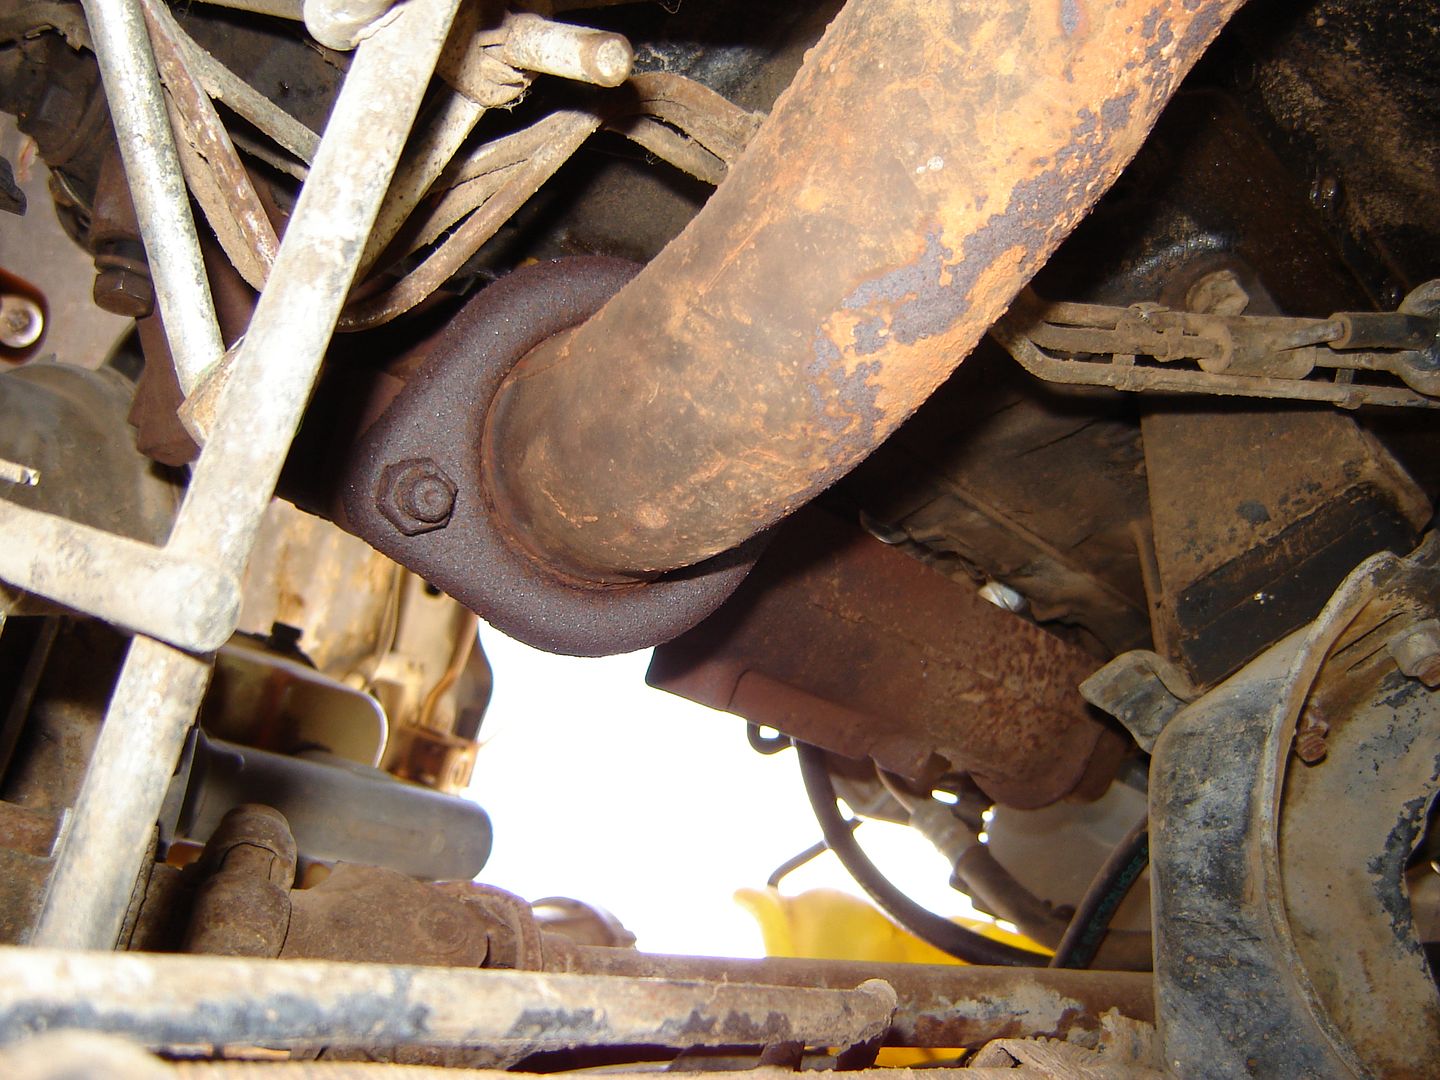
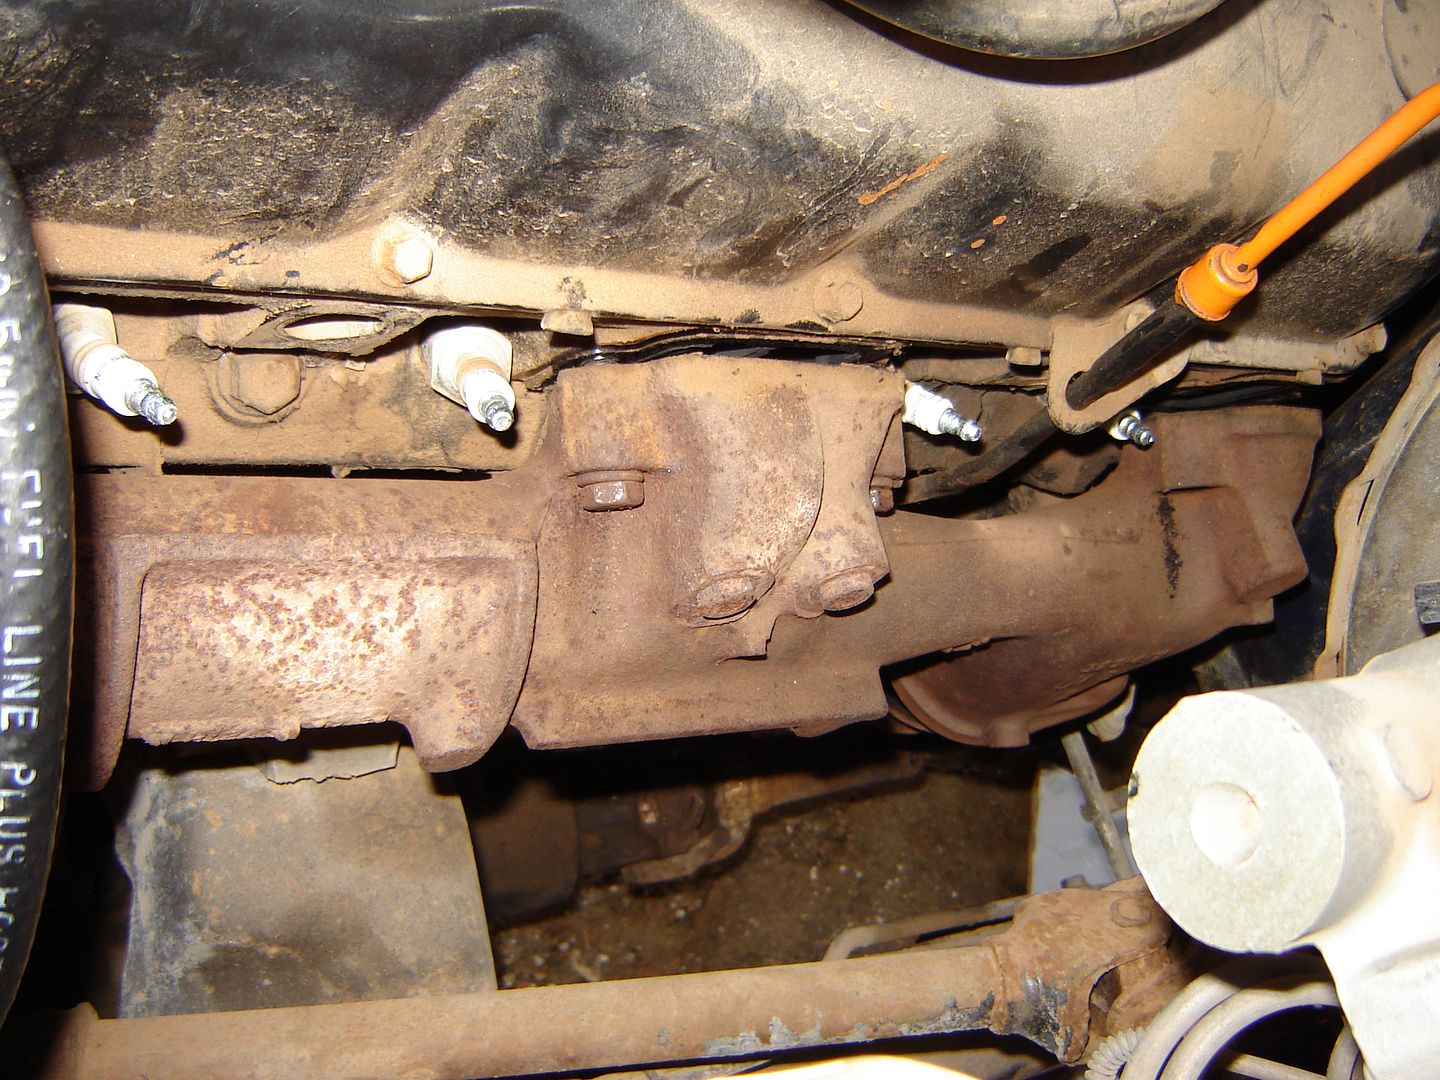
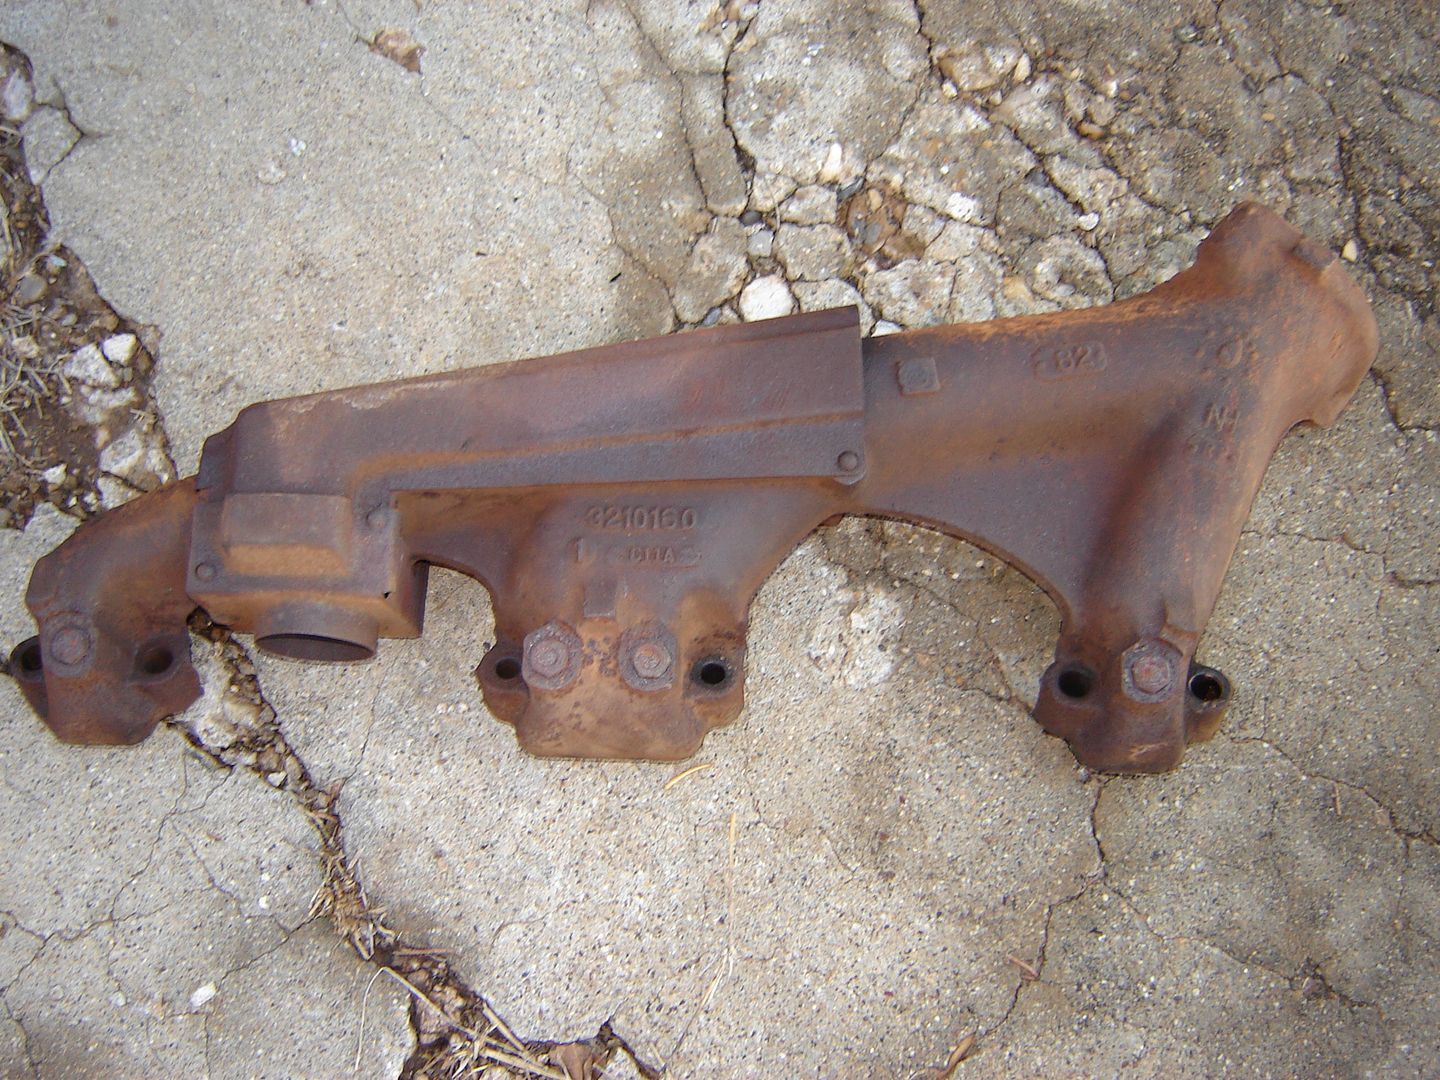
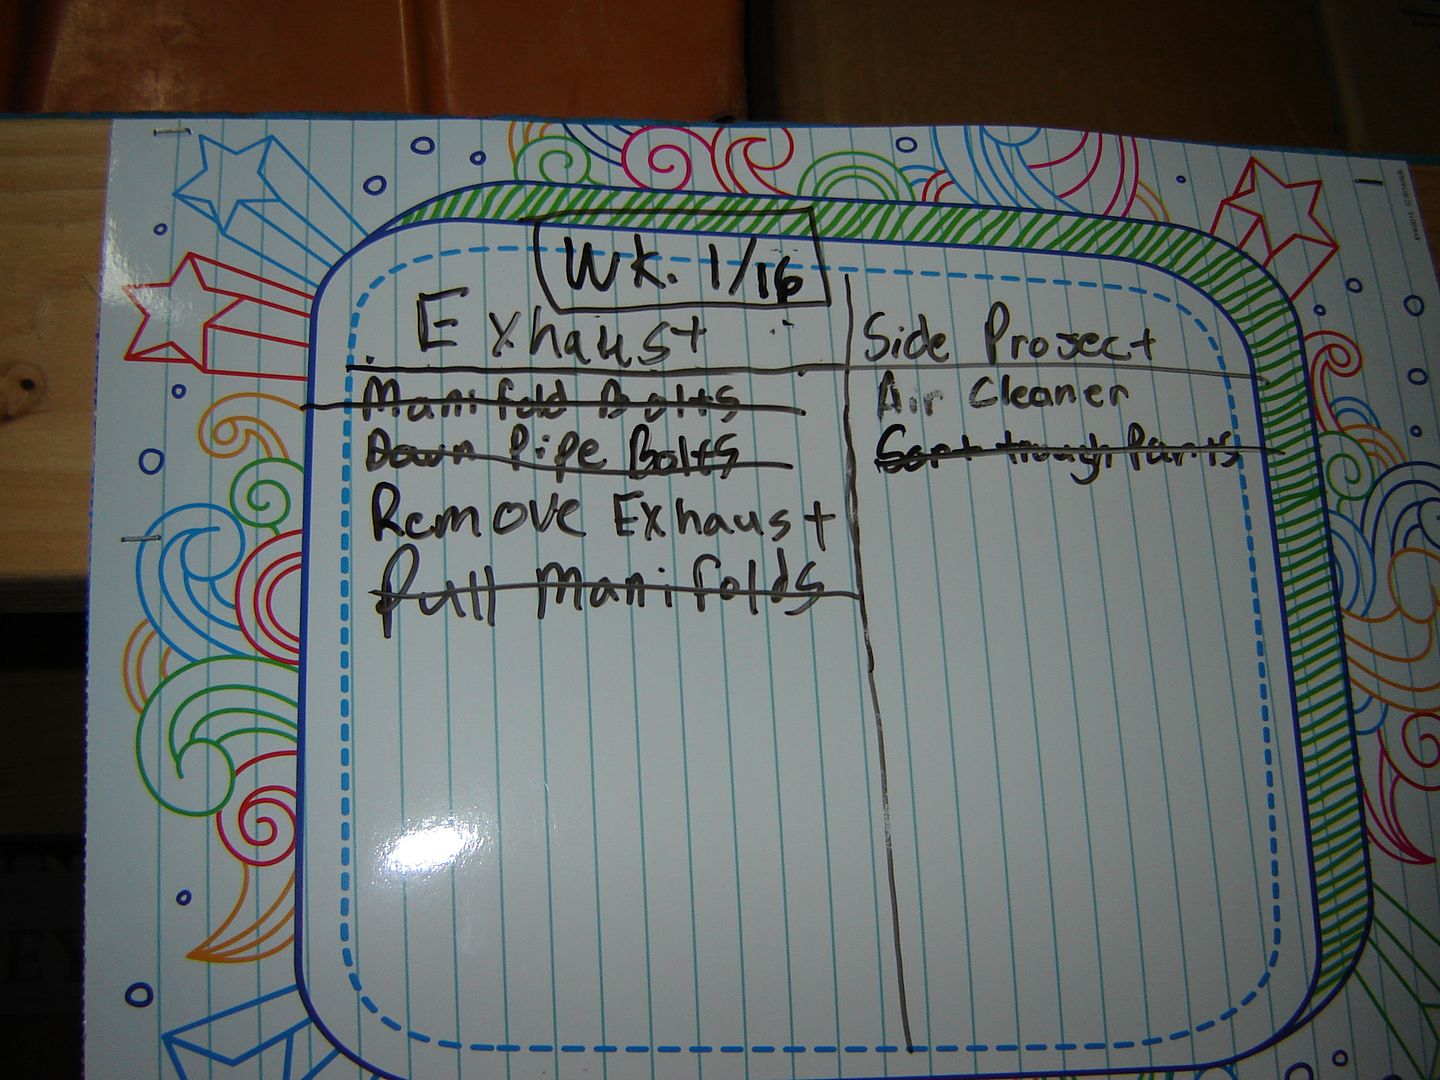
Exhaust
Trying to be a little more organized put up a dry erase board.
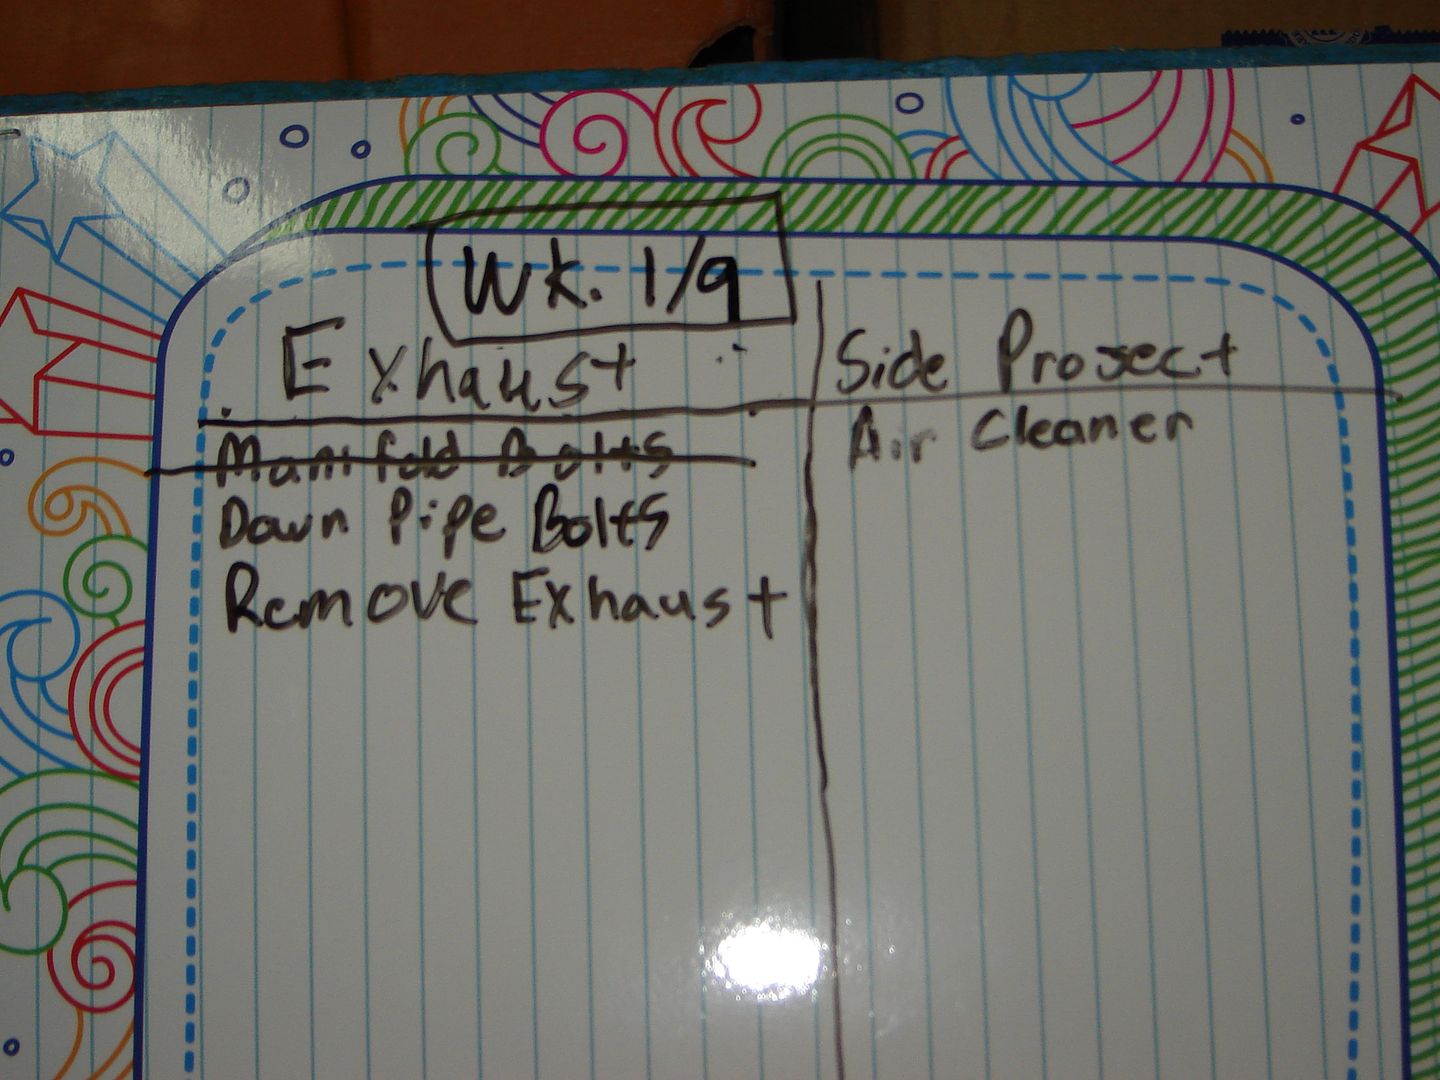
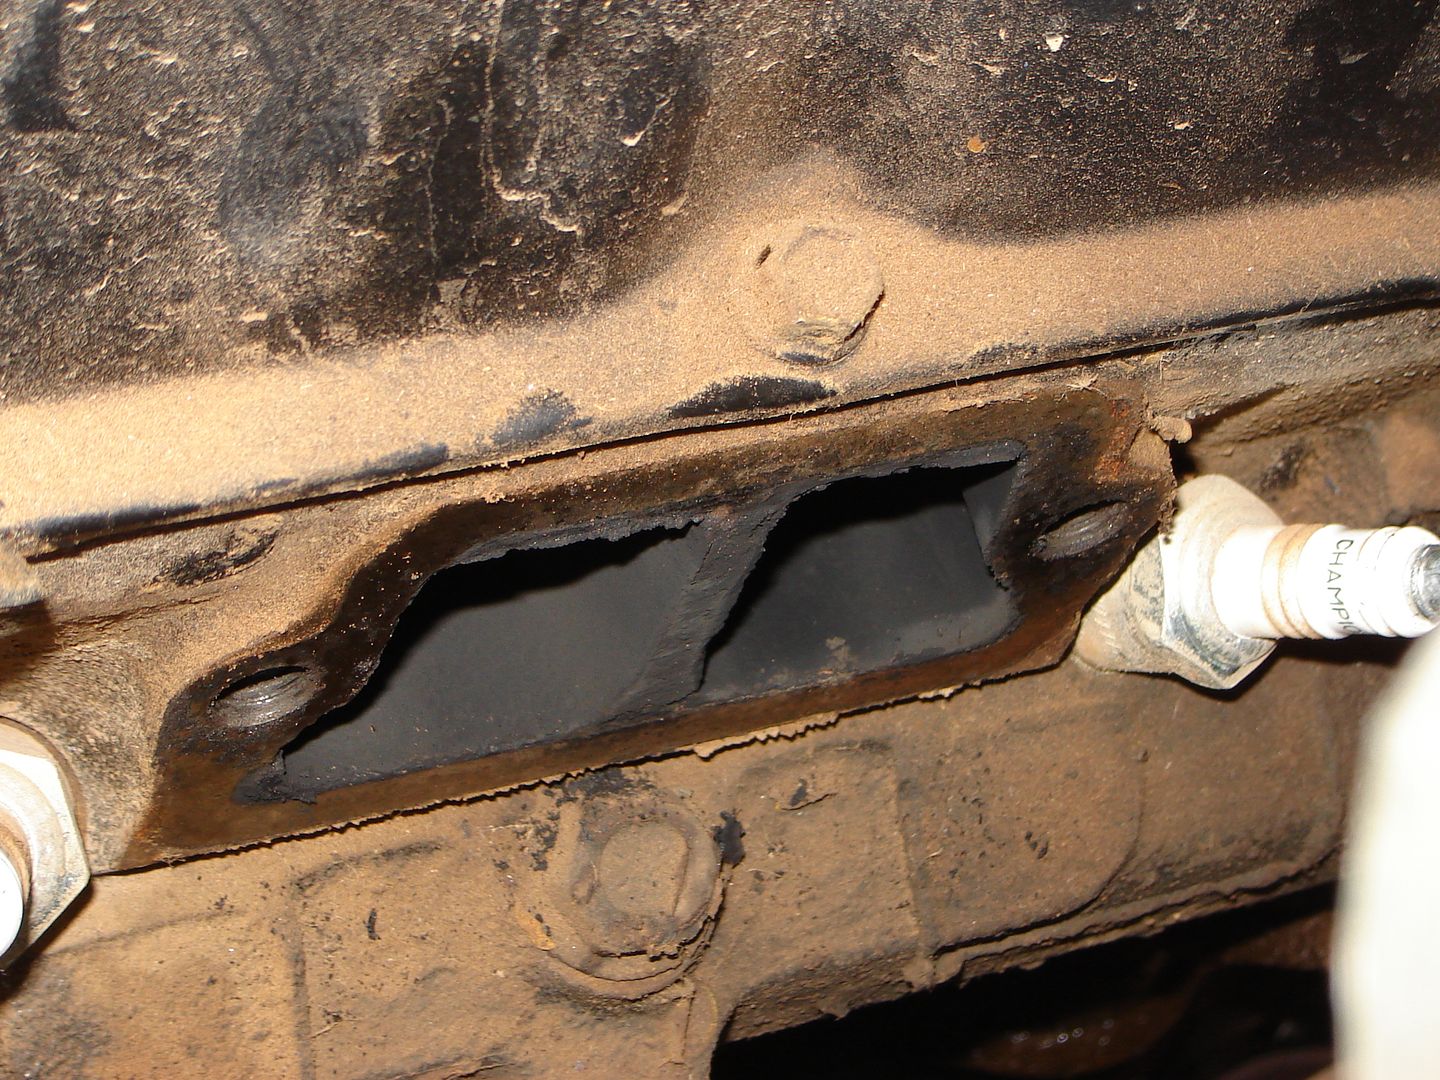
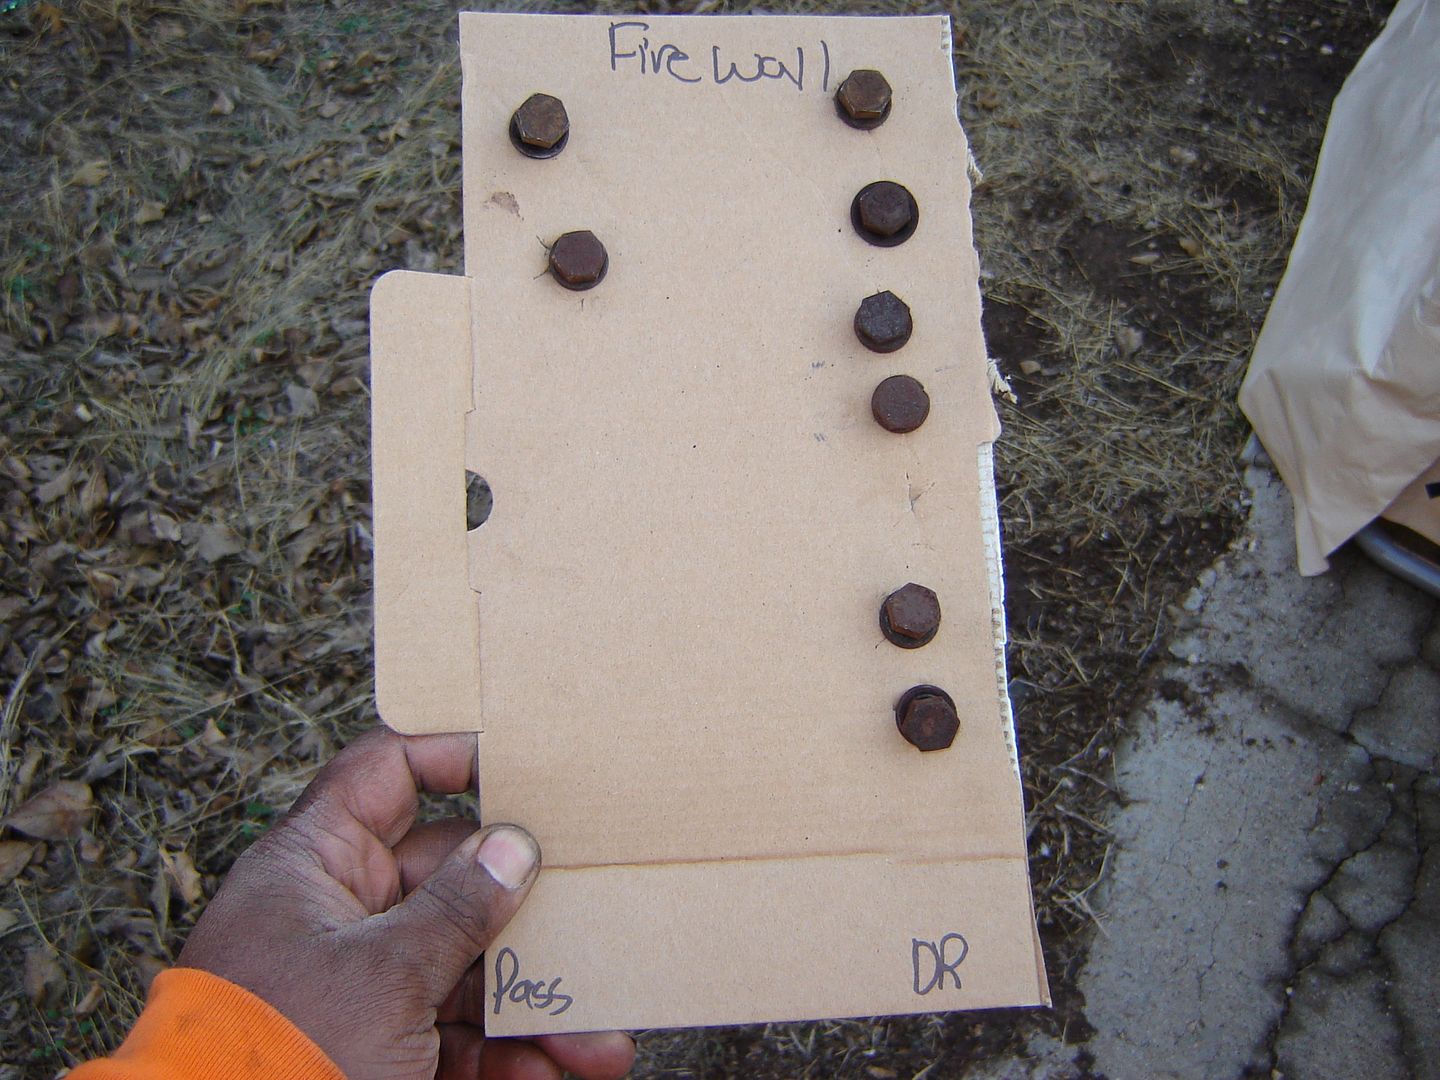
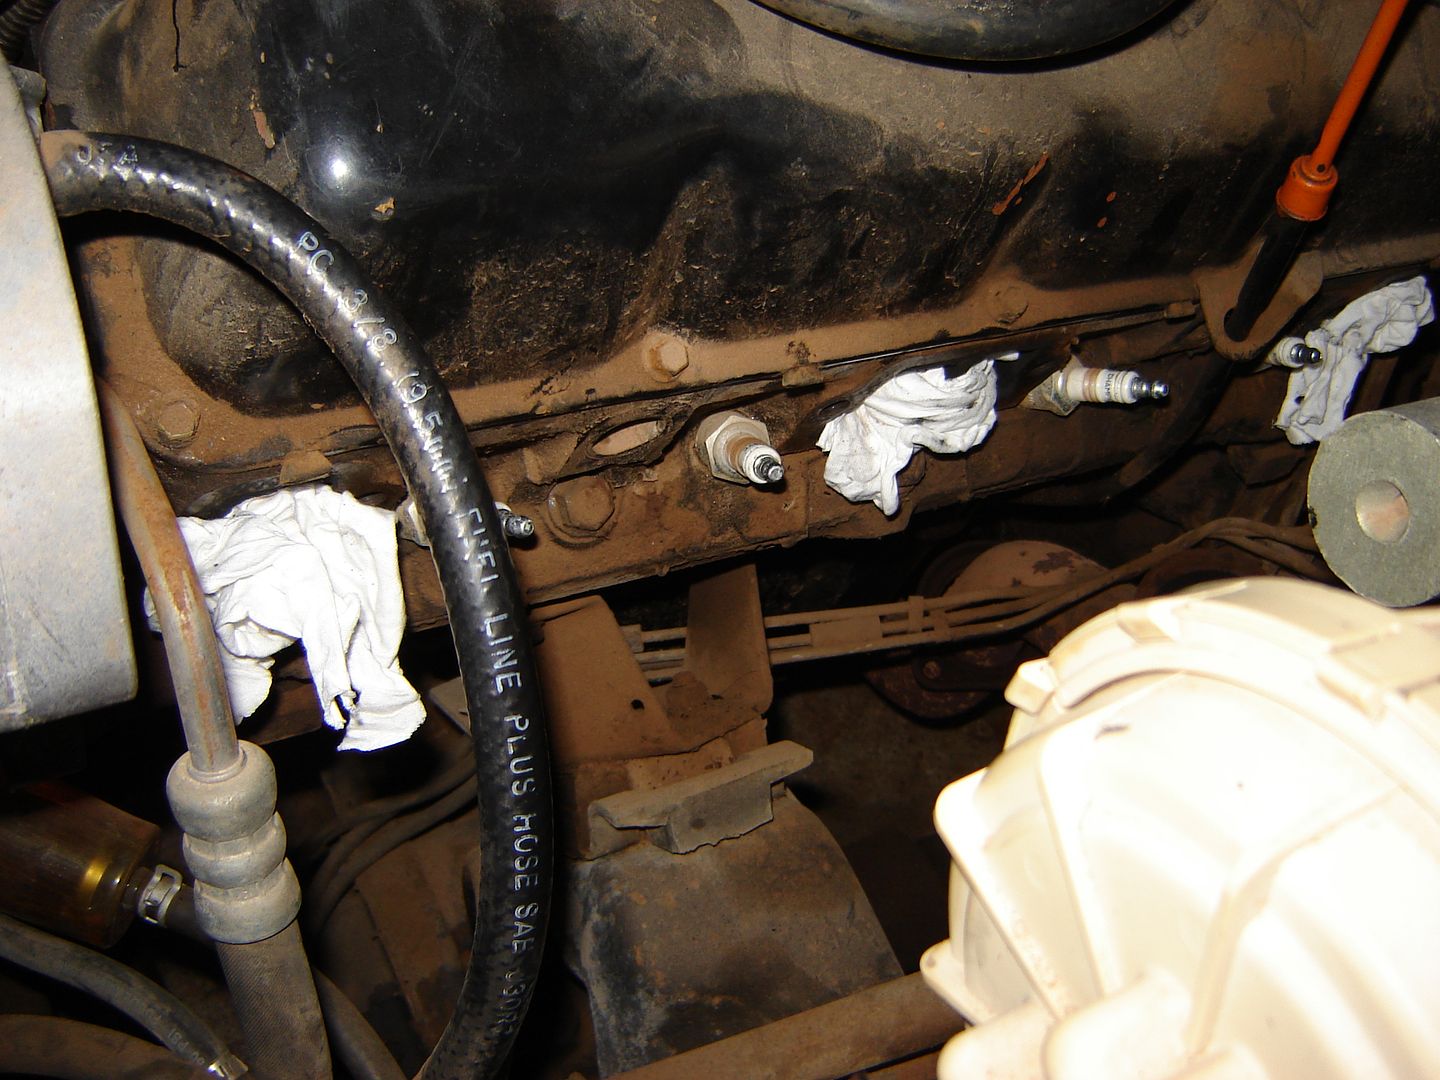
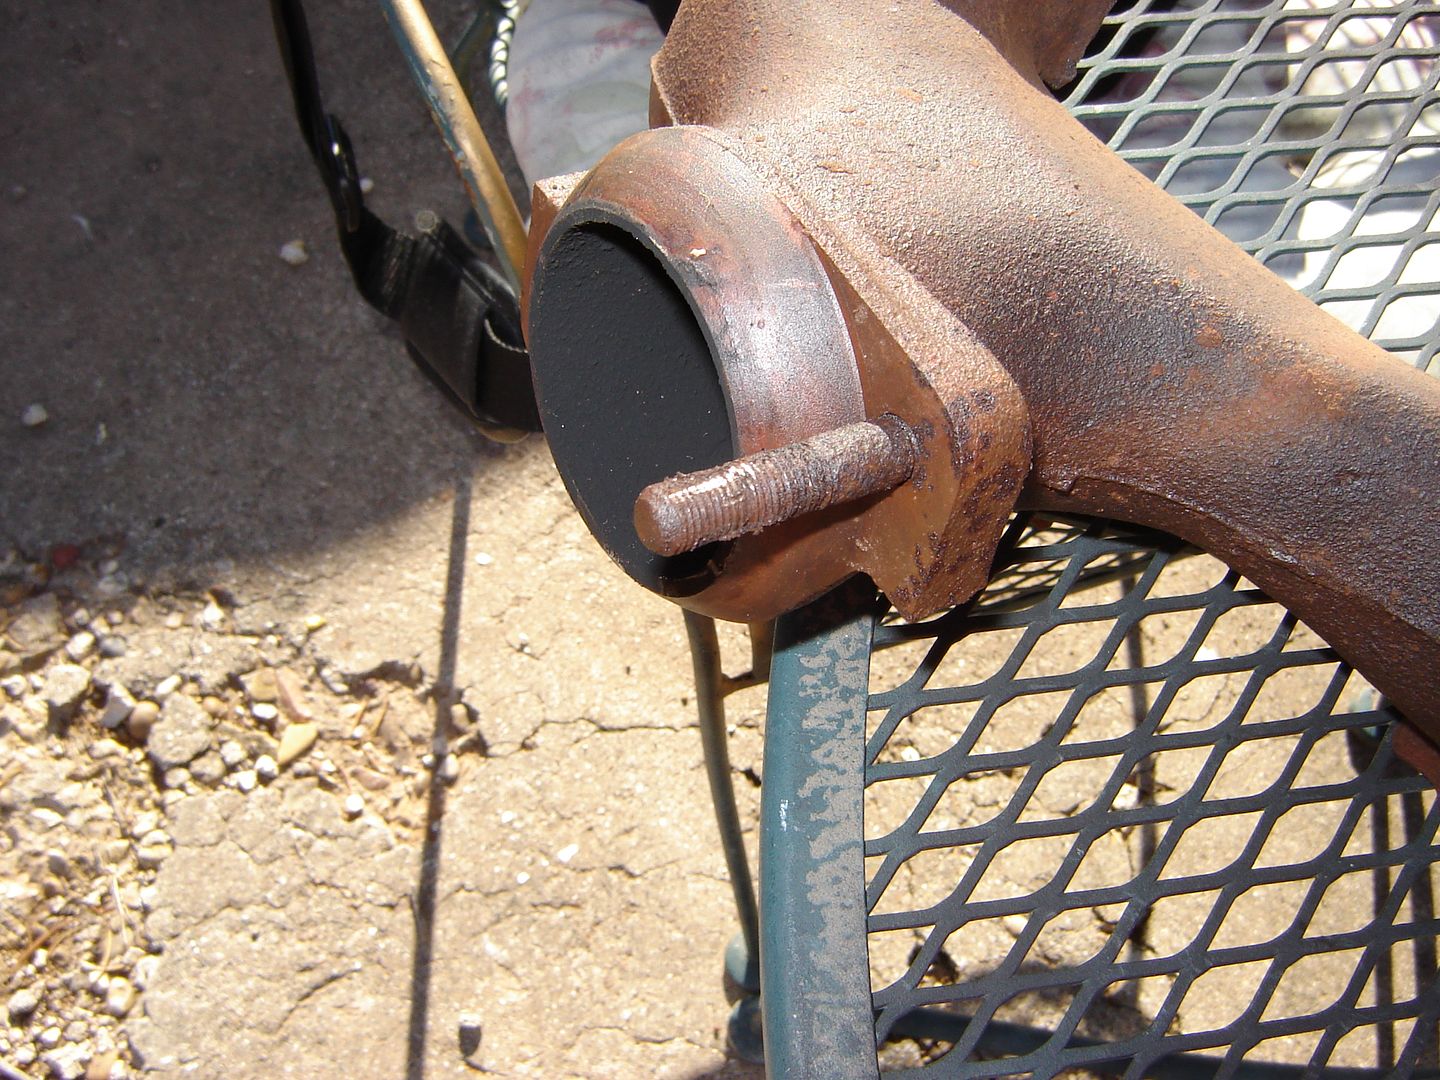
I have been spraying down the exhaust manifold and down pipe bolts with PB Blaster the past couple of weeks. I have heard lots of stories of people snapping the hollow bolts off in the head and was very fearful of this happening. Today I tried one of the bolts on the driver side. To my surprise it was already loose.

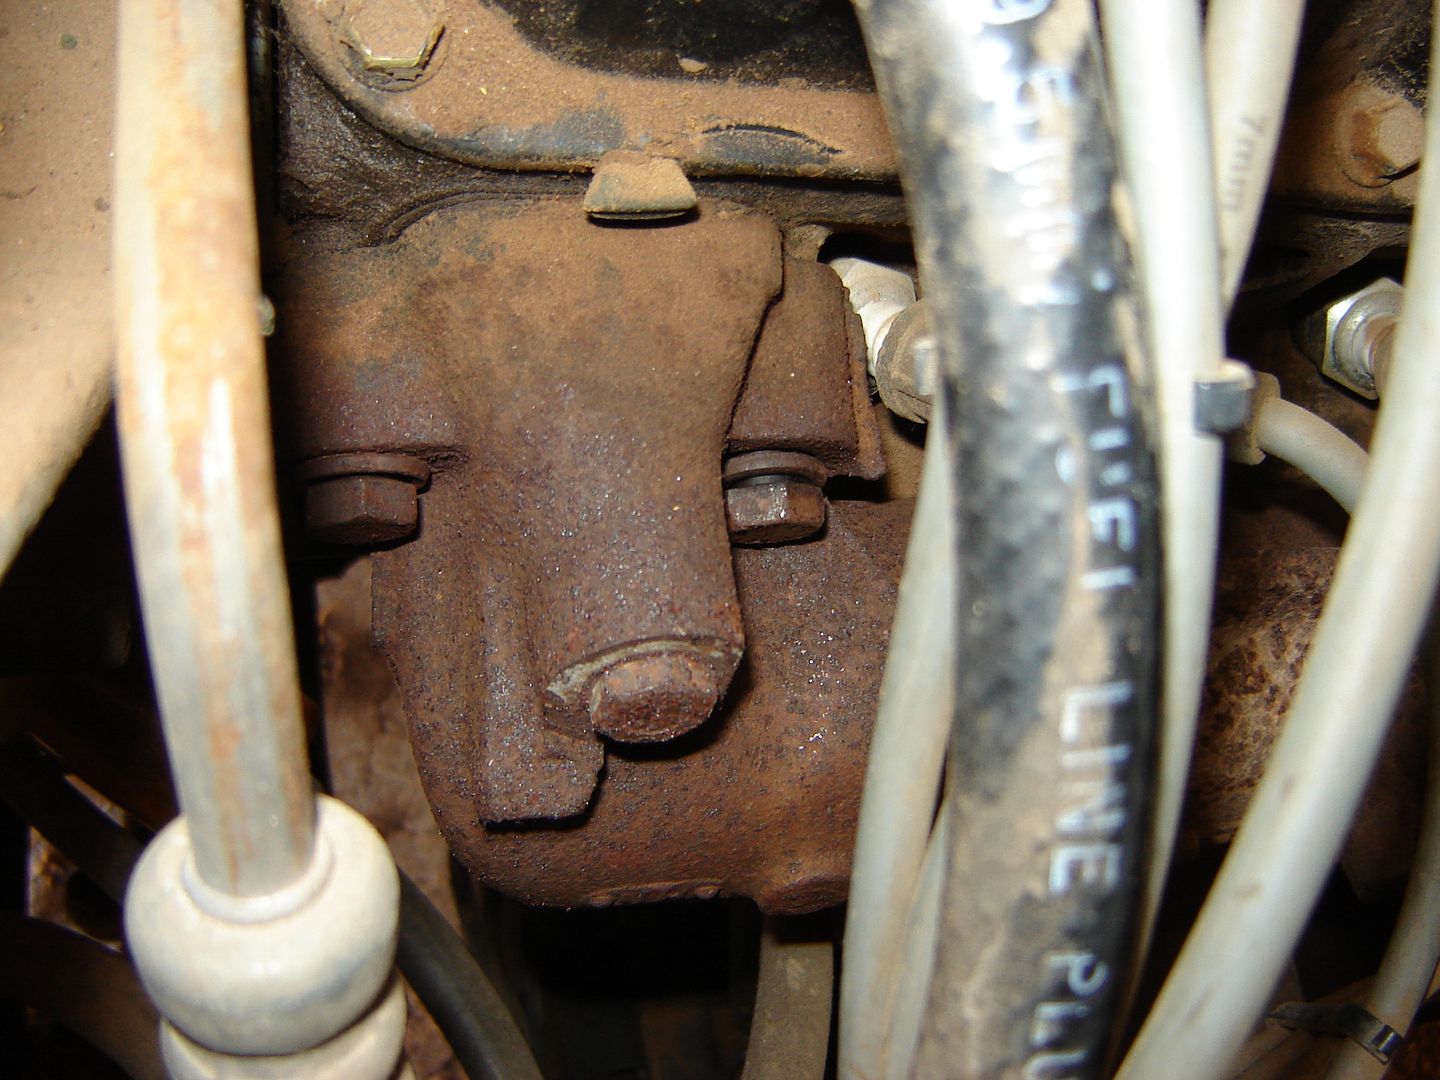
Every exhaust manifold bolt was loose except for two. Holy Smokes the two bolts closest to the firewall were hard to get at.
The infamous hollow bolts.
Next I will try to knock the down pipe bolts loose. We are expecting bad weather again so I am merely knocking the bolts loose but not removing the parts so the nothing is left open to the elements. I will be able to get it apart quickly once the weather cooperates.Life happens while you are making plans...............
1983 Wagoneer Limeted, 169k 360 AMC, NP 229, 727,
MODS: 2003 Durango bucket seats:
http://www.ifsja.org/forums/vb/showthread.php?t=159286
Build Thread: http://www.ifsja.org/forums/vb/showthread.php?t=174925Comment
-
Just got done reading your thread. You are doing some really nice work and I am looking forward to seeing how you handle the rust at the top of the windshield.
I was curious, where are you planning to instal the auxiliary fuse/relay block you rewired?Comment
-
I hope the top of the windshield is not bad. It's a Texas jeep and most of the rust on it is surface rust. With that being said I won't rule it out. Windshield is coming out in the spring when the weather is better. The auxiliary fuse blocks will either be under the dash or in the center console I plan to build. The console in there now is plan B.Life happens while you are making plans...............
1983 Wagoneer Limeted, 169k 360 AMC, NP 229, 727,
MODS: 2003 Durango bucket seats:
http://www.ifsja.org/forums/vb/showthread.php?t=159286
Build Thread: http://www.ifsja.org/forums/vb/showthread.php?t=174925Comment
-
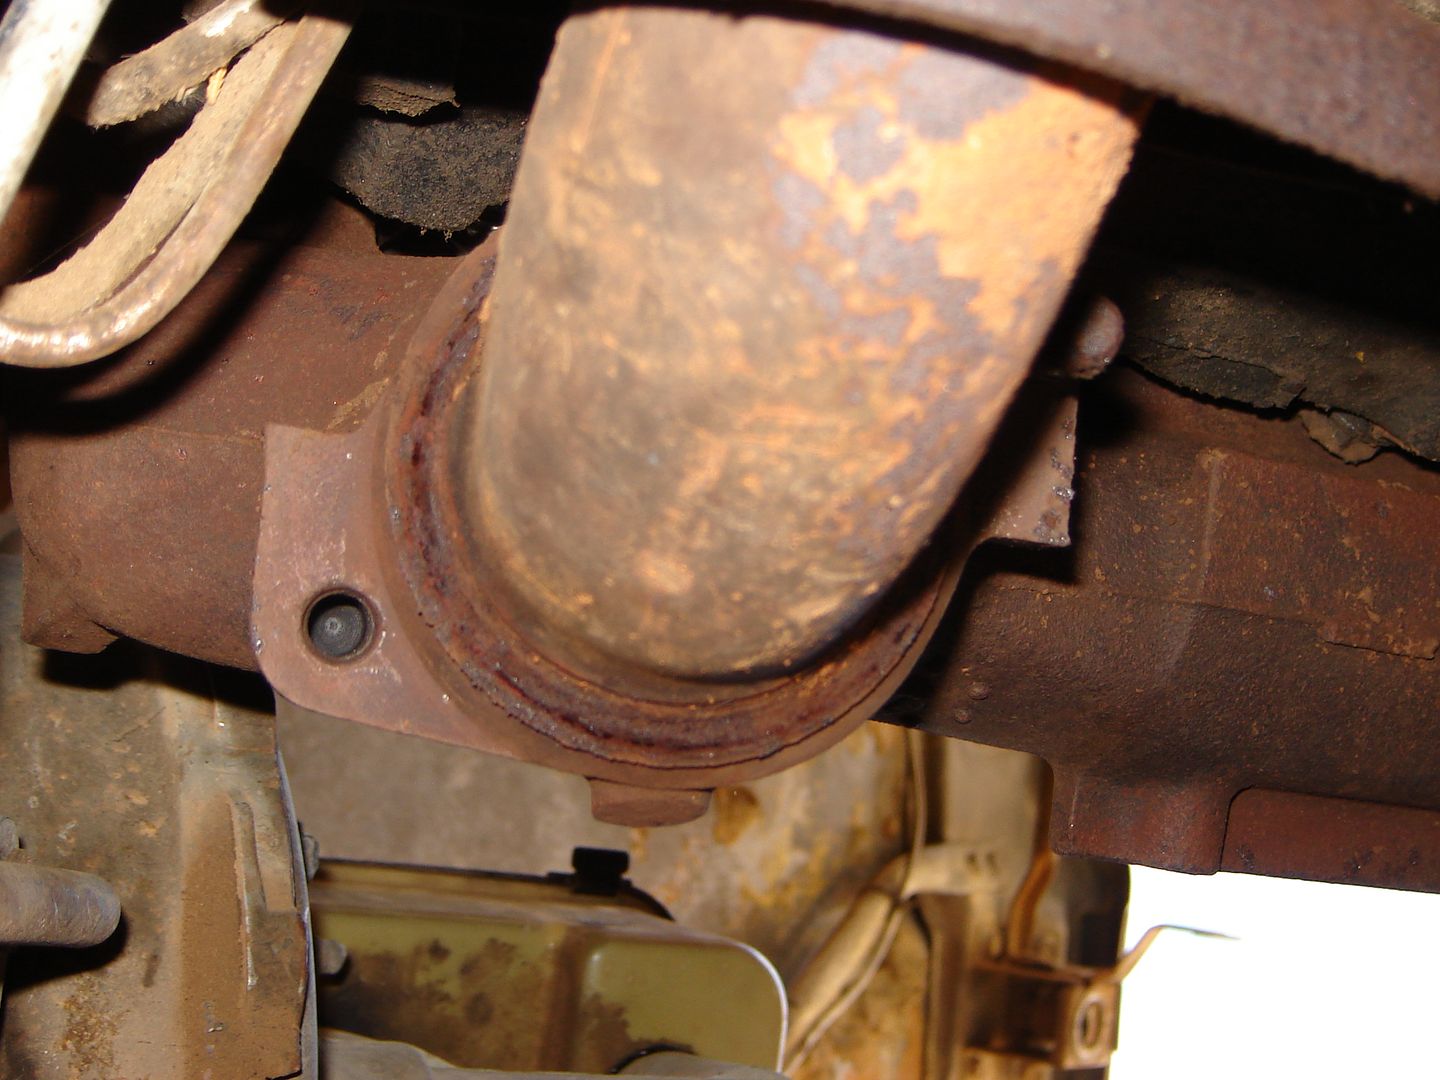
The four day rain-fest stopped and the Sun was out 54 degrees. I worked on the Wagoner most of the afternoon.
Started on the driver side removing y pipe bolts:
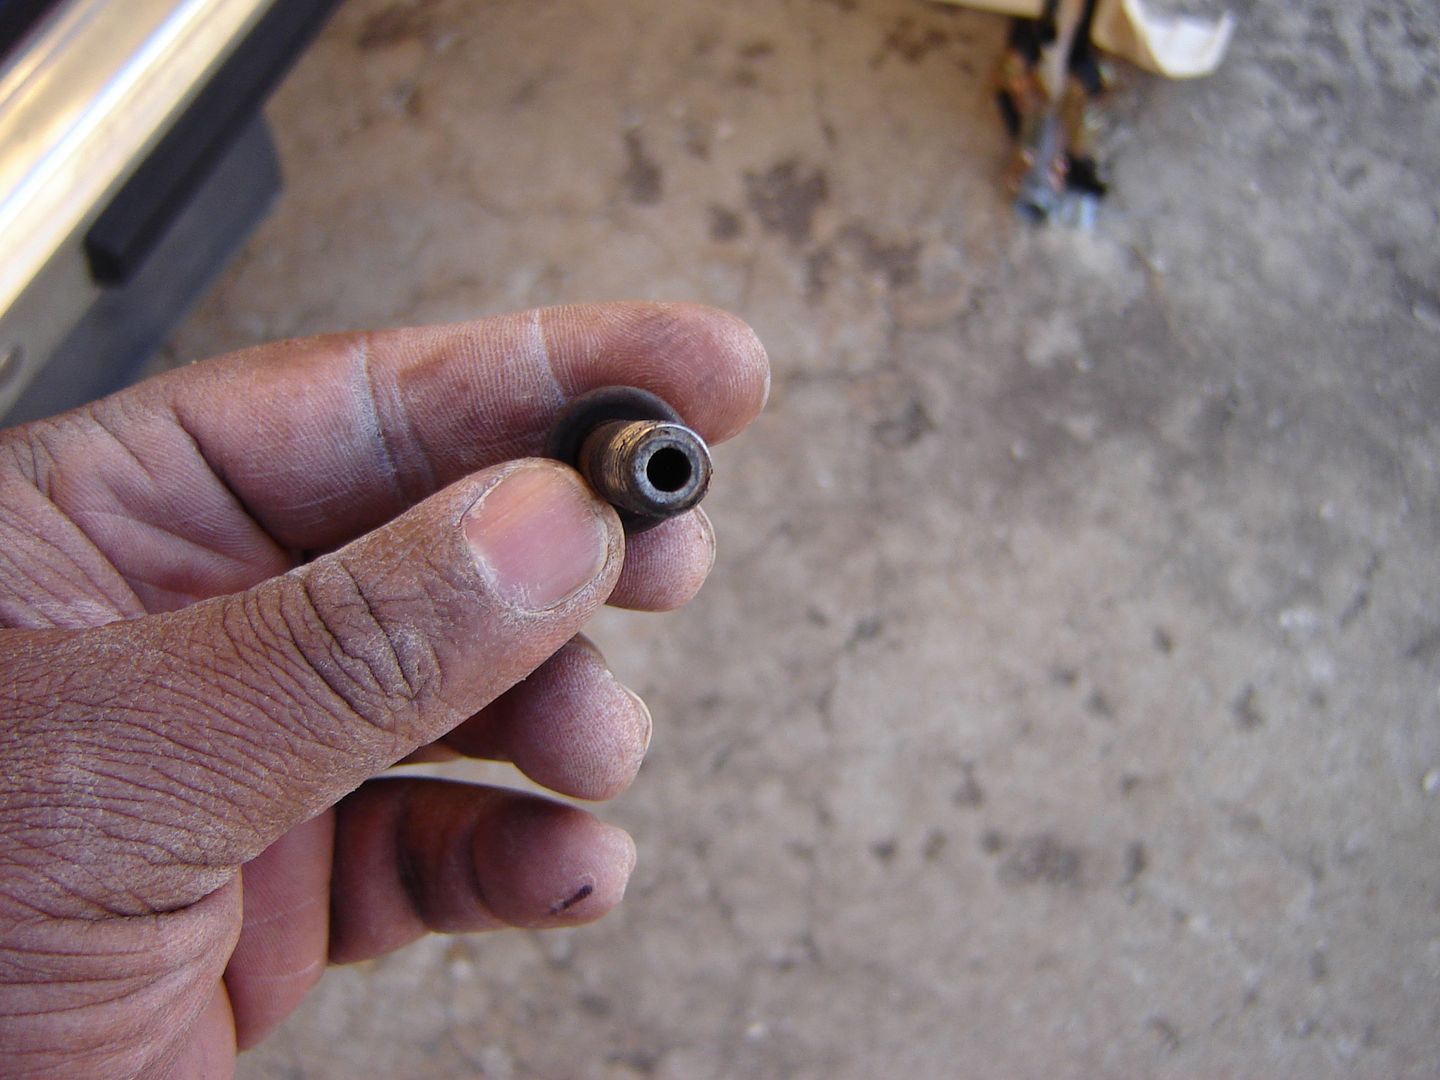
One stud twisted out and the nut came of of the other:
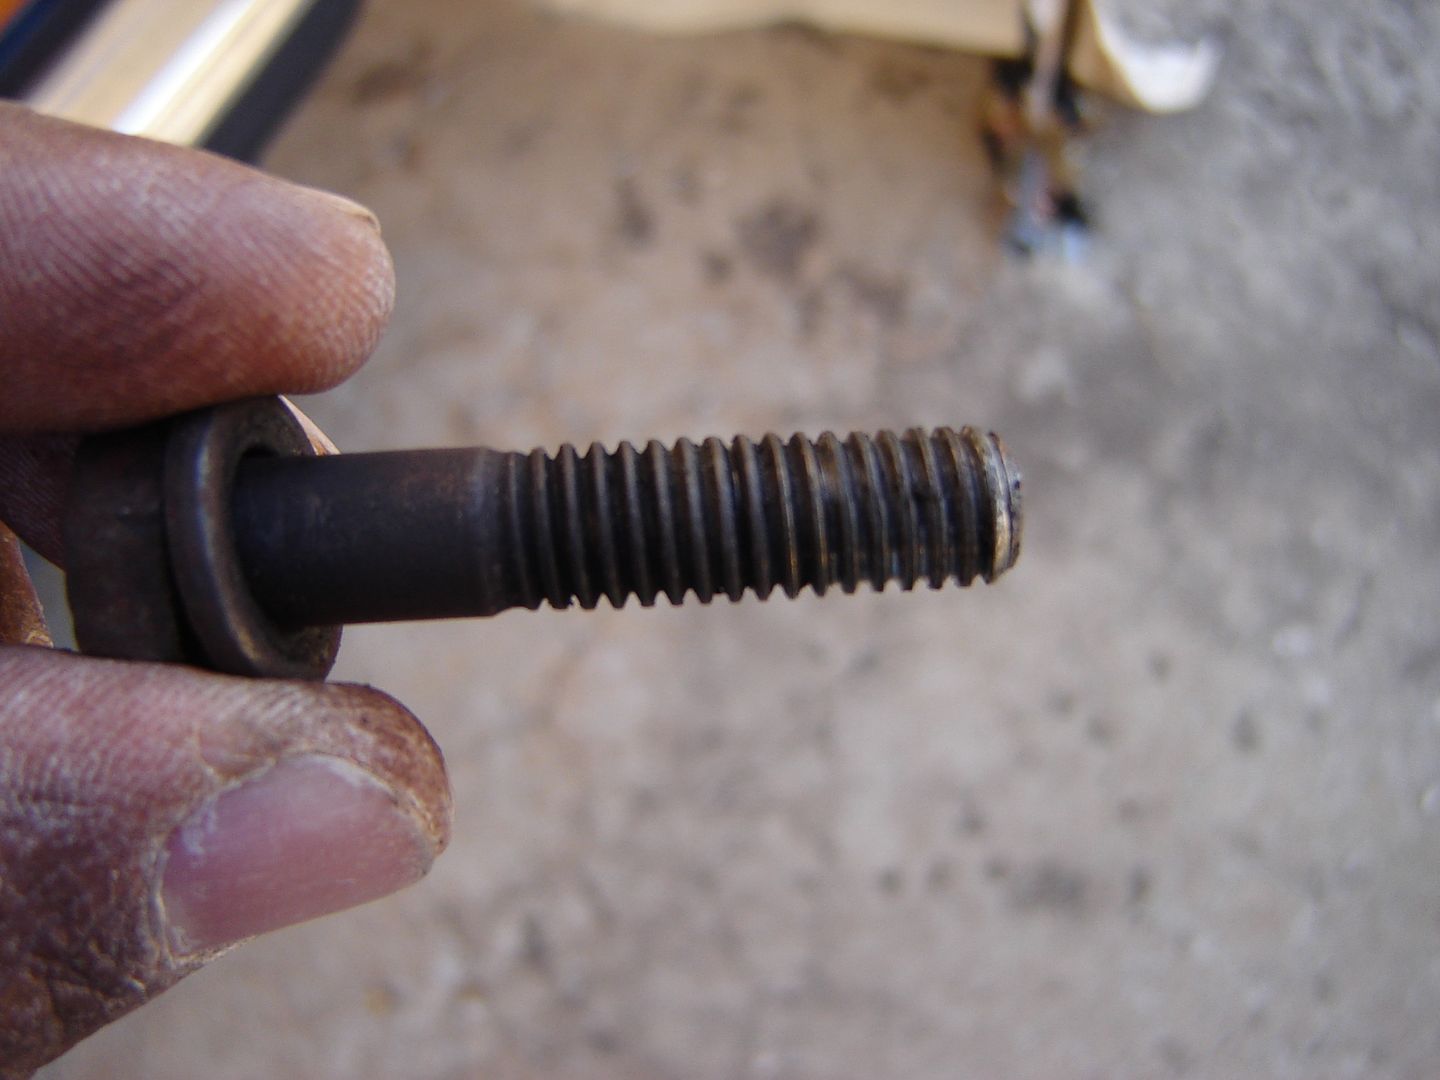
Had not broken a bolt or stud yet until I got to the passenger side. Someone had put a bolt in instead of a manifold stud:

Will not complain about it as it is the only one that I broke.
Was able to get the heat riser and gasket out when the Y pipe sagged down:
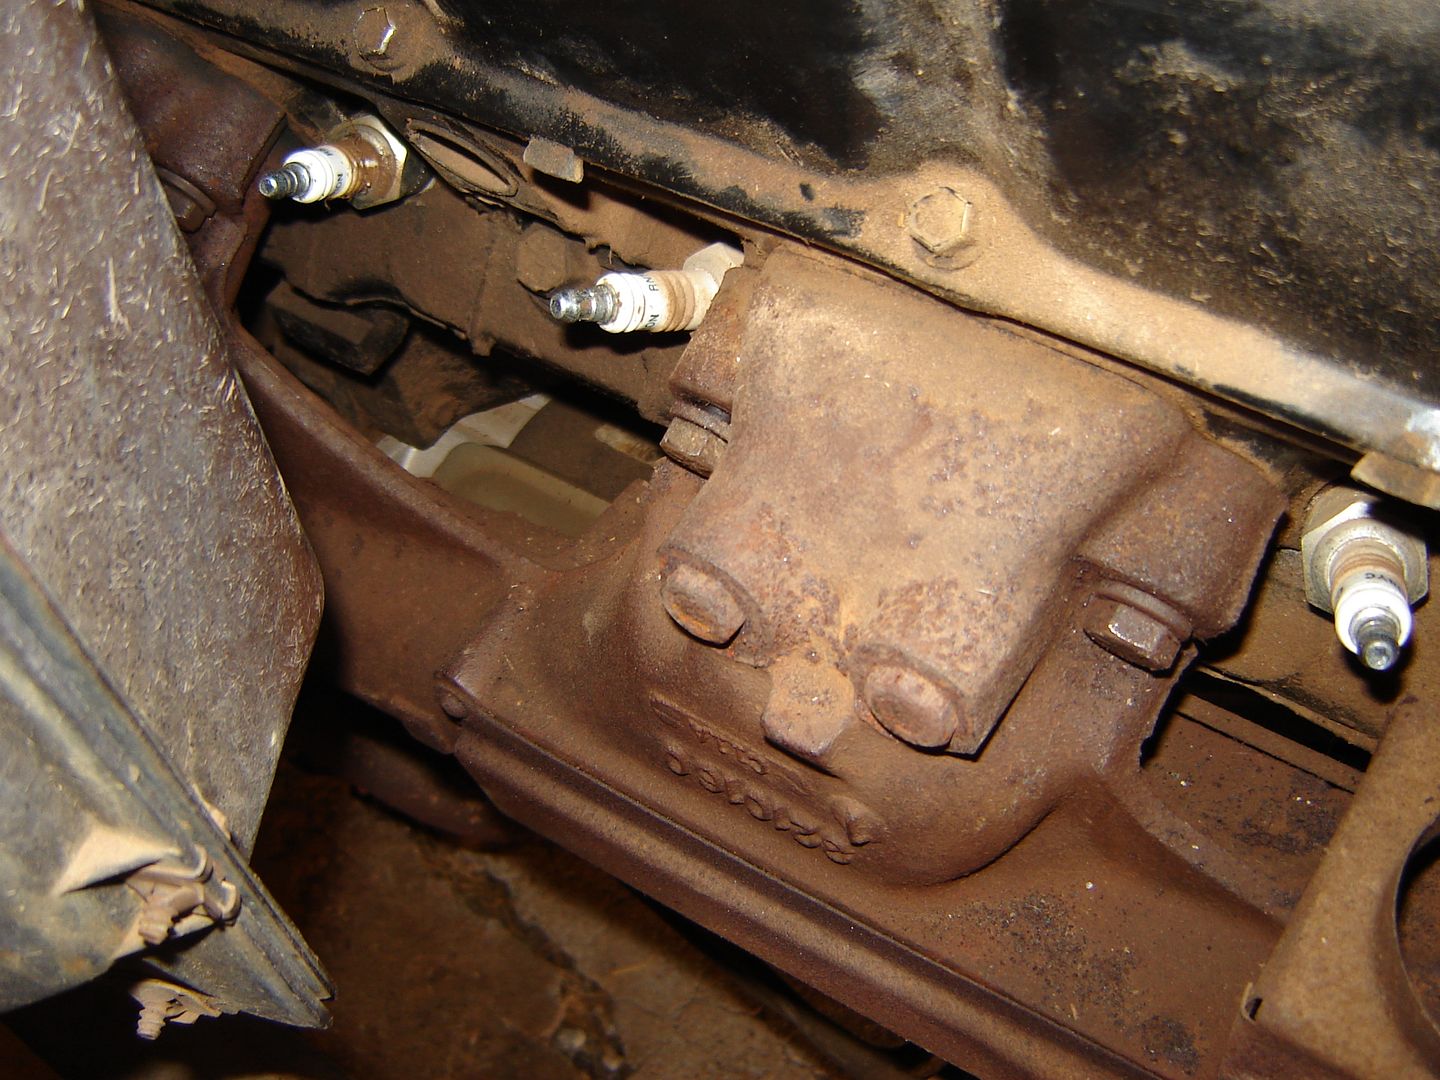
Started pulling the Driver side manifold bolts:
It came out without an issue.
 Life happens while you are making plans...............
1983 Wagoneer Limeted, 169k 360 AMC, NP 229, 727,
MODS: 2003 Durango bucket seats:
http://www.ifsja.org/forums/vb/showthread.php?t=159286
Build Thread: http://www.ifsja.org/forums/vb/showthread.php?t=174925Comment
-
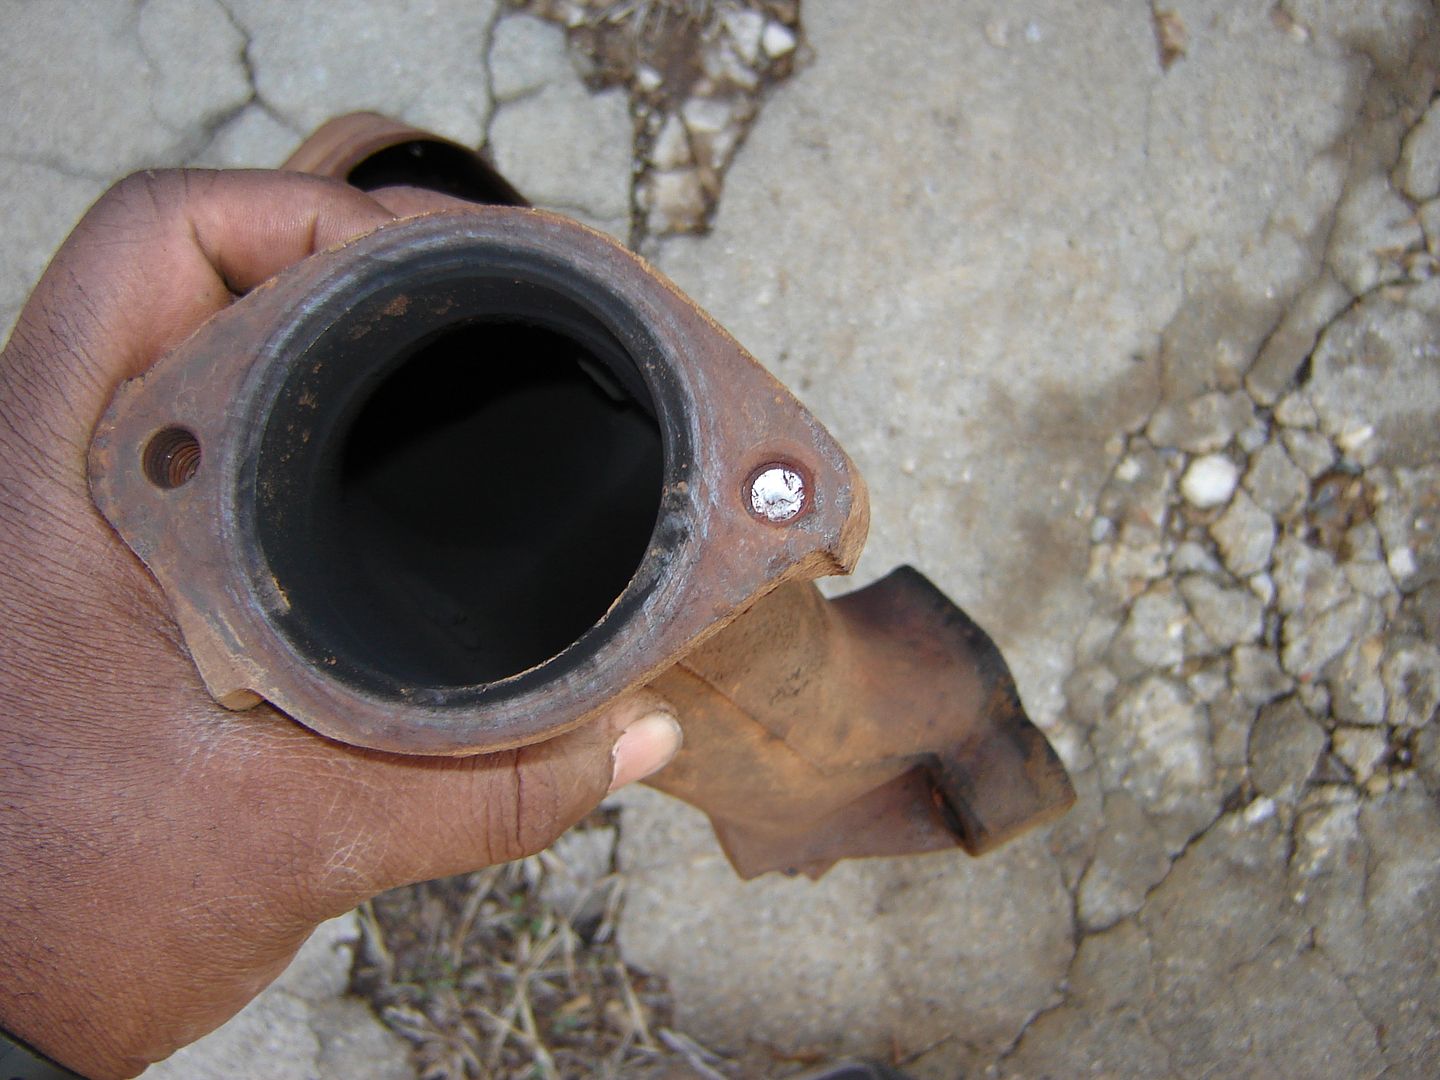
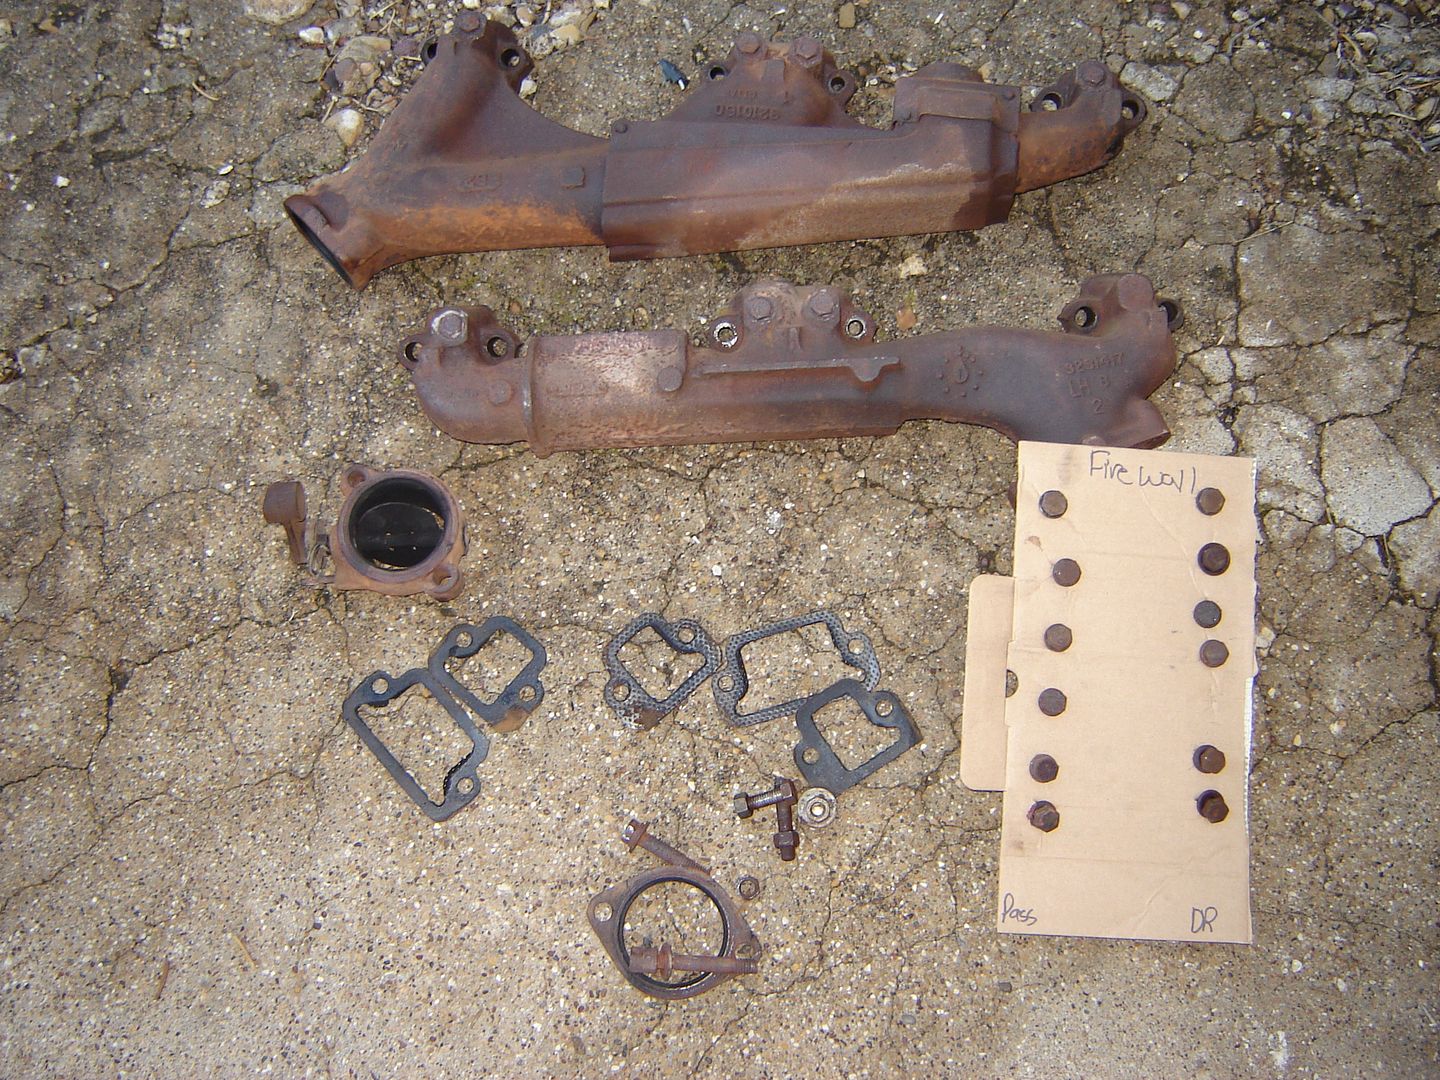
Dog leg Ports:
I kept the bolts in order just in case there was something screwy going on:
Moved on to the passenger side:
Yep, broke a bolt:
Plugged the ports up with old rags to keep stuff out of them:
Today's Carnage:
Today was a really productive day!!!!Life happens while you are making plans...............
1983 Wagoneer Limeted, 169k 360 AMC, NP 229, 727,
MODS: 2003 Durango bucket seats:
http://www.ifsja.org/forums/vb/showthread.php?t=159286
Build Thread: http://www.ifsja.org/forums/vb/showthread.php?t=174925Comment
-
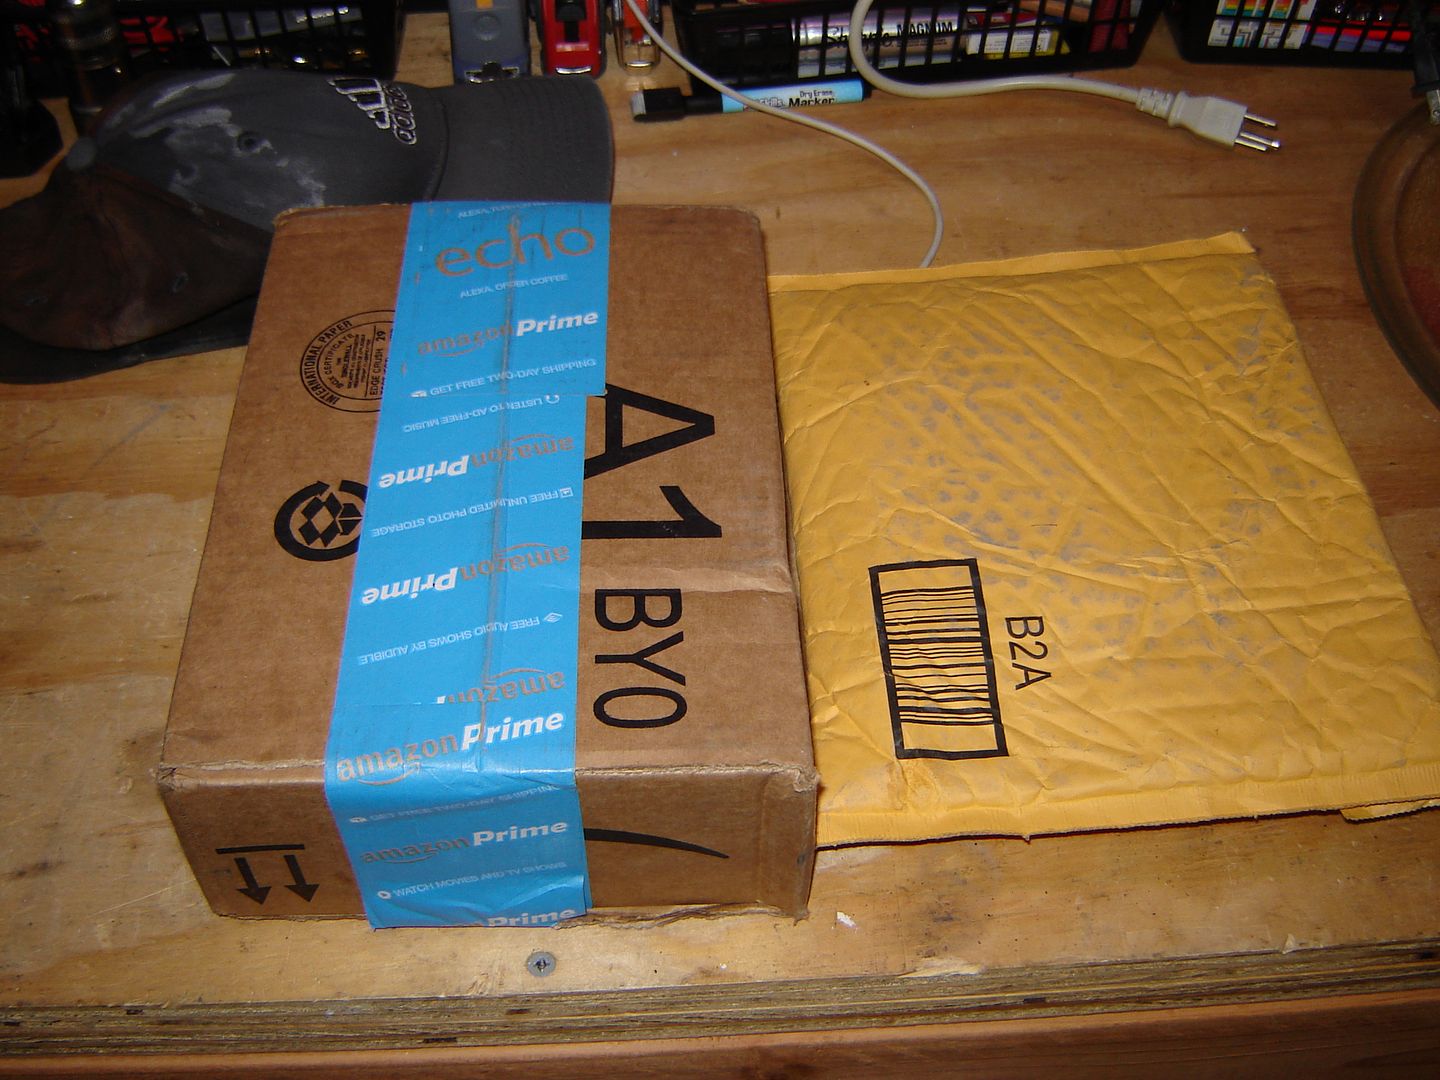
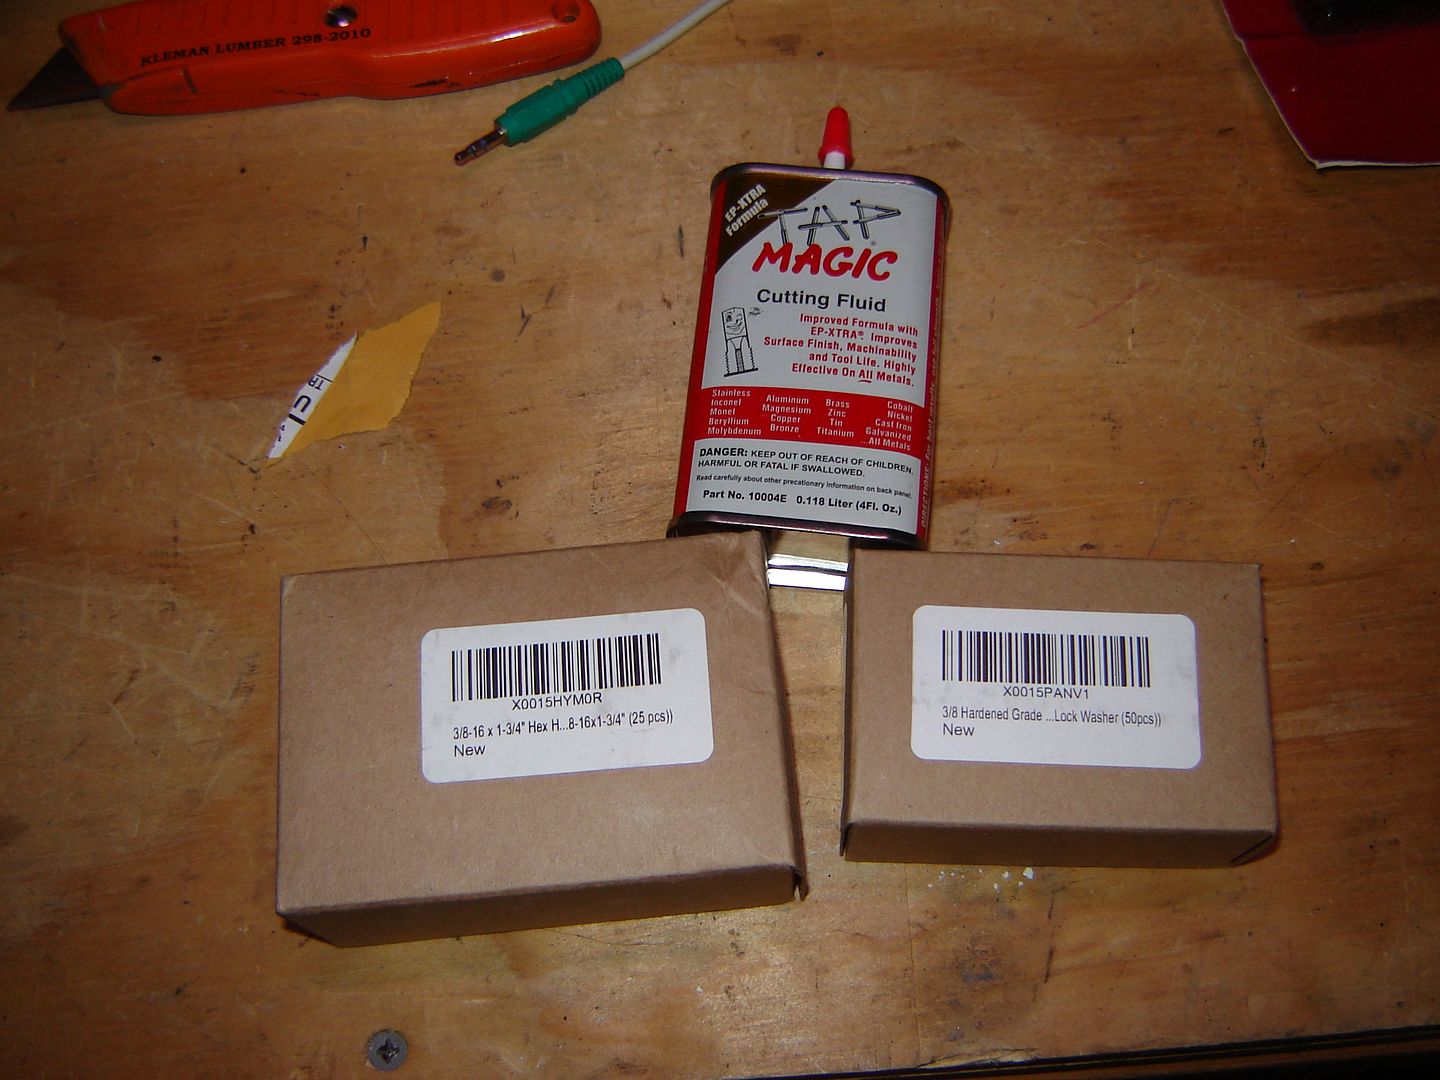
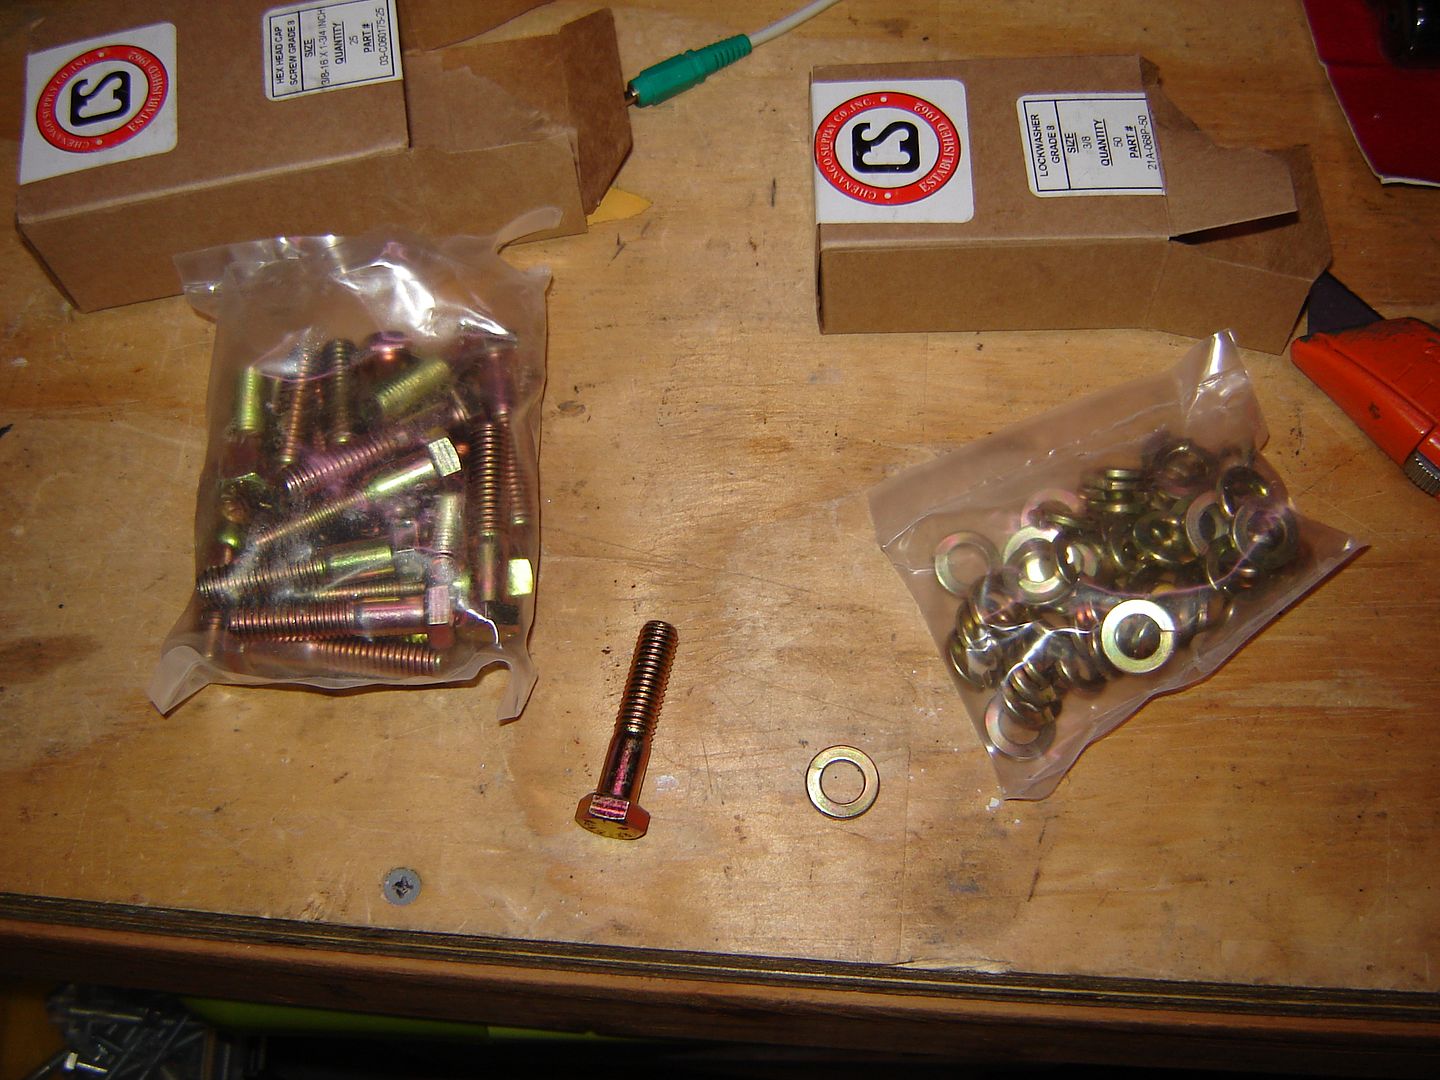
Ups showed up with a couple of packages:
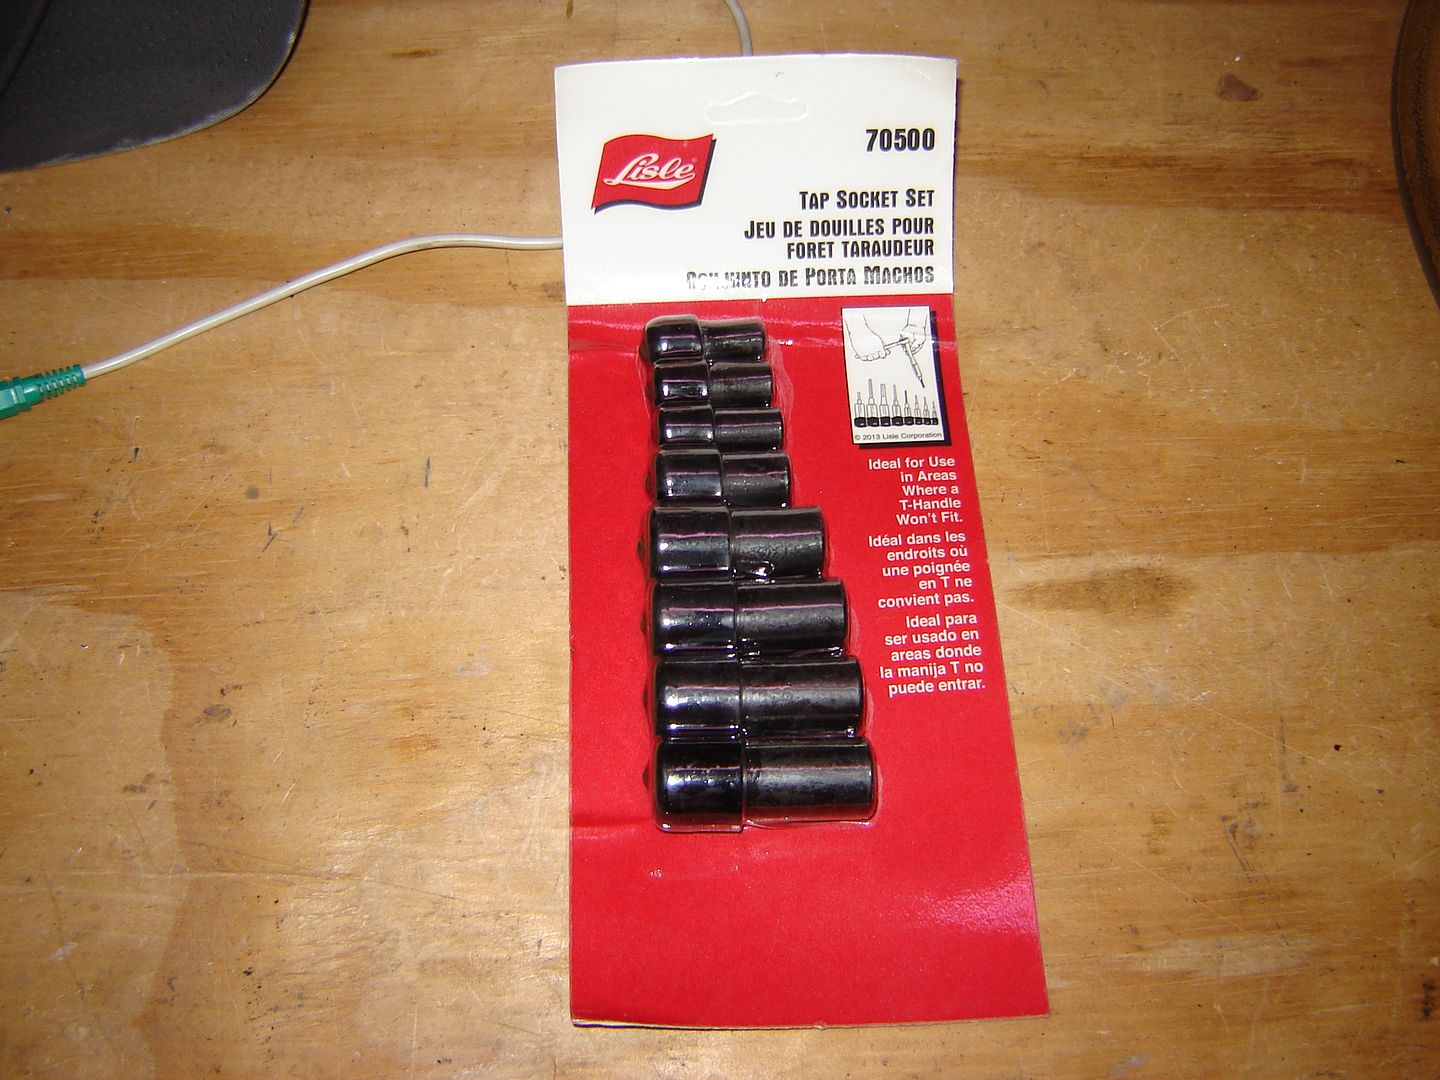
Got a tap socket set to hold taps and use them with a ratchet:
And some cutting oil and grade 8 3/8"-16 bolts and washers for the manifold.
Got a lot done today:
 Life happens while you are making plans...............
1983 Wagoneer Limeted, 169k 360 AMC, NP 229, 727,
MODS: 2003 Durango bucket seats:
http://www.ifsja.org/forums/vb/showthread.php?t=159286
Build Thread: http://www.ifsja.org/forums/vb/showthread.php?t=174925Comment
-
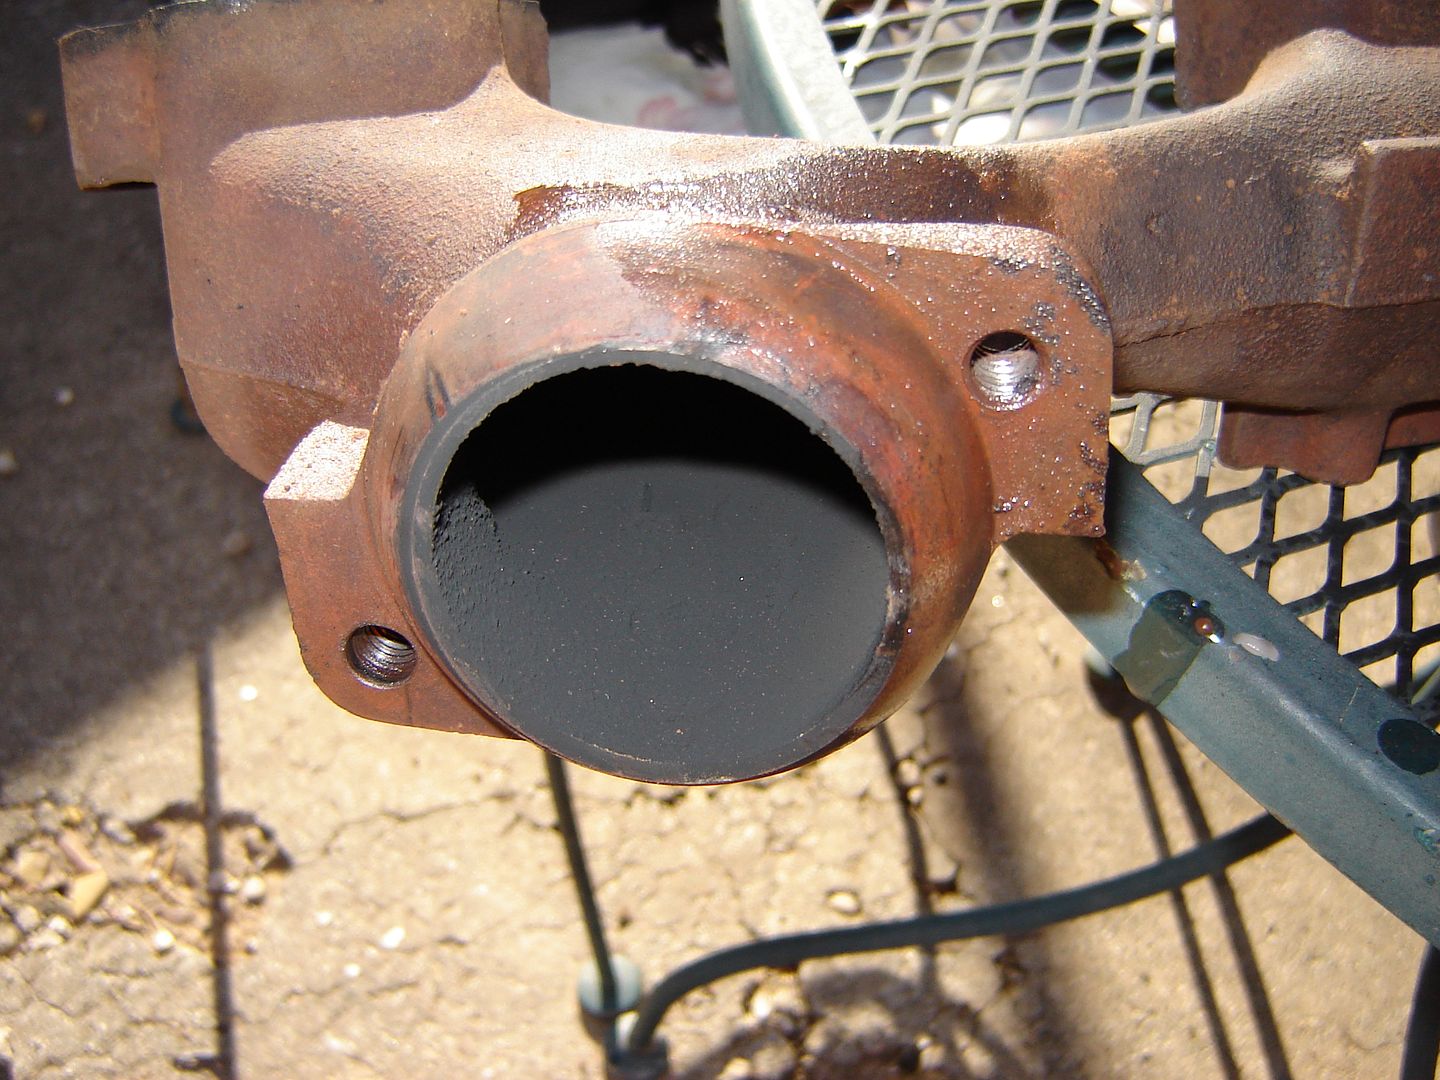
Removing the a seized stud from the Driver side exhaust manifold. I tried a method that I found on YouTube.
Torch, vise grips and paraffin wax (any type of wax will do.) A cutting torch is preferable I tried it with this propane torch and it worked. Heat the stud and the area around it with the torch. You are suppose to get it glowing red but that was impossible with this little torch. Once hot you touch the wax to the threads and the area it is threaded into to wick the wax up into it. attach the vise grips and try to turn the stud out.
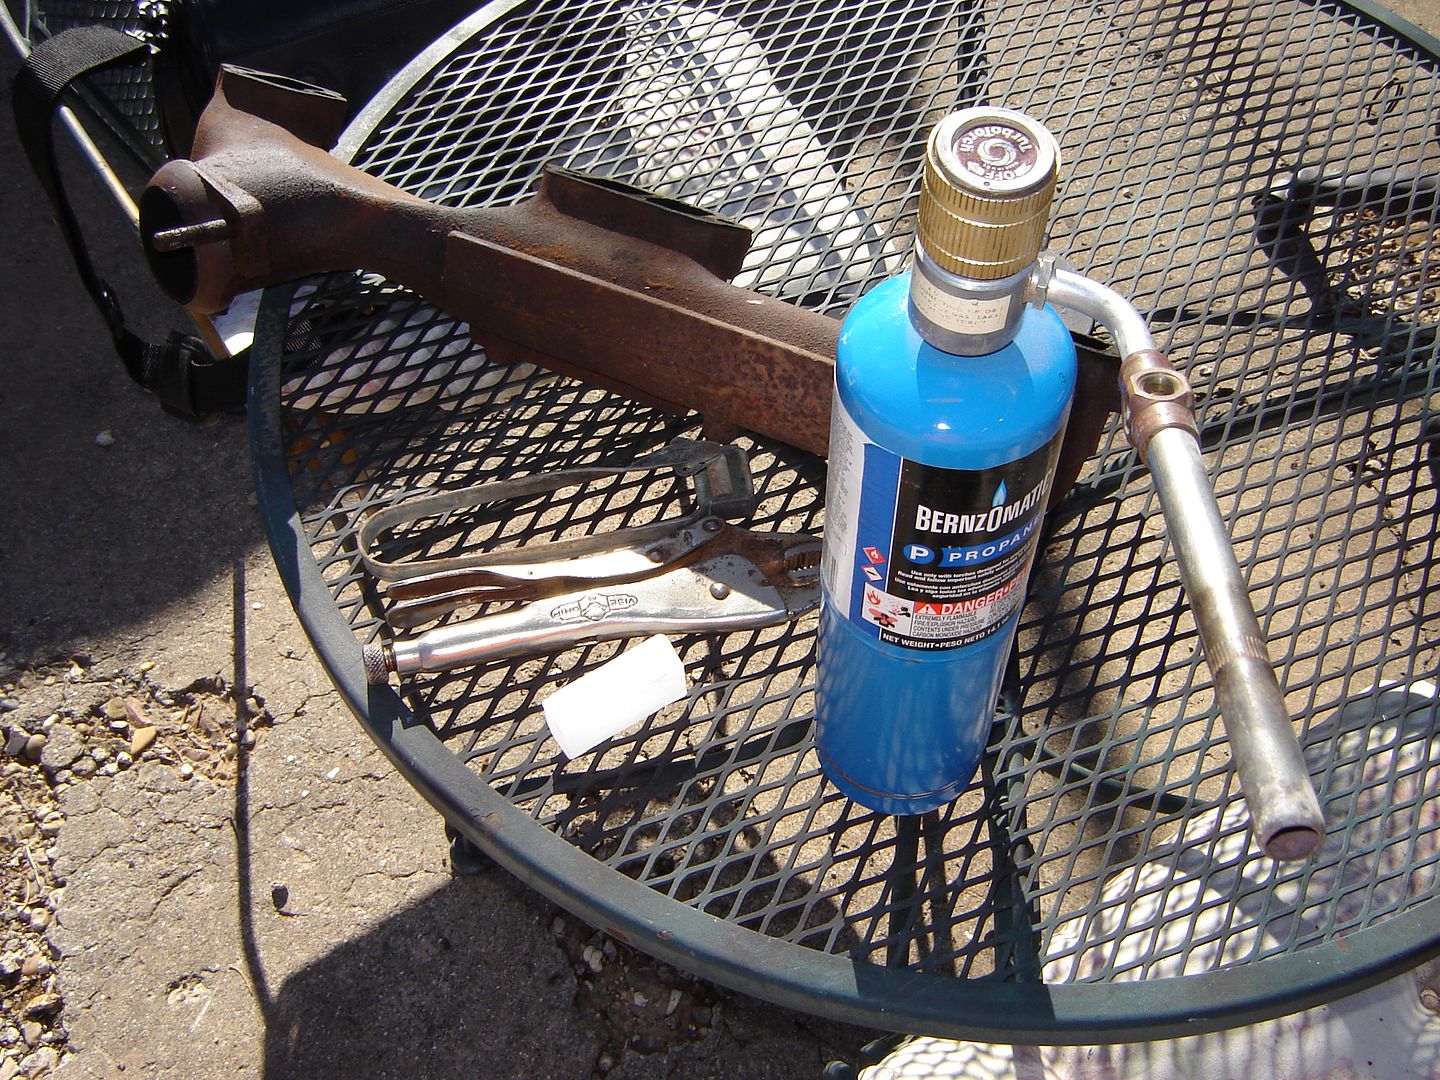
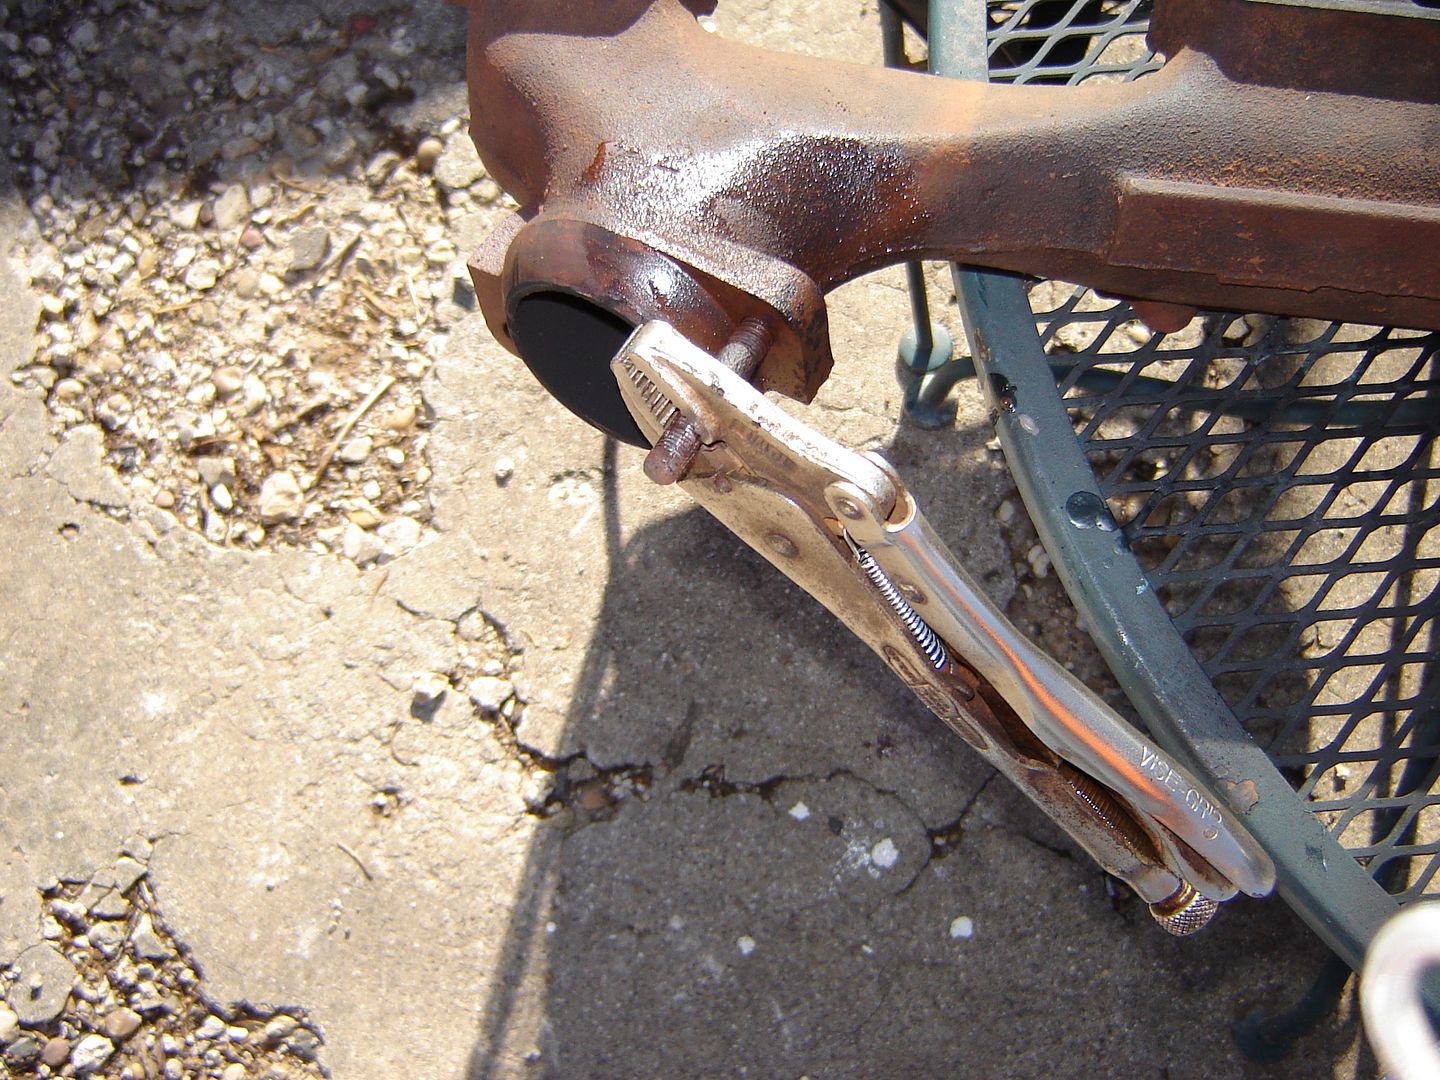
The vise grips slipped a little and had to be readjusted several times, but once they got a good bite they were able to turn the stud. Once the progress has stopped, you start the above process over again, of heating applying the wax and trying to turn the stud out with the vise grips. You repeat this process until the stud completely backs out.
 Life happens while you are making plans...............
1983 Wagoneer Limeted, 169k 360 AMC, NP 229, 727,
MODS: 2003 Durango bucket seats:
http://www.ifsja.org/forums/vb/showthread.php?t=159286
Build Thread: http://www.ifsja.org/forums/vb/showthread.php?t=174925Comment
-
I've heard of people using wax, but I've never tried it, glad to see that it works. I always weld a nut on the stud when I break one, the heat from the weld is usually enough to get it to break free. keep up the good work, I love seeing your progress80 cj 5
87 GW
Another 87 GW
88 GW
99 Wrangler
07 Dodge 3500
67 Chevy SWB
2 furry shop bosses (Ash & Duke(RIP 2/13/16))Comment
-
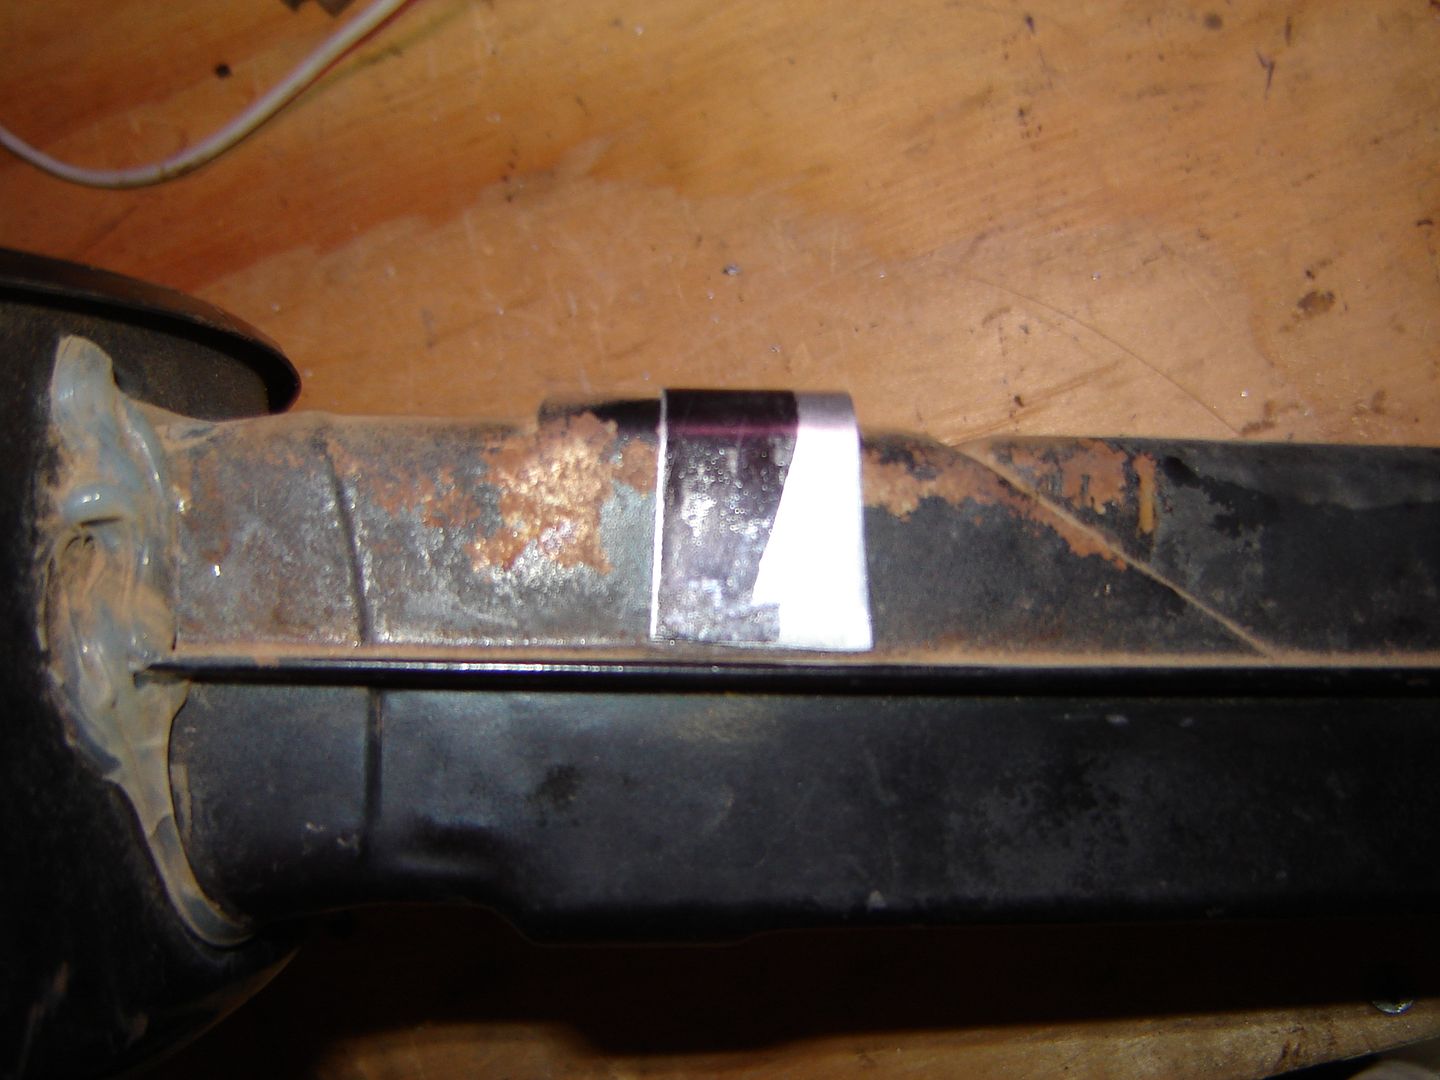
Gutting the exhaust damper
No need for it so I am going to take the flapper out.
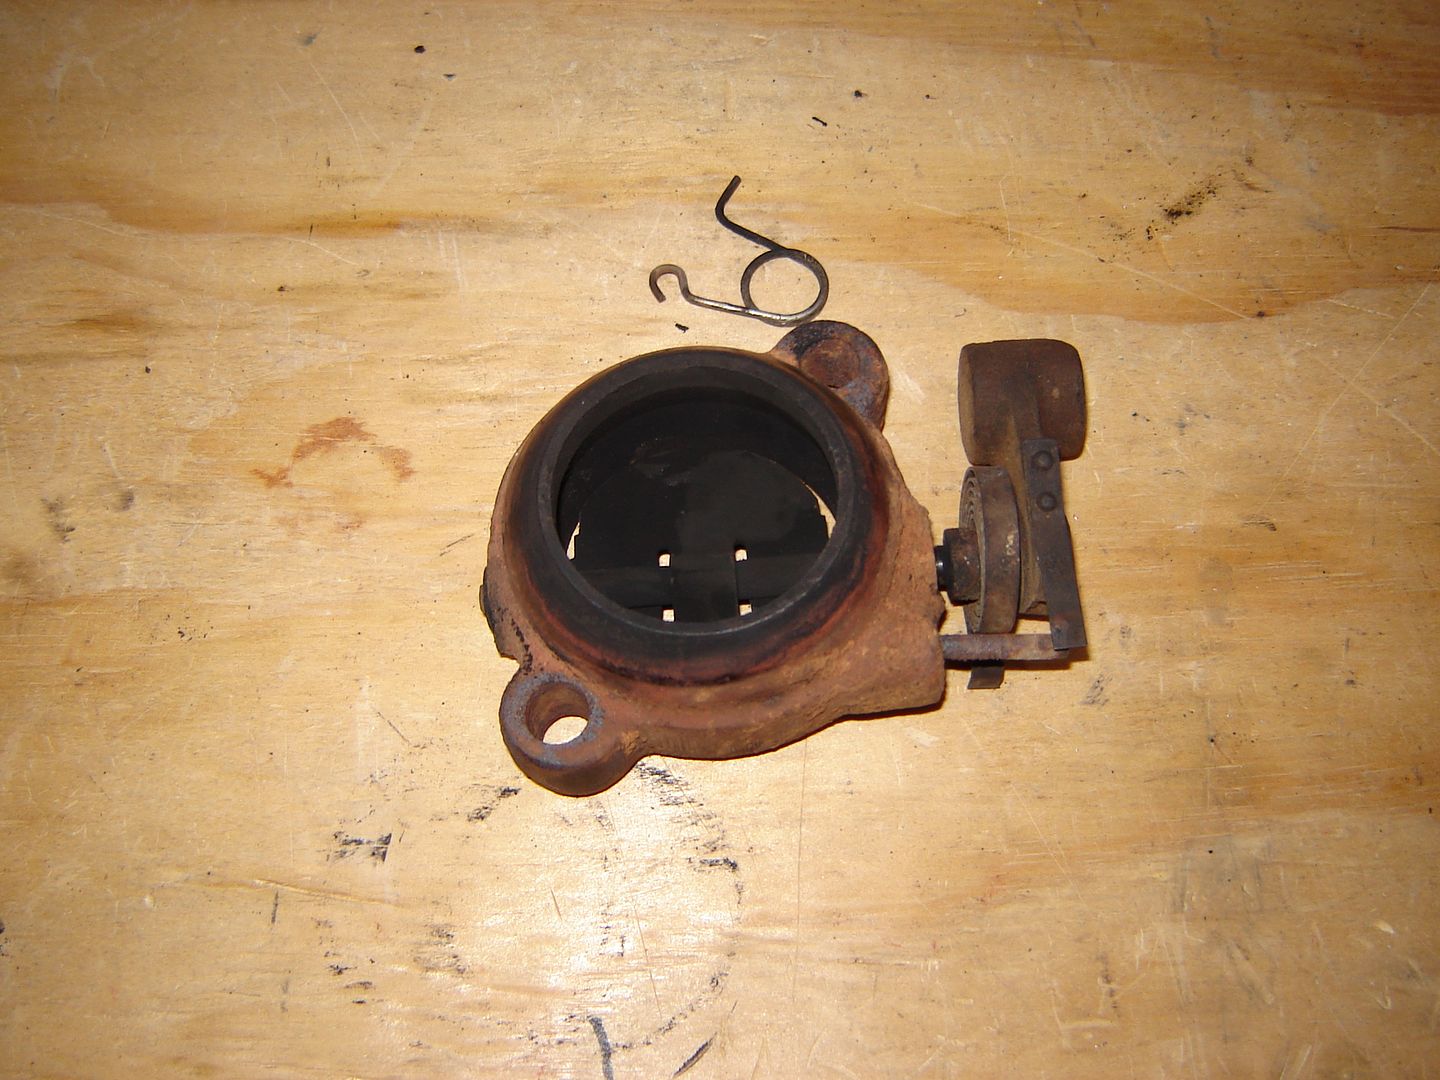

I cut the shaft on the weight side and the welds ( could not tell if they were welds or just crimped) butterfly valve in the damper with a Dremel. I took a punch and started knocking out the shaft.
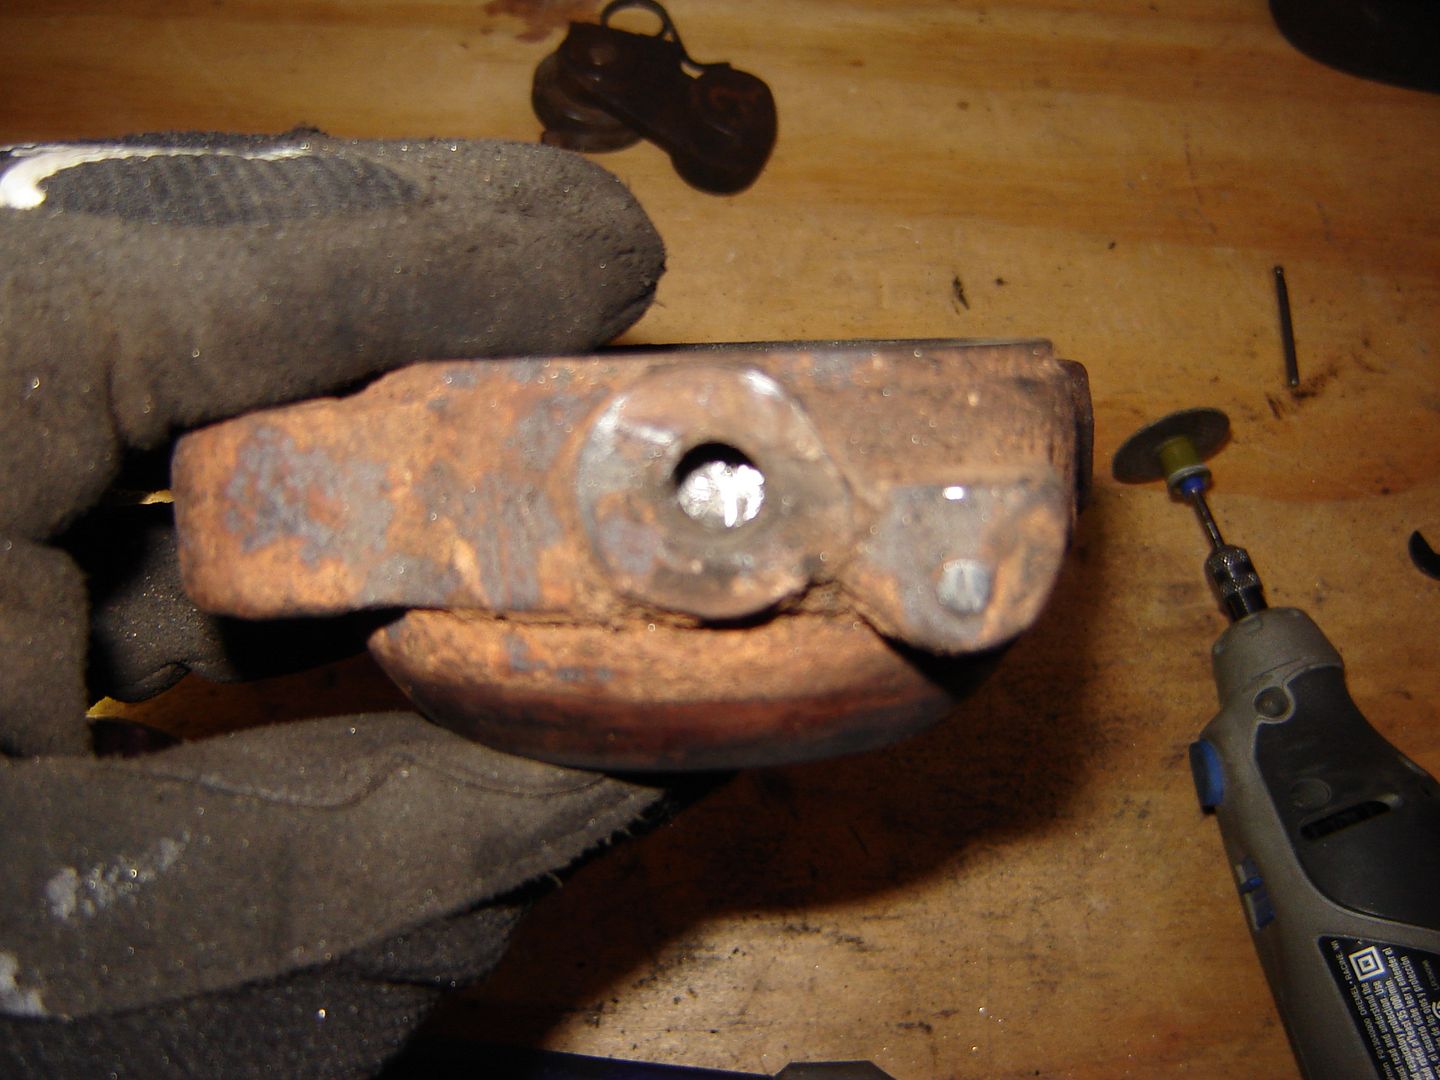
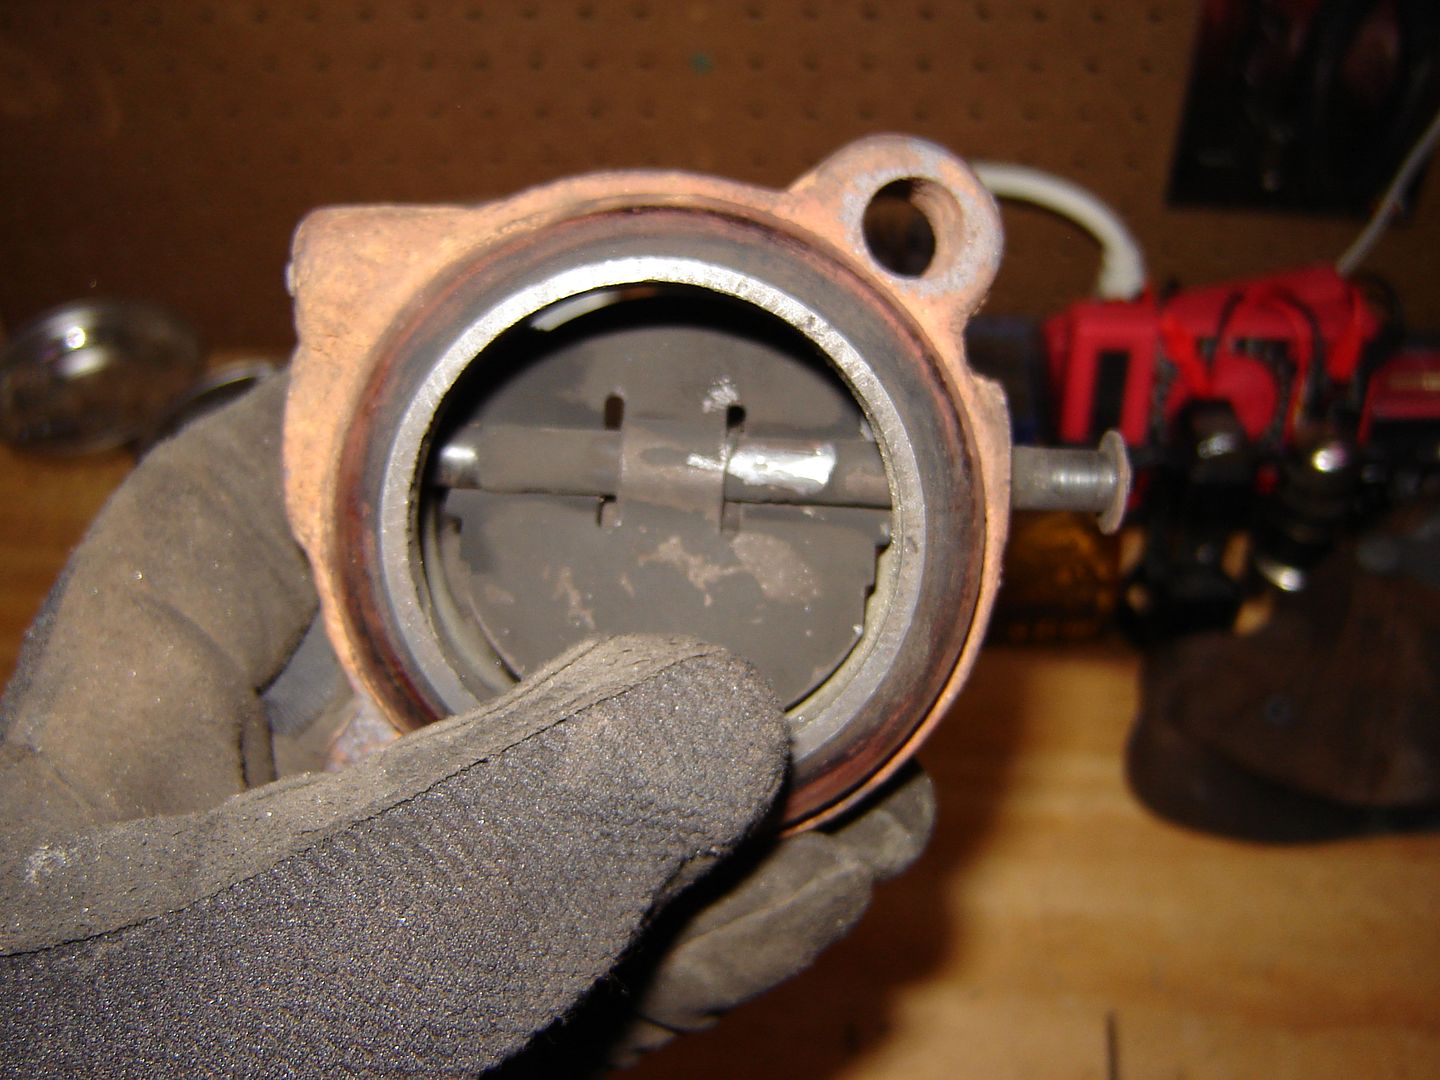
Everything Removed:
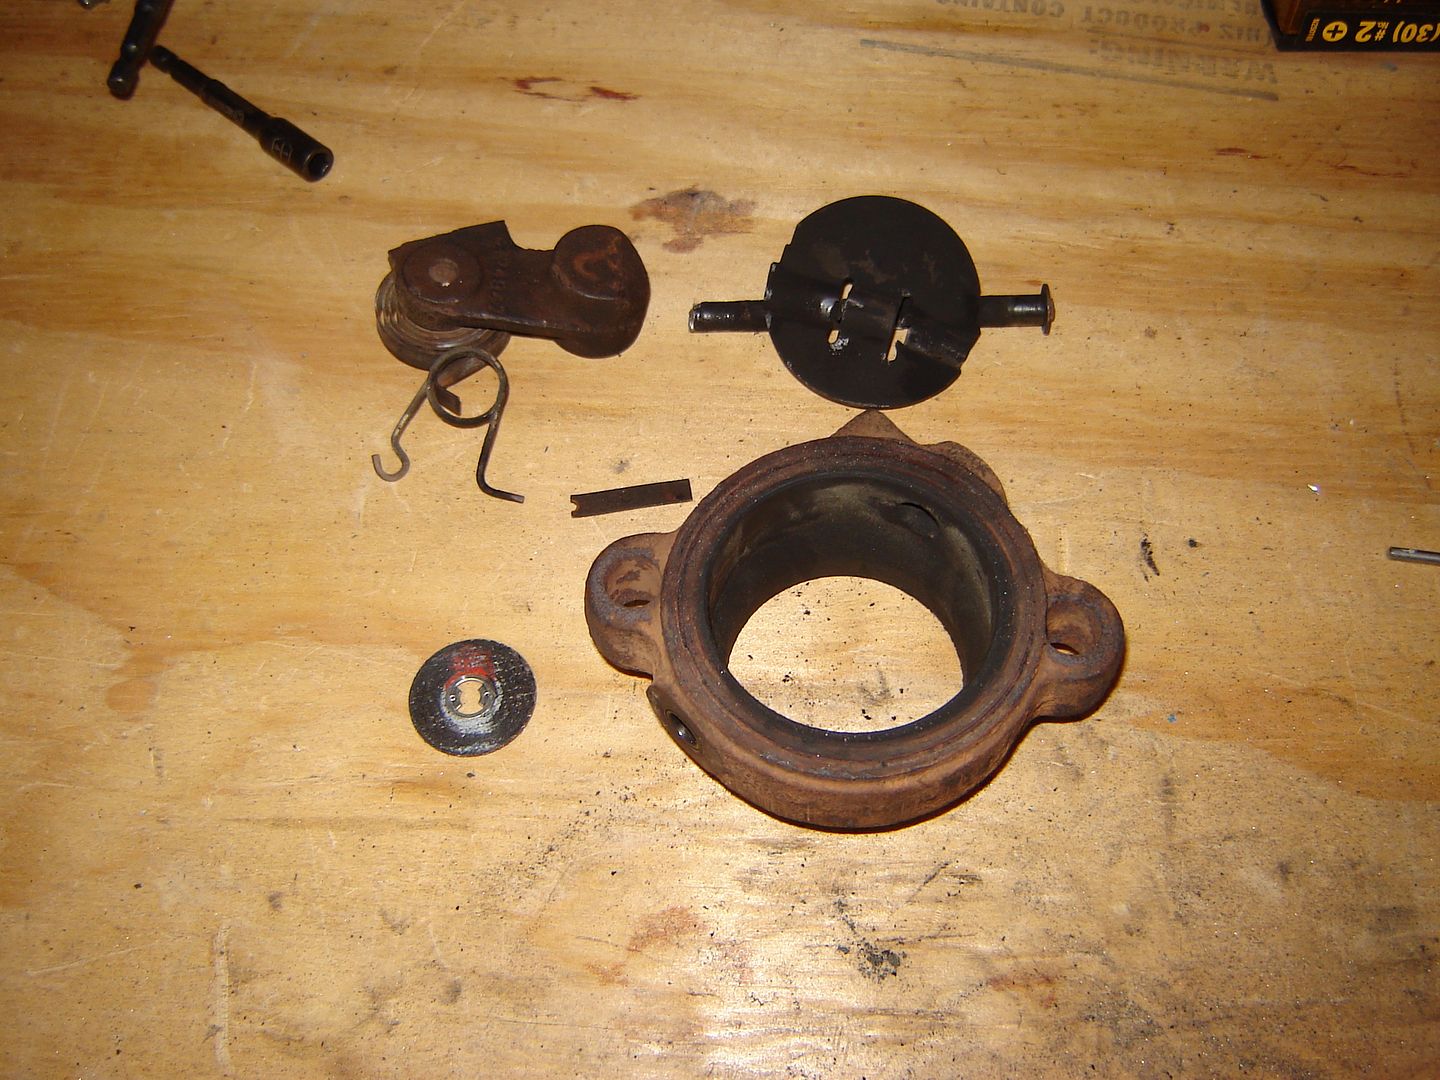
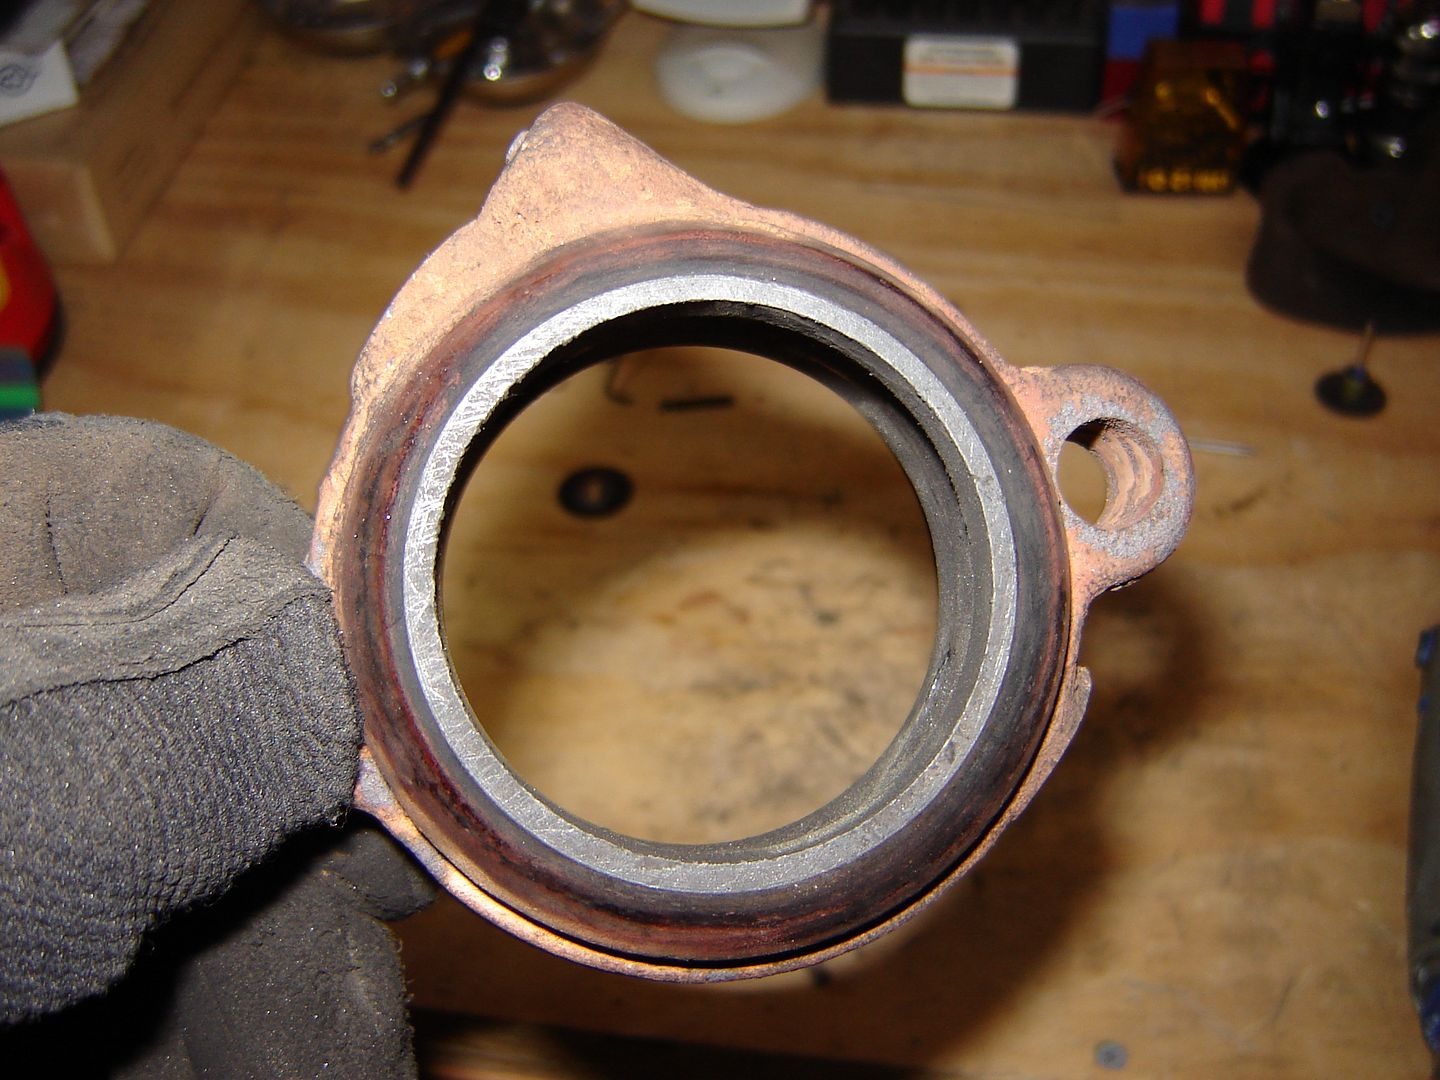
Now to figure out how I am going to Plug the holes that were left?Life happens while you are making plans...............
1983 Wagoneer Limeted, 169k 360 AMC, NP 229, 727,
MODS: 2003 Durango bucket seats:
http://www.ifsja.org/forums/vb/showthread.php?t=159286
Build Thread: http://www.ifsja.org/forums/vb/showthread.php?t=174925Comment
-
You could tap them and install some pipe plugs or just put some bolts with nuts through them like I did on a past rig.-Jonny B.
1979 Cherokee Golden Eagle - UNDER CONSTRUCTION
7" Alcan springs, BJ's HD shackles - 35x12.5x15 BFG Mud Terrains
AMC 401 - Pro-Flo 4 EFI
NV4500/NWF BB/NP205 - Triple Stick'd
F D44 - 4.10, Eaton E-Locker
R M23 - 4.10, Detroit Locker
1979 Cherokee Chief - Parts
1979 Cherokee Chief - Parts
1979 Wagoneer - Sold
1981 Cherokee Chief - CubedComment


Comment