My 79 J10's New Life

Collapse
X
 
  • Filter
  • Time
  • Show
Clear All
new posts
  • BigBlueYJ
    232 I6
    • Apr 26, 2006
    • 158

    My 79 J10's New Life

    Short history lesson on the truck. My Dad bought the truck when I was 4 years old. I'm almost 34 so I've had it a little while. He drove it until he passed away four years later. I learned to drive in the thing. It was originally a 360/T18 granny truck. It went through my brother's abusive driving habits and ended up with a new rear end and a new engine. He liked to play in the mud but never cleaned it out. You'll see in a little bit. After the rear spring hanger rotted, I couldn't weld yet, my Mom sold the truck while I was at the beach one year. Shortly after I returned, the truck was mysteriously back at my house and the guy that bought it had some of his money back. The bed was trashed though. So I decided to start taking it all apart, 7 years ago. I got it all apart then had to move houses, twice. So it got put on the back burner for a while. Once everything was settled, I knew I was moving to CA in January of this year. I had to get a move on it. Here's my spin on my Dad's old truck. Hope you enjoy it.

    This starts with the cab off the truck and everything apart. Many years in VA with cold winters and snow, along with some mud and other stuff the floor had to be redone. I had already finished it in the pics.
    [/IMG]
    [/IMG]
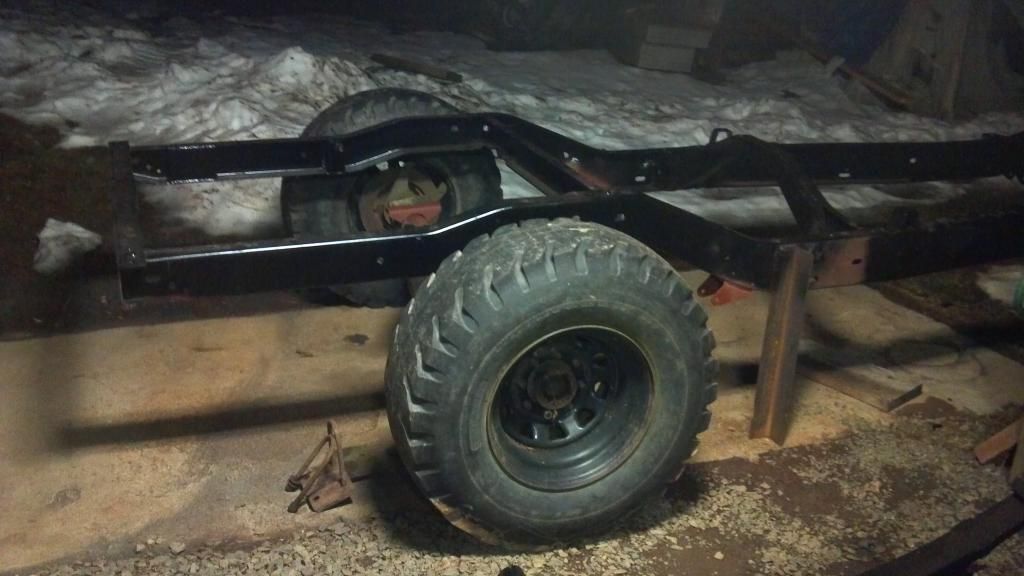
    SO once I got on the build wagon, I just jumped in with both feet. I pulled the front axle and springs. Here's the frame getting the front part prepped with the wire brush, primer and paint.
    [/IMG]
    The rear mid crossmember was a box and I wanted to make sure it was clean, so I cut it out and split it. Cleaned it up and put it all back together, and welded it back in.
    [/IMG]
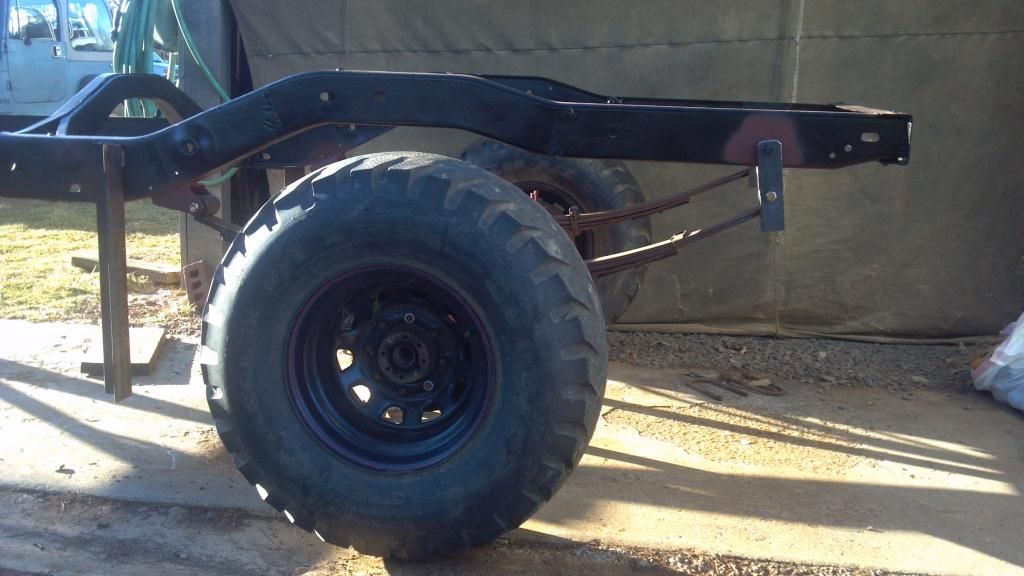
    Once I knew that was done I needed to work on the rear of the frame. Remember the MUD and my brother's habit of not cleaning it. Well, the driver's side of the frame after that crossmember looked like swiss cheese. So I found a better section of frame from a truck in a salvage yard. Measured a lot of times and cut once, four separate times.
    [/IMG]
    [/IMG]
    [/IMG]
    Now it was ready for the axles and springs.
    89 Wrangler, 350LT1 sbc, NV4500, NP231 w/SYE, SOA'd with custom framework, HP44/60 locked w/ 4.10's on 36 super swampers

    79 FS J10 with 5.3 swap, S465 and 205. Sitting on a HD44/14 bolt and 37's. This thing should be fun to drive if I ever get it finished.
  • BigBlueYJ
    232 I6
    • Apr 26, 2006
    • 158

    #2
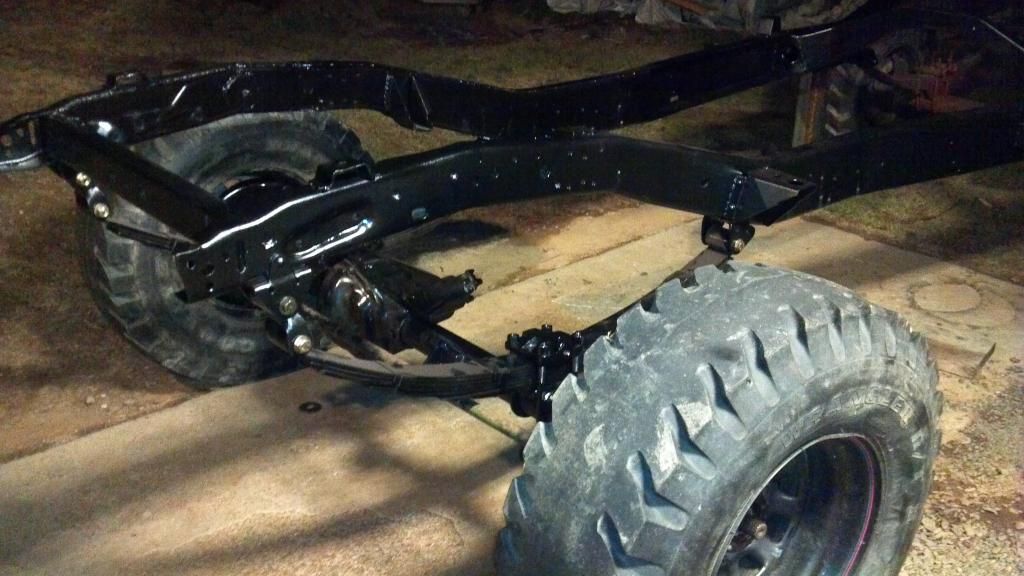
    I knew I was going to go SOA in the front and the rear had to be inboarded. SO I started with the rear axle. It was already on the concrete. I built my plates and welded them on after the measure, measure, measure bit, set the spring pads at a close angle and hard tacked the pads on the axle. Corporate 14 bolt Full Floater.

    Pay no attention to the butch mock up shackles. I just needed a height reference.

    Those are bald 36" military's on there too. I know there is no weight on it but still it looks tall.

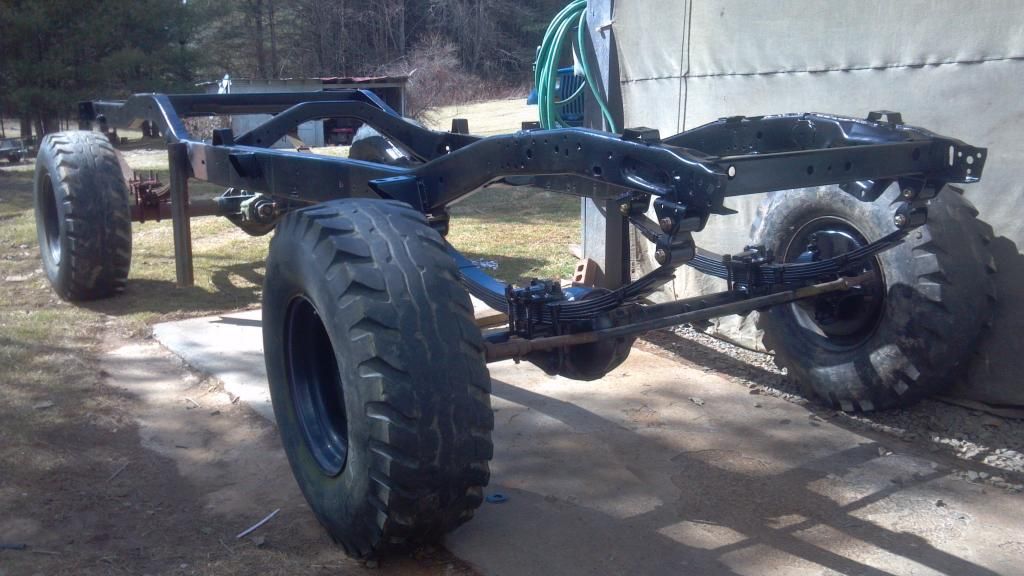
    Now it was time for the front. I pulled the Chevy 44 and slung it under the front end with all new bearings, and seals, brake parts, and all the other fun stuff. It was already a SOA axle so that made my life so much easier. Bolted it in and here ya go.

    It leveled out alot better than I thought it might with the SOA in the front and the inboard in the rear.

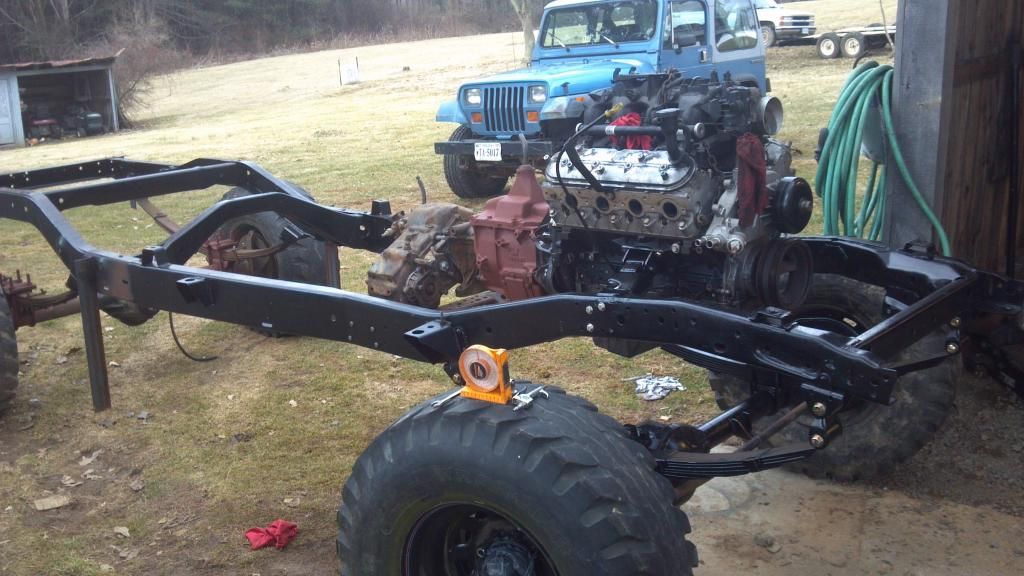
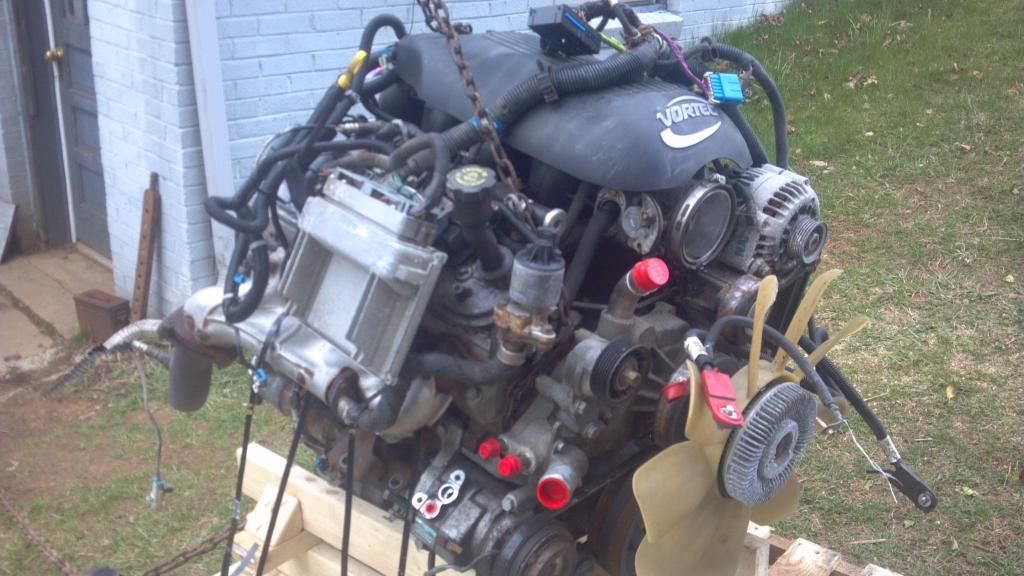
    Next up was the drivetrain. I had bought a 5.3 earlier in the year and then a SM465/205. So I bought some motor mounts from Jeepinpete that bolted it to the factory frame mounts. I had to build a different crossmember/trans mount but that was easy.

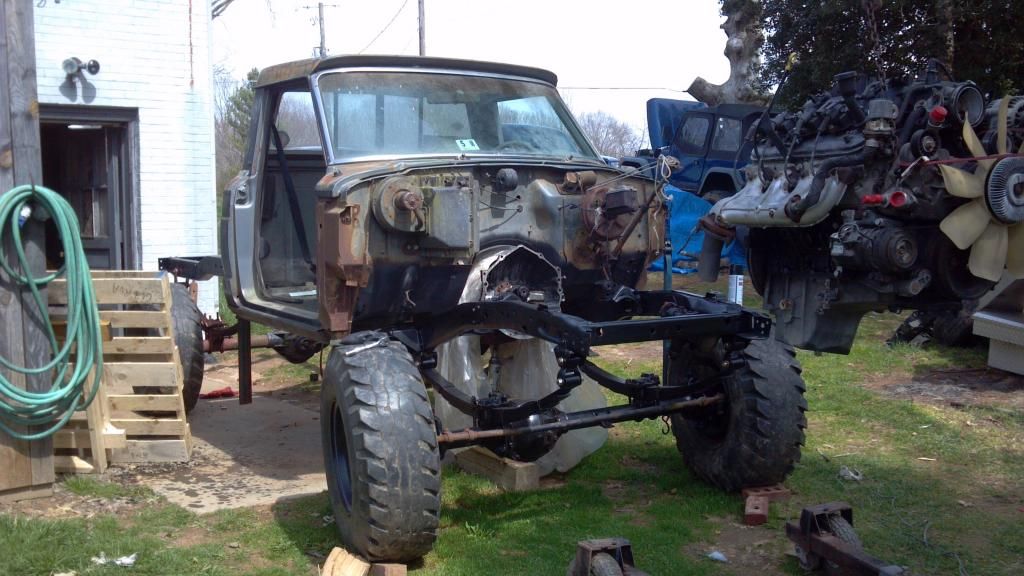
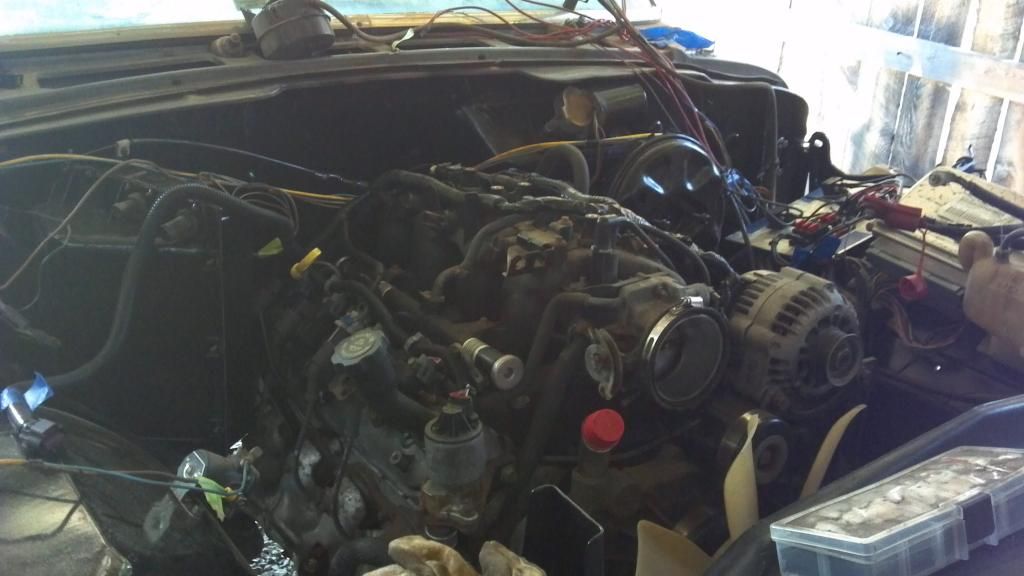
    I set the cab on it, and then figured out that the motor I had wouldn't be as easy to make work as I had thought. SO I sold it to my friend and bought a complete motor to replace it.

    Out with the old and in with the new.
    89 Wrangler, 350LT1 sbc, NV4500, NP231 w/SYE, SOA'd with custom framework, HP44/60 locked w/ 4.10's on 36 super swampers

    79 FS J10 with 5.3 swap, S465 and 205. Sitting on a HD44/14 bolt and 37's. This thing should be fun to drive if I ever get it finished.

    Comment

    • BigBlueYJ
      232 I6
      • Apr 26, 2006
      • 158

      #3
      In and all covered up to keep the weather out of it.
      [/IMG]
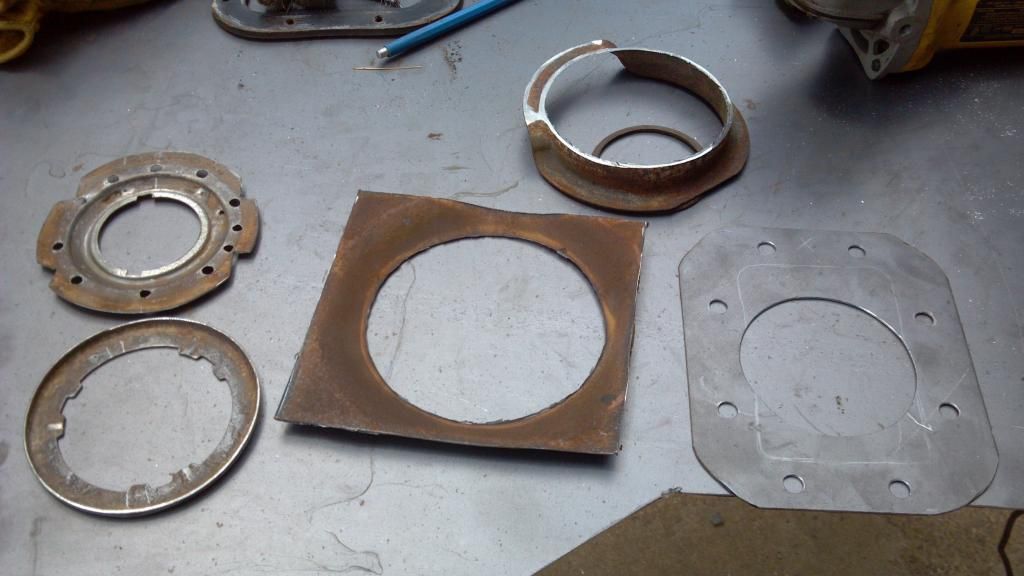
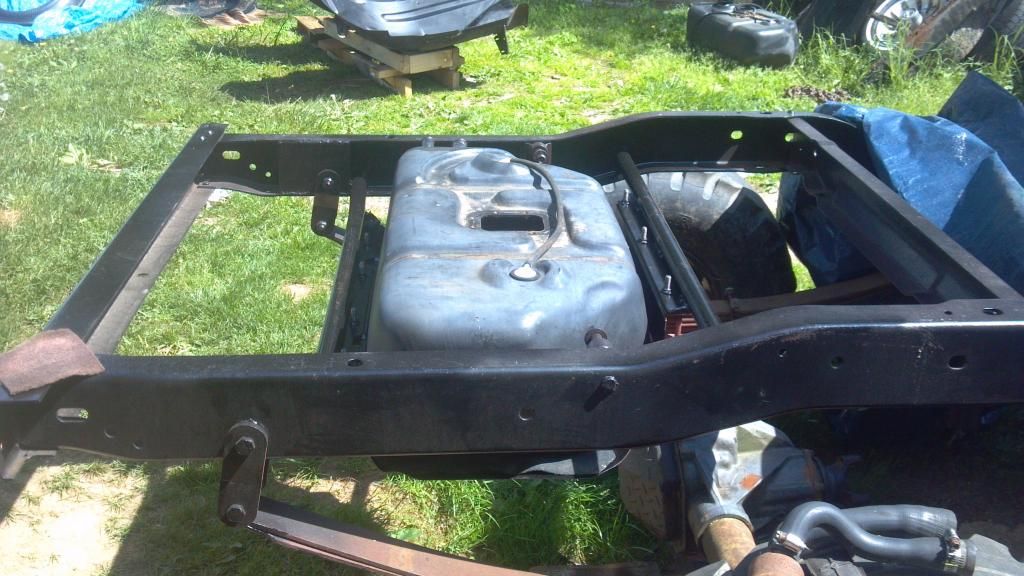
      Well I knew I had to feed this thing, and I had no gas tank for it. I did have a tank from my YJ that was laying around. Plastic tank, 22 gallons. I just had to make the factory J truck sending unit work with that tank. SO I grabbed a jtruck tank from a salvage yard, most are rusted and crappy, I just needed the lock ring and sending unit anyways. SO I cut it all apart and made a new locking ring for the wrangler tank.

      After some custom crossmembers to hold the tank in place...

      Plumbed it all, and added the front clip. Bolted some stuff down and started on the wiring.

      Threw the bed on it and the hood. And fired it up, just to hear it run for a second.

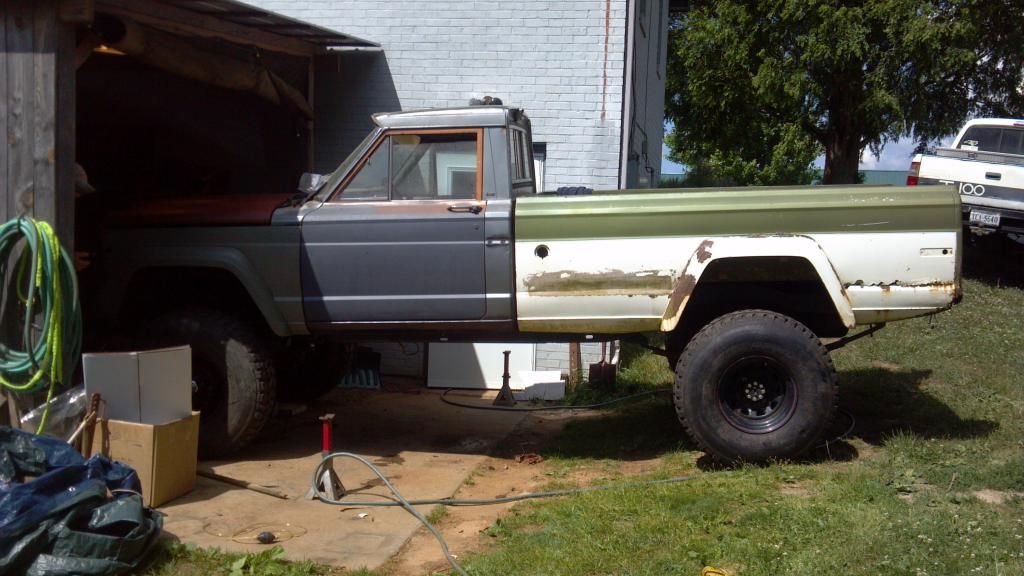
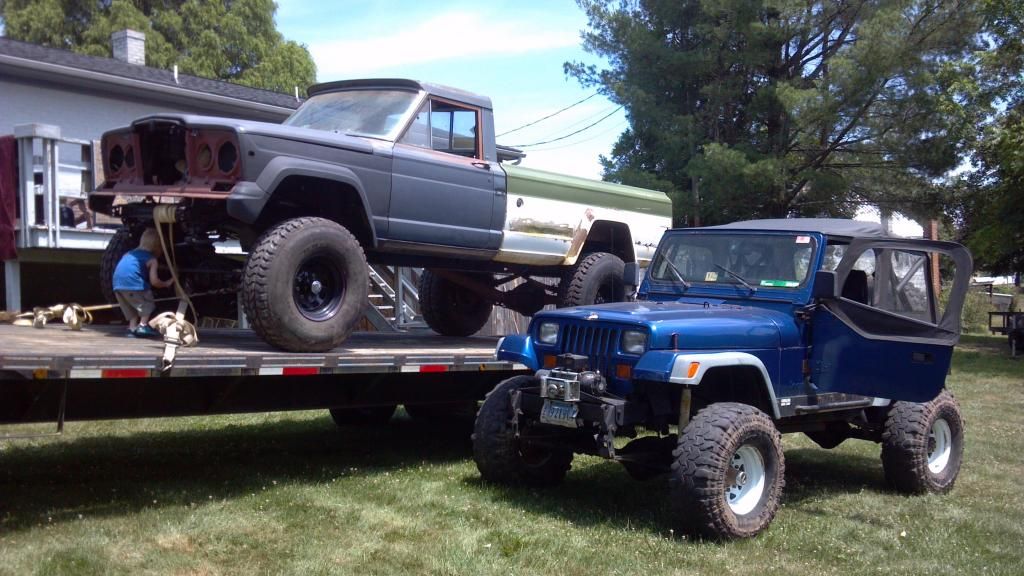
      Threw a little more primer on the front end to look somewhat better, but not much and pulled it up on the trailer to wait for the shipper.

      Thats my Blue YJ with the LT1 in it that I had to leave in VA too. Fun little rig.
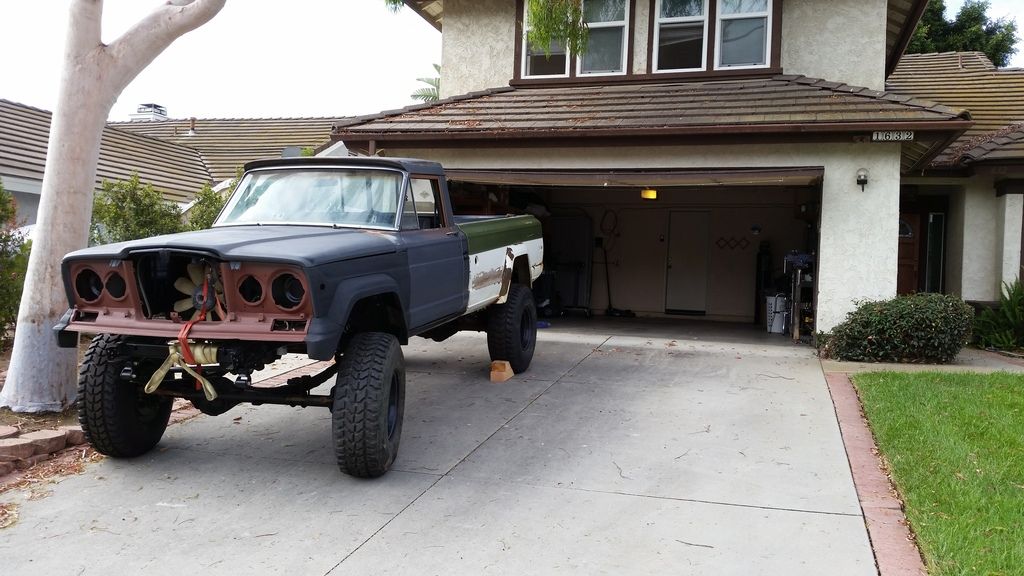
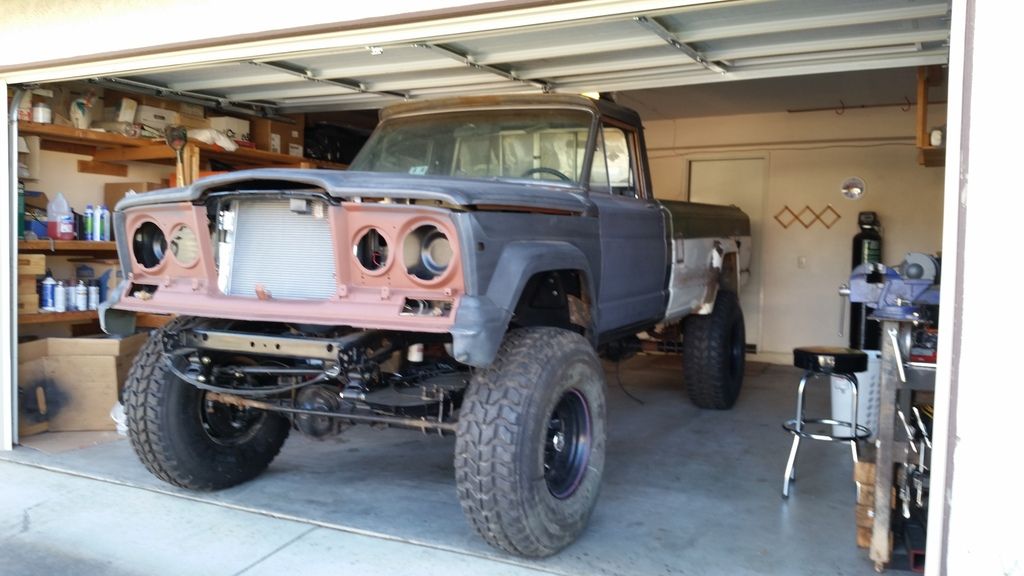
      Looks haven't changed much since I got here to my new house. It has a radiator now and brakes, And the clutch should work, now, but still doesn't. I'm still working on it every chance I get but my work schedule only gives me about 1 day a week to work on it. And it's usually a short day.

      Oh yeah, here's the video of it firing the first time. Just manifolds. I love the sound of a nice V8.
      89 Wrangler, 350LT1 sbc, NV4500, NP231 w/SYE, SOA'd with custom framework, HP44/60 locked w/ 4.10's on 36 super swampers

      79 FS J10 with 5.3 swap, S465 and 205. Sitting on a HD44/14 bolt and 37's. This thing should be fun to drive if I ever get it finished.

      Comment

      • Mr. Church
        230 Tornado
        • Feb 02, 2014
        • 11

        #4
        Awesome work so far. Great to see you reviving your dads old truck as a memorial piece of sorts. Why was the front half of the frame hacked off then rewelded? I didnt understand that portion

        Comment

        • BigBlueYJ
          232 I6
          • Apr 26, 2006
          • 158

          #5
          It was the rear of the frame. It was full of mud and never washed out like it should have been. So it rusted out very badly.
          89 Wrangler, 350LT1 sbc, NV4500, NP231 w/SYE, SOA'd with custom framework, HP44/60 locked w/ 4.10's on 36 super swampers

          79 FS J10 with 5.3 swap, S465 and 205. Sitting on a HD44/14 bolt and 37's. This thing should be fun to drive if I ever get it finished.

          Comment

          • Full Size Jeeper
            304 AMC
            • Jul 20, 2014
            • 2475

            #6
            Very nice work. You have picked up some nice skills, it feels good when you can do most of the work yourself. The best part is later on when you start driving it and people ask who did this and who did that, and you get to say (I did), that's a good feeling. Your dad would be proud!
            1978 Wagoneer

            401/turbo 400 trans. Quadra-Trac BW1339 (with Low) 4" Rusty's lift with 31" Summit Mud Dawgs

            Mods:
            Fuel Tank, Red Holley Fuel Pump, Razor Grill (profile pic out dated), Rebuilt steering box

            Comment

            • BigBlueYJ
              232 I6
              • Apr 26, 2006
              • 158

              #7
              Thanks. This isn't my first build of this proportion. But it's because of this Jeep that I discovered these skills. I remember watching my Dad with the first J truck. He was changing the motor to a 455 Pontiac. Had the motor out of it already and the new motor hanging from a boom on a tractor. He was standing in the engine bay looking at it. But the simple fact that he could do that by himself was always a feat to me. SO that led me to start building things once I became old enough. Starting with my Jeeps.
              89 Wrangler, 350LT1 sbc, NV4500, NP231 w/SYE, SOA'd with custom framework, HP44/60 locked w/ 4.10's on 36 super swampers

              79 FS J10 with 5.3 swap, S465 and 205. Sitting on a HD44/14 bolt and 37's. This thing should be fun to drive if I ever get it finished.

              Comment

              • BigBlueYJ
                232 I6
                • Apr 26, 2006
                • 158

                #8
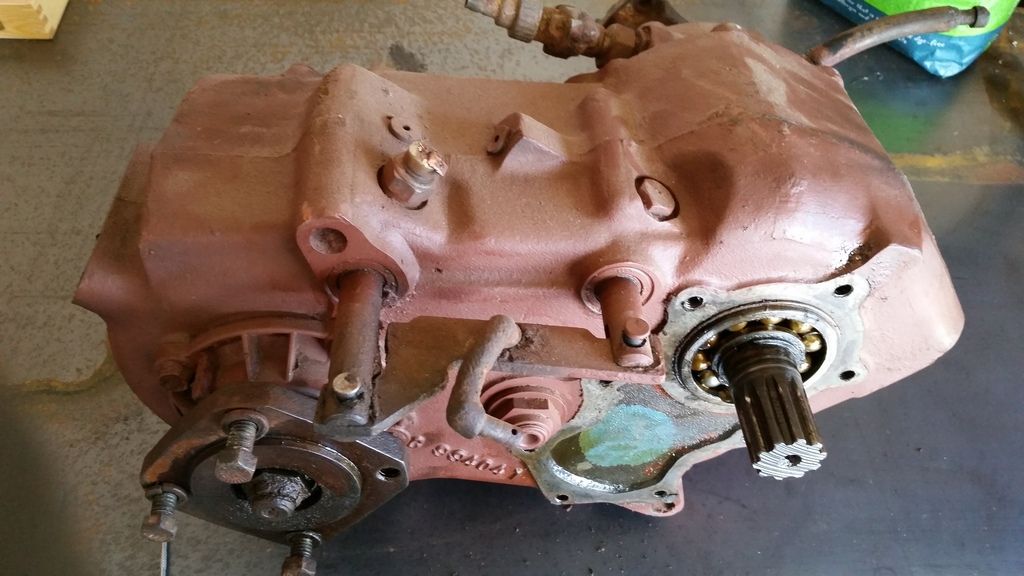
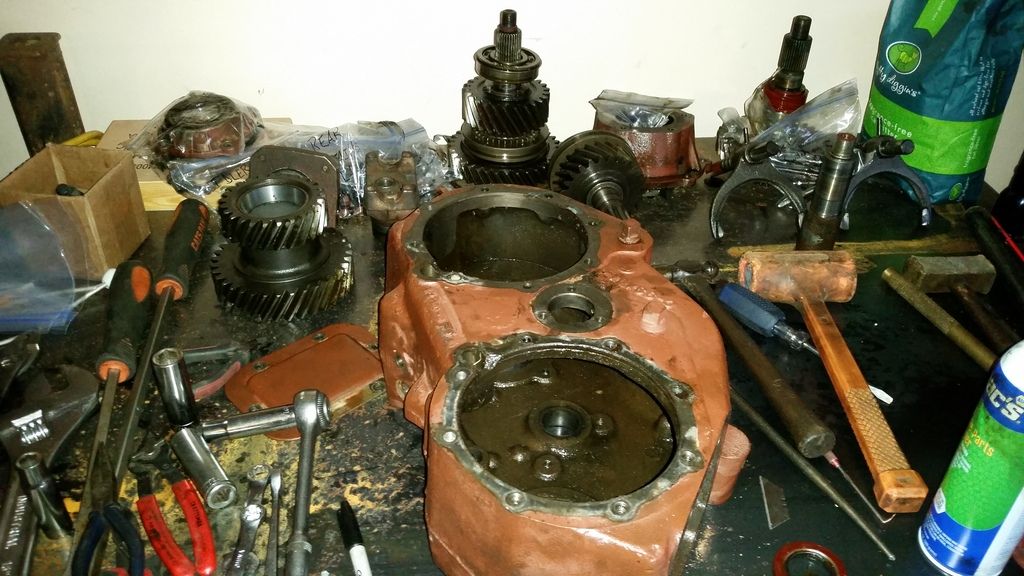
                SO once the Jtruck arrived in CA at my new home, it had to get a few things done to it. So I finished the brakes, (as in made new lines from scratch and new calipers all the way around), got the hydraulic clutch to work properly, and got the radiator and fan shroud fitted. Now that it was able to move under it's own power and run for longer than a minute without over heating, it was time to tackle some other things to getting it closer to finished. I ordered up a rebuild kit for the NP205 and started to tear it down.


                New bearings and seals, yadda, yadda, yadda. Back together it went and back into the truck. That sucker was HEAVY!!!
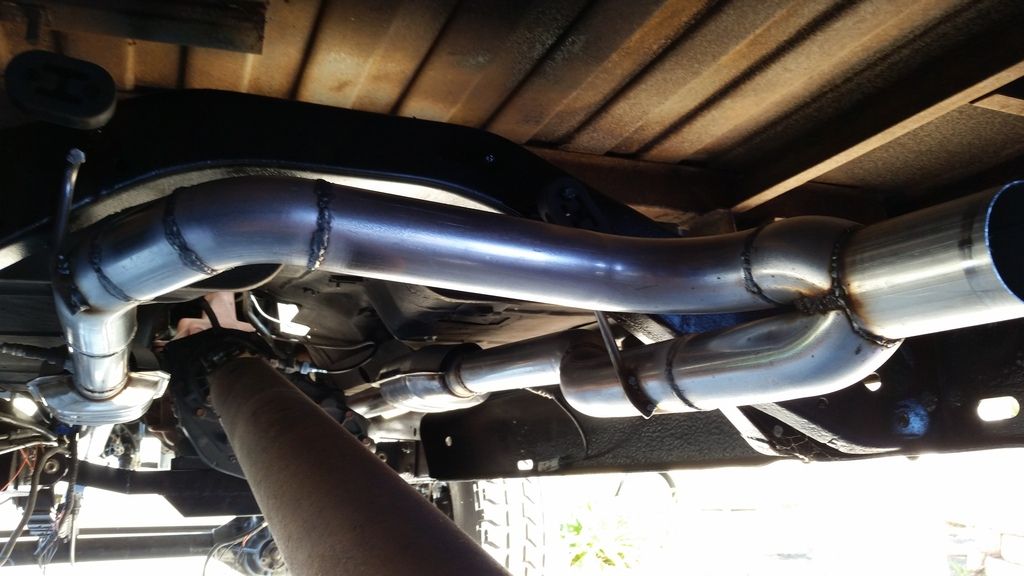
                Then I started on the exhaust. I ordered up some new catalytic converters and some pre-bent exhaust tubing. Cut the pipe where I needed and rewelded them to fit. Not terrible for a driveway built exhaust.
                It's not completely finished out yet but it's to the single outlet. Waiting on my shocks to finish it out.
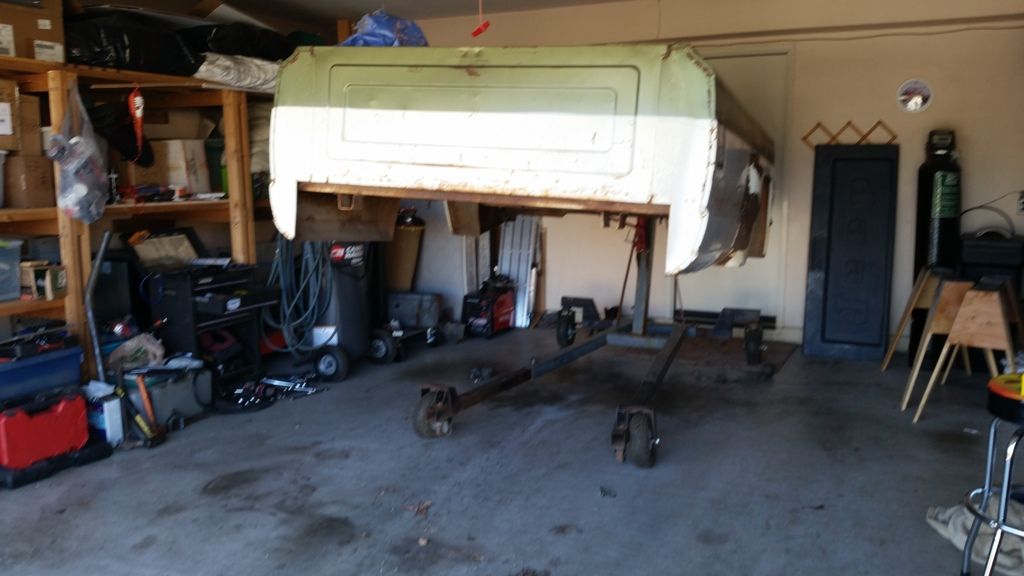
                THen it was time to pull the bed and start on some much needed bodywork.


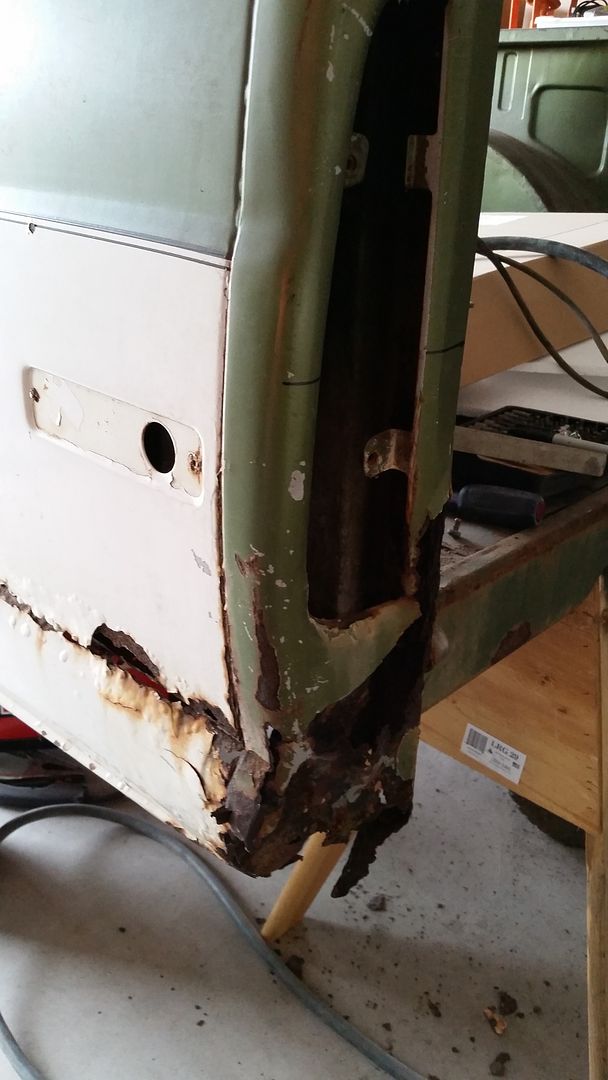
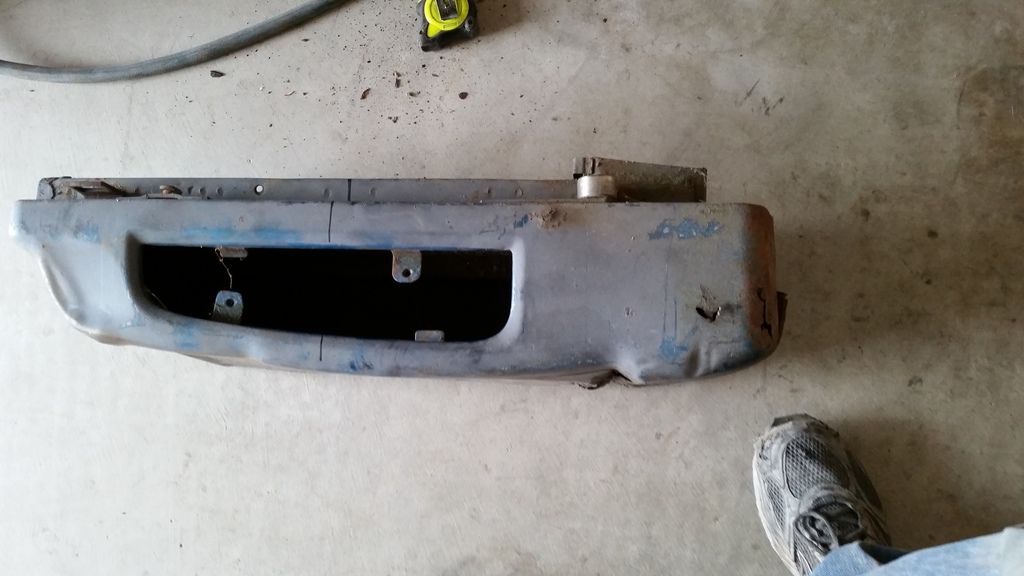
                I started with a crusty tail light bucket. Started pecking it with a hammer to end up with this.
                I had another set of tail light buckets I picked up a very well known yard on here....(THanks Jake and Jackie)Started cutting..
                89 Wrangler, 350LT1 sbc, NV4500, NP231 w/SYE, SOA'd with custom framework, HP44/60 locked w/ 4.10's on 36 super swampers

                79 FS J10 with 5.3 swap, S465 and 205. Sitting on a HD44/14 bolt and 37's. This thing should be fun to drive if I ever get it finished.

                Comment

                • BigBlueYJ
                  232 I6
                  • Apr 26, 2006
                  • 158

                  #9
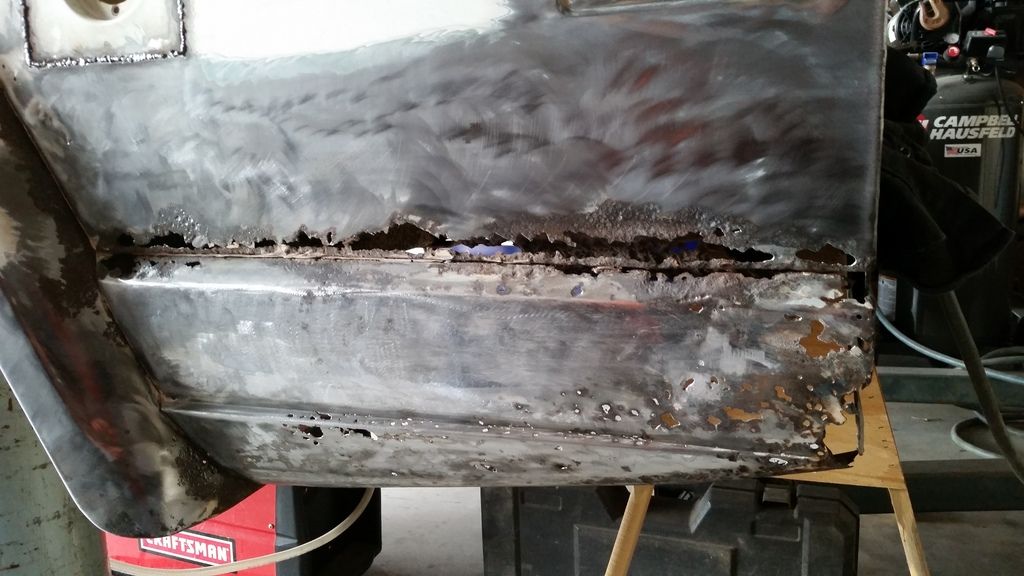
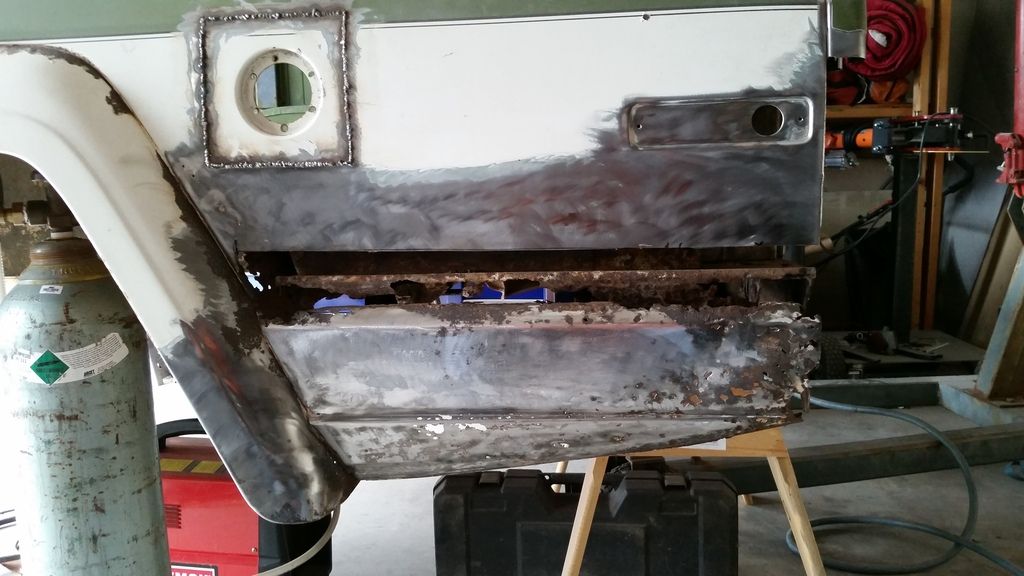
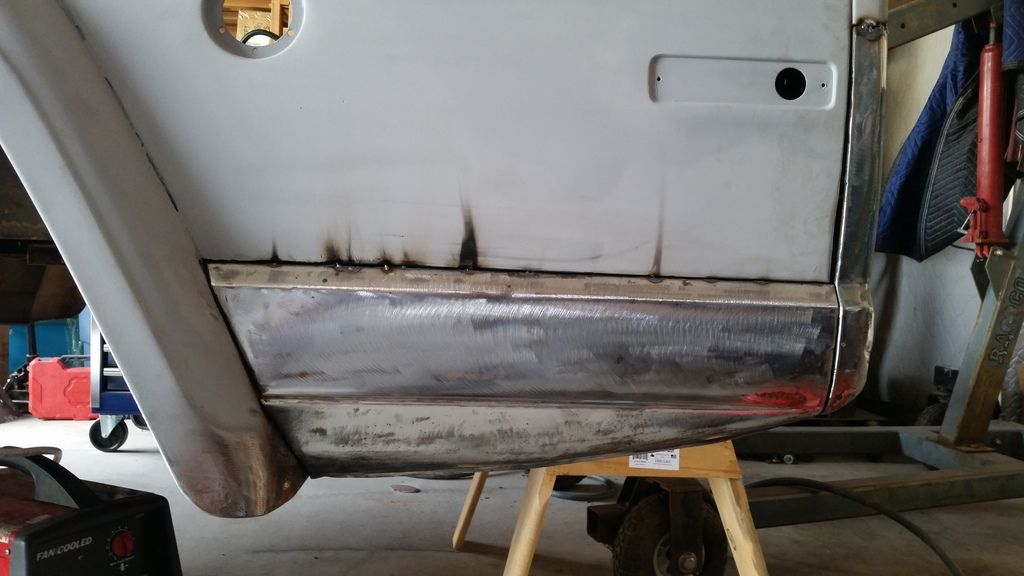
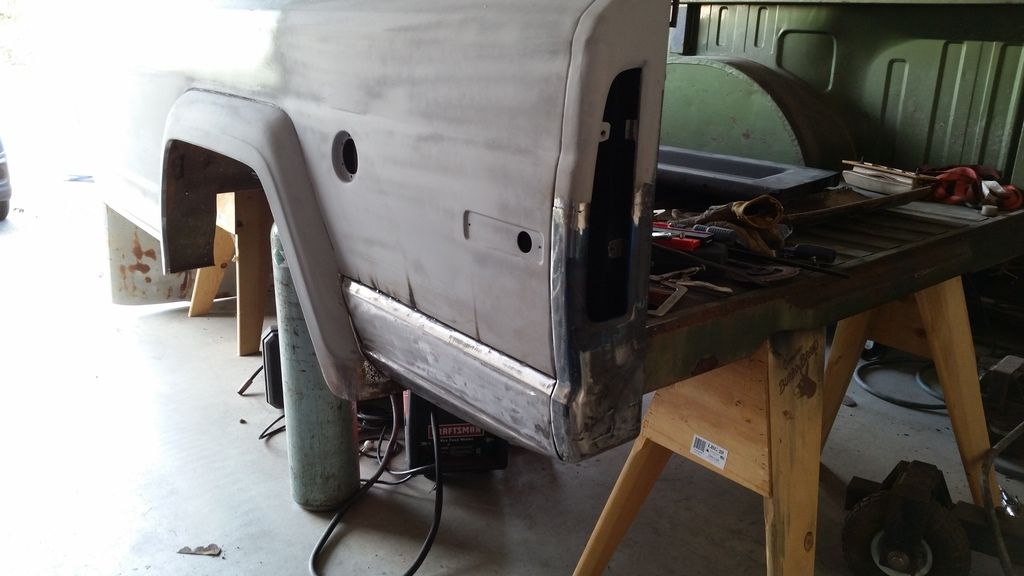
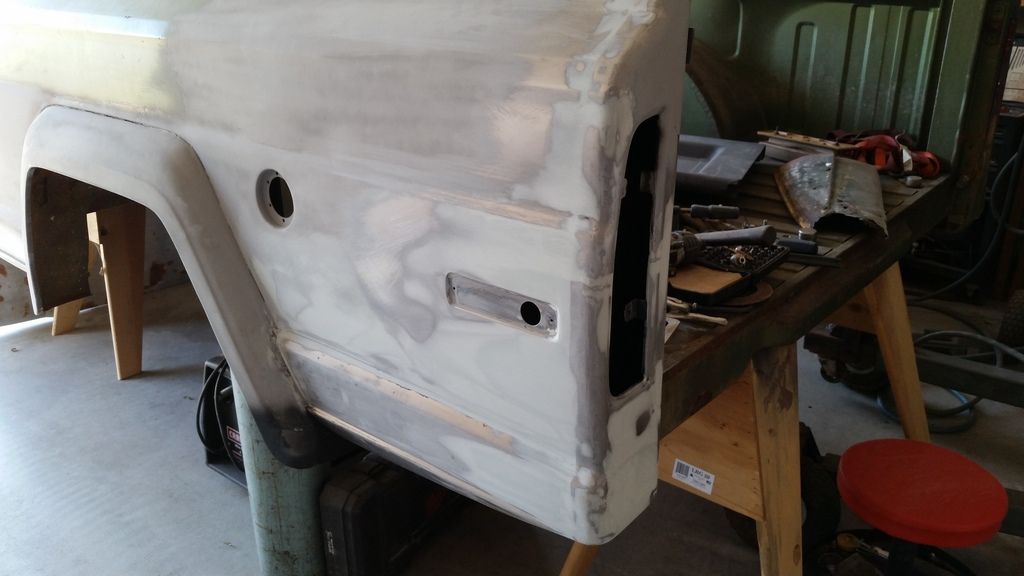
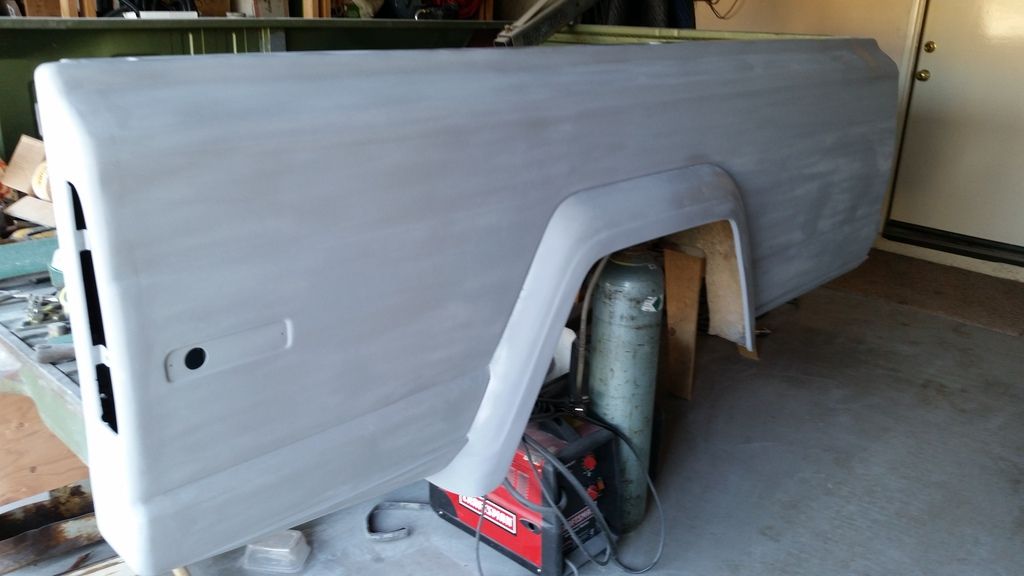
                  Also started getting into the bedside since everything's tied together right there. Figured might as well do it right.....

                  It got ugly before it got better.

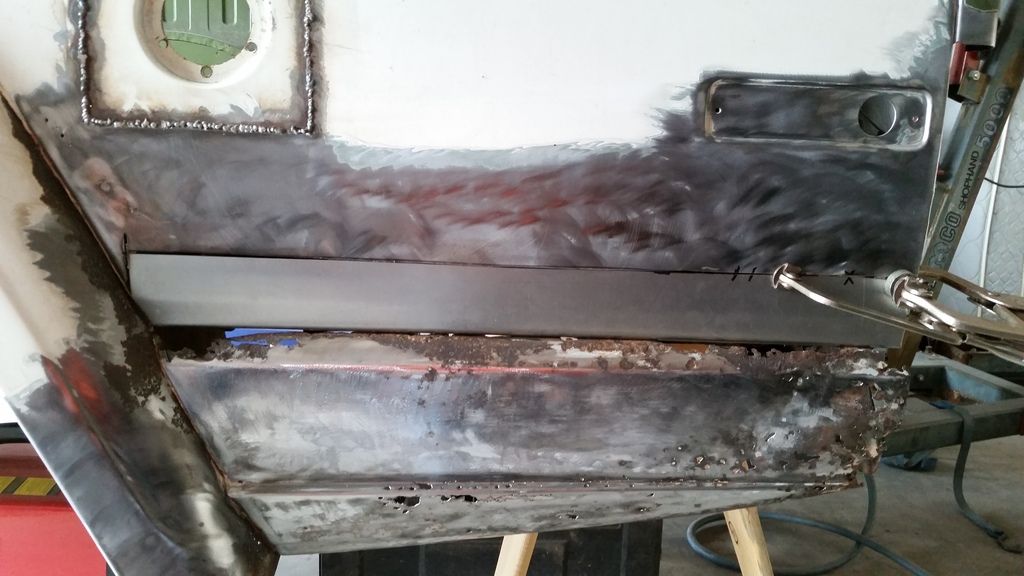
                  Patch panel....
                  THen it was easier to replace the bottom panel than try to repair it.


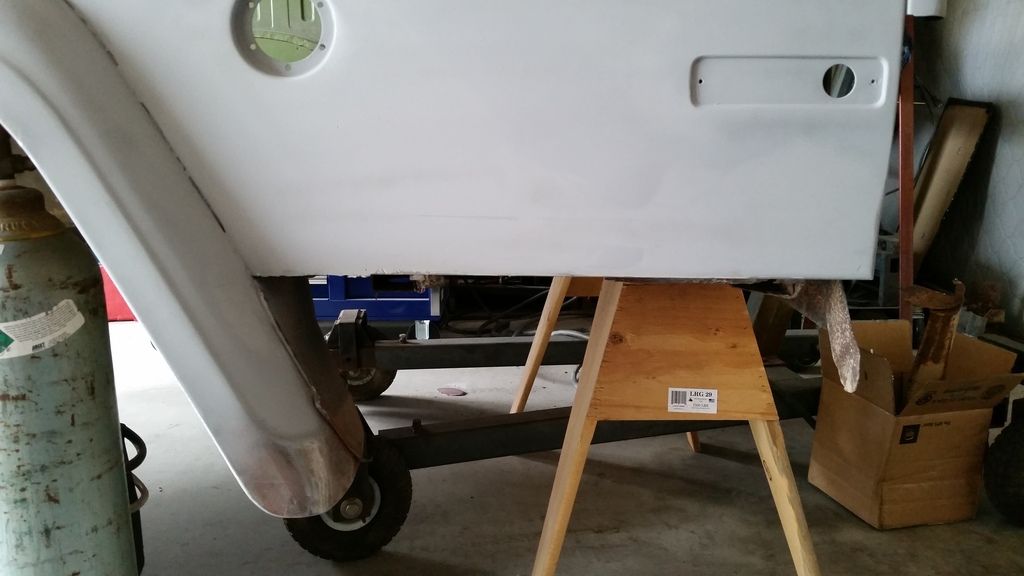
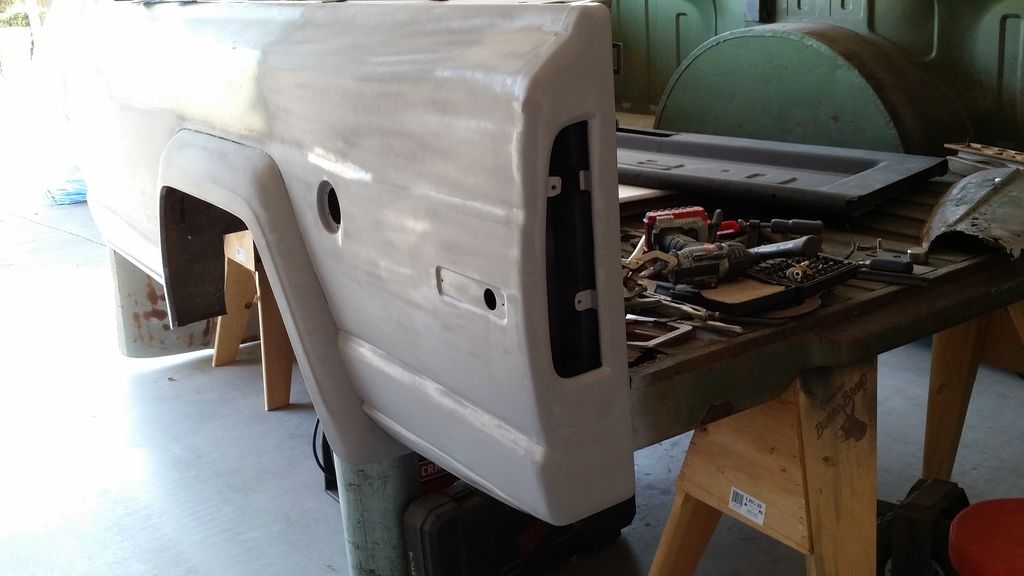
                  Turned out ok I think.

                  Some filler to level it all out and make the seam disappear. Just a little different.

                  Other side was the same crusty tail light bucket repair, and then body filler. Small holes on the seams on this side. Small patch panels but nothing too bad.
                  I am not claiming to be a body man by any means. But I do know that I can make a curved patch panel and remake a tail light housing from a flat piece of sheet metal. Can you tell where I did it? If not then that's great. If you can then you have a great set of eyes. And thats where I am at right now. Hopefully the bed will be finished by the weekend.
                  89 Wrangler, 350LT1 sbc, NV4500, NP231 w/SYE, SOA'd with custom framework, HP44/60 locked w/ 4.10's on 36 super swampers

                  79 FS J10 with 5.3 swap, S465 and 205. Sitting on a HD44/14 bolt and 37's. This thing should be fun to drive if I ever get it finished.

                  Comment

                  • 1975_jeep_j10
                    232 I6
                    • Feb 17, 2013
                    • 110

                    #10
                    Originally posted by BigBlueYJ
                    Also started getting into the bedside since everything's tied together right there. Figured might as well do it right.....

                    It got ugly before it got better.

                    Patch panel....
                    THen it was easier to replace the bottom panel than try to repair it.


                    Turned out ok I think.

                    Some filler to level it all out and make the seam disappear. Just a little different.

                    Other side was the same crusty tail light bucket repair, and then body filler. Small holes on the seams on this side. Small patch panels but nothing too bad.
                    I am not claiming to be a body man by any means. But I do know that I can make a curved patch panel and remake a tail light housing from a flat piece of sheet metal. Can you tell where I did it? If not then that's great. If you can then you have a great set of eyes. And thats where I am at right now. Hopefully the bed will be finished by the weekend.
                    That's really nice work! I'm going to be doing the same sorta thing on my J20. The bed seams are rotting out. How did you make that patch panel? What Gauge did you use for metal?
                    76' J20: 401/th-400/quad

                    Comment

                    • 1975_jeep_j10
                      232 I6
                      • Feb 17, 2013
                      • 110

                      #11
                      how much lift do you think you have?
                      76' J20: 401/th-400/quad

                      Comment

                      • cma
                        350 Buick
                        • Jan 26, 2012
                        • 1460

                        #12
                        really nice work! hats off!
                        Markus!

                        Member, FSJ Prissy Restoration Association

                        Note: Everyone has a plan until they get punched in the face. - Mike Tyson

                        Cherokee Chief Laredo, 360 cui, selec trac, black, 12/1982

                        Picture story:

                        https://picasaweb.google.com/1019823...eat=directlink

                        Comment

                        • BigBlueYJ
                          232 I6
                          • Apr 26, 2006
                          • 158

                          #13
                          I made the patch panels for the bed out of 18 gauge sheet. I bought a little harbor freight brake, and bent the piece I'm holding. Once I got it all folded the way I needed I spotted it in accordingly.

                          As far as the lift goes... it's merely a SOA in the front with an add-a-leaf. The back is inboarded with an SOA / Add-a-leaf. Keep in mind that these add-a-leafs have been in there for the better part of almost twenty years. So with that being said I'd call it about 8 inches... I figure the SOA gives you about 6 and the add-a-leaf is roughly 2.
                          Last edited by BigBlueYJ; 09-07-2015, 09:08 PM.
                          89 Wrangler, 350LT1 sbc, NV4500, NP231 w/SYE, SOA'd with custom framework, HP44/60 locked w/ 4.10's on 36 super swampers

                          79 FS J10 with 5.3 swap, S465 and 205. Sitting on a HD44/14 bolt and 37's. This thing should be fun to drive if I ever get it finished.

                          Comment

                          • BigBlueYJ
                            232 I6
                            • Apr 26, 2006
                            • 158

                            #14
                            After the bed work it was time for the rest..... cab, front end, blah blah blah.
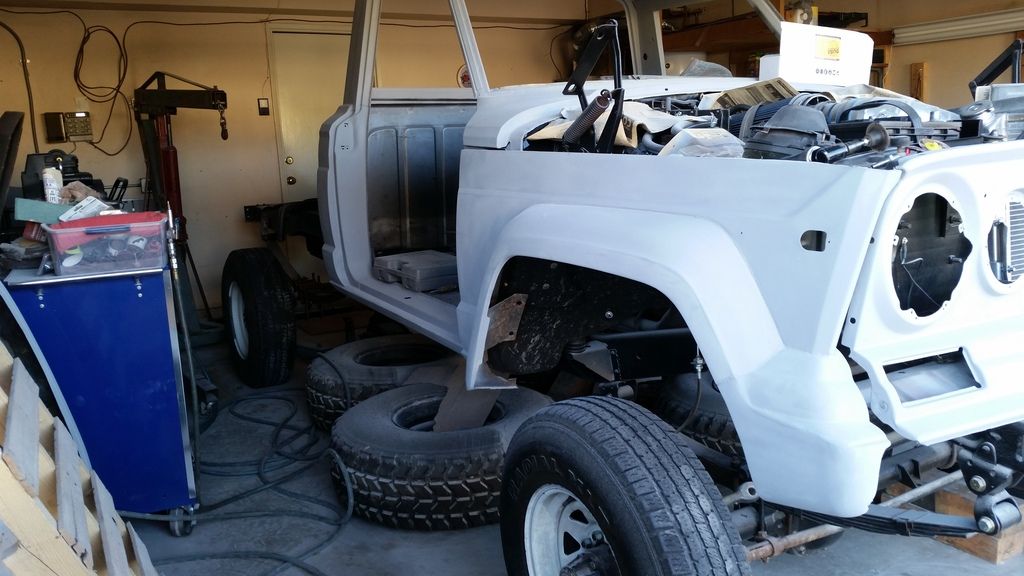
                            Lets start with the easy stuff.... RHINO conversion. Made my tabs for the light rings and got everything to fit, and painted it all flat black. I'm not into shiny stuff. [/IMG]
                            Then it got put in the garage for the hard stuff. [/IMG]
                            Dropped the wheels and got it to an easier height to work on.[/IMG]
                            Started sanding the cab. [/IMG]
                            Started fixing one piece at a time. I had to repair the cab corners from previous attempts. [/IMG]
                            Then moved to the front. Pulled the cracked windshield myself. Did it without breaking it surprisingly. [/IMG]
                            Lots of rot for the frame, seeing as that glass was in there for about 20 years. It could've been worse. [/IMG][/IMG]
                            So I cut it out and started over[/IMG][/IMG]
                            Then I moved to the top. It wasn't in bad shape. Couple of small dents. Then I just used filler to smooth them out. [/IMG][/IMG]
                            Pulled the hood and then primed the cowl[/IMG]
                            Started on the fenders. [/IMG]
                            Then my very unstraight hood. It was warped pretty bad in spots. But it's alot better than the other hood I have. The filler isn't as thick as it looks. But it is very straight now. [/IMG][/IMG]
                            Now I'm on the doors. I stripped it down to no glass and filled the small dents in. [/IMG][/IMG]
                            AND that is where I am at the moment. Another door and the tailgate to go then it's alot of sanding and the real primer......
                            89 Wrangler, 350LT1 sbc, NV4500, NP231 w/SYE, SOA'd with custom framework, HP44/60 locked w/ 4.10's on 36 super swampers

                            79 FS J10 with 5.3 swap, S465 and 205. Sitting on a HD44/14 bolt and 37's. This thing should be fun to drive if I ever get it finished.

                            Comment

                            • BigBlueYJ
                              232 I6
                              • Apr 26, 2006
                              • 158

                              #15
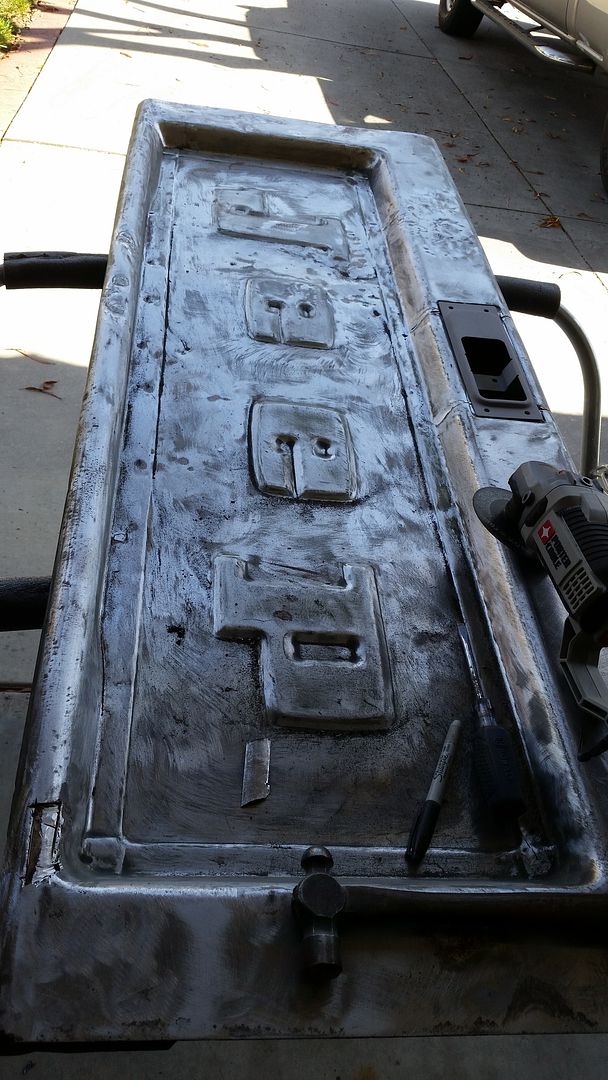
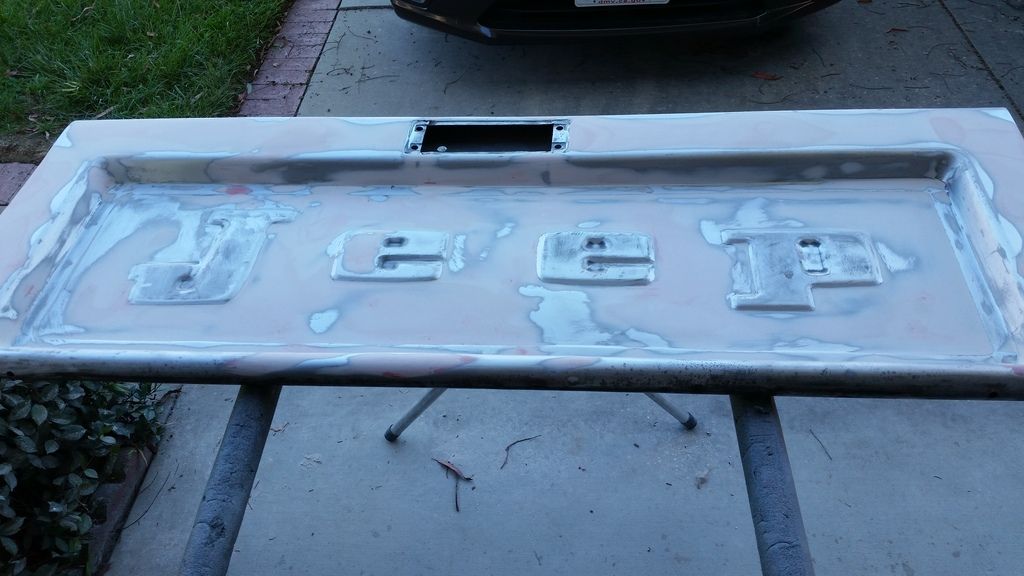
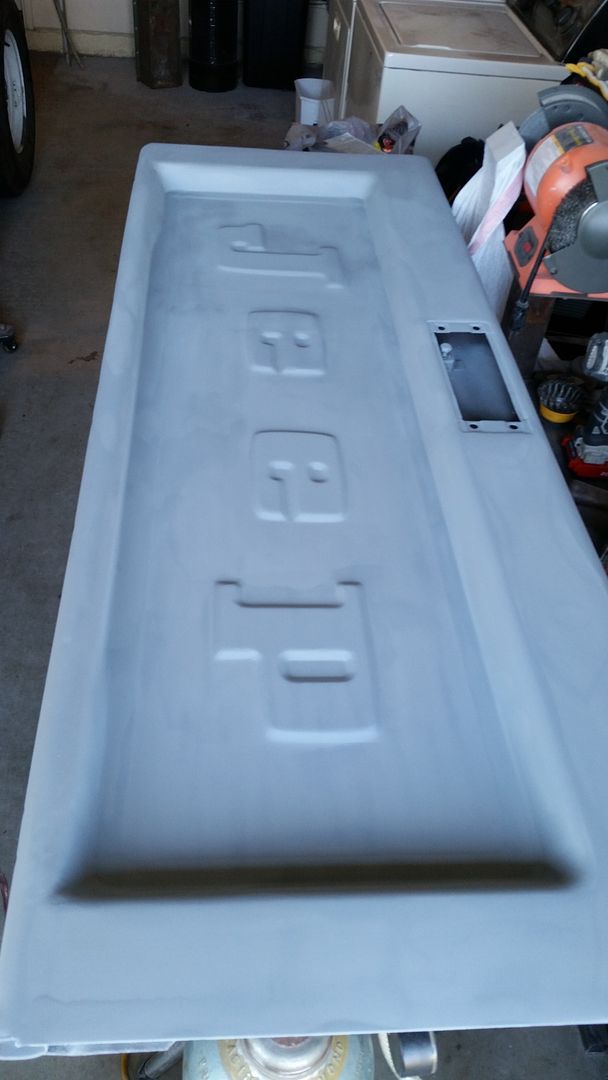
                              So, I'm almost to the completion of the bodywork. I managed to finish both doors and the tailgate. I had to do a little repair work on the tailgate, mostly from a typical hard life. But not too awful. Its just that those things have so many lines on them, its really hard to get it all level. But here is the finished product in rattle can primer. Have a look.


                              Also got me a set of small rollers so that I can get it in and out of the garage without scraping the top while I'm doing the paint.

                              Thats where I'm at right now. I'm ready to pull it outside and blow the garage out, clean it up, and get all the dust out, then the real primer starts....
                              89 Wrangler, 350LT1 sbc, NV4500, NP231 w/SYE, SOA'd with custom framework, HP44/60 locked w/ 4.10's on 36 super swampers

                              79 FS J10 with 5.3 swap, S465 and 205. Sitting on a HD44/14 bolt and 37's. This thing should be fun to drive if I ever get it finished.

                              Comment

                              Working...
                              X