
 Tweet
Tweet
I just made a set of wagoneer inner quarter panels for member miracleed. I thought I would post how it was done to help others possibly get theirs done. I started out knowing absolutely nothing about this. A couple of you tube videos and a general idea on how hammer forms work, I charged ahead.
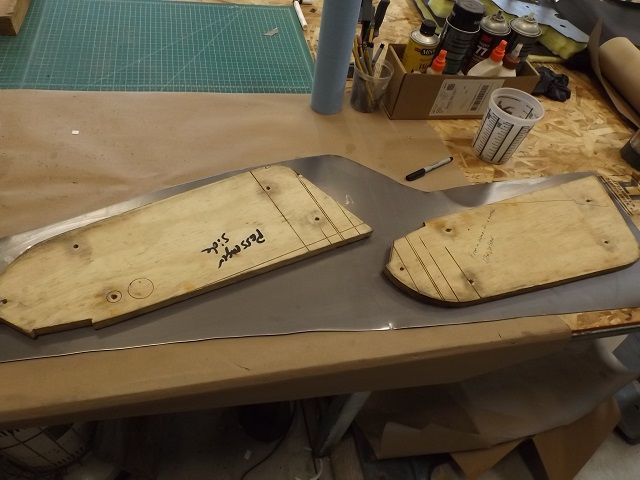
I have a set of rust free 1979 panels that I was able to make a two part hammer form out of. The OEM panels are great for checking accuracy and making a part that fits with minimal work. A hammer form is two pieces of hardwood clamped or bolted together for a flat sheet. The sheet is then hammered to shape using the wood buck to shape it. I used cabinet grade 3/4 plywood and I'd like to find oak or maple to make another form. This form is tired and you want sharp corners for hammering over. I extracted near perfect rust free factory rear quarters and these inner panels for my 69 X model. They still are not installed. I made this hammer form for the 70 wagoneer I toiled over for years. Some of you know that wagoneer as Sadie. I will make new inners and keep the OEM panels for patterns. I have invested in tools to help me get this done. But they could be made without them. It would just take more work. So here goes...
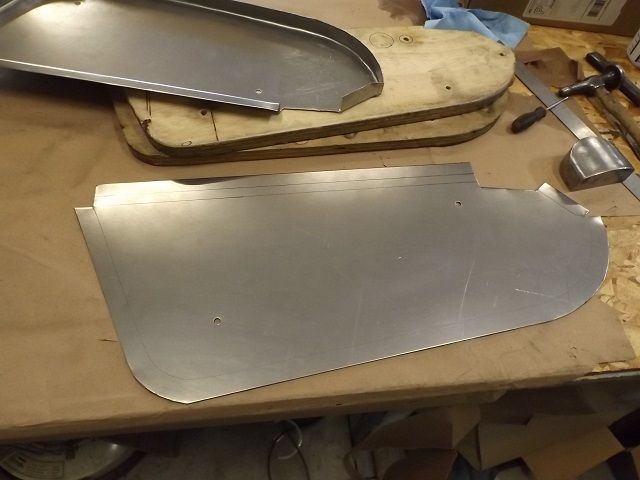
Using 18 GA sheetmetal I cut the metal to make both sides.
Mark out the panel with the folds you need. Then cut to shape. I used a 36 inch foot stomp shear for the long straight runs and a beverly shear. for the corners.
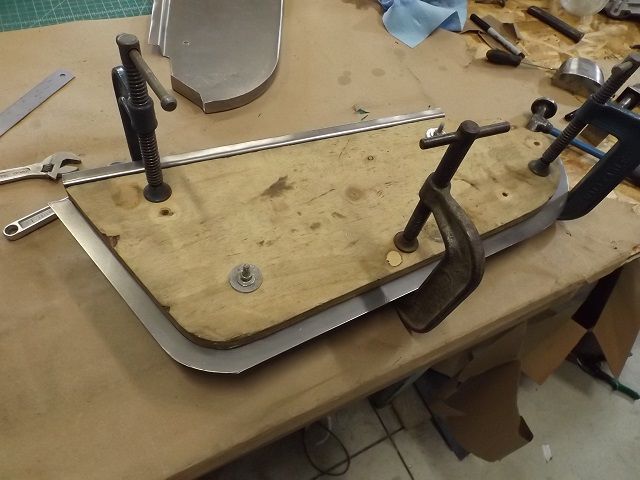
Then secure it between the forms. I usually use all bolts. But used two bolts and some C clamps. Less to weld shut later The metal can't move at all while you are working the edges over. I prebent the edge that welds to the floor on a 4 foot box and pan brake. I have the Harbor Freight 40 inch straight bender and it would do this just fine.
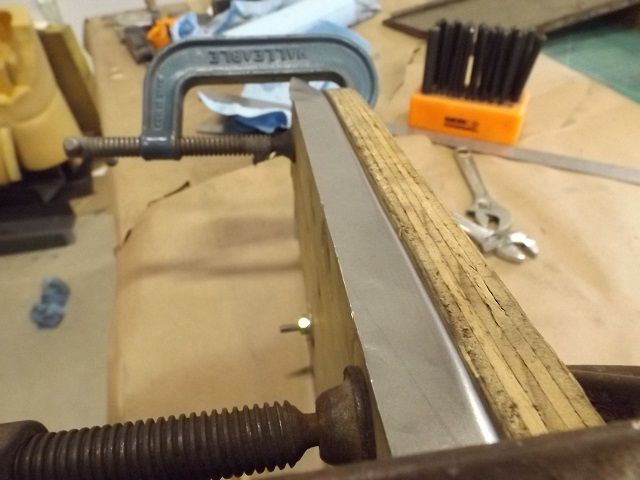
Using a body hammer and not anything else, start working the edges over. Take your time and work your way around the whole panel. Go around again and again till you have this.
This is where problems arise. You are trying to hammer metal through a corner but there is to much metal trying to go into a smaller space. You end up with this.
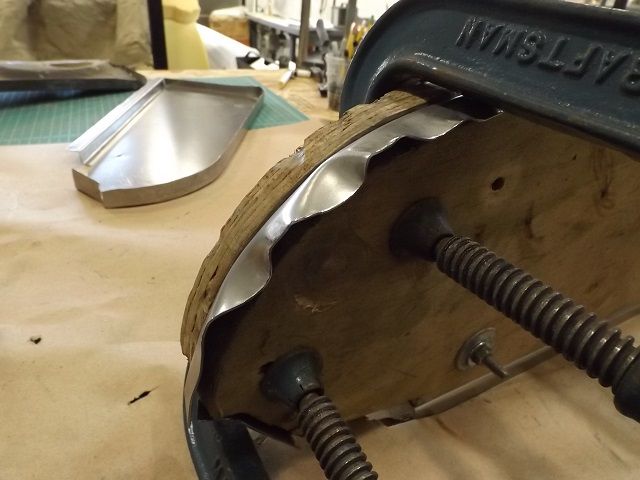
That aint gonna work you say.... go slow and yes it will. Keep working the high spots and don't allow a fold to develop. Keep shrinking with hitting each one once and just keep working back and forth. Gather that metal.
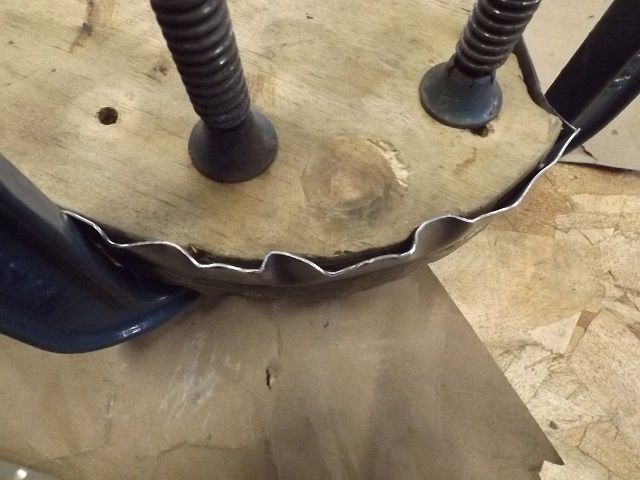
Slightly smaller bumps and valleys... Keep going. Be patient. It will flatten out with work.
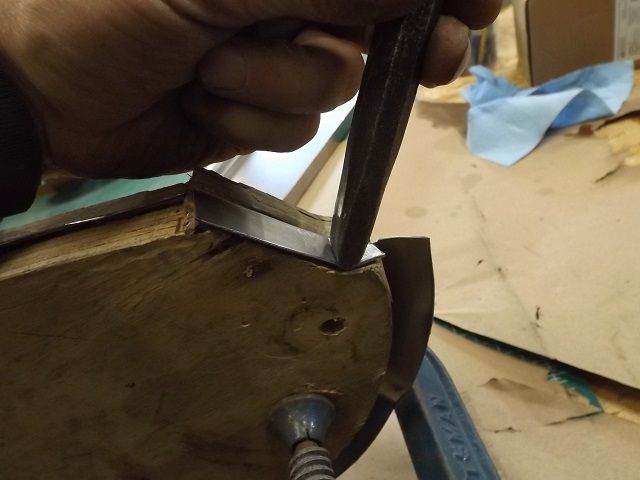
The lower front corner that would be just behind the wheel is just to tight of a radius to get the metal to cooperate. I had to do two relief cuts to get the corner folded over. I had well over a 1/2 inch overlap on both cuts about an inch apart. Later when the correct shape was formed, I used a mini air sawzall to cut the overlaps out. That left a simple cut to TIG weld up and sand back. There is no other way to make that work that I could find.

So keep working the panel. Drive the metal using any tools that work.
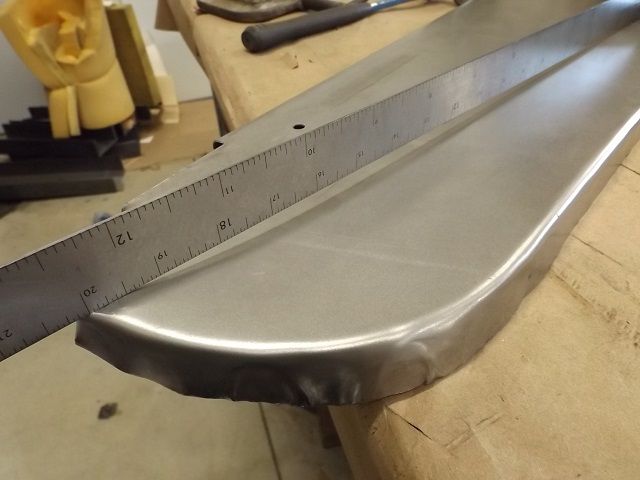
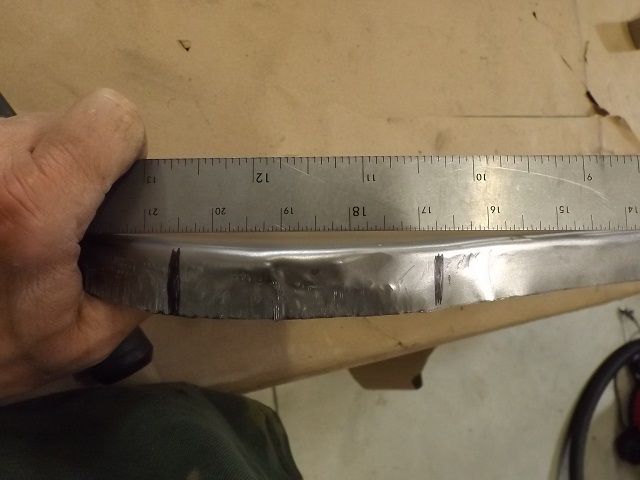
So you get it just about to where you think great! Its working. But what has happened is all the force to gather that metal and shrink it into the corner plays havoc on the straightness of the overall panel. This happens. The fold did not shrink enough to keep the panel straight. This bend would not line up with the outer quarter panel in the right spot.
So this is where a shrinker stretcher just rocks. But for a guy that does not have one, make relief cuts and make that panel straight. Then carefully weld the fold up. Thats one way, and here is is another. Using the shrinker you shrink the edge till it pulls the panel straight. The trick to this is to do just the outer edge first. Then run the metal fold deeper into the jaws. You get very fast results this way. You always have to take your time. Moving metal never happens quickly.
This is nasty.
Lets get rid of that curl. Do only the edge first. It will distort your work. Don't worry about it and fix the contour later.
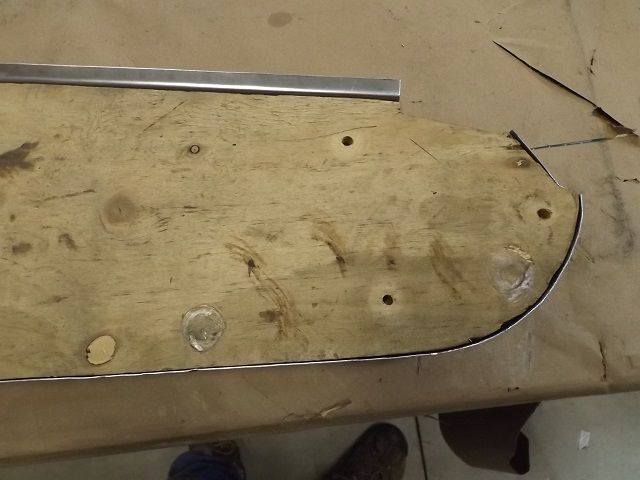
You can check your progress by putting the form in the part. It shows the correction needed. Keep shaping, shrinking and little by little it will come in.
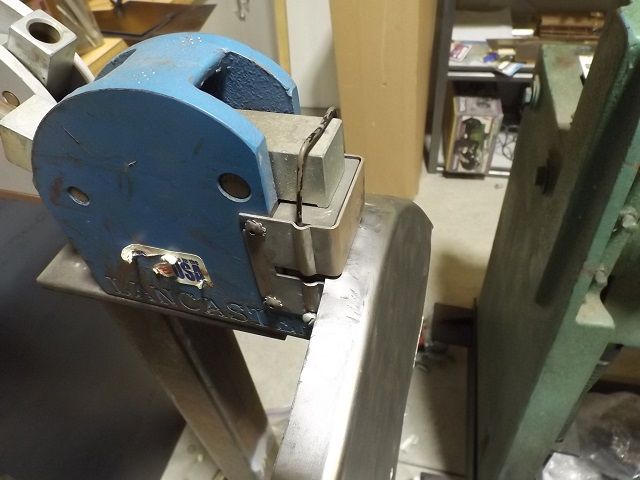
Now a word on Shrinker stretchers. Never ever buy the ones from Harbor Freight. You will waste your money and be very sorry. The shrinker stretcher unit was invented in 1939 by the Charlie Brown tool company. Or Lancaster. When you try to save a buck, you get import garbage that simply will not do what you wish to accomplish. It will frustrate and waste your time possibly scrapping a part you already have hours into.
I fortunately found this when I was shopping. I have the lancaster units and they work.
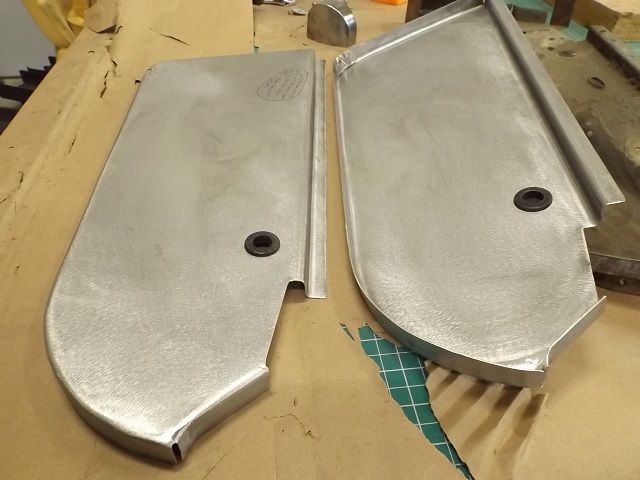
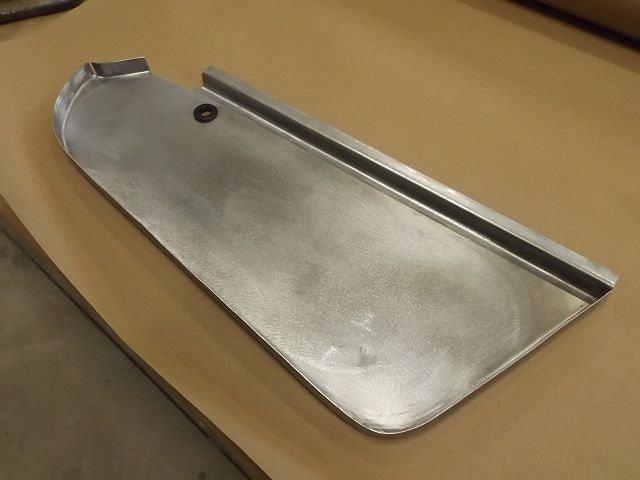
So after a day on each panel, I had something that was starting to look like I could send it out. Tail light electrical holes done and drain holes in the same spots as the OEM panels, they were ready to ship.

Some other views.
On the wrapping paper.
I would suggest to anyone that is replacing metal to get it painted and sealed very well. Use body caulk where the factory did. The spray the entire inner panels with 3M cavity wax. Everything 3M makes works exceptionally well.
So make those forms and get some panels made. Keep saving those jeeps.
I have a set of rust free 1979 panels that I was able to make a two part hammer form out of. The OEM panels are great for checking accuracy and making a part that fits with minimal work. A hammer form is two pieces of hardwood clamped or bolted together for a flat sheet. The sheet is then hammered to shape using the wood buck to shape it. I used cabinet grade 3/4 plywood and I'd like to find oak or maple to make another form. This form is tired and you want sharp corners for hammering over. I extracted near perfect rust free factory rear quarters and these inner panels for my 69 X model. They still are not installed. I made this hammer form for the 70 wagoneer I toiled over for years. Some of you know that wagoneer as Sadie. I will make new inners and keep the OEM panels for patterns. I have invested in tools to help me get this done. But they could be made without them. It would just take more work. So here goes...
Using 18 GA sheetmetal I cut the metal to make both sides.
Mark out the panel with the folds you need. Then cut to shape. I used a 36 inch foot stomp shear for the long straight runs and a beverly shear. for the corners.
Then secure it between the forms. I usually use all bolts. But used two bolts and some C clamps. Less to weld shut later The metal can't move at all while you are working the edges over. I prebent the edge that welds to the floor on a 4 foot box and pan brake. I have the Harbor Freight 40 inch straight bender and it would do this just fine.
Using a body hammer and not anything else, start working the edges over. Take your time and work your way around the whole panel. Go around again and again till you have this.
This is where problems arise. You are trying to hammer metal through a corner but there is to much metal trying to go into a smaller space. You end up with this.
That aint gonna work you say.... go slow and yes it will. Keep working the high spots and don't allow a fold to develop. Keep shrinking with hitting each one once and just keep working back and forth. Gather that metal.
Slightly smaller bumps and valleys... Keep going. Be patient. It will flatten out with work.
The lower front corner that would be just behind the wheel is just to tight of a radius to get the metal to cooperate. I had to do two relief cuts to get the corner folded over. I had well over a 1/2 inch overlap on both cuts about an inch apart. Later when the correct shape was formed, I used a mini air sawzall to cut the overlaps out. That left a simple cut to TIG weld up and sand back. There is no other way to make that work that I could find.
So keep working the panel. Drive the metal using any tools that work.
So you get it just about to where you think great! Its working. But what has happened is all the force to gather that metal and shrink it into the corner plays havoc on the straightness of the overall panel. This happens. The fold did not shrink enough to keep the panel straight. This bend would not line up with the outer quarter panel in the right spot.
So this is where a shrinker stretcher just rocks. But for a guy that does not have one, make relief cuts and make that panel straight. Then carefully weld the fold up. Thats one way, and here is is another. Using the shrinker you shrink the edge till it pulls the panel straight. The trick to this is to do just the outer edge first. Then run the metal fold deeper into the jaws. You get very fast results this way. You always have to take your time. Moving metal never happens quickly.
This is nasty.
Lets get rid of that curl. Do only the edge first. It will distort your work. Don't worry about it and fix the contour later.
You can check your progress by putting the form in the part. It shows the correction needed. Keep shaping, shrinking and little by little it will come in.
Now a word on Shrinker stretchers. Never ever buy the ones from Harbor Freight. You will waste your money and be very sorry. The shrinker stretcher unit was invented in 1939 by the Charlie Brown tool company. Or Lancaster. When you try to save a buck, you get import garbage that simply will not do what you wish to accomplish. It will frustrate and waste your time possibly scrapping a part you already have hours into.
I fortunately found this when I was shopping. I have the lancaster units and they work.
So after a day on each panel, I had something that was starting to look like I could send it out. Tail light electrical holes done and drain holes in the same spots as the OEM panels, they were ready to ship.
Some other views.
On the wrapping paper.
I would suggest to anyone that is replacing metal to get it painted and sealed very well. Use body caulk where the factory did. The spray the entire inner panels with 3M cavity wax. Everything 3M makes works exceptionally well.
So make those forms and get some panels made. Keep saving those jeeps.


Comment