Rob's 1988 Baltic Blue & Tan Grand Wagoneer Restoration

Collapse
X
 
  • Filter
  • Time
  • Show
Clear All
new posts
  • MysticRob
    350 Buick
    • Nov 26, 2019
    • 819

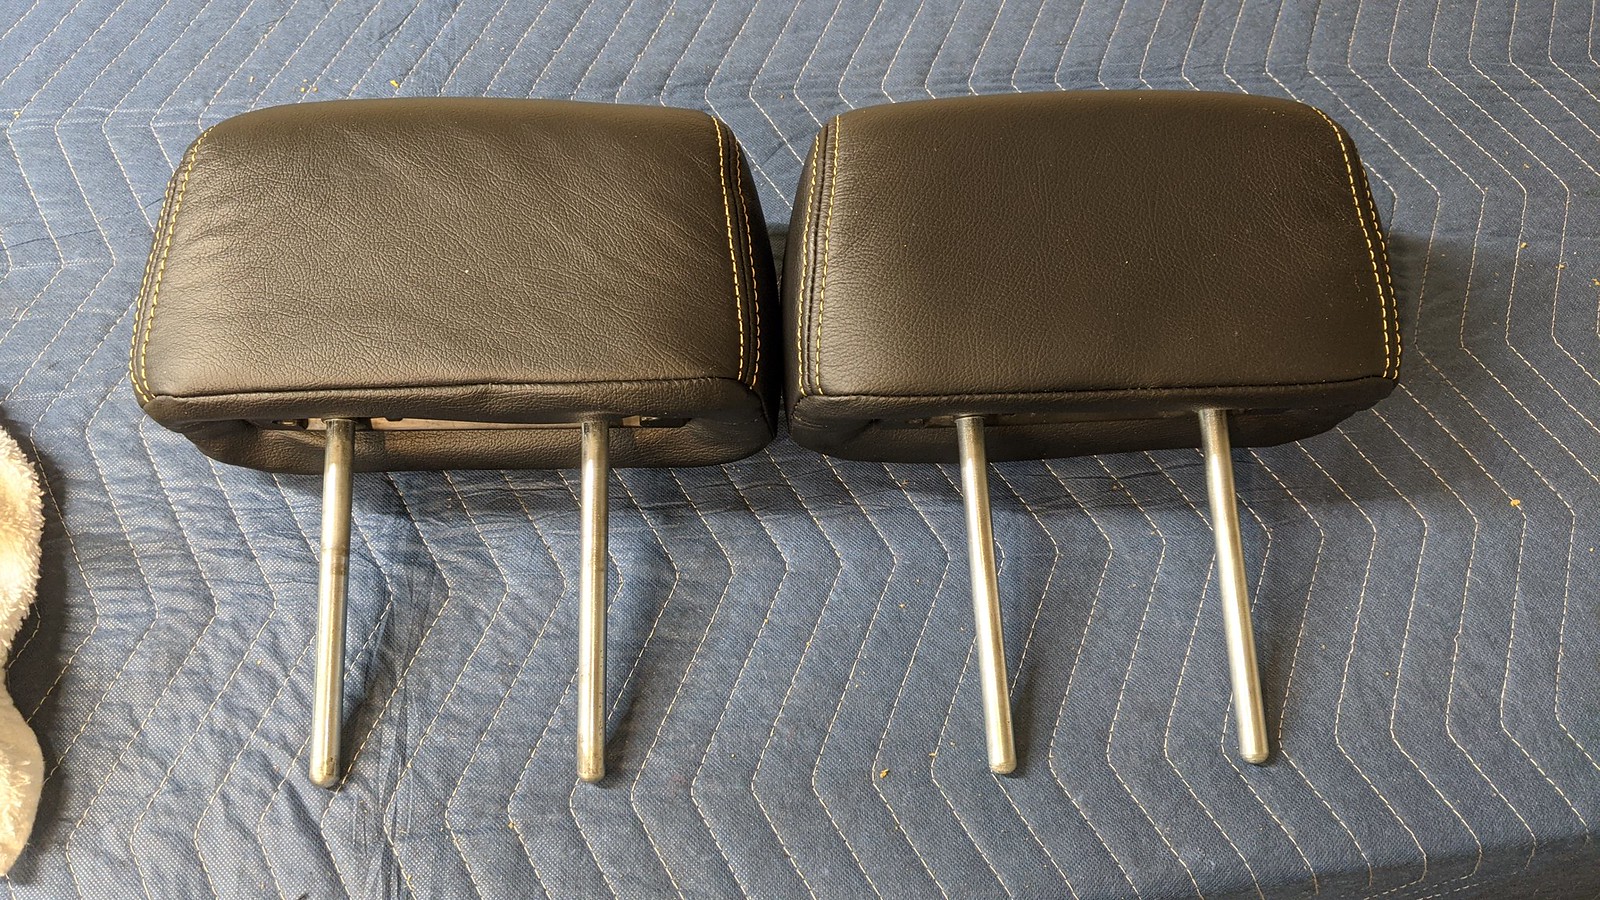
    Had some time to continue the seat covers, so dove into the headrests. New covers next to old moldy and smelly headrests:
    PXL_20210202_002642259 by Robert Stone, on Flickr

    Two screws removed and the entire headrest assembly pops right out:
    PXL_20210202_002919985 by Robert Stone, on Flickr

    Gently took old covers off, and had my son help with squishing and cajoling the new covers on to avoid ripping or destroying the foam or new covers. Again with the awesome parchment stitching for contrast and tie-in:
    PXL_20210202_020233921 by Robert Stone, on Flickr

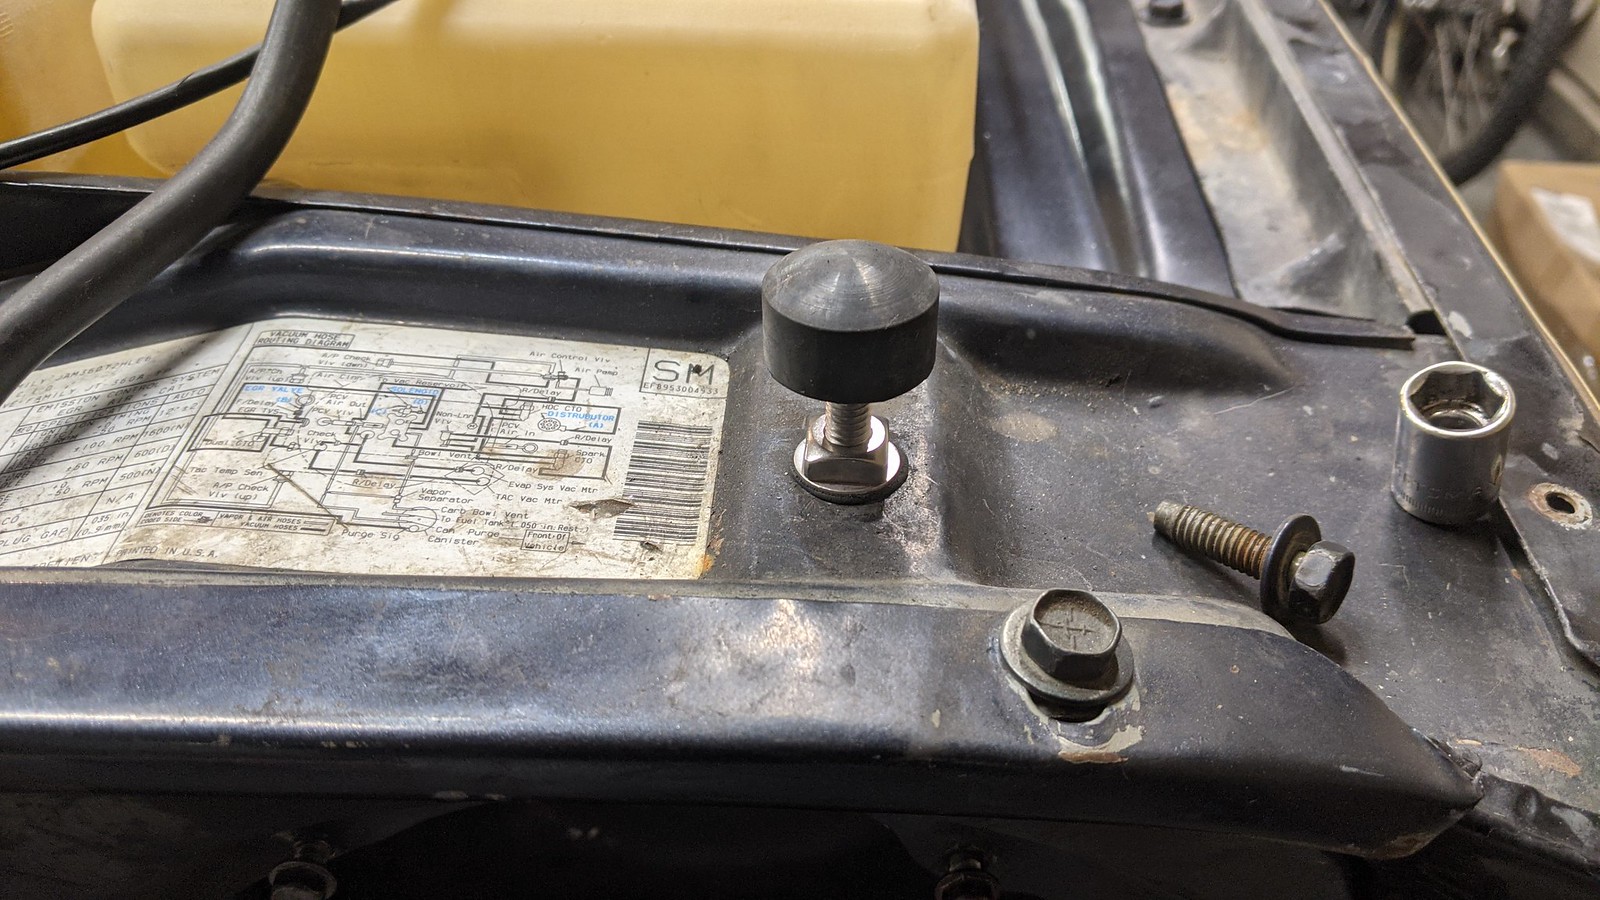
    Also had a bit of time to place my new air cleaner decals all the way from Kaz in Japan. Pay no attention to the rat's nest of crap, that'll all get connected, cleaned, and painted when I'm done with the interior. Much of that vacuum crap I'm hoping to remove if/when I go fuel injection:
    PXL_20210202_040531473 by Robert Stone, on Flickr
    Last edited by MysticRob; 09-11-2021, 11:33 AM.
    --Rob--
    1988 Jeep Grand Wagoneer / Baltic Blue & Tan

    My build thread:
    https://forums.ifsja.org/forum/tire-...er-restoration

    My Howell TBI Install How-To:
    https://forums.ifsja.org/forum/tire-...rb-e-o-d-452-2

    Comment

    • SOLSAKS
      304 AMC
      • Jul 25, 2016
      • 1781

      love the photos.

      especially the console restoration....superb.

      dave in NC
      SOLSAKS - dave
      1976 J-10 HONCHO Fleetside
      1982 J-10 Fleetside
      1988 grand wagoneer
      2004 RUBICON jeep
      Benson, NC

      Comment

      • MysticRob
        350 Buick
        • Nov 26, 2019
        • 819

        Yeah, we're getting there. Last few days I've taken it slow since reverse engineering the fit on the bottoms was difficult due to slightly shorter amount of material on the Katzkins versus the original stuff.

        Definitely didn't help matters that I had my local upholstery shop glue some more 1/2" seat foam onto the existing bottom cushions to build them up after 30+ years of asses smashing them down.

        I didn't take many pics of this process due to it beating my hands to death, but I'm summarize here. Seatbacks went on first:
        PXL_20210201_045109046 by Robert Stone, on Flickr

        To get the headrests on, I used the headrest sliders and my fingers to measure approximate locations to cut holes in the seatback upholstery and install the headrests in the seatbacks. I had to remove quite a bit of material around the headrest holes to get the inner and outer trim ring pieces to sit flush and fit properly. I just reached my hands up into the seats to place the inner headrest trim ring pieces in prior to fitting the posts thru the holes.

        Next was hog-rings on the seat bottom top-rails to center them, then placement on the frame, some maneuvering to center the seams, then stretching them over the frame sides:
        PXL_20210206_012945884 by Robert Stone, on Flickr

        Finished driver side from the front. I'd already cut the slit and trimmed a bit off to fit the power seat controls and screw them into the frame:
        PXL_20210206_203018144 by Robert Stone, on Flickr

        Pretty much finished pic of the driver controls. Will do some final fitting of where the bottom and sides meet to match angles and lines later:
        PXL_20210206_203012021 by Robert Stone, on Flickr

        Passenger seat done from the front:
        PXL_20210206_171216607 by Robert Stone, on Flickr

        And passenger seat controls:
        PXL_20210206_195406733 by Robert Stone, on Flickr
        Last edited by MysticRob; 09-11-2021, 11:30 AM.
        --Rob--
        1988 Jeep Grand Wagoneer / Baltic Blue & Tan

        My build thread:
        https://forums.ifsja.org/forum/tire-...er-restoration

        My Howell TBI Install How-To:
        https://forums.ifsja.org/forum/tire-...rb-e-o-d-452-2

        Comment

        • chubbinius
          258 I6
          • Oct 31, 2018
          • 294

          Looks phenomenal! Really nice colors and fit.
          1970 1414X Wagoneer "The Pig"
          -Dauntless 350 V8
          -D27 front/D44 rear
          2006 XK (65th Ann Edition)-DD

          Comment

          • MysticRob
            350 Buick
            • Nov 26, 2019
            • 819

            Originally posted by chubbinius
            Looks phenomenal! Really nice colors and fit.
            If they last then I'll be more than satisfied with the cost too!

            I had enough time today to install the center armrest first, which has to be done prior to installing the seats to make it easier:
            PXL_20210206_235606004 by Robert Stone, on Flickr

            Then got both seats installed and retested to ensure all the power mechanisms still work:
            PXL_20210207_043437861 by Robert Stone, on Flickr

            Hardest part was cutting enough of the carpet out for the high/low lever to get through (kinda had to twist it around the lever)...:
            PXL_20210206_213602391 by Robert Stone, on Flickr

            ...and to start the seat bolts into the floors, and to get the wiring harnesses popped out where they'd be unseen and wouldn't get hung up:
            PXL_20210207_043351072 by Robert Stone, on Flickr
            Last edited by MysticRob; 09-11-2021, 11:37 AM.
            --Rob--
            1988 Jeep Grand Wagoneer / Baltic Blue & Tan

            My build thread:
            https://forums.ifsja.org/forum/tire-...er-restoration

            My Howell TBI Install How-To:
            https://forums.ifsja.org/forum/tire-...rb-e-o-d-452-2

            Comment

            • 78 WIDETRAC
              350 Buick
              • Aug 19, 2003
              • 845

              Rob


              You have done such a great job on your Jeep! You have amazing attention to detail and skill. Those color choices look perfect! You make it look easy! But I know it's not. I love seeing the updates on this thread!

              Comment

              • SOLSAKS
                304 AMC
                • Jul 25, 2016
                • 1781

                i second 78 WIDETRAC

                NICE GOING !!!

                dave in NC
                SOLSAKS - dave
                1976 J-10 HONCHO Fleetside
                1982 J-10 Fleetside
                1988 grand wagoneer
                2004 RUBICON jeep
                Benson, NC

                Comment

                • MysticRob
                  350 Buick
                  • Nov 26, 2019
                  • 819

                  Thanks, guys, I appreciate it!

                  Yesterday I focused more on mechanical stuff like installing a new green "HDC-CTO Thermostat Housing Emission Switch" (I broke the original taking the intake off to inspect the lifter valley last year) since my beast has the heavy duty tow package and tranny cooler.

                  Also cleaned the AC switch and hoses on the right front fender and rerouted some vacuum hoses, etc.

                  Months ago I was going to take the gas tank out to inspect it when I couldn't start the beast, but changed my mind after taking out quite a few skid plate bolts and thinking better of dropping it alone. Later I rebuilt the carb, used a fluid pump to remove whatever orange non-gas crap (likely a bunch of stabilizers) was in it, then filled with new gas to get the engine running for a couple minutes without coolant in it. Yesterday I finally got back under it with my son and we were able to get the right rear bolt and nut back in that proved troublesome to line up 3 different holes correctly. Then tightened up all the other skid plate bolts and called it a day to watch TB12 dominate his 7th "supper bowl".

                  While under there I noticed evidence of a transmission fluid leak somewhere near the gear shift mechanism, so I'm looking forward to jacking up each side and crawling under with my pressure washer hooked up directly to the water heater to steam clean everything out and figure out exactly where that leak is.
                  Last edited by MysticRob; 02-08-2021, 09:16 AM.
                  --Rob--
                  1988 Jeep Grand Wagoneer / Baltic Blue & Tan

                  My build thread:
                  https://forums.ifsja.org/forum/tire-...er-restoration

                  My Howell TBI Install How-To:
                  https://forums.ifsja.org/forum/tire-...rb-e-o-d-452-2

                  Comment

                  • Fla Ryan
                    230 Tornado
                    • Apr 18, 2019
                    • 8

                    Originally posted by MysticRob
                    Thanks, guys, I appreciate it!

                    Yesterday I focused more on mechanical stuff like installing a new green "HDC-CTO Thermostat Housing Emission Switch" (I broke the original taking the intake off to inspect the lifter valley last year) since my beast has the heavy duty tow package and tranny cooler.

                    Also cleaned the AC switch and hoses on the right front fender and rerouted some vacuum hoses, etc.

                    Months ago I was going to take the gas tank out to inspect it when I couldn't start the beast, but changed my mind after taking out quite a few skid plate bolts and thinking better of dropping it alone. Later I rebuilt the carb, used a fluid pump to remove whatever orange non-gas crap (likely a bunch of stabilizers) was in it, then filled with new gas to get the engine running for a couple minutes without coolant in it. Yesterday I finally got back under it with my son and we were able to get the right rear bolt and nut back in that proved troublesome to line up 3 different holes correctly. Then tightened up all the other skid plate bolts and called it a day to watch TB12 dominate his 7th "supper bowl".

                    While under there I noticed evidence of a transmission fluid leak somewhere near the gear shift mechanism, so I'm looking forward to jacking up each side and crawling under with my pressure washer hooked up directly to the water heater to steam clean everything out and figure out exactly where that leak is.
                    I am 99.9% sure the transmission leak is coming from your shift shaft seal. Get yourself the 727 shift shaft seal tool and a couple new seals.

                    The tool is way overpriced, but it works. Big key is get downward pressure on the tool so it bites into the top of the seal. Use a pry bar, c clamp or ball joint press to get pressure, but be careful not to damage the bottom of your transmission pan if you go the clamp route. Use a piece of old underneath to protect it.

                    Once it’s out need to tap the seal in. I found a few good YouTube vids. I’ll send you links tomorrow.
                    1990 Grand Wagoneer
                    1988 Grand Wagoneer

                    Comment

                    • MysticRob
                      350 Buick
                      • Nov 26, 2019
                      • 819

                      Originally posted by Fla Ryan
                      I am 99.9% sure the transmission leak is coming from your shift shaft seal. Get yourself the 727 shift shaft seal tool and a couple new seals.

                      The tool is way overpriced, but it works. Big key is get downward pressure on the tool so it bites into the top of the seal. Use a pry bar, c clamp or ball joint press to get pressure, but be careful not to damage the bottom of your transmission pan if you go the clamp route. Use a piece of old underneath to protect it.

                      Once it’s out need to tap the seal in. I found a few good YouTube vids. I’ll send you links tomorrow.
                      I watched a few vids on it and figure it doesn't look too hard to do, so will tackle it at some point soon. Thanks!
                      Last edited by MysticRob; 02-16-2021, 10:19 PM.
                      --Rob--
                      1988 Jeep Grand Wagoneer / Baltic Blue & Tan

                      My build thread:
                      https://forums.ifsja.org/forum/tire-...er-restoration

                      My Howell TBI Install How-To:
                      https://forums.ifsja.org/forum/tire-...rb-e-o-d-452-2

                      Comment

                      • FleetFox
                        258 I6
                        • Apr 04, 2018
                        • 290

                        Mystic Blue Persuasion.... Marching right along. Looks great Rob!

                        Fleet Fox

                        Comment

                        • MysticRob
                          350 Buick
                          • Nov 26, 2019
                          • 819

                          Originally posted by FleetFox
                          Mystic Blue Persuasion.... Marching right along. Looks great Rob!

                          Fleet Fox
                          Thanks, brother, some health setbacks lately but it's getting there slowly. Can't wait to get her on the road since I've never actually driven her more than 20ft onto the trailer.
                          --Rob--
                          1988 Jeep Grand Wagoneer / Baltic Blue & Tan

                          My build thread:
                          https://forums.ifsja.org/forum/tire-...er-restoration

                          My Howell TBI Install How-To:
                          https://forums.ifsja.org/forum/tire-...rb-e-o-d-452-2

                          Comment

                          • FleetFox
                            258 I6
                            • Apr 04, 2018
                            • 290

                            Going on 3 years now and I've only driven it up and down the driveway twice and on and off the trailer a few times. So I totally feel you.

                            Fleet Fox

                            Comment

                            • MysticRob
                              350 Buick
                              • Nov 26, 2019
                              • 819

                              Originally posted by FleetFox
                              Going on 3 years now and I've only driven it up and down the driveway twice and on and off the trailer a few times. So I totally feel you.

                              Fleet Fox
                              LOL, I'm hoping to not have mine be like that!
                              So, I took some time away from the build to rest my weary arm.
                              Messed it up either doing something completely non-physical or having blood drawn at the VA.
                              Had a large bruise so just took it easy the last few days.
                              Today I felt good so jumped into more resto work.
                              First was installing my new hood bumper kit from TGW since my originals had broken plastic bits:
                              PXL_20210220_200442380 by Robert Stone, on Flickr

                              This is all easiest with the headlights out, and since my entire front end is apart, why not do it now?
                              PXL_20210220_200456269 by Robert Stone, on Flickr

                              Put the black donor fender on, which was an absolute pain since I still had to deal with previous left side accident damage that had pushed in the old front grill a bit, deformed the blinker housing a lot, and generally made it hard to fit the 3 fender-to-grill bolts behind the grill. The donor fender, as beat as it is, is still in WAY better shape than the trashed fender I threw out long ago. I'll figure out a better replacement someday:
                              PXL_20210220_200623665 by Robert Stone, on Flickr

                              Good pic of the bashed blinker housing. Damage was so old the paint had begun lifting after cracking. The donor fender had a lot of bondo on the front lower section from its own accident damage that caused a groove and a small hole thru the backside. Since bondo loves to absorb water it soaked it up from that inside hole and rusted out the base metal underneath, causing the bondo to separate and crack, so I stripped it down to see how bad it was:
                              PXL_20210220_214204568 by Robert Stone, on Flickr

                              Cleaned everything up and reshaped the metal so the blinker housing will fit properly now. I'll primer and half-ass paint to protect it at some point soon, but I don't plan to really restore the exterior for quite awhile. I really had to work the jack, a 2x4 block, metal hammer, and bunch of other tools to get everything to line up so I could fit the fender bolts on.
                              PXL_20210220_223339687 by Robert Stone, on Flickr
                              Last edited by MysticRob; 09-11-2021, 11:49 AM.
                              --Rob--
                              1988 Jeep Grand Wagoneer / Baltic Blue & Tan

                              My build thread:
                              https://forums.ifsja.org/forum/tire-...er-restoration

                              My Howell TBI Install How-To:
                              https://forums.ifsja.org/forum/tire-...rb-e-o-d-452-2

                              Comment

                              • MysticRob
                                350 Buick
                                • Nov 26, 2019
                                • 819

                                Salvage yard offered donor front blinker lenses and housings since all of mine were broken and cracked when I bought the beast. Took some Mother's rubbing compound and polish to brighten them up. Top one is after I polished. It actually actually looked worse than the untouched bottom one before I wore my fingers out making it look good:
                                PXL_20210220_002410901 by Robert Stone, on Flickr

                                Now that the seats are in I figured I'd finish the front carpet and kick panels before doing the new TGW OEM door seals. If I win the lottery I'll get new door scuff plates, but these old ones will do for now. The new door seals make the doors difficult to close so will need to figure something out to fix that:
                                PXL_20210221_011859098 by Robert Stone, on Flickr

                                Trimmed the driver side carpet and tucked under the kick panels before putting the new OEM door seal and old scuff plates on. Decided to follow Ryan's advice and ran the sunroof power wire inside the seal then brought it out under the dash unseen to the fuse panel:
                                PXL_20210221_024141311 by Robert Stone, on Flickr
                                Last edited by MysticRob; 09-11-2021, 11:55 AM.
                                --Rob--
                                1988 Jeep Grand Wagoneer / Baltic Blue & Tan

                                My build thread:
                                https://forums.ifsja.org/forum/tire-...er-restoration

                                My Howell TBI Install How-To:
                                https://forums.ifsja.org/forum/tire-...rb-e-o-d-452-2

                                Comment

                                Working...
                                X