
 Tweet
Tweet
This past weekend I dusted off the Pertronix kit to install on my stock distributor. It's a pretty simple conversion, but took me the entire weekend to finish because I decided to replace the vacuum advance as well and had to wait for it to come in. I used Pertronix part #1181 for Delco 8 cylinder distributors. I replaced the cap and rotor, which is recommended when installing the kit, with the MSD cap and rotor kit part #8442 from Summit Racing. I got the vacuum advance from Autozone for $10, part #DV1465, if anyone is interested.
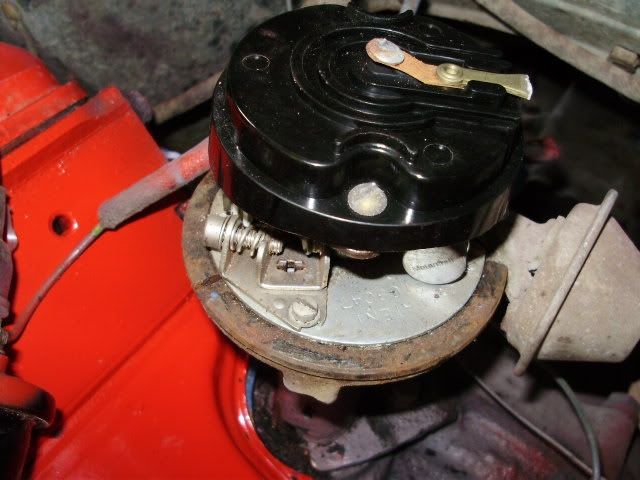
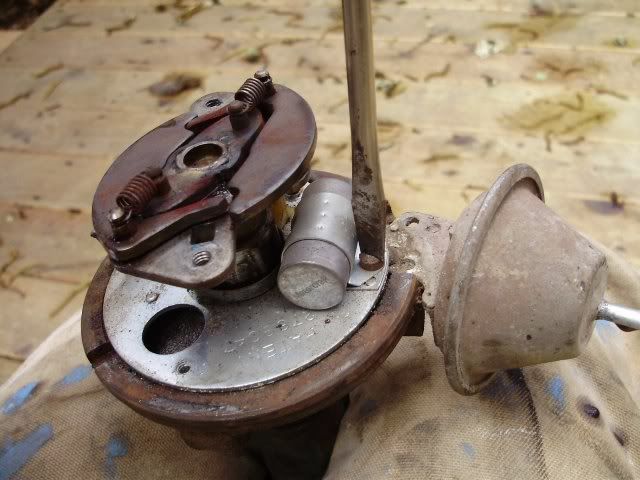
First remove the distributor cap and note the position of the rotor before removing the distributor. The distributor must be removed in order to check the air gap accurately once the kit is installed. I made a mark at the top of the shaft in line with the rotor, and then a mark at the base of the shaft and the corresponding gear tooth. The distributor is held in place by a steel bracket, which is easily removed after removing the single bolt.
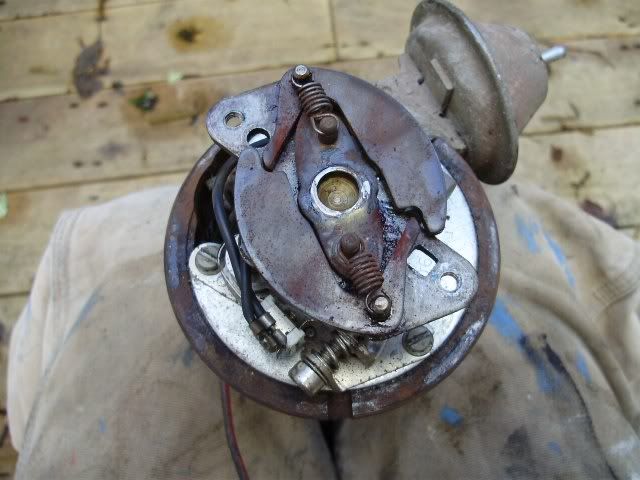
Once the distributor is out you can remove the rotor. The weights and the plate they are mounted to were very greasy so I cleaned it thorougly with carb cleaner and a toothbrush before installing the kit.
Disconnect the condensor wire by removing this screw.
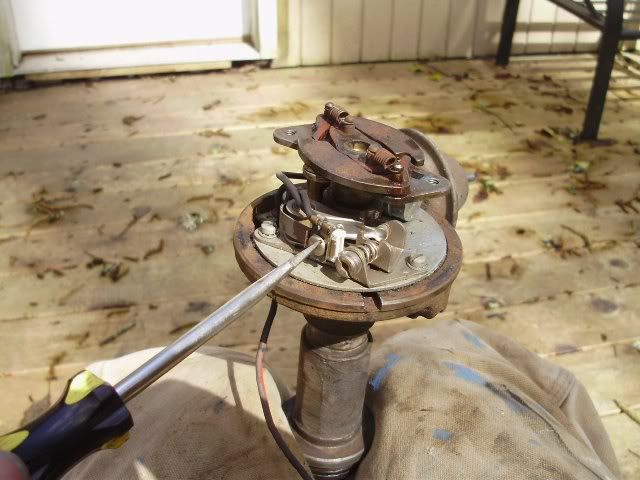
Remove the points, which are held on by two screws. These screws need to be saved as they are used later to secure the Ignitor.
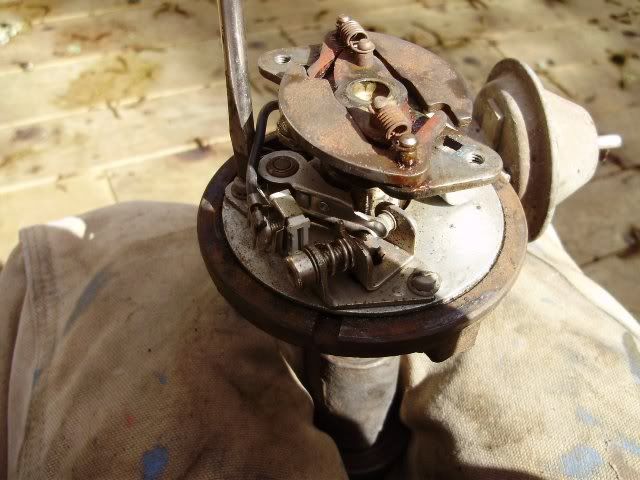
Disconnect the condensor by removing one screw. The condensor can then be removed.
Now you can install the kit. Start by installing the magnet ring, which slips over the weight assembly. The two threaded studs are then inserted through the holes in the weights base plate where the rotor screws had been attached previously.
Next install the new rotor over the magnet ring studs and secure with the supplied washers and nuts.
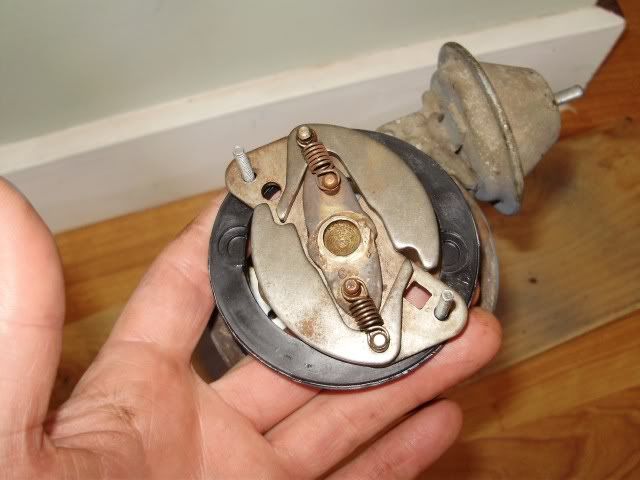
The Ignitor installs in the same location that the points were removed from. There is a small nub on the breaker plate, which fits into a hole in the Ignitor base. The Ignitor is in place when the two screw holes are aligned and the nub slips into the hole in the Ignitor base. This is what it looks like installed.
Next check the gap between the Ignitor module and the magnet ring. The instructions are pretty specific about this measurement; the lowest gap no less than .010", then rotate the rotor to find the highest gap, which should be no greater than .060".
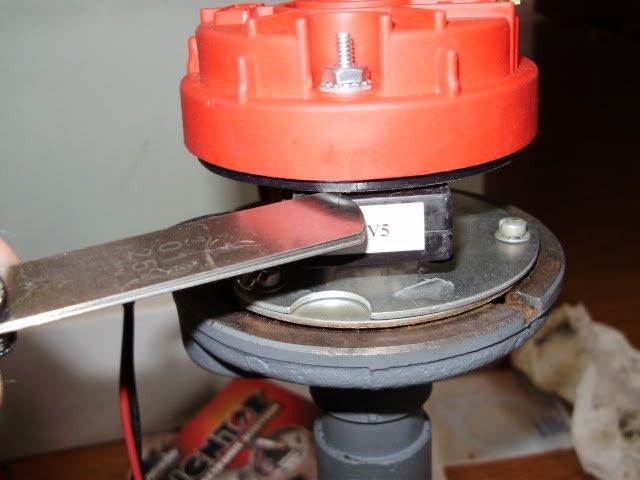
The gaps need to be measured with the distributor gear at its lowest point in the shaft and also with the distributor gear pushed up. It's a slight difference, but the gap parameters are the same in both positions. The kit comes with washers to use as spacers for both the magnet ring and the distributor gear if needed. My gaps were fine without the spacers. A new grommet is supplied with the kit, which is installed in the underside of the distributor housing then run the Ignitor wires through.
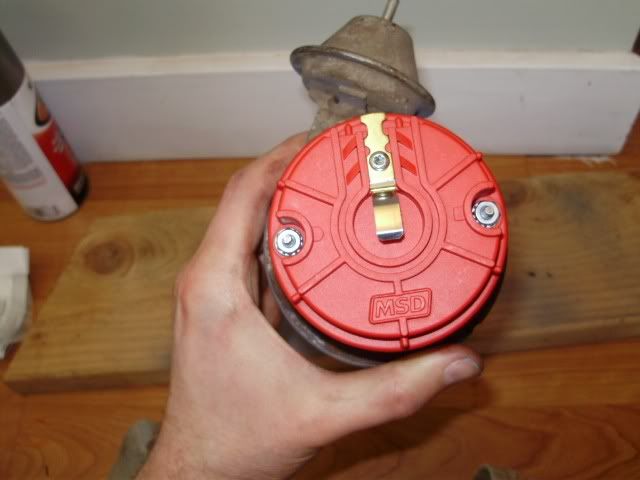
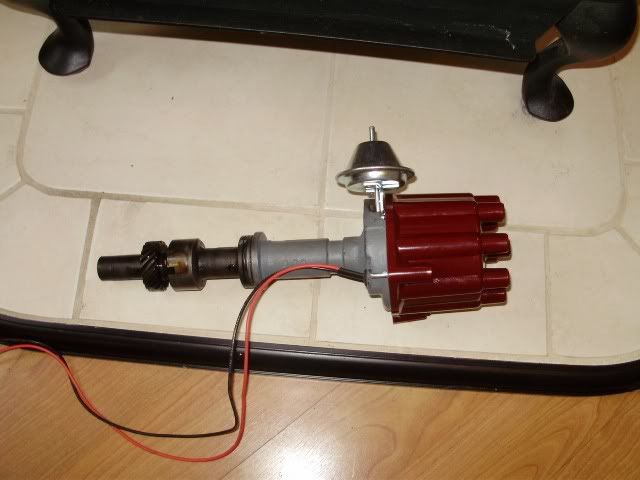
Lastly, I replaced the vacuum advance. This required that I remove the Pertronix kit and rotor, but by this stage in the conversion I could practically remove and install the kit with my eyes closed...I topped it off with the MSD cap, which fit perfectly. I also painted the distributor shaft after a good cleaning
And that's it! Let me know what you guys think. This was a first for me (in so many ways) and I'm eager for feedback...
First remove the distributor cap and note the position of the rotor before removing the distributor. The distributor must be removed in order to check the air gap accurately once the kit is installed. I made a mark at the top of the shaft in line with the rotor, and then a mark at the base of the shaft and the corresponding gear tooth. The distributor is held in place by a steel bracket, which is easily removed after removing the single bolt.
Once the distributor is out you can remove the rotor. The weights and the plate they are mounted to were very greasy so I cleaned it thorougly with carb cleaner and a toothbrush before installing the kit.
Disconnect the condensor wire by removing this screw.
Remove the points, which are held on by two screws. These screws need to be saved as they are used later to secure the Ignitor.
Disconnect the condensor by removing one screw. The condensor can then be removed.
Now you can install the kit. Start by installing the magnet ring, which slips over the weight assembly. The two threaded studs are then inserted through the holes in the weights base plate where the rotor screws had been attached previously.
Next install the new rotor over the magnet ring studs and secure with the supplied washers and nuts.
The Ignitor installs in the same location that the points were removed from. There is a small nub on the breaker plate, which fits into a hole in the Ignitor base. The Ignitor is in place when the two screw holes are aligned and the nub slips into the hole in the Ignitor base. This is what it looks like installed.
Next check the gap between the Ignitor module and the magnet ring. The instructions are pretty specific about this measurement; the lowest gap no less than .010", then rotate the rotor to find the highest gap, which should be no greater than .060".
The gaps need to be measured with the distributor gear at its lowest point in the shaft and also with the distributor gear pushed up. It's a slight difference, but the gap parameters are the same in both positions. The kit comes with washers to use as spacers for both the magnet ring and the distributor gear if needed. My gaps were fine without the spacers. A new grommet is supplied with the kit, which is installed in the underside of the distributor housing then run the Ignitor wires through.
Lastly, I replaced the vacuum advance. This required that I remove the Pertronix kit and rotor, but by this stage in the conversion I could practically remove and install the kit with my eyes closed...I topped it off with the MSD cap, which fit perfectly. I also painted the distributor shaft after a good cleaning
And that's it! Let me know what you guys think. This was a first for me (in so many ways) and I'm eager for feedback...

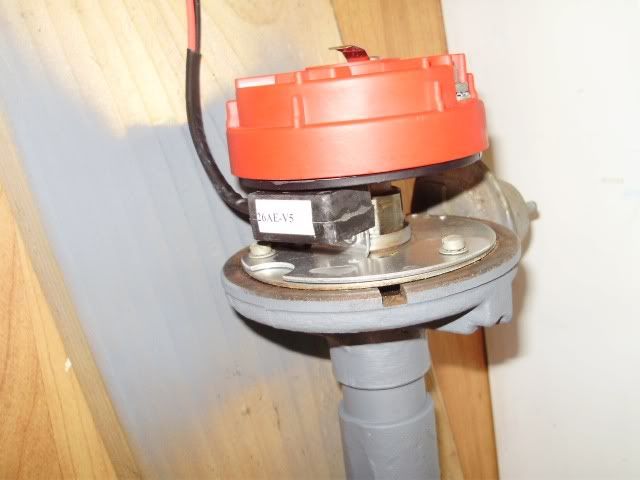
 I ran out of time to install it today, but the wiring seems pretty straight forward. I will also be replacing the stock coil with a Pertronix Flame Thrower coil. Unfortunately, I won't be able to give an update on performance right away because I'm still waiting on a 4 barrel carb and to have my radiator rebuilt


Comment