
 Tweet
Tweet
Like many of you I have had to repair or replace my blower resistor. I know there had been a few changes and that the one that the parts stores show (RU203) doesn't exactly work the same.
I know that some places do show that they have one that work (ryder/uhaul) but availability can be an issue. I would like to state that this was done on my 1988 - I don't know for sure what years this applies to. If someone knows, please add.
I am sure this information is posted somewhere, but I spent more time searching than I did finding so I figured I would put this out there.
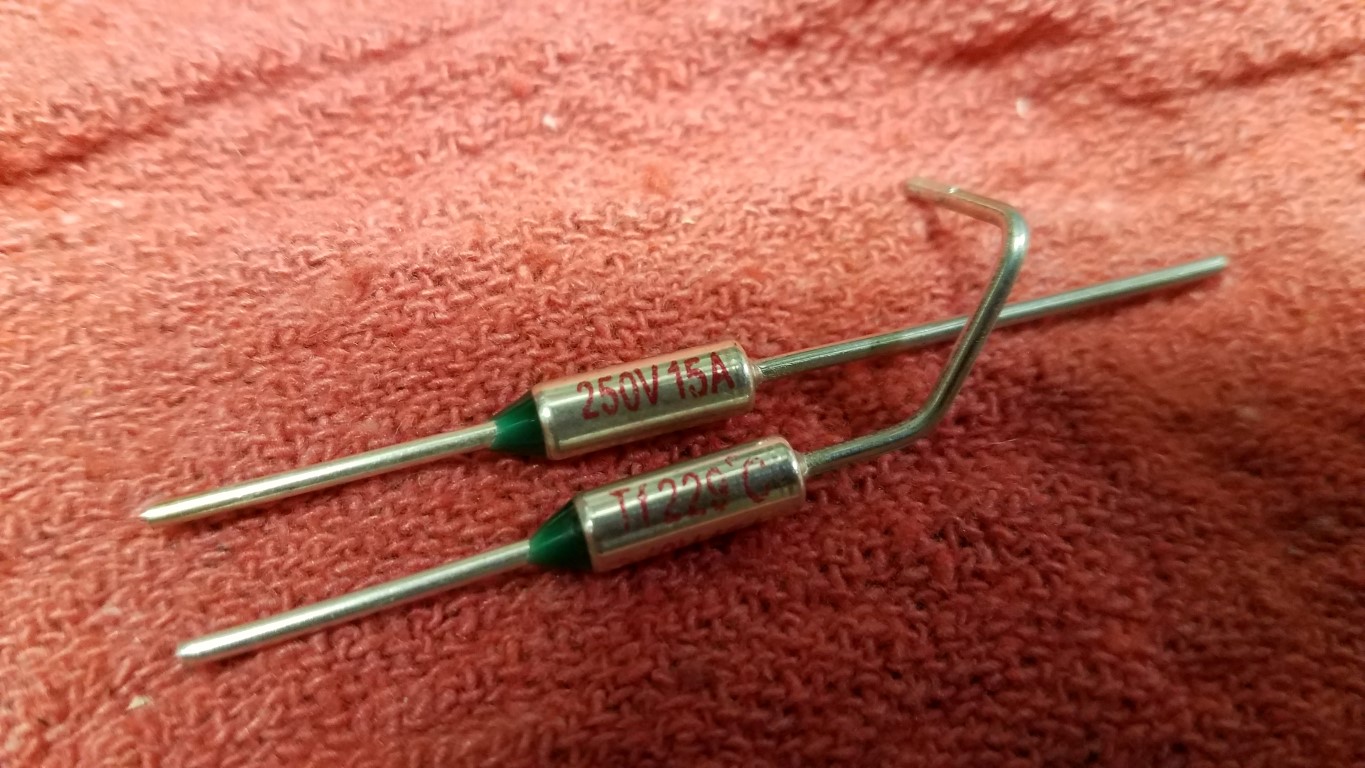
Stock on left, RU203 on the right. Also pictured is the thermal fuse (Tf 229°C 229 Deg C 15A 250V) which is what goes bad, and a terminal - more on that later.

Thermal fuse - Tf 229°C 229 Deg C 15A 250V
FIXING YOUR EXISTING RESISTOR PACK:
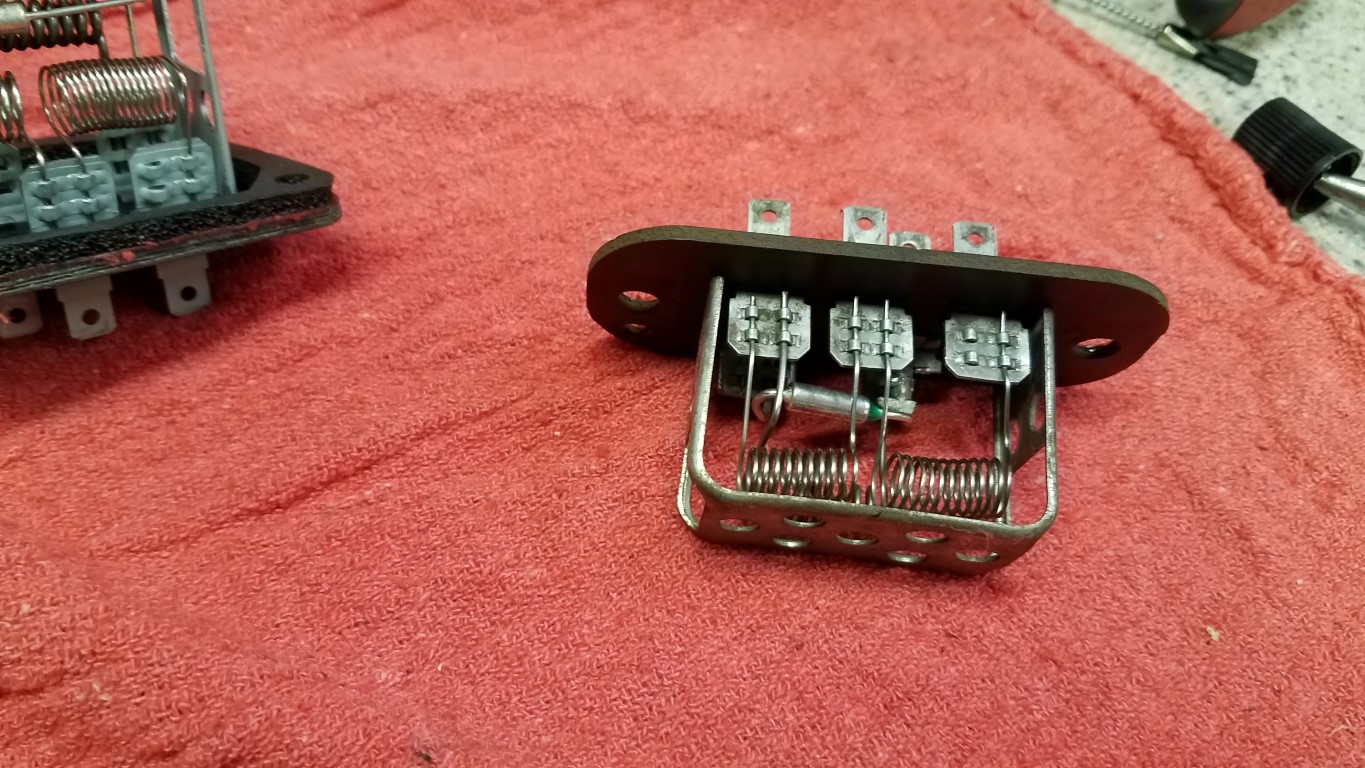
The stock resistor for my '88

Remove the old thermal fuse, inspect all coils for breaks or damage. If you have damaged coils they will need to be replaced, but most likely you do not.
It is easiest to snip the old thermal fuse out, you can drill out the tab or push and pry until your fingers bleed but all you need to do is cut it off.

Bend the new TF to fit

I removed the protective cage to make my work easier but this step is not necessary. If you would like to it's quite easy by bending the tabs out (GLPT scraped away) and the pull off the cage.

You can put the end of the TF in the open loops on the left terminal. For the right terminal, I made a 'clamp' but snipping out some of the metal and folding it over. Crimp the TF in place with a pliers or similar.

I sealed the terminals with RTV instead of GLPT, easier to remove if i needed to and still protects the terminals.

MODIFYING AN RU203:
There are a handful of methods available to utilize the RU203, but I went for the closest I could get to the stock unit. I did not modify the shape as it should still screw in with minimal modification. You may want to modif for your purposes however.
RU203, fresh out of the package


The first thing I did was modify the male terminal, prying open with a screwdriver of similar width to the existing 'stub'


Remove the thermal fuse, you don't want to do the next steps until you do, you could overheat and damage the TF.

Flux and solder the new terminal on the stub. Sand/clean the metal prior for good contact.


Now put the termal fuse in place. I used one existing open crimp and then soldered the other leg to the existing stub left from where it was cut. Solder quickly, attach a heatsink if you feel it's needed. You just need one quick dab to get it to join. Dont apply too much heat or for too long.


After it's soldered, you can trim up the leftover leg and crimp the other.

Now the coils. The larger primary coil need to be removed and re-situated. Since this is a big tough spring, you can wiggle and pry it out with a pliers.

The coil needs to be uncoiled and bent slightly so that one leg can reach the rear.


Completed RU203 modified next to the stock one done earlier.

And same as before, I added RTV to seal the terminals.

Hope this helps someone, please feel free to add any pertinent information.
I know that some places do show that they have one that work (ryder/uhaul) but availability can be an issue. I would like to state that this was done on my 1988 - I don't know for sure what years this applies to. If someone knows, please add.
I am sure this information is posted somewhere, but I spent more time searching than I did finding so I figured I would put this out there.
Stock on left, RU203 on the right. Also pictured is the thermal fuse (Tf 229°C 229 Deg C 15A 250V) which is what goes bad, and a terminal - more on that later.
Thermal fuse - Tf 229°C 229 Deg C 15A 250V
FIXING YOUR EXISTING RESISTOR PACK:
The stock resistor for my '88
Remove the old thermal fuse, inspect all coils for breaks or damage. If you have damaged coils they will need to be replaced, but most likely you do not.
It is easiest to snip the old thermal fuse out, you can drill out the tab or push and pry until your fingers bleed but all you need to do is cut it off.
Bend the new TF to fit
I removed the protective cage to make my work easier but this step is not necessary. If you would like to it's quite easy by bending the tabs out (GLPT scraped away) and the pull off the cage.
You can put the end of the TF in the open loops on the left terminal. For the right terminal, I made a 'clamp' but snipping out some of the metal and folding it over. Crimp the TF in place with a pliers or similar.
I sealed the terminals with RTV instead of GLPT, easier to remove if i needed to and still protects the terminals.
MODIFYING AN RU203:
There are a handful of methods available to utilize the RU203, but I went for the closest I could get to the stock unit. I did not modify the shape as it should still screw in with minimal modification. You may want to modif for your purposes however.
RU203, fresh out of the package
The first thing I did was modify the male terminal, prying open with a screwdriver of similar width to the existing 'stub'
Remove the thermal fuse, you don't want to do the next steps until you do, you could overheat and damage the TF.
Flux and solder the new terminal on the stub. Sand/clean the metal prior for good contact.
Now put the termal fuse in place. I used one existing open crimp and then soldered the other leg to the existing stub left from where it was cut. Solder quickly, attach a heatsink if you feel it's needed. You just need one quick dab to get it to join. Dont apply too much heat or for too long.
After it's soldered, you can trim up the leftover leg and crimp the other.
Now the coils. The larger primary coil need to be removed and re-situated. Since this is a big tough spring, you can wiggle and pry it out with a pliers.
The coil needs to be uncoiled and bent slightly so that one leg can reach the rear.
Completed RU203 modified next to the stock one done earlier.
And same as before, I added RTV to seal the terminals.
Hope this helps someone, please feel free to add any pertinent information.


Comment