
 Tweet
Tweet
I worked on the snorkel today and have it just about finished.
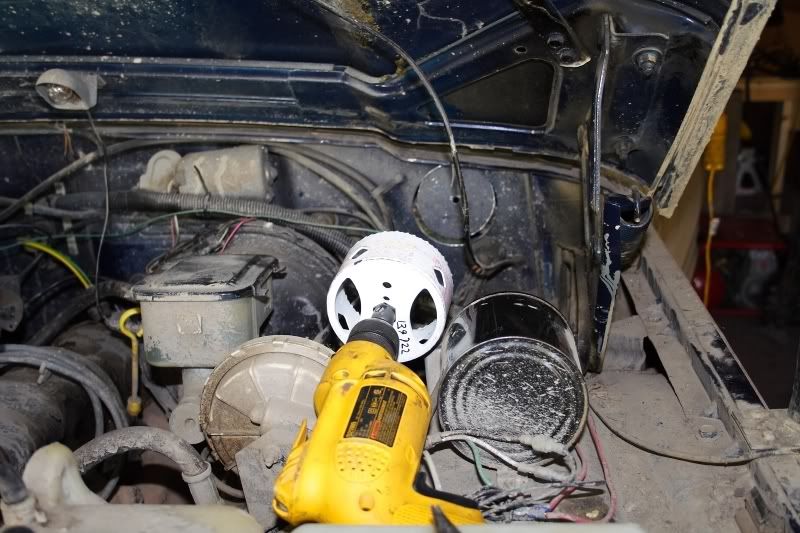
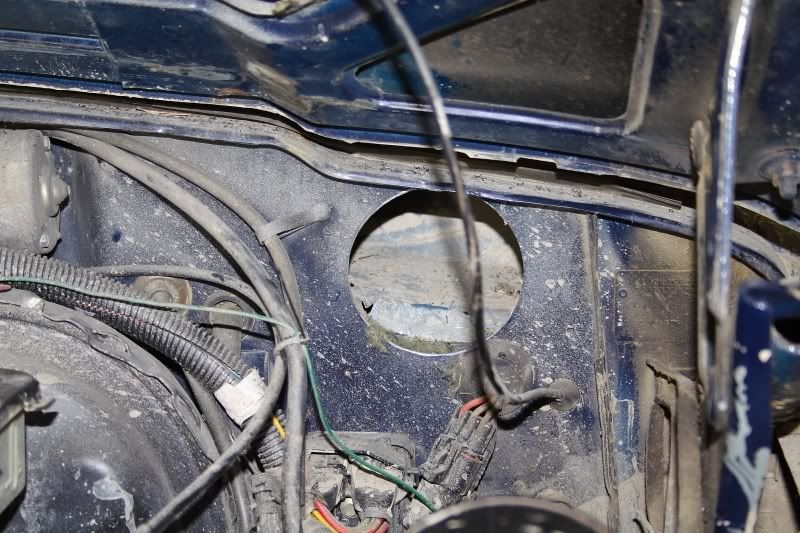
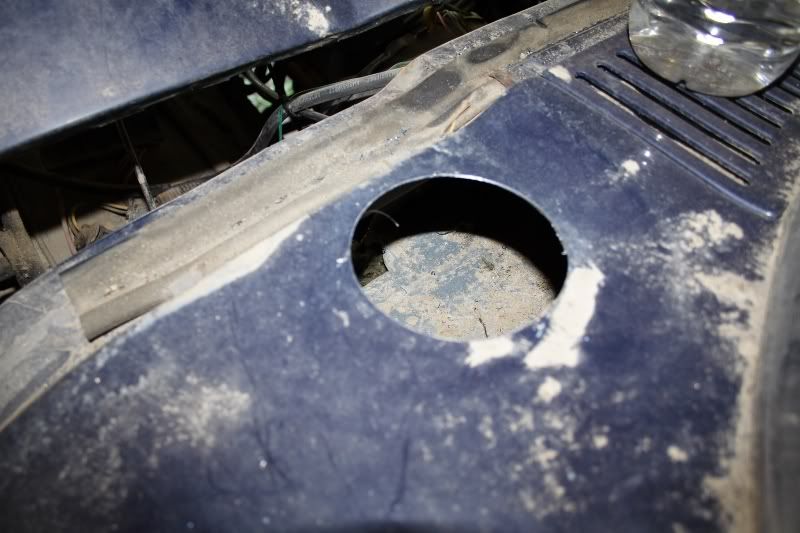
I used a 4 " hole say to go through the firewall into the cowl. In hind sight, the 4" size was a little large in that it cut through the bottom of the cowl, giving me a pool under the dash until I sealed it up. I used a 3" hole saw for the top of the cowl as I wanted it to be a tight fit. I inserted a NEL 9x90 Rubber elbow into the hole for the 3" OD exhaust tubing to fit into.
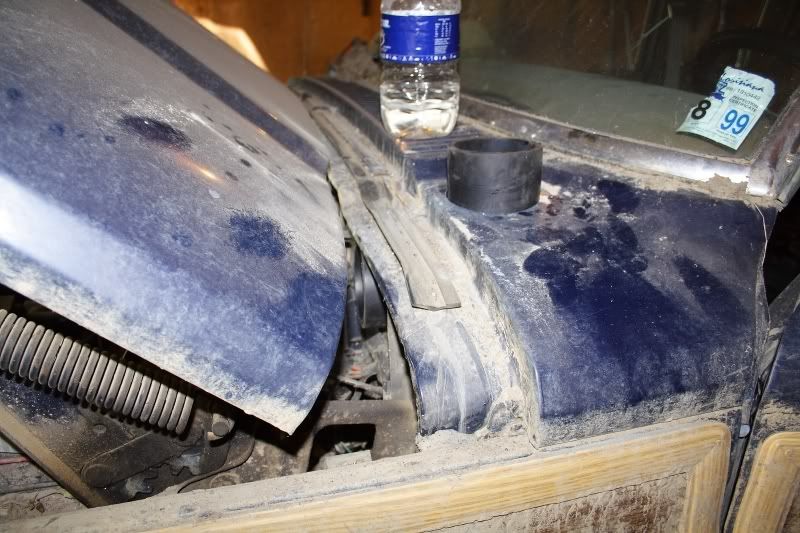
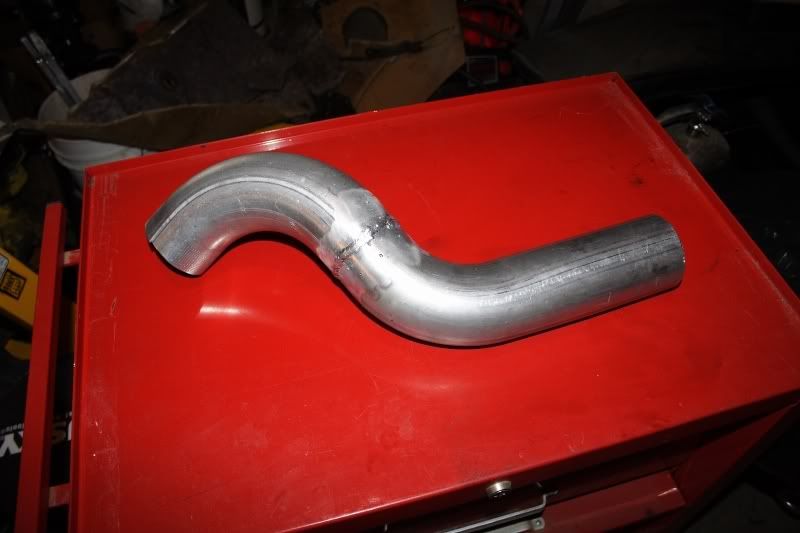
Next, I purchased a 3" OD mandrel bent 90 degree elbow to use above the cowl in order to keep it as tight as possible. I then used a 3" OD mandrel bent 60 degree elbow to make the final curve up the a-pillar. The two pieces were welded together, ground smooth and painted flat black.
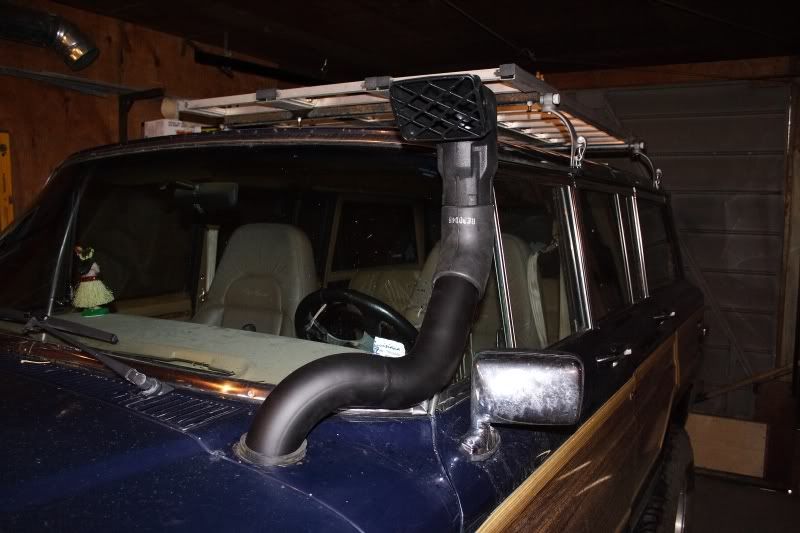
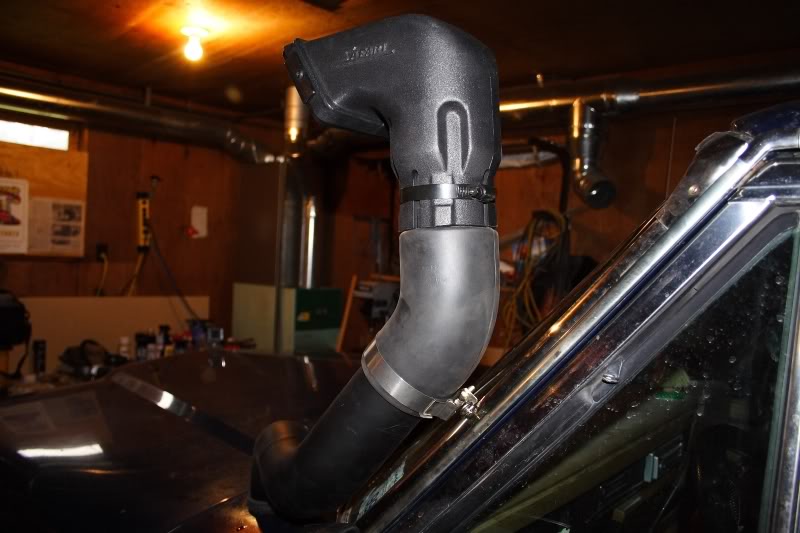
At the top of this pipe, I used a 3" ID 45 degree rubber elbow, about 1/2 a foot of 3" OD exhaust pipe and then the top of a Safari Snorkel that I had purchased in a group buy about a year ago. I clamped it together and drilled through the a-pillar and securred it.
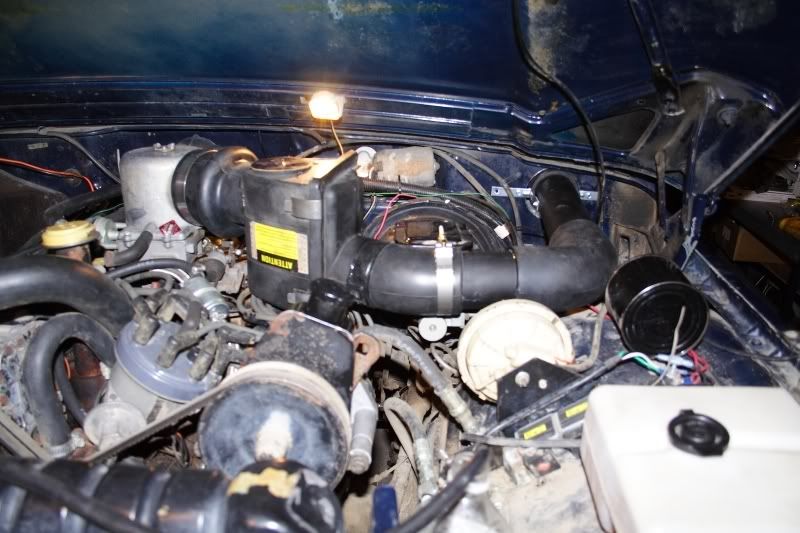
For under the hood, I used a propane convertion hood into a 5" to 4" rubber adapter and then into the air filter box from a mid 90's Buick Century. Then it was a 3" ID rubber insert in the filter box, some more 3" OD exhaust pipe, a 3" ID rubber 45 degree elbow, some more 3" exhaust pipe into a 90 degree rubber elbow and finally some more 3" exhaust pipe. All the pipe was primed and painted flat black and adhesive was used on some of the joints and clamps where I wanted to be able to remove them easily to get at the filter. One issue that I had was stabilizing the 90 degree rubber elbow in the cowl. This was solved by mounting the pipe above the cowl to the a-pillar and then mounting the pipe going through the firewall to the firewall with 2 modified Home Depot L-brackets, which still need to be painted.
For the most part, it is done. I just need to confirm the integrity of the connections and test it. The Filter box just rests on the valve covers and the pipe that comes out of it rests on the cruise control module, but that piece is rubber, so I don't expect too much wear. I'll get some better outside pictures in the next few days to give you a better idea of how it looks.
Greg
I used a 4 " hole say to go through the firewall into the cowl. In hind sight, the 4" size was a little large in that it cut through the bottom of the cowl, giving me a pool under the dash until I sealed it up. I used a 3" hole saw for the top of the cowl as I wanted it to be a tight fit. I inserted a NEL 9x90 Rubber elbow into the hole for the 3" OD exhaust tubing to fit into.
Next, I purchased a 3" OD mandrel bent 90 degree elbow to use above the cowl in order to keep it as tight as possible. I then used a 3" OD mandrel bent 60 degree elbow to make the final curve up the a-pillar. The two pieces were welded together, ground smooth and painted flat black.
At the top of this pipe, I used a 3" ID 45 degree rubber elbow, about 1/2 a foot of 3" OD exhaust pipe and then the top of a Safari Snorkel that I had purchased in a group buy about a year ago. I clamped it together and drilled through the a-pillar and securred it.
For under the hood, I used a propane convertion hood into a 5" to 4" rubber adapter and then into the air filter box from a mid 90's Buick Century. Then it was a 3" ID rubber insert in the filter box, some more 3" OD exhaust pipe, a 3" ID rubber 45 degree elbow, some more 3" exhaust pipe into a 90 degree rubber elbow and finally some more 3" exhaust pipe. All the pipe was primed and painted flat black and adhesive was used on some of the joints and clamps where I wanted to be able to remove them easily to get at the filter. One issue that I had was stabilizing the 90 degree rubber elbow in the cowl. This was solved by mounting the pipe above the cowl to the a-pillar and then mounting the pipe going through the firewall to the firewall with 2 modified Home Depot L-brackets, which still need to be painted.
For the most part, it is done. I just need to confirm the integrity of the connections and test it. The Filter box just rests on the valve covers and the pipe that comes out of it rests on the cruise control module, but that piece is rubber, so I don't expect too much wear. I'll get some better outside pictures in the next few days to give you a better idea of how it looks.
Greg


 & Hydroboost, EDL performer intake and cam, Howell TBI, CS144, front & rear customer tube bumpers, Warn 12k
Comment