AMC360 build with 343 Rebuild Kit

Collapse
X
 
  • Filter
  • Time
  • Show
Clear All
new posts
  • SC/397
    Administrator
    • Feb 01, 2010
    • 1024

    AMC360 build with 343 Rebuild Kit

    This is more or less a repeat of this build thread but this time, we are using a complete off the shelf 343 rebuild kit from Ebay. This one is for ELRonDeCuba going to France.
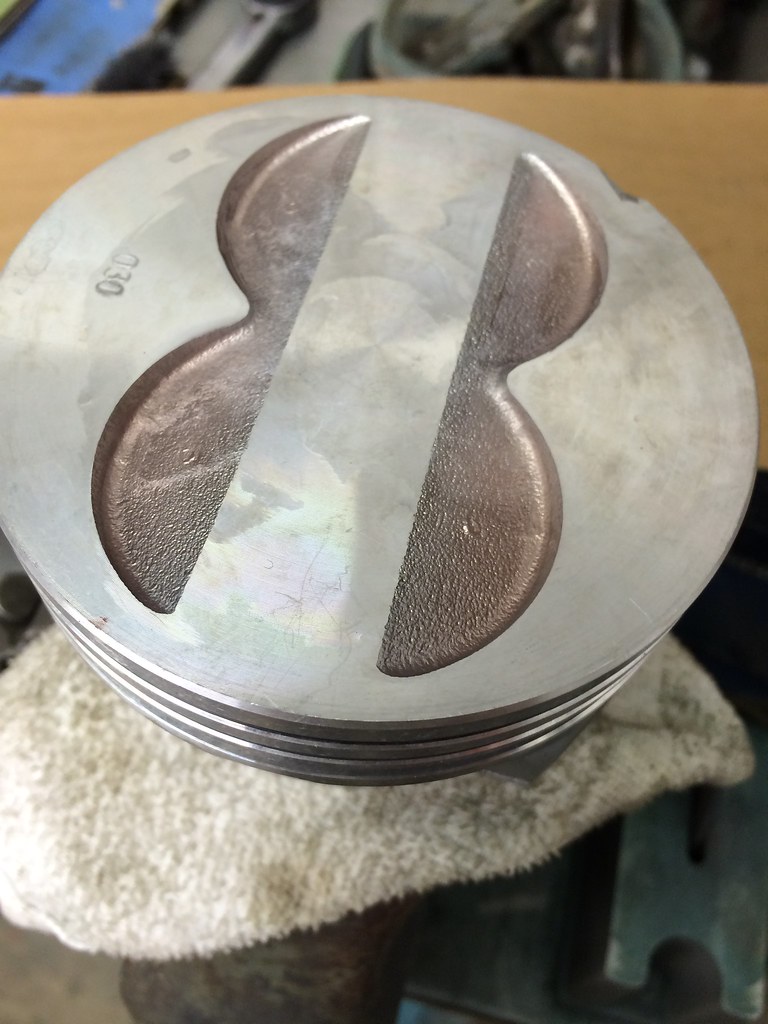
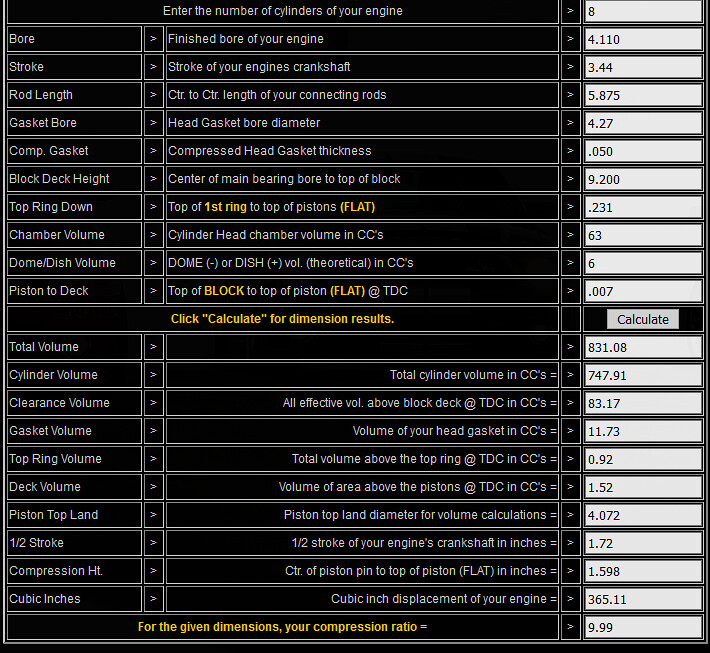
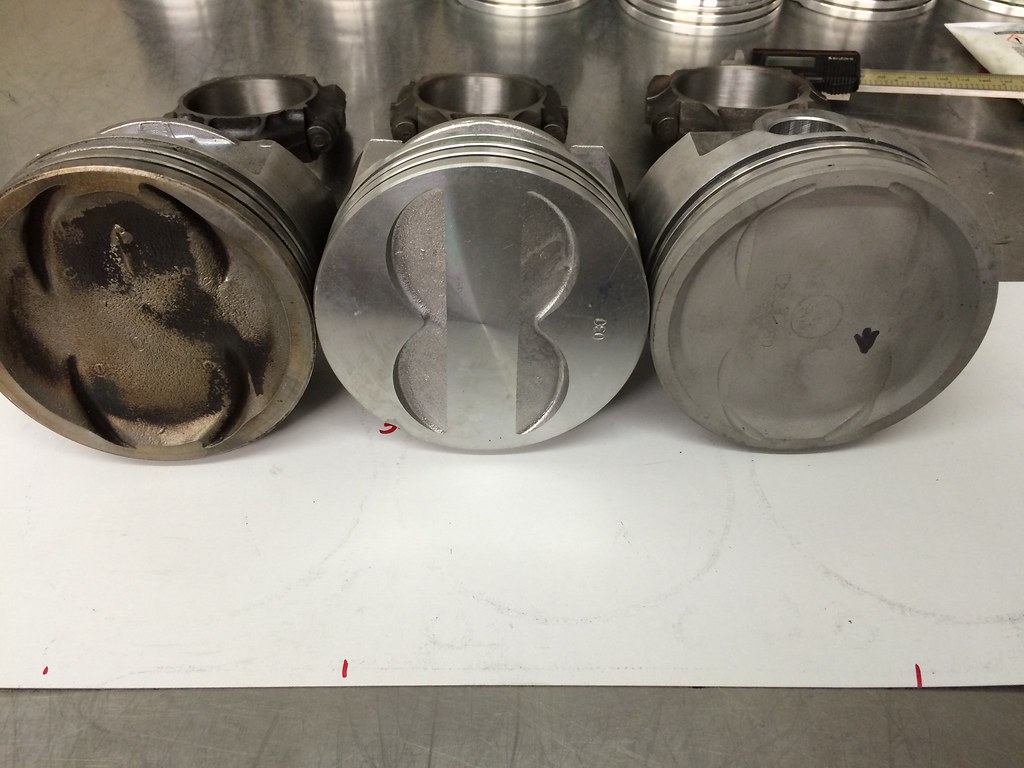
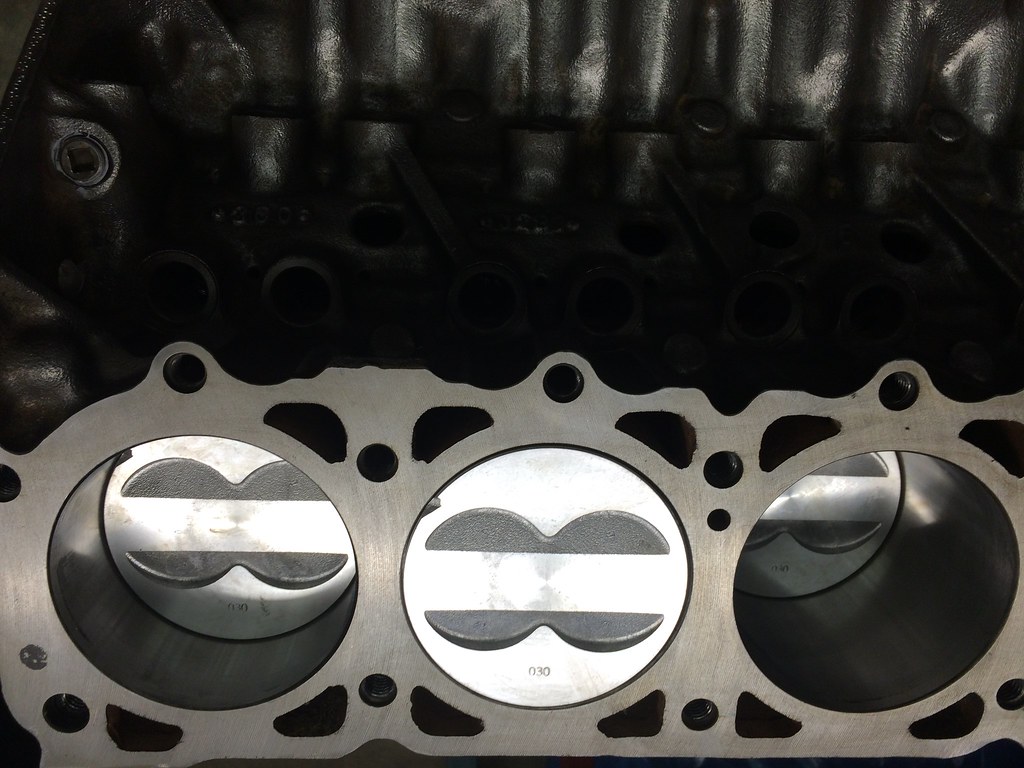
    Again, the idea is to use off the shelf 343 flat top pistons to boost the compression ratio just below the magical number of 10.0:1 to be able to run on regular old pump gas.

    This post is about a simple rebuild on a late model low compression 360 to get the most bang for the buck. The idea is to use off the shelf 343 flat top pistons to boost the compression ratio along with an inexpensive cam, intake and carb. The goal is to maximize the compression ratio but to keep it below the magical number of


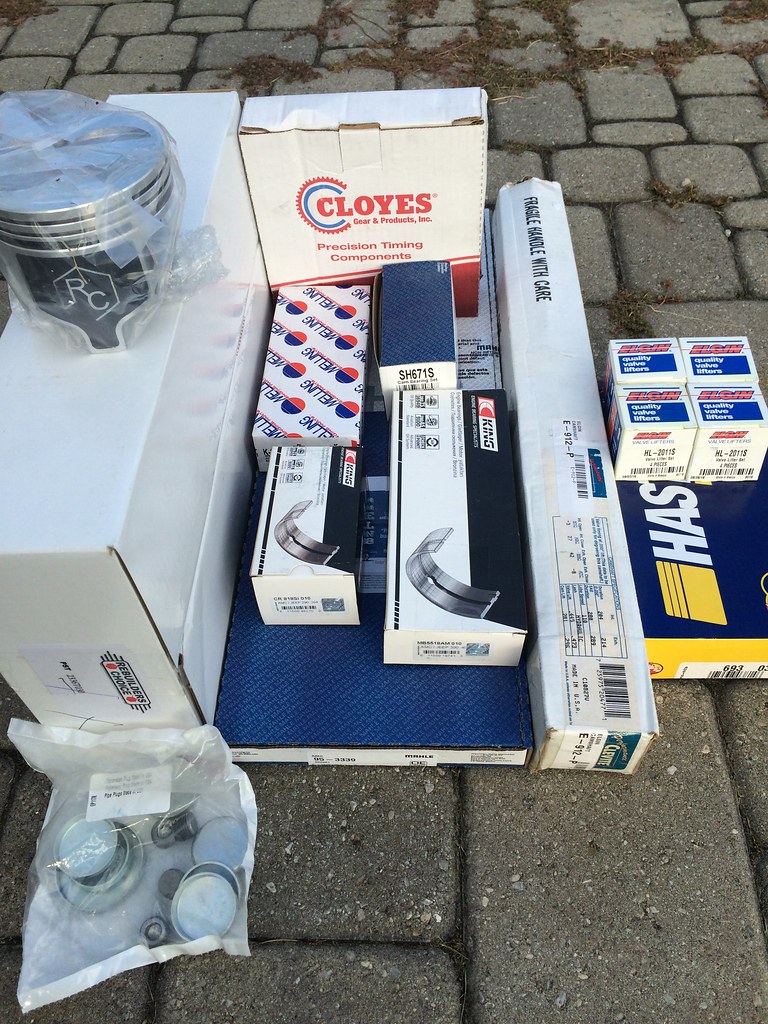
    This is the kit that I bought off of Ebay.


    This the actual kit.
    IMG_0813 by Rick Jones, on Flickr
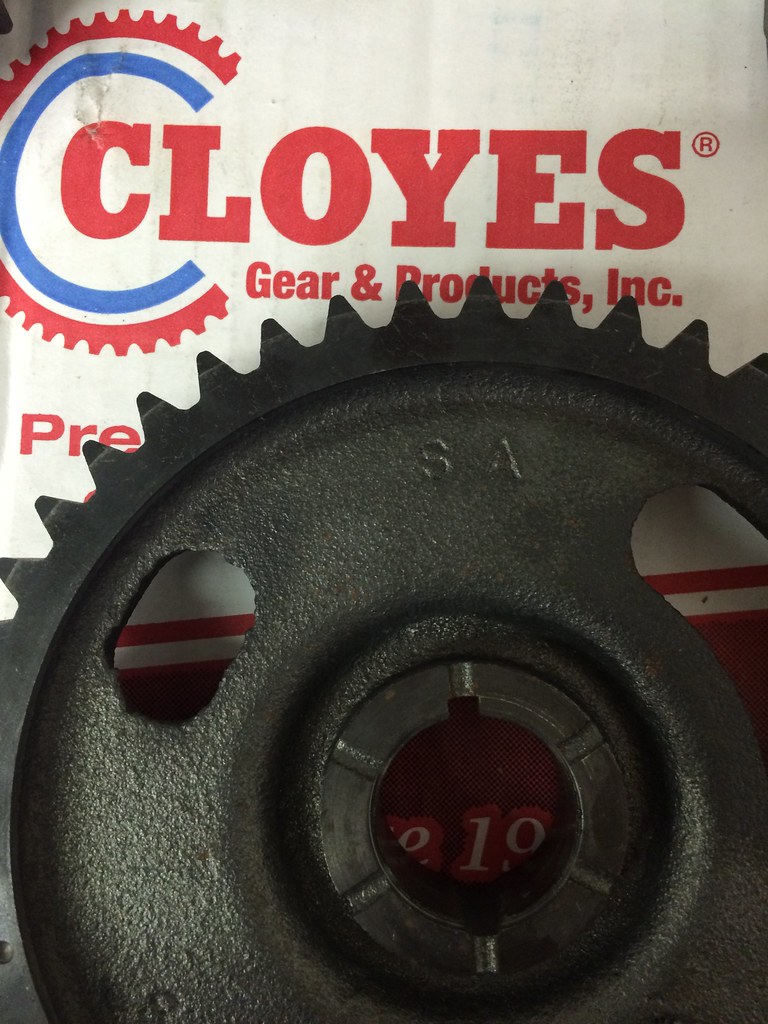
    The cam card.
    IMG_0814 by Rick Jones, on Flickr


    The first key things that I had to do before ordering the kit was:
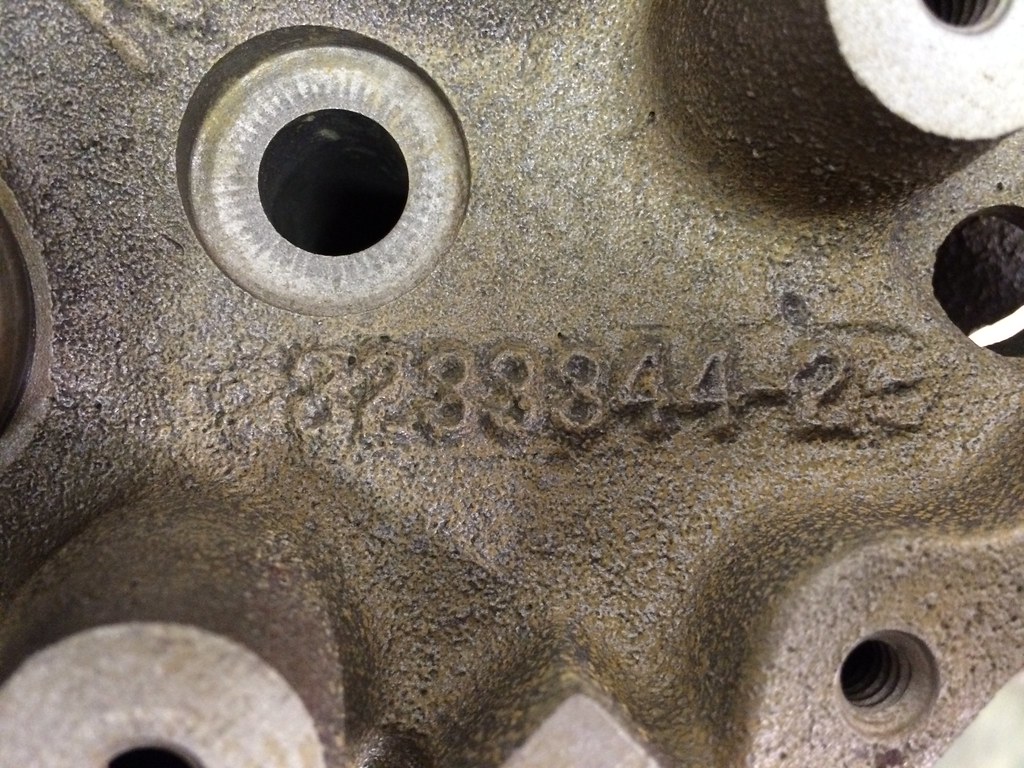
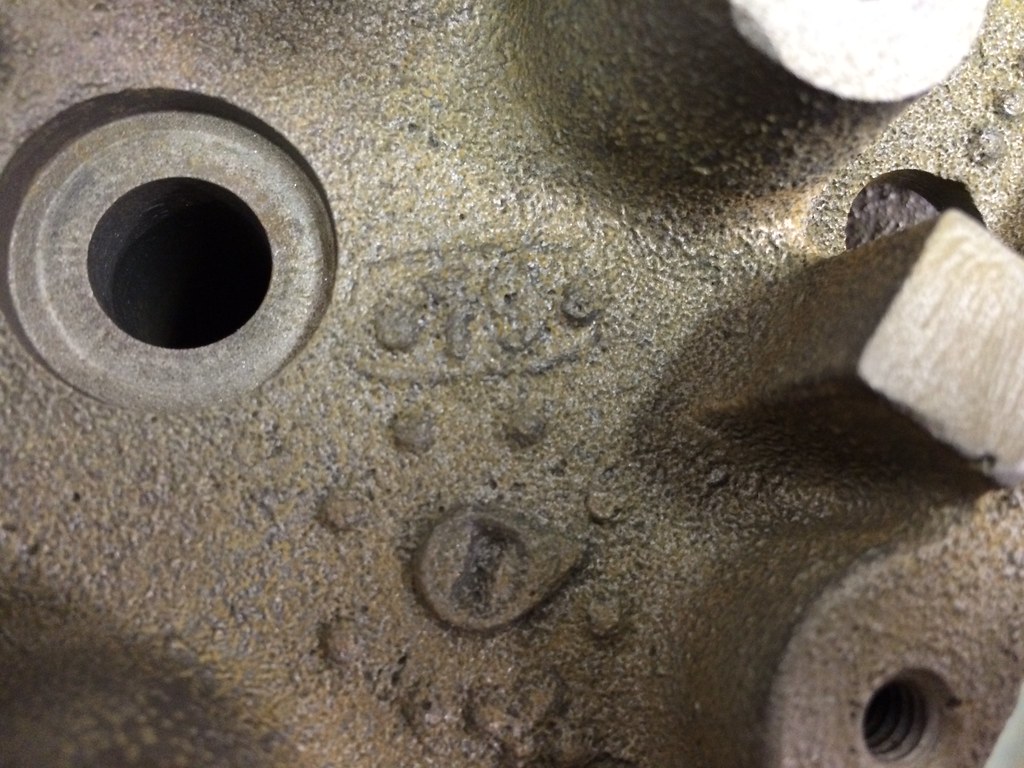
    1. Select a pair of cylinder heads with the largest combustion chamber (63cc) so that I can keep the compression ratio below 10.0:1. I found a set of cylinder heads casted from 1978 that have the 63cc combustion chamber. They vary quite a bit from year to year and must be checked to make sure of the chamber size.
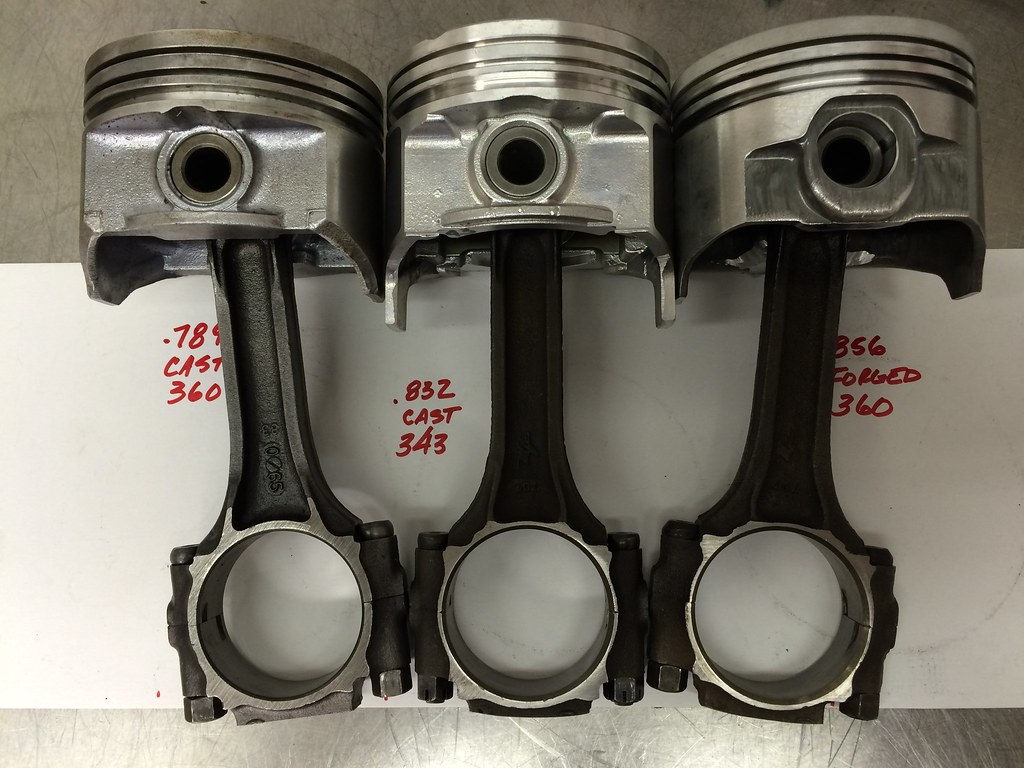
    2. Determine what over size pistons were needed.
    3. Determine what under size Rod and Main Bearings were needed.
    Last edited by SC/397; 06-16-2021, 03:52 AM.
    The Squeaky Wheel gets replaced in my world
  • SC/397
    Administrator
    • Feb 01, 2010
    • 1024

    #2
    Here is a picture of the casting number on the cylinder head.
    IMG_1201 by Rick Jones, on Flickr


    Here is the date code 79.
    IMG_1200 by Rick Jones, on Flickr


    Just to confirm, I measured the combustion chamber which came out to 63cc.
    IMG_1202 by Rick Jones, on Flickr
    For reference, here are the approximate combustion chamber sizes for the various years.
    They vary and must be measured to confirm.
    51cc - 1970 & early 1971 #3196291C
    58cc - 1971 through 1974 #3212993, #3213948, #3220502
    60cc - 1975 through 1977 #3220503
    63cc - 1978 and up.


    I measured the head gasket as well so that I could calculate what the compression will be.
    IMG_1199 by Rick Jones, on Flickr


    The valve reliefs in the piston measured about 6cc.
    IMG_1198 by Rick Jones, on Flickr


    For calculation purposes, I assumed that the head gasket would crush to about .050"
    Here is the calculations for the compression ratio.
    360-343CompRatio by Rick Jones, on Flickr
    Last edited by SC/397; 06-16-2021, 03:53 AM.
    The Squeaky Wheel gets replaced in my world

    Comment

    • SC/397
      Administrator
      • Feb 01, 2010
      • 1024

      #3
      I had learned that one of the critical measurements that I needed to take is from the piston pin center line to the bottom of the piston to make sure that there will be clearance to the crank throws. The left piston is a normal cast 360 piston. The center piston is the new 343 piston. The piston on the right is a forged 360 piston. From the measurements, the 343 piston will be fine.
      IMG_1205 by Rick Jones, on Flickr


      Big difference between the 360 dished pistons and the 343 flat top.
      IMG_1206 by Rick Jones, on Flickr
      The Squeaky Wheel gets replaced in my world

      Comment

      • SC/397
        Administrator
        • Feb 01, 2010
        • 1024

        #4
        The timing set that came in the kit is a Cloyes C-3008K which is actually SA Gear timing set. It is also the same as the Summit G6508 among others.
        IMG_1189 by Rick Jones, on Flickr


        I checked the oil feed cavity on the back side of the timing gear to see if it lines up with the oil feed hole in the cam. It doesn't. This will have to be reworked to assure oil flow to the distributor gear. This is typical. It is rare that I don't have to correct these.
        IMG_1190 by Rick Jones, on Flickr


        I moved the slot over with my die grinder. I always clean out the transfer slot as well.
        IMG_1212 by Rick Jones, on Flickr
        Looks like it will work now.
        IMG_1209 by Rick Jones, on Flickr


        I braze all the slots on the front shut except for the one at the key way slot. The factory didn't put these in and they rob oil from the distributor gear. I learned the hard way that with cast iron like this I need to heat the whole thing up before brazing.
        IMG_1213 by Rick Jones, on Flickr


        There were no instructions or cam lube provided with the cam so, I use CRC SL3331 to lubricate the cam lobes.
        IMG_1188 by Rick Jones, on Flickr
        The Squeaky Wheel gets replaced in my world

        Comment

        • SC/397
          Administrator
          • Feb 01, 2010
          • 1024

          #5
          The gasket set that came in the kit is a MAHLE AMC 95-3339. There are only rubber valve seals in the kit and there is no nylon type which is the ones I would rather use. We will be using positive seals in the build so not a issue. The distributor gasket is over size and I won't be able to use that either. The rest of the gaskets seem to be ok.

          The FelPro 260-1151 is a better gasket set.
          IMG_1203 by Rick Jones, on Flickr
          The Squeaky Wheel gets replaced in my world

          Comment

          • SC/397
            Administrator
            • Feb 01, 2010
            • 1024

            #6
            Short block is together. Now it has to rest for a few days before I can get back to it.


            IMG_1214 by Rick Jones, on Flickr
            Last edited by SC/397; 08-09-2020, 05:21 AM.
            The Squeaky Wheel gets replaced in my world

            Comment

            • wiley-moeracing
              350 Buick
              • Feb 15, 2010
              • 1430

              #7
              Very interested, been thinking about doing this same build for a while now. My concern is with the piston skirts clearing the crank? and wonder about the quality of the pistons?, keep posting. Thanks

              Comment

              • rang-a-stang
                Administrator
                • Oct 31, 2016
                • 5505

                #8
                Subscribed. Love this stuff.
                Chuck McTruck 71 J4000
                (Chuck McTruck Build Thread)
                (8.1L swap questions - PerformanceTrucks.net Forums​)
                79 Cherokee Chief (SOLD, goodbye old buddy)
                (Cherokee Build Thread)
                11 Nissan Pathfinder Silver Edition 4x4
                09 Mazdaspeed3 Grand Touring
                00 Baby Cherokee

                Comment

                • SC/397
                  Administrator
                  • Feb 01, 2010
                  • 1024

                  #9
                  Originally posted by wiley-moeracing
                  Very interested, been thinking about doing this same build for a while now. My concern is with the piston skirts clearing the crank? and wonder about the quality of the pistons?, keep posting. Thanks
                  There is plenty of clearance in there, I will try to get a picture. The pistons are cast PST brand and look as good as any cast piston.
                  IMG_1224 by Rick Jones, on Flickr
                  Last edited by SC/397; 01-29-2019, 03:05 PM.
                  The Squeaky Wheel gets replaced in my world

                  Comment

                  • SC/397
                    Administrator
                    • Feb 01, 2010
                    • 1024

                    #10
                    I would say there is at least 0.090" clearance between the crank throw and the bottom of the piston.
                    IMG_1234 by Rick Jones, on Flickr
                    IMG_1233 by Rick Jones, on Flickr
                    The Squeaky Wheel gets replaced in my world

                    Comment

                    • SC/397
                      Administrator
                      • Feb 01, 2010
                      • 1024

                      #11
                      Oil Pick Up Screen - The little button in the center is the factory stock part that just about always falls off. The button is there in case the bottom of the oil pan gets pushed up to the screen. I replace them with a 1/4"-20 x 3/8" bolt and nut installed with loctite.
                      IMG_1237 by Rick Jones, on Flickr
                      IMG_1238 by Rick Jones, on Flickr


                      Timing cover - I sandblast it and spray a coat of zincrom primer on it. After that I spray a coat of paint where the water pump mounts and the coolant passage. I also hand lap the oil pump cover area.
                      IMG_1239 by Rick Jones, on Flickr


                      Oil Pan - I always test fit it without a gasket first. Every now and then you have to tighten the oil pick up tube and or, tweak the pan here and there. This is a new pan and it cleared the screen but wouldn't fit over the main caps without some effort. I did a little body work with a hammer at the rear of the pan and then it fit fine.
                      IMG_1240 by Rick Jones, on Flickr
                      The Squeaky Wheel gets replaced in my world

                      Comment

                      • asphaltrockdweller
                        350 Buick
                        • Jul 09, 2009
                        • 1218

                        #12
                        Rick I love reading your engine build threads.
                        I have learned so much from you over the years, and truly appreciate your attention to detail on these builds.

                        Thanks again!
                        (Ristow)fram!....that deserves a ratchet upside the head.

                        Comment

                        • Probesport
                          232 I6
                          • Apr 15, 2015
                          • 155

                          #13
                          I'm watching this one, an engine rebuild is on my list.

                          I'm also in Michigan, are you doing your own machining or do you have a preferred shop? I don't mind building, but I don't have anything large enough to do my own machining....
                          Ken S.
                          Jeep toy: 1988 Jeep Grand Wagoneer
                          Megasquirt EFI
                          : Heated Seats : Blower fix : Driving light brackets : Shorty headers : Coil Packs : Electric Fans
                          Prior Jeeps: 1997 Jeep Wrangler TJ, 1994 Jeep Grand Cherokee Limited
                          Other toys: 1930 Model A (Hotrod), 1997 Ford Probe Turbo, 2000 Jaguar XJ8, 2005 VW Touareg

                          Comment

                          • SC/397
                            Administrator
                            • Feb 01, 2010
                            • 1024

                            #14
                            Originally posted by asphaltrockdweller
                            Rick I love reading your engine build threads.
                            I have learned so much from you over the years, and truly appreciate your attention to detail on these builds.

                            Thanks again!
                            Thanks Man! I just do my best, I build them all as if they are for me.
                            Last edited by SC/397; 02-02-2019, 05:21 AM.
                            The Squeaky Wheel gets replaced in my world

                            Comment

                            • SC/397
                              Administrator
                              • Feb 01, 2010
                              • 1024

                              #15
                              Originally posted by Probesport
                              I'm watching this one, an engine rebuild is on my list.

                              I'm also in Michigan, are you doing your own machining or do you have a preferred shop? I don't mind building, but I don't have anything large enough to do my own machining....
                              I am just a assembler. I use one Machine shop in Ottawa lake (1 mile north of Toledo) and another one near Jonesville MI.
                              Last edited by SC/397; 02-02-2019, 05:21 AM.
                              The Squeaky Wheel gets replaced in my world

                              Comment

                              Working...
                              X