Gauge Cluster Touch-Up and Voltmeter Swap Write-Up

Collapse
X
 
  • Filter
  • Time
  • Show
Clear All
new posts
  • Coryd55
    350 Buick
    • Jan 23, 2010
    • 1113

    Gauge Cluster Touch-Up and Voltmeter Swap Write-Up

    Spent a good portion of last night and about 5 minutes this morning working on my gauge cluster. Figured I would do a little walk through, since I couldn't find one and went into it blind (let me know if I did something wrong, missed something, etc.) Also, just a note: I disassembled two clusters and used the best parts from each. Just in case I mention that in the walkthrough, so it won't be confusing later on.

    What you'll need:

    Needle nose pliers
    Flat head screwdriver
    Philips head screwdriver
    Very fine steel wool
    Model paint (in the colors that you need to touch up)
    -I used Model Master flourescent red and gloss white and Testors red and dark blue
    Set of very small brushes (I used only a 10/0 and a 5/0)
    -They don't need to be expensive brushes, but make sure they are quality enough to hold up for detail work
    Invisible Glass (or other glass cleaner)
    Deep well 3/8" socket - a regular one works fine, but I suggest deep well so you can turn it by hand. However, you can use a regular 3/8" socket with no issue.
    Paper towels
    Power Drill
    Drill (bit) set
    Small torx bit (depending on year)
    Toothpicks
    Cotton swabs
    Isopropyl alcohol
    Emblem adhesive (or any other strong, long-lasting adhesive)
    -I used 3M emblem and badge adhesive
    Inverted voltmeter
    -Sunpro CP7985 works well
    Trashcan
    Common sense
    Gauge cluster in need of some love

    So, lets get started shall we?

    Removal:
    First things first, we need to remove the gauge cluster from the vehicle (if it is not already out). Simply reach under your dash and disconnect all the connectors and bulbs, then disconnnect your speedometer. It should slide out relatively easily (you may want to lay something over the steering column to protect the paint just in case). Be gentle with it--it really does not require much force to get out, you just have to find the right spot.

    Disassembly:
    Now what we will need to do, is begin disassembly. Make sure you keep track of you screws, nuts, bolts, etc, etc. However you have found best to keep up with them will work just fine. But, if you absolutely must follow this to a tee, I cut out a piece of cardboard in the shape of the cluster, then poke holes with scissors in the spots where there are screws. Next, I just poke them into their respective holes. This way I know exactly which screw goes where.

    Moving on, you will find three screws on the bottom of the circuit board and three on top. You will also find five screws around the perimeter of the AC controls. These all need to be removed. Next, pull the AC controls out (the knob on the temperature switch pulls off, make sure you remove it before removing the rest of the assembly). Next, remove the remaining gauge cluster assembly. Set the case and AC controls aside for now.


    Now we will disassemble the gauge cluster assembly. Looking at the back you will notice four studs coming through on the left, and five on the right--these are your gauges (except for your speedometer/odometer, that is the giant silver thing in the middle). If you flip the gauge cluster over, you will notice that your oil/amp and fuel/temp cover plates are held on by either a small hex head or torx head bolt. I did not have the proper size to remove the hex head with a socket, so I just grabbed onto it with needle nose pliers and twisted--they aren't torqued very tight, so this was not an issue. If yours is the torx style, then simply use the proper torx bit, or follow the previous advice if you don't have it.


    After the cover plates are off, turn the unit back over and remove the nuts (use the 3/8" deep well socket if they are to tight to hand remove) that hold the four outside gauges on (as noted above). The gauges should slide out without a hitch; set them aside. At this point, the oil/amp side of the metal plate between the circuit board and shell of cluster should come off--set it aside as well. Next, we will remove the speedometer assembly.


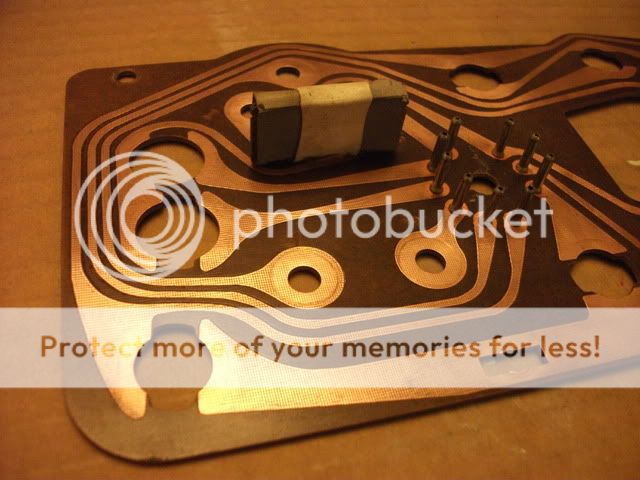
    Simply unscrew the two screws on the metal casing that is sticking up out of the center of the circuit board--this will release the speedometer. Set it aside as well.

    The unit should be fully disassembled at this point.
    1976 Cherokee Chief Build - Update 7/3/2014

    Chief for sale - contact via PM if interested.
  • Coryd55
    350 Buick
    • Jan 23, 2010
    • 1113

    #2
    Cleaning:
    Chances are, your unit has not been cleaned or maintained in 20-30 years. So lets take care of the dirt and grime that has built up over the years. Wash the cluster housing (plastic shell) with some warm soapy water, rinse it and dry it. I used some Invisible Glass to clean the lenses and cover plates. You can also wipe off the actual gauges themselves if they need it.

    Use the steel wool to remove any rust/grime from the metal backing plate. Wipe it off with a damp paper towel or cloth.


    Very lightly use the very fine steel wool to remove any oxidization or grime from the copper traces on the circuit board. Then, follow up with several cotton swabs dipped (not soaked) in rubbing/isopropyl alcohol. Make sure, especially, that the traces are clean near connectors.


    1976 Cherokee Chief Build - Update 7/3/2014

    Chief for sale - contact via PM if interested.

    Comment

    • Coryd55
      350 Buick
      • Jan 23, 2010
      • 1113

      #3
      Detail Work:
      Much of the detail work from the factory has worn down or deteriorated. Dull letters and chipping chrome can be quite an eyesore, so I decided to fix that problem. Pull out the model paint, brushes, steel wool, and screwdriver. Using your screwdriver or any other small tipped object, pop out the labels for the AC controls and the windshield wiper and lights labels. There are two sets of labels (one sheet of plastic for "OFF FAN HI, OFF HEAT DEF" and one for ""COOL-------WARM, WIPER WASHER, LIGHTS." Use the steel wool to remove any trim/paint that you want to refinish. Wipe the areas clean that you wish to touch up. Make sure any fibers from the steel wool (or any other debris) are removed. Use the finest brush you have and the white paint to paint the letters. I also used the white paint and the 5/0 brush to detail around the lenses (where chrome used to be), and the two strips towards the bottom of the assembly (another previously chromed spot). However, detail what you want, where you want, and in whatever colors you want. Set aside the labels and cluster shell to dry.


      If your gauges have faded areas, then get out the red paint and the 10/0 brush. Very, very carefully go over the previously red (now dull pinkish orange) areas with the brush. If you mess up or go outside the lines, you can use a toothpick for small areas, or some polish (Turtle Wax works) for larger messups. Now, using the flourescent red (or orange) paint, touch up the needles of your gauges (even if it looks like they don't need it, do it anyway--makes a big difference). Try not to apply too many coats because the added weight on the needle from the paint can throw your gauges out of calibration.


      Perform any other paint touchup/detailing that you wish.

      Set the gauges aside to dry.
      Last edited by Coryd55; 01-03-2012, 11:12 AM.
      1976 Cherokee Chief Build - Update 7/3/2014

      Chief for sale - contact via PM if interested.

      Comment

      • Coryd55
        350 Buick
        • Jan 23, 2010
        • 1113

        #4
        Voltmeter Swap:
        Now for the fun part. Get out your SunPro voltmeter and open the packaging.


        Remove the u-bracket on the back and set it aside (or throw it away if you don't plan on using it for anything--you won't need it for the swap).


        Use a flat head screwdriver to pry open and remove the metal bezel. It may be necessary to go all the way around the bezel to allow for smooth removal. If you break the glass, no problem because we won't be using it. Set aside the glass, bezel, and metal casing (Throw them away if you don't have any other use for them). The voltmeter should be down to its bare bones now. I used some of the flourescent red (or orange) paint on the needle to make it fit in better with the other gauges.


        This voltmeter is not a direct swap and requires some modification to the circuit board and metal plate. Get your drill ready and find what size drill bits fit the circuit board and metal plate (they are different sizes and I forget to record them while I was doing it). Measure 3mm down from the old holes on the circuit board. Drill pilot holes (I used about 4 bits, incrementally getting closer to the actual size to ensure the safety of the circuit board) and then drill the new holes. Transcribe those holes to the metal plate, and drill those holes. test fit the two gauges and make sure there is plenty of space. If there is not, use a round file to slowly enlarge the hole. If you are good to go, then move on.
        1976 Cherokee Chief Build - Update 7/3/2014

        Chief for sale - contact via PM if interested.

        Comment

        • Coryd55
          350 Buick
          • Jan 23, 2010
          • 1113

          #5
          Odometer:
          USE THIS SECTION ONLY IF YOU NEED TO SET A NEW ODOMETER TO THE PROPER MILEAGE--DO NOT USE THIS INFORMATION TO SET YOUR ODOMETER TO MISREAD ACTUAL MILEAGE.

          With your speedometer removed, you can see your odometer as well. There is a small retaining spring holding it in. Use your needle nose pliers to remove it. You should now be able to lift and slide out your odometer (do not force it out, it takes a second to find the right spot for it to slip out). You will notice separators between each number. In order to change the numbers, you will need to hold the separators to the left of the number with your left thumb and index finger and those to the right with your right thumb and index finger. Twist the ones to the right until the proper digit is achieved. Then hold one more separator in your left hand, and one less in your right (if that makes sense) and twist the right side again until the digit is in the proper setting. Continue this through all the digits until it reads the correct mileage. Make sure all of the separators are aligned and then replace the odometer (check the front to make sure the proper numbers are showing, if not lift the odometer partially out and move the separators slightly in the direction needed for the proper numbers to be read and place it back in). Reattach the retaining spring (it can be a PITA, just to warn you--I found it easiest to hook it onto the odometer first, then push it down to where it goes, and finish pulling it through with the needle nose pliers).

          Speedometer:
          Now is a good time to replace your speedometer gear if it is reading inaccurately. Make sure you get the proper gear to match your tire size. I did not do this, so I do not have a walkthrough.
          1976 Cherokee Chief Build - Update 7/3/2014

          Chief for sale - contact via PM if interested.

          Comment

          • 8man
            304 AMC
            • Jan 04, 2011
            • 1561

            #6
            Very nice!
            79 Cherokee S (current project)
            82 Cherokee (parts for the 79)

            Member FSJ Prissy Restoration Association

            Comment

            • Coryd55
              350 Buick
              • Jan 23, 2010
              • 1113

              #7
              Reassembly:
              Reassembling the unit is more or less the opposite of disassembly. However, make sure you use the emblem adhesive to reattach the labels that you touched up and your lenses (if they had fallen out). Let those dry for about an hour or so (according to directions of the adhesive that you use). before reinstalling the gauge cluster assembly into the housing.

              Here is the order in which you should reassemble:
              Blue/green bulb covers and indicator covers (brake/fasten belts, 4x4, etc)
              Gauges
              Gauge faceplates/covers
              Speedometer


              Then, just put the AC assembly and cluster assembly back into the housing.

              Finished product:


              Easy as pie.

              Thanks for reading! I hope this will be of help to at least one poor Jeeping soul. It's not perfect and I'm sure many of y'all can do this better than me, but figured I would put somethign out there. If there are any questions, comments, or concerns, let me know.
              1976 Cherokee Chief Build - Update 7/3/2014

              Chief for sale - contact via PM if interested.

              Comment

              • JeepBountyHunter
                GrimJeeperReaper
                • Jul 08, 2002
                • 10250

                #8
                Well done.
                1992 Cherokee XJ Laredo

                Comment

                • serehill
                  Gone,Never Forgotten.
                  • Nov 22, 2009
                  • 8619

                  #9
                  Kewel

                  Well done Cordy55


                  A+

                  80 Cherokee
                  360 ci 727 with
                  Comp cams 270 h
                  NP208
                  Edlebrock performer intake
                  Holley 4180
                  Msd total multi spark.
                  4" rusty's springs
                  Member, FSJ Prissy Restoration Association

                  If you can't make it better why waste your time. No use repeating the orignal mistakes. I'm to old to push it that's why.

                  Comment

                  • mdill
                    Gone. Not Forgotten.
                    • Nov 22, 2000
                    • 7076

                    #10
                    Looks good.
                    -----------------------------------------
                    Home of ADHD project list

                    1977 J-10 Honcho 360-T15-D20
                    1977 Cherokee WT 360-Th400-NP241 true-trac(s)
                    1979 Cherokee 4 Door 258-T-18-D20
                    1981 Cherokee Chief WT 360-727-NP208
                    1972 K20 Suburban 350 SM465 205
                    And the other stuff that gets driven
                    ----------------------------------------

                    Comment

                    • Billygoat
                      304 AMC
                      • Mar 16, 2004
                      • 2493

                      #11
                      good golly you cloned mine!


                      Ok I have the custom indicator lights

                      Good choice to start with, I love the burled walnut

                      good job

                      Comment

                      • Coryd55
                        350 Buick
                        • Jan 23, 2010
                        • 1113

                        #12
                        Great minds think alike .
                        1976 Cherokee Chief Build - Update 7/3/2014

                        Chief for sale - contact via PM if interested.

                        Comment


                        • #13
                          Looks good. Make sure you check the two tab from the backing plate are touching the temperature gauge housing. I had to solder copper wire to connect it because the backing on the gauge warps and prevents it from grounding. If it looses ground connection, it can self destruct and cook the fuel and oil gauge.
                          Mark B. Jones

                          Originally posted by GrandWag&Prix
                          Actually, now that I think about it, that could be either awesome or really terrible.


                          '79 Cherokee Chief "Junaluska"

                          Comment

                          • Chumley360
                            350 Buick
                            • Sep 06, 2007
                            • 780

                            #14
                            That looks great!
                            1968 M715-Driveway queen/in progress

                            Comment

                            • svining
                              350 Buick
                              • May 16, 2011
                              • 828

                              #15
                              Acrylic Scratch remover for lenses

                              Great Job!! I don't know if you mentioned it or not...but...if you have superficial lense scratches I used the two step scratch remover and polished the lenses with very good results. They are soft plastic so no doubt I'll be doing it again , just be gingerly when cleaning them in the future.


                              Originally posted by Chumley360
                              That looks great!
                              Flashlight
                              "I started with nothing, I still got most of it left"
                              1982 GW,Stock, No Emissions Equip.
                              Mallory HEI, AMC 360, Motorcraft 2150

                              Comment

                              Working...
                              X