
 Tweet
Tweet
Like the title says, just a few random pictures of the progress so far. I bought all this stuff forever ago, but took forever to get around to actually spending the amount of time that the project required. I've put in a couple long days in the past few days, and I ordered my Comp Cams break in additive today. Hopefully by the time it gets here I will be ready to add fluids and see where she heads when I try to crank.
A brief rundown of what's going in (this isn't anything that many many people haven't done before, but here's my trip down that road).
-Edelbrock 3731 Intake Manifold
-Edelbrock 1406 Carb
-Summit 8600 Cam
-Summit G6618 Timing Set
-Summit HT2011 Lifters
-Edelbrock 4431 Valve Covers
-Flowkooler 1781 Water Pump
-Robertshaw 330-195 Thermostat
-BJ's 5-0009 AMC V8 Bolt Kit - Hex Unpolished
-BJ's 14-6019 V8 76-91 Fuel Pump
-New rubber fuel lines
-New rubber heater hoses
-Comp Cams CCA-150 Cam Shaft Break In Lube
My AC system was already discharged, so in the pictures you will notice that the radiator and condenser are both removed from the vehicle and the transmission cooler is simply unbolted and moved out of the way with the lines still connected. I would not have wanted to tackle this project with the AC condenser in place; being able to work on the front of the engine from outside the engine bay GREATLY simplified this project. Obviously, the grille is also removed. It was also very convenient to have the hood completely removed. Mine is being replaced anyway, but if I were to do it again, I would take it off for this project. This is the first time I have tackled anything deeper than replacing a head gasket and for the most part basic hand tools will get the job done. If you have a pretty good understanding of what you are tackling and have either a factory service manual or a Hayne's (I actually preferred the Hayne's on this project as everything is fairly straightforward and doesn't really require the detail often delivered by the FSM), you should be ok to attack this in your own driveway. In addition, this forum serves as an invaluable resource for any road bumps that creep up. Many auto parts stores loan pullers for the harmonic balancer, but they are also available at Sears for about $20 (that's the route that I took). You will also need a torque wrench for reassembly. Another little piece that I picked up that I could not have done without was a u-joint adapter for a 3/8" ratchet. There are alot of fasteners in places that are just about impossible to get to without one. Do yourself a favor and add one of those and various other extensions to your toolbox. Also, one "tool" that come in more handy than you would probably think is a digital camera. Even if you don't plan on sharing your pictures with anyone, taking pictures along the way and before you ever even start (from all different angles) will help tremendously with reassembly. Bag and tag everything as well. I also recommend having another entire Jeep sitting there so you can reference that when you are trying to figure out which way this bracket or that bracket or whatever bolts back in, haha.
A few pictures...
"Baseline"
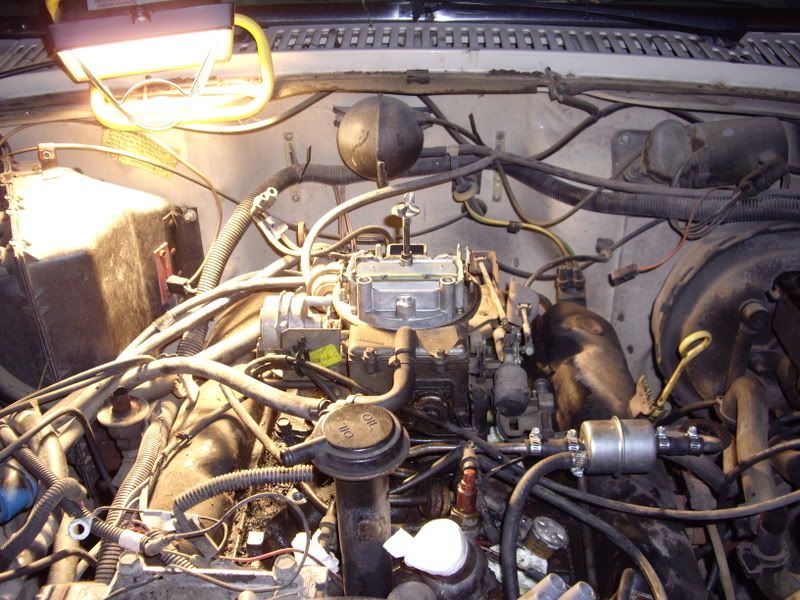

Intake manifold and carb removed. I took them off as one unit. Fair warning, if you are doing this by yourself, be ready to muscle it out. It's a pretty heavy piece, especially at arms length.
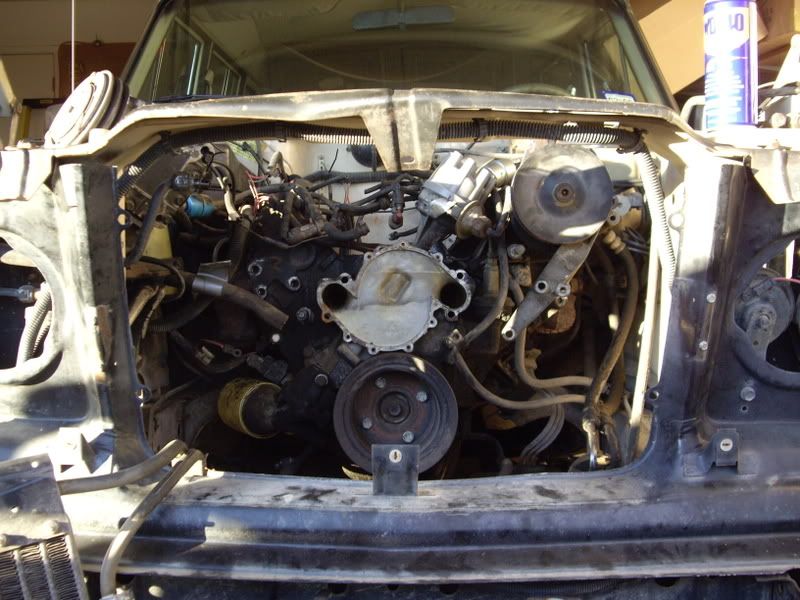
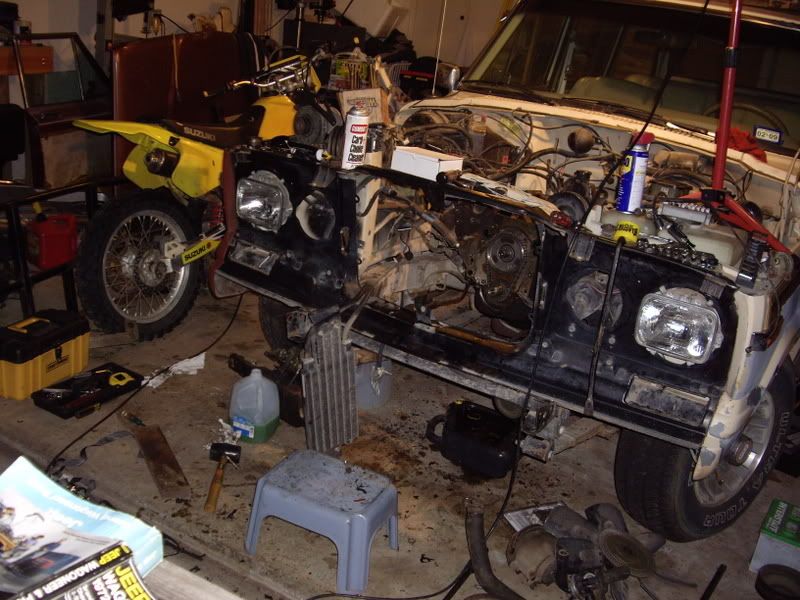
Here is a good picture of the "work area" created by taking the little extra time to get rid of everything mounted to the core support. As I said, my AC was already discharged, so that wasn't a factor for me. This is with the front accessories and water pump removed, but the main pulley still in place.
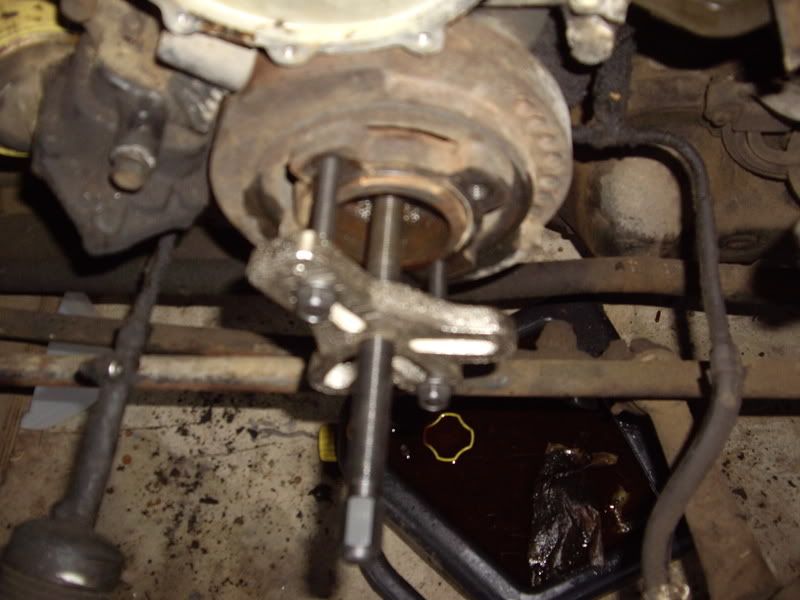
This picture is kind of blurry (apparently I'm focused on the floor, oops), but it shows the puller attached to the balancer. A few turns of the ratchet and it will pop right off. This is after the pulley has been removed, as well as the front accessories such as the alternator and AC.
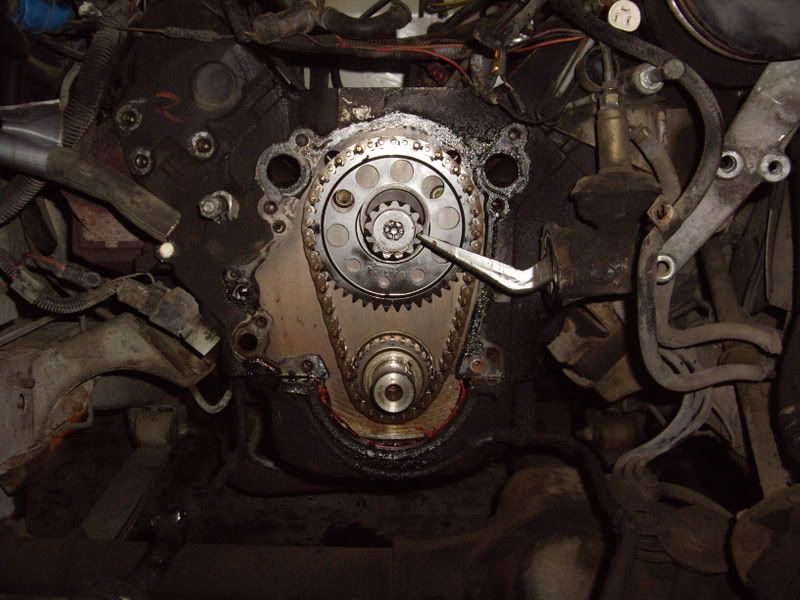
This is a wide shot of what you will see after you pull off the front cover.
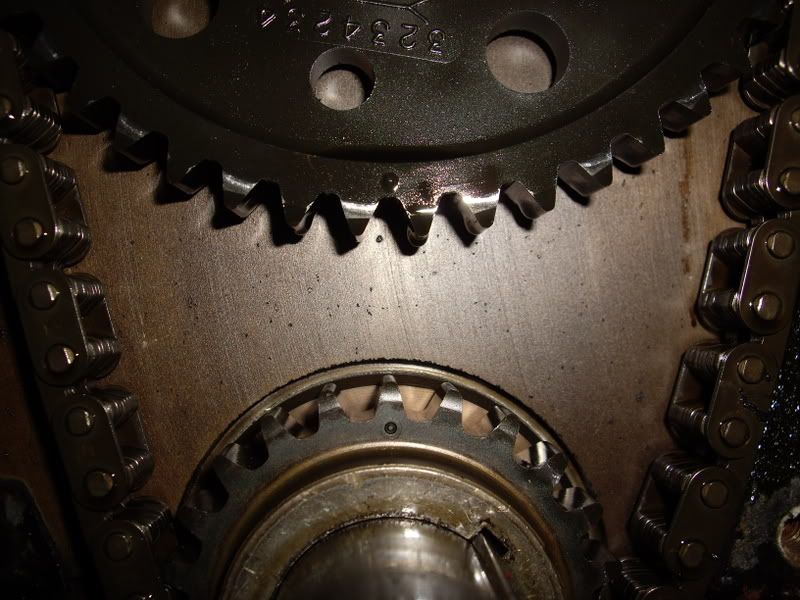
And what it should look like if you set TDC correctly. The dots should be lined up as they are in this picture. No matter how sure you are that you have it set correctly, it sure feels good when you pull the cover and the dots are in the right place.
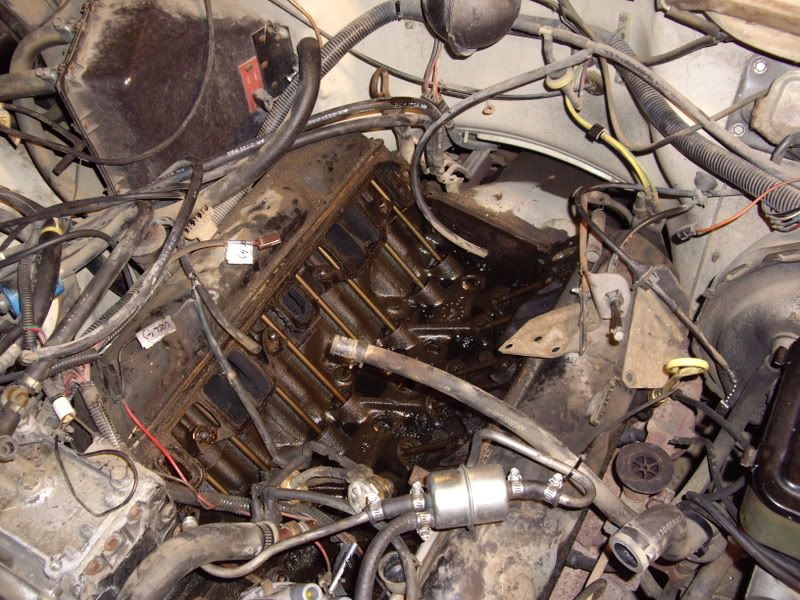
BEFORE you try to pull the cam, be sure that you have the valve covers off and the lifters pulled out. If you are using a new cam, you must replace the lifters. In that case (as in this situation), I wasn't worried about saving the old lifters, so I was able to use a small magnet to pick them up slightly and then grab the edge of the lifter with a pair of needle nose to get them all the way out. In this picture, the rockers, rods and lifters are all removed.
In my case, my rods were good (roll them on a piece of flat glass to see if they are warped or bent). Your rods should go back exactly where you pulled them from, so keep them in order as you take them out.
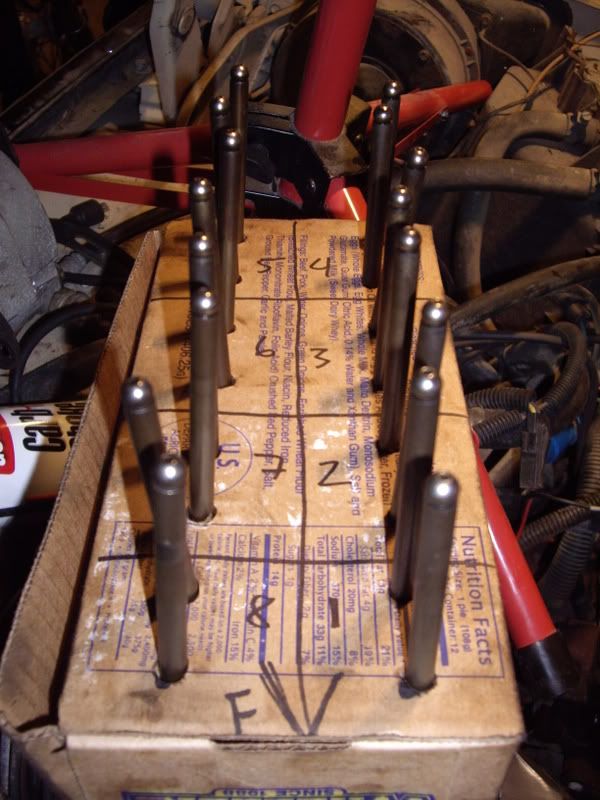
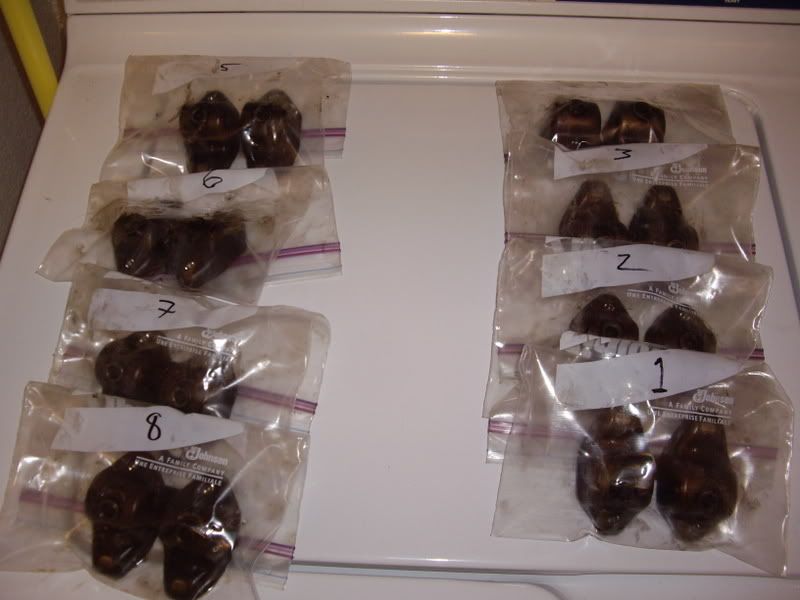
Same goes for the rockers. I placed each one in a plastic bag and labeled the bag. When you are single, the top of the washing machine is a great place to get something out of the way where it won't get mixed up.
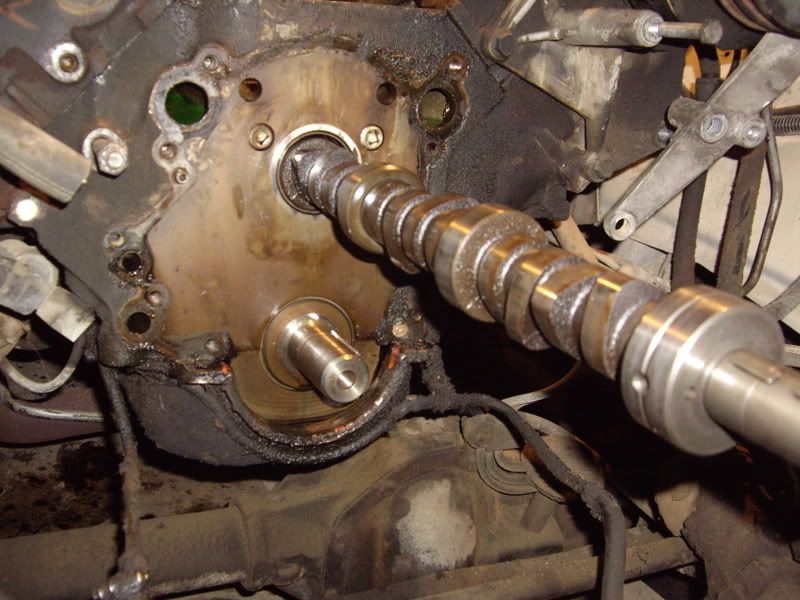
After removing the timing set, you are ready to slide the cam out. Mine came out easily by hand.
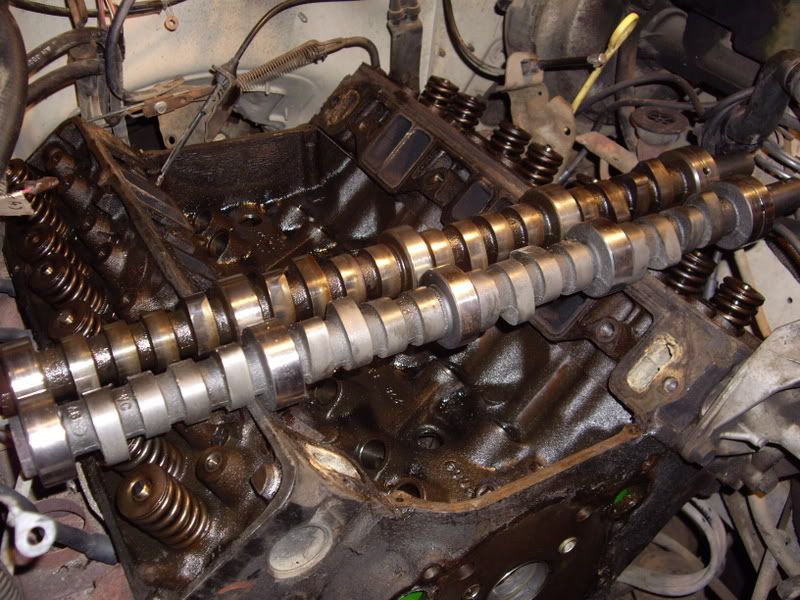
The old and the new.
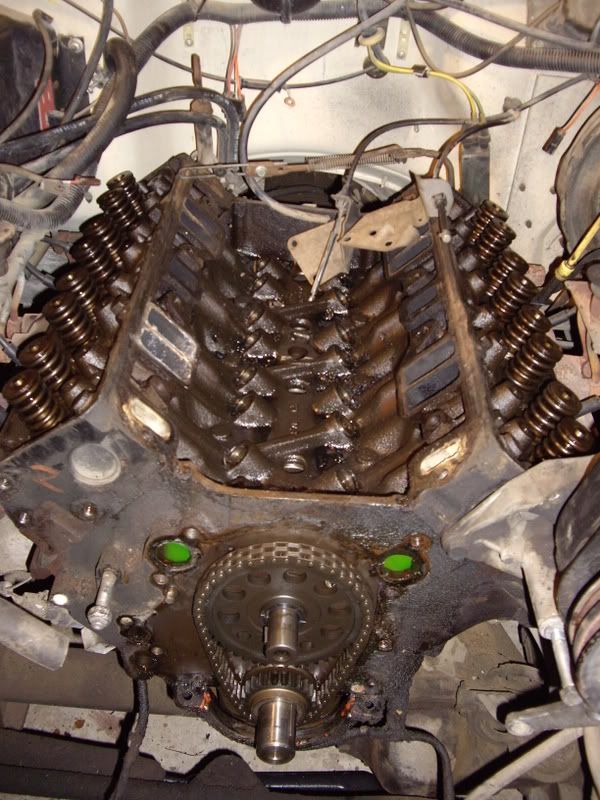
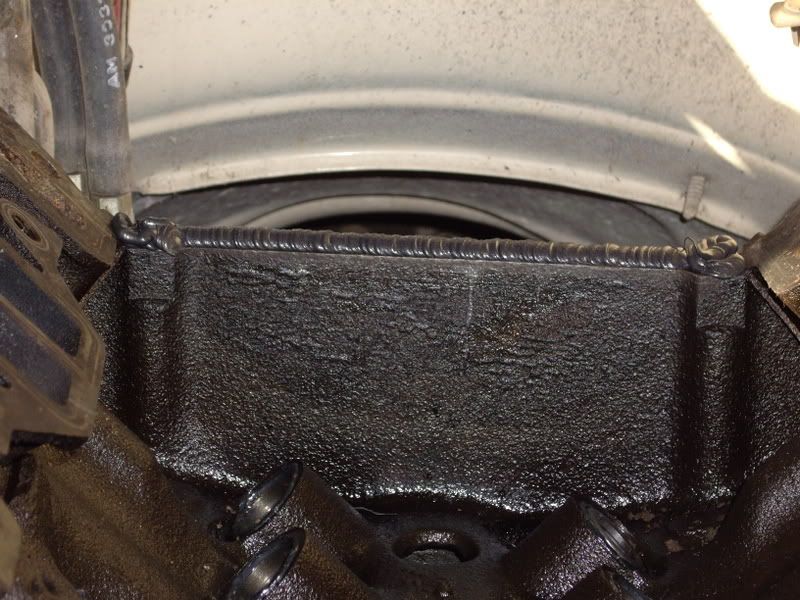
I always hate it when in the manual is says, "installation is the reverse of removal," but in this case, it really does just boil down to replacing everything that you have just taken apart. While you are using aftermarket parts, everything goes right back where the part that is is replacing came from. If you have looked around too much or even read Edelbrock's suggestions, you will see that they recommend using a bead of RTV to seal the front and rear of the intake manifold to the block (as opposed to the rubber seals that come with your valley pan and were originally installed on your engine). This is what that looks like, although I built up the bead one more level from this picture to ensure contact with the intake manifold.
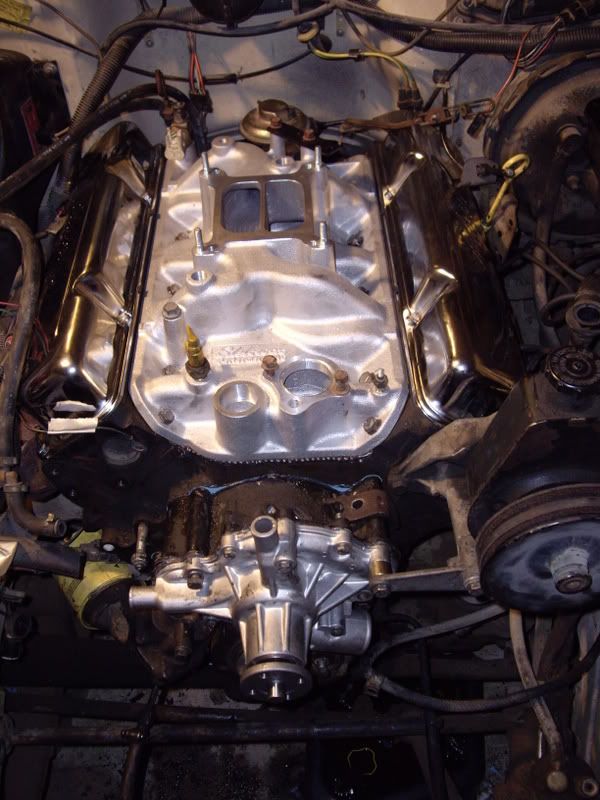
Here I have installed the new water pump, valve covers and intake.
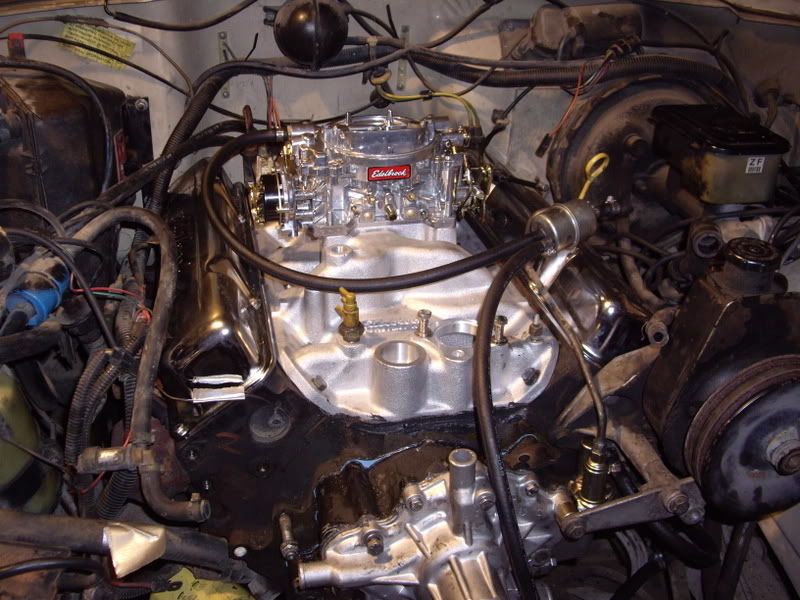
Here I have the 1406 sitting on top and have begun running fuel lines and installing various pieces on the manifold.
That's kind of where I stand right now. Hopefully fuel and spark this weekend! Another thing that should be mentioned is to be sure to use plenty of assembly lube on any parts that have metal to metal contact, including the entirety of the cam, the rockers, lifters and rods. Also use anti-seize on all your bolts as you reassemble. You'll thank yourself next time you tear into the engine.
One more picture....I like to think of this one as the "scene of the crime"
I'm going to continue to post to this thread as I finish up. I'm trying to be thorough so that if someone searches in the future, they may be able to get alot of their info in one place. Sorry for the mundane details, but hopefully this thread will help someone along the way.
A brief rundown of what's going in (this isn't anything that many many people haven't done before, but here's my trip down that road).
-Edelbrock 3731 Intake Manifold
-Edelbrock 1406 Carb
-Summit 8600 Cam
-Summit G6618 Timing Set
-Summit HT2011 Lifters
-Edelbrock 4431 Valve Covers
-Flowkooler 1781 Water Pump
-Robertshaw 330-195 Thermostat
-BJ's 5-0009 AMC V8 Bolt Kit - Hex Unpolished
-BJ's 14-6019 V8 76-91 Fuel Pump
-New rubber fuel lines
-New rubber heater hoses
-Comp Cams CCA-150 Cam Shaft Break In Lube
My AC system was already discharged, so in the pictures you will notice that the radiator and condenser are both removed from the vehicle and the transmission cooler is simply unbolted and moved out of the way with the lines still connected. I would not have wanted to tackle this project with the AC condenser in place; being able to work on the front of the engine from outside the engine bay GREATLY simplified this project. Obviously, the grille is also removed. It was also very convenient to have the hood completely removed. Mine is being replaced anyway, but if I were to do it again, I would take it off for this project. This is the first time I have tackled anything deeper than replacing a head gasket and for the most part basic hand tools will get the job done. If you have a pretty good understanding of what you are tackling and have either a factory service manual or a Hayne's (I actually preferred the Hayne's on this project as everything is fairly straightforward and doesn't really require the detail often delivered by the FSM), you should be ok to attack this in your own driveway. In addition, this forum serves as an invaluable resource for any road bumps that creep up. Many auto parts stores loan pullers for the harmonic balancer, but they are also available at Sears for about $20 (that's the route that I took). You will also need a torque wrench for reassembly. Another little piece that I picked up that I could not have done without was a u-joint adapter for a 3/8" ratchet. There are alot of fasteners in places that are just about impossible to get to without one. Do yourself a favor and add one of those and various other extensions to your toolbox. Also, one "tool" that come in more handy than you would probably think is a digital camera. Even if you don't plan on sharing your pictures with anyone, taking pictures along the way and before you ever even start (from all different angles) will help tremendously with reassembly. Bag and tag everything as well. I also recommend having another entire Jeep sitting there so you can reference that when you are trying to figure out which way this bracket or that bracket or whatever bolts back in, haha.
A few pictures...
"Baseline"
Intake manifold and carb removed. I took them off as one unit. Fair warning, if you are doing this by yourself, be ready to muscle it out. It's a pretty heavy piece, especially at arms length.
Here is a good picture of the "work area" created by taking the little extra time to get rid of everything mounted to the core support. As I said, my AC was already discharged, so that wasn't a factor for me. This is with the front accessories and water pump removed, but the main pulley still in place.
This picture is kind of blurry (apparently I'm focused on the floor, oops), but it shows the puller attached to the balancer. A few turns of the ratchet and it will pop right off. This is after the pulley has been removed, as well as the front accessories such as the alternator and AC.
This is a wide shot of what you will see after you pull off the front cover.
And what it should look like if you set TDC correctly. The dots should be lined up as they are in this picture. No matter how sure you are that you have it set correctly, it sure feels good when you pull the cover and the dots are in the right place.
BEFORE you try to pull the cam, be sure that you have the valve covers off and the lifters pulled out. If you are using a new cam, you must replace the lifters. In that case (as in this situation), I wasn't worried about saving the old lifters, so I was able to use a small magnet to pick them up slightly and then grab the edge of the lifter with a pair of needle nose to get them all the way out. In this picture, the rockers, rods and lifters are all removed.
In my case, my rods were good (roll them on a piece of flat glass to see if they are warped or bent). Your rods should go back exactly where you pulled them from, so keep them in order as you take them out.
Same goes for the rockers. I placed each one in a plastic bag and labeled the bag. When you are single, the top of the washing machine is a great place to get something out of the way where it won't get mixed up.
After removing the timing set, you are ready to slide the cam out. Mine came out easily by hand.
The old and the new.
I always hate it when in the manual is says, "installation is the reverse of removal," but in this case, it really does just boil down to replacing everything that you have just taken apart. While you are using aftermarket parts, everything goes right back where the part that is is replacing came from. If you have looked around too much or even read Edelbrock's suggestions, you will see that they recommend using a bead of RTV to seal the front and rear of the intake manifold to the block (as opposed to the rubber seals that come with your valley pan and were originally installed on your engine). This is what that looks like, although I built up the bead one more level from this picture to ensure contact with the intake manifold.
Here I have installed the new water pump, valve covers and intake.
Here I have the 1406 sitting on top and have begun running fuel lines and installing various pieces on the manifold.
That's kind of where I stand right now. Hopefully fuel and spark this weekend! Another thing that should be mentioned is to be sure to use plenty of assembly lube on any parts that have metal to metal contact, including the entirety of the cam, the rockers, lifters and rods. Also use anti-seize on all your bolts as you reassemble. You'll thank yourself next time you tear into the engine.
One more picture....I like to think of this one as the "scene of the crime"
I'm going to continue to post to this thread as I finish up. I'm trying to be thorough so that if someone searches in the future, they may be able to get alot of their info in one place. Sorry for the mundane details, but hopefully this thread will help someone along the way.


Comment