1970/71 Gladiator J-4000 Build

Collapse
X
 
  • Filter
  • Time
  • Show
Clear All
new posts
  • CameraFinn
    232 I6
    • Oct 15, 2015
    • 56

    1970/71 Gladiator J-4000 Build

    Hi All.


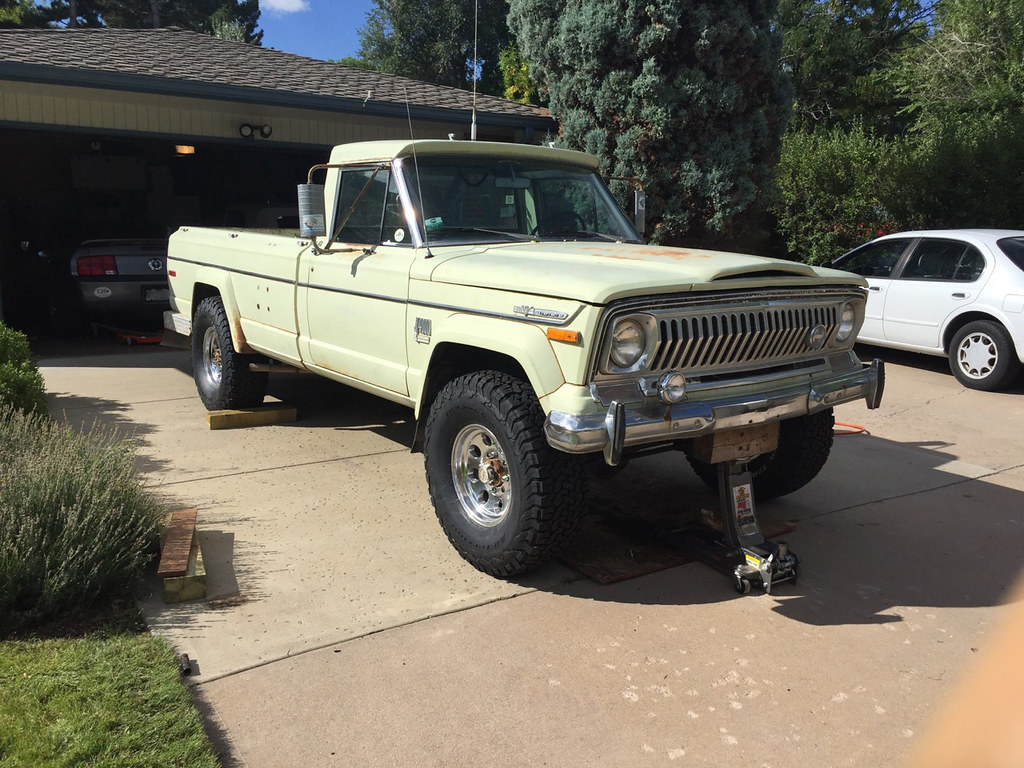
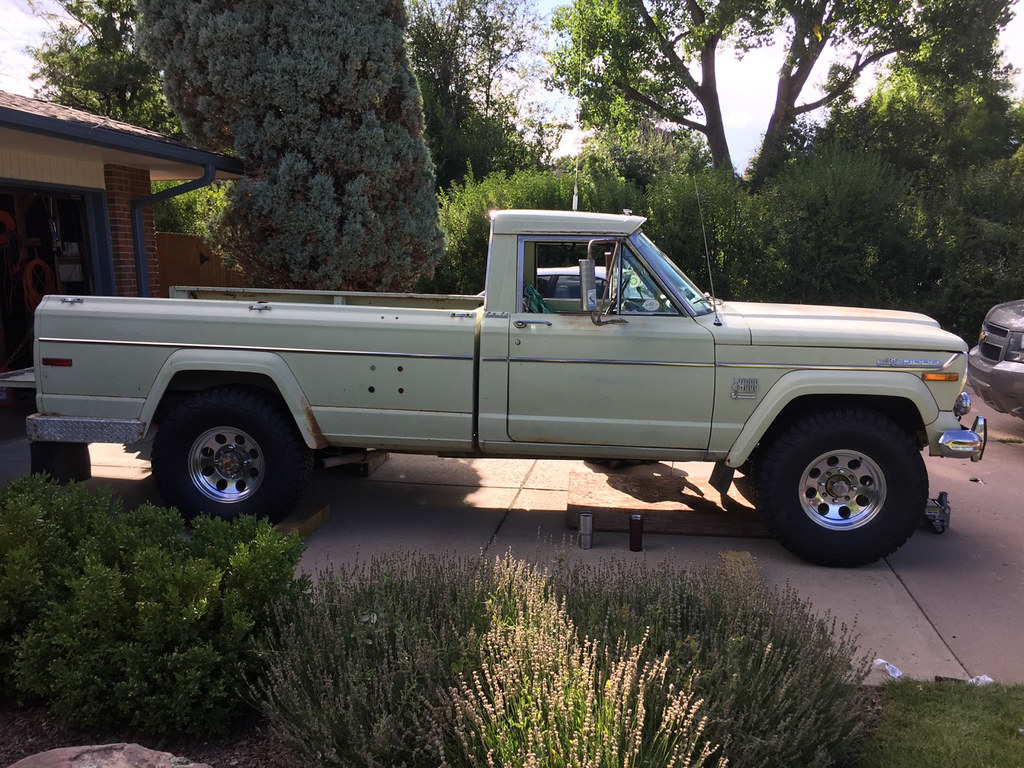
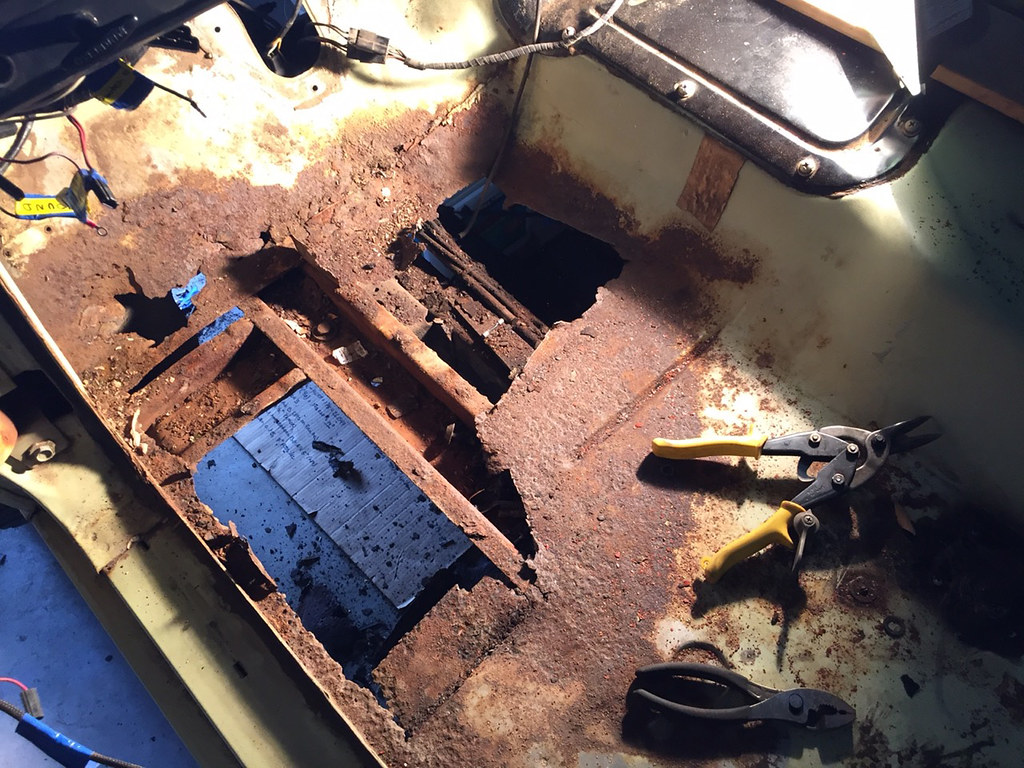
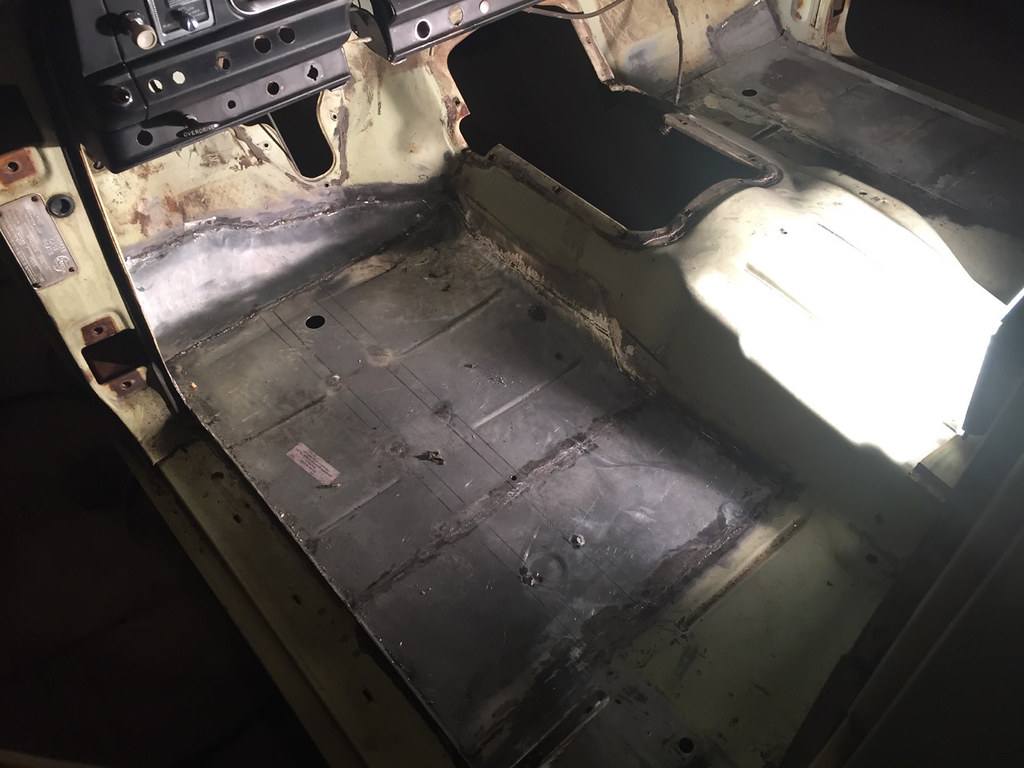
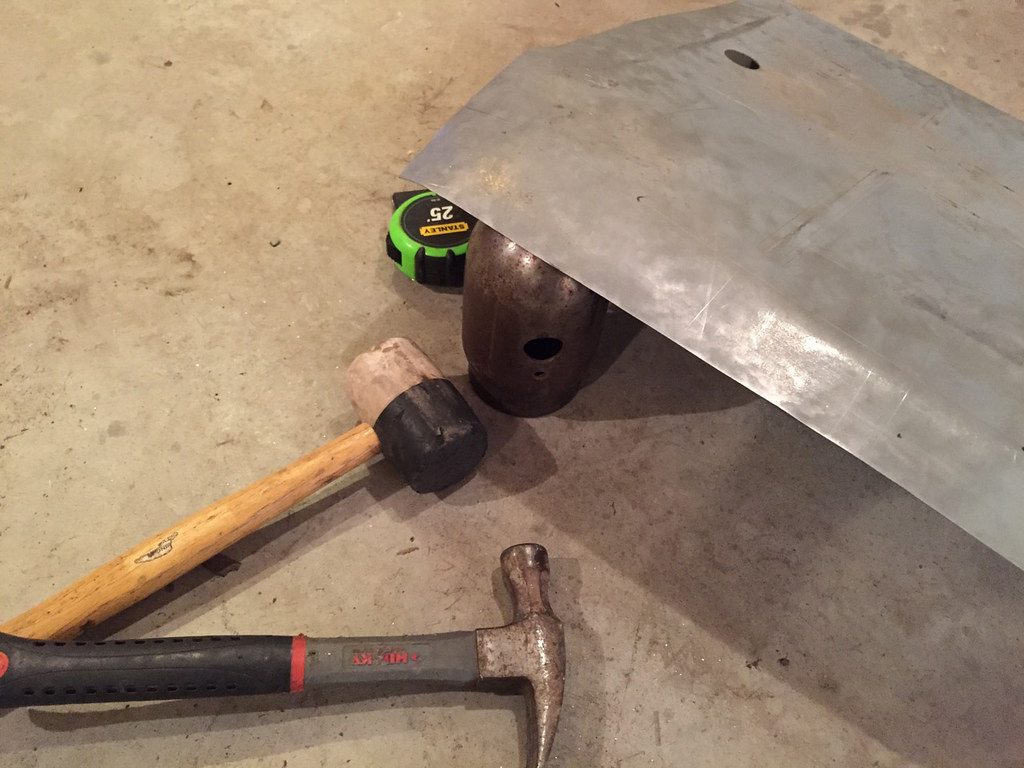
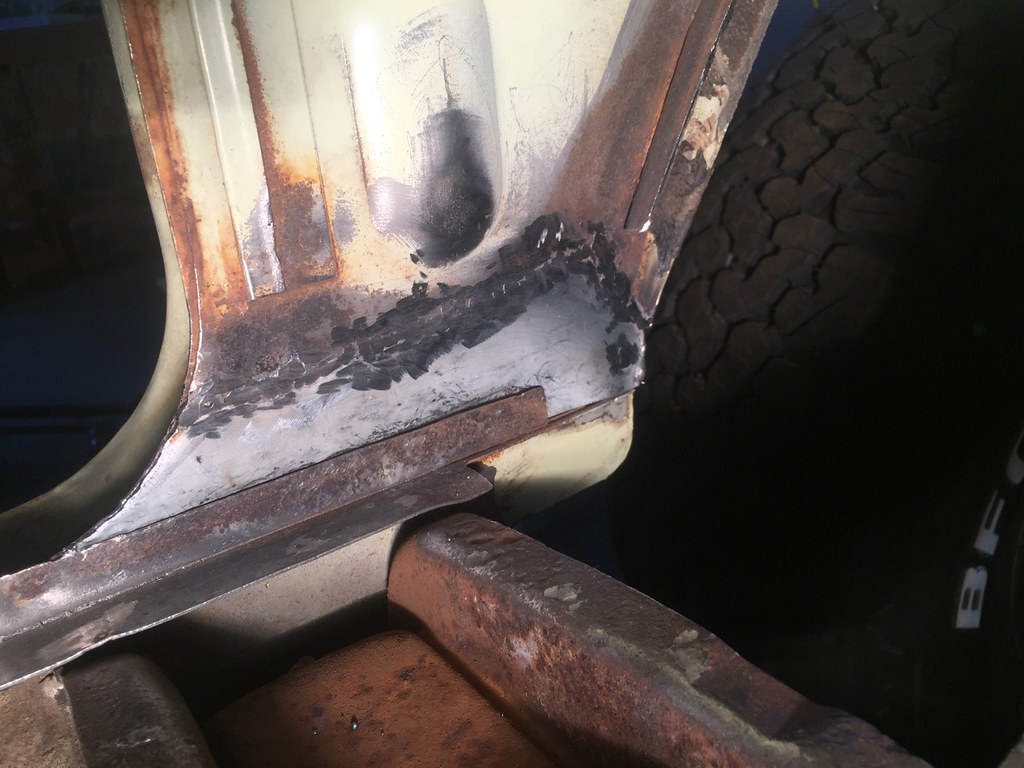
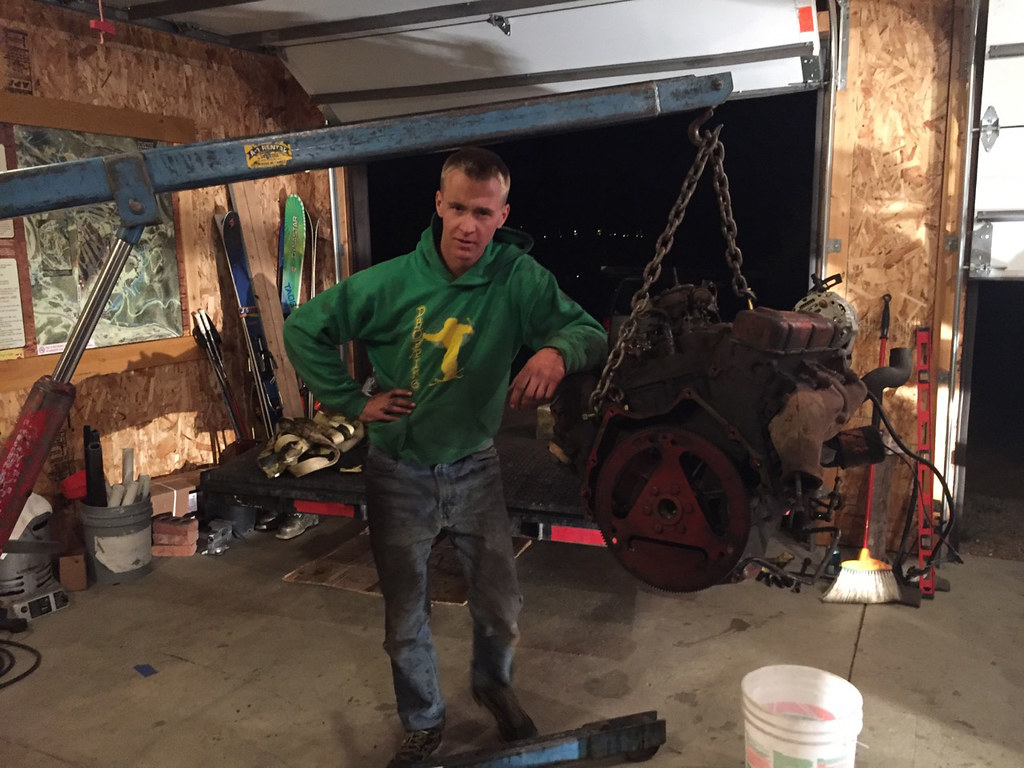
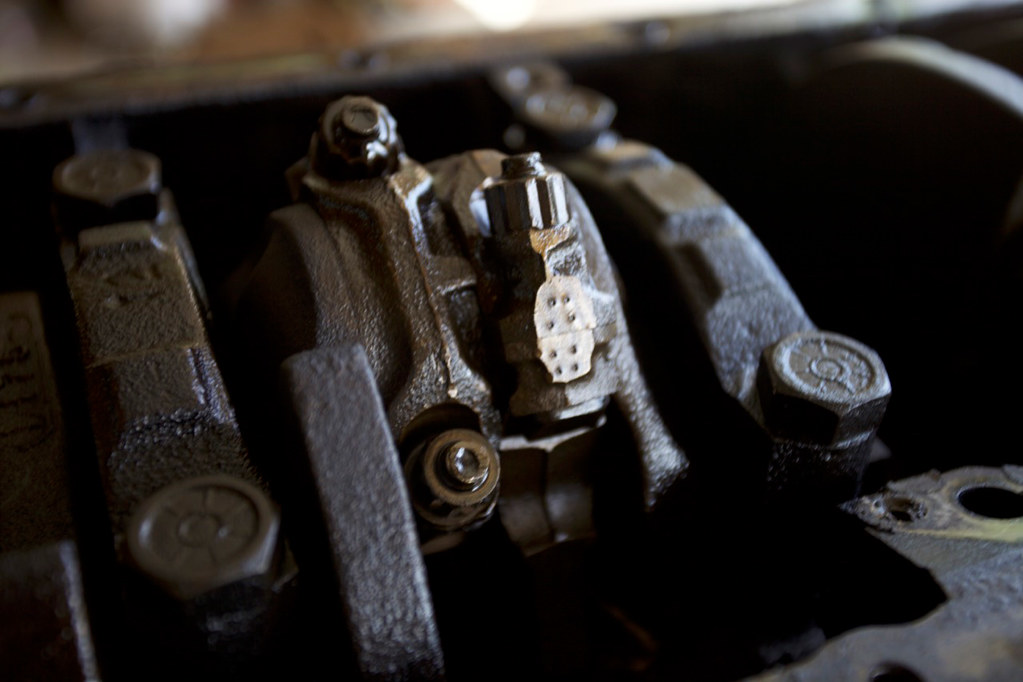
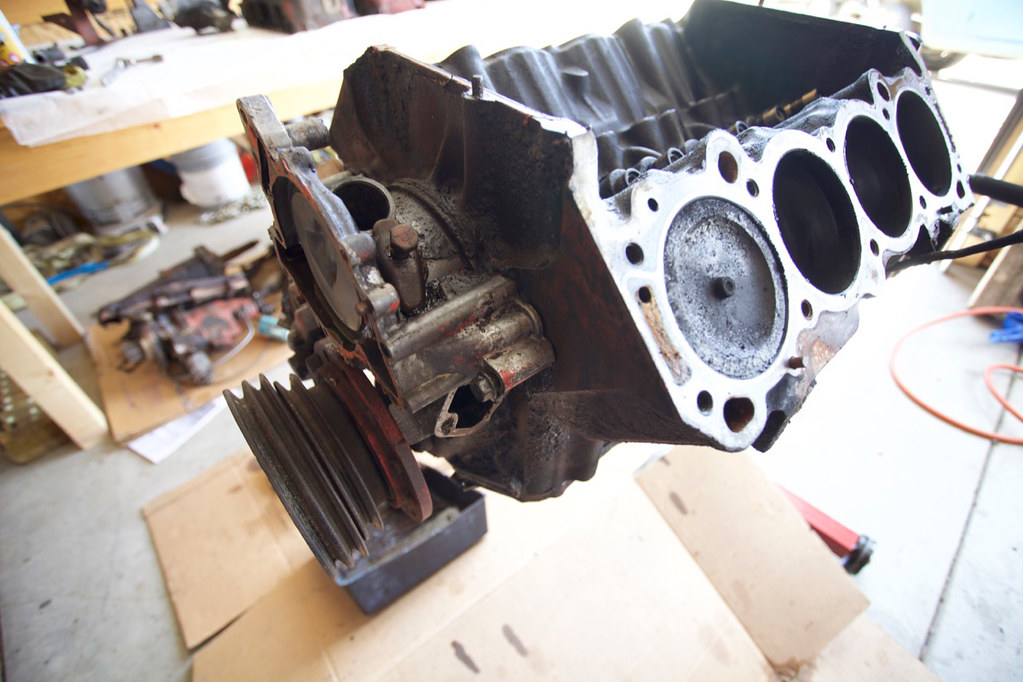
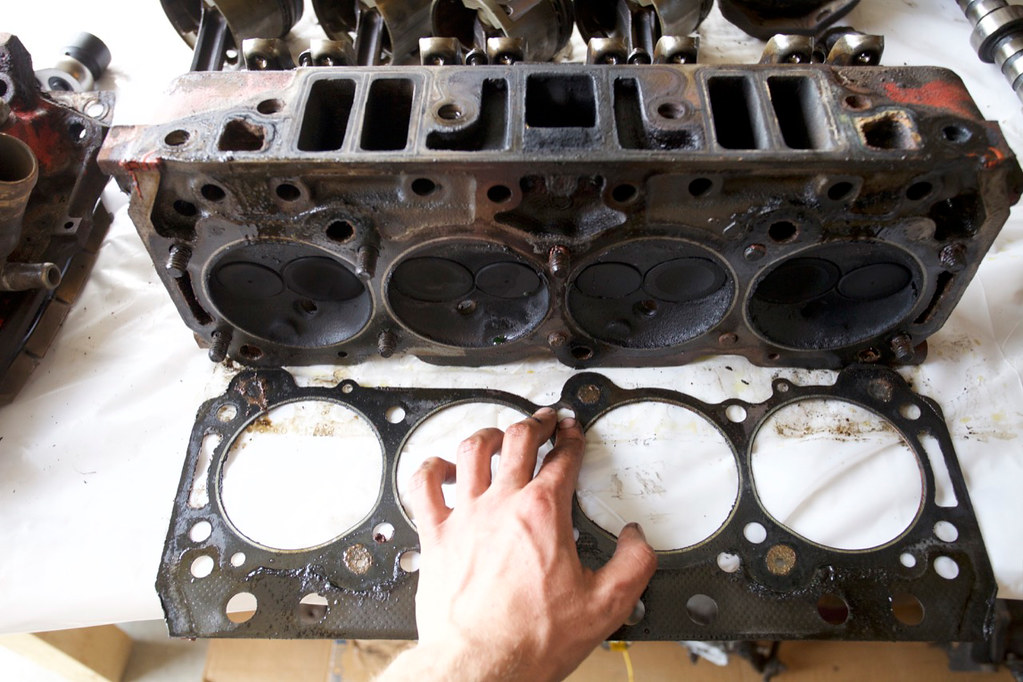
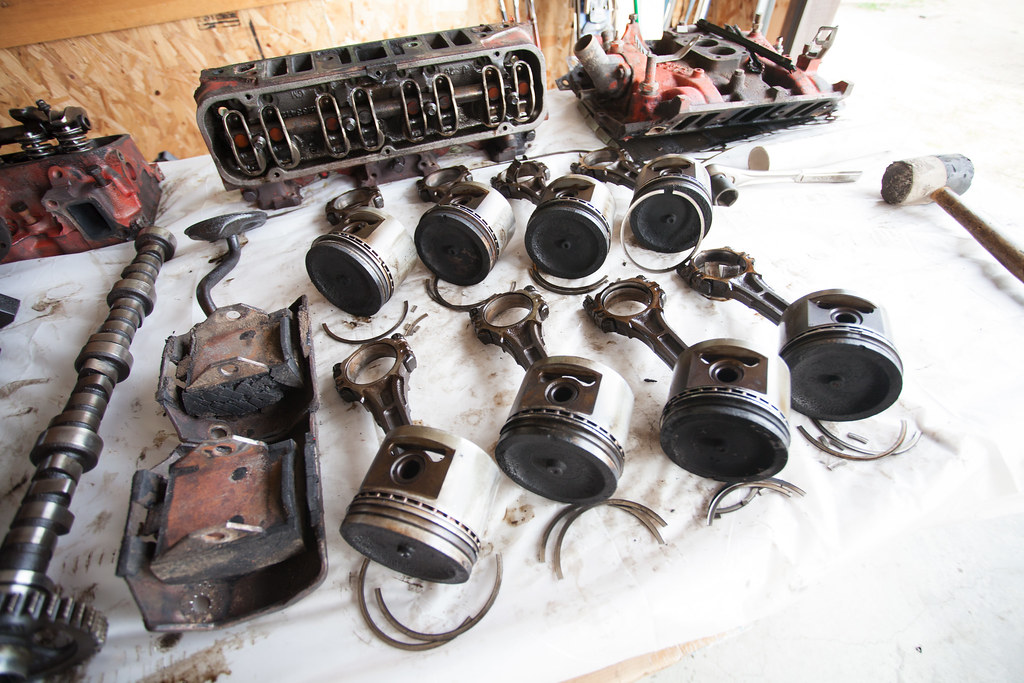
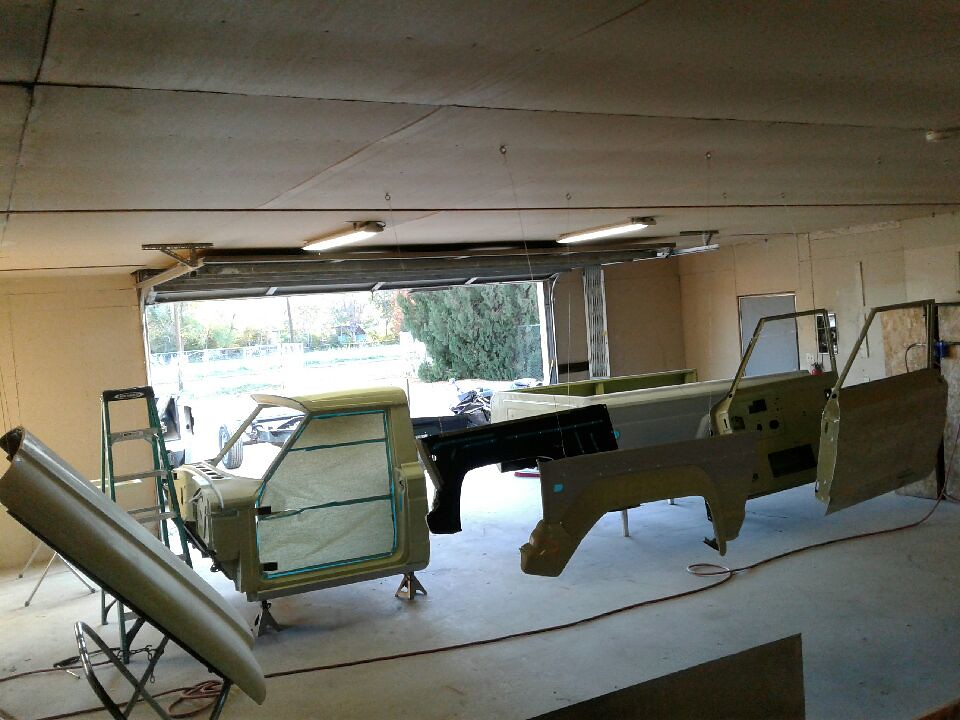
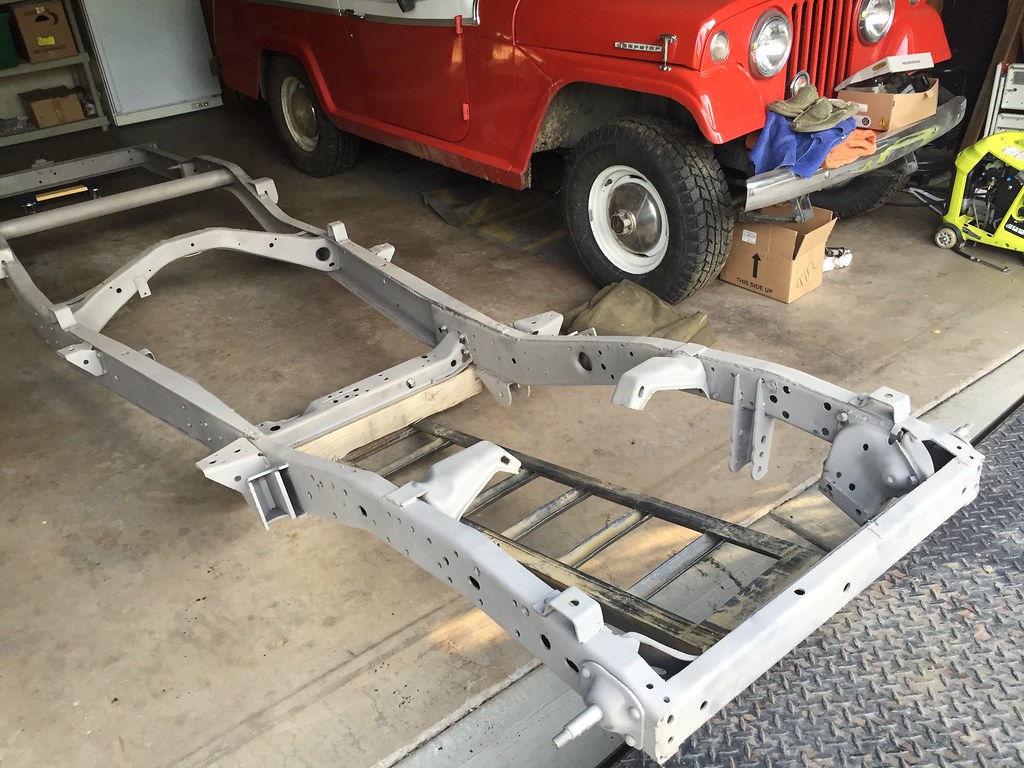
    Figured I'd post pictures at the top of the thread. Because a thread is useless without pictures, right?
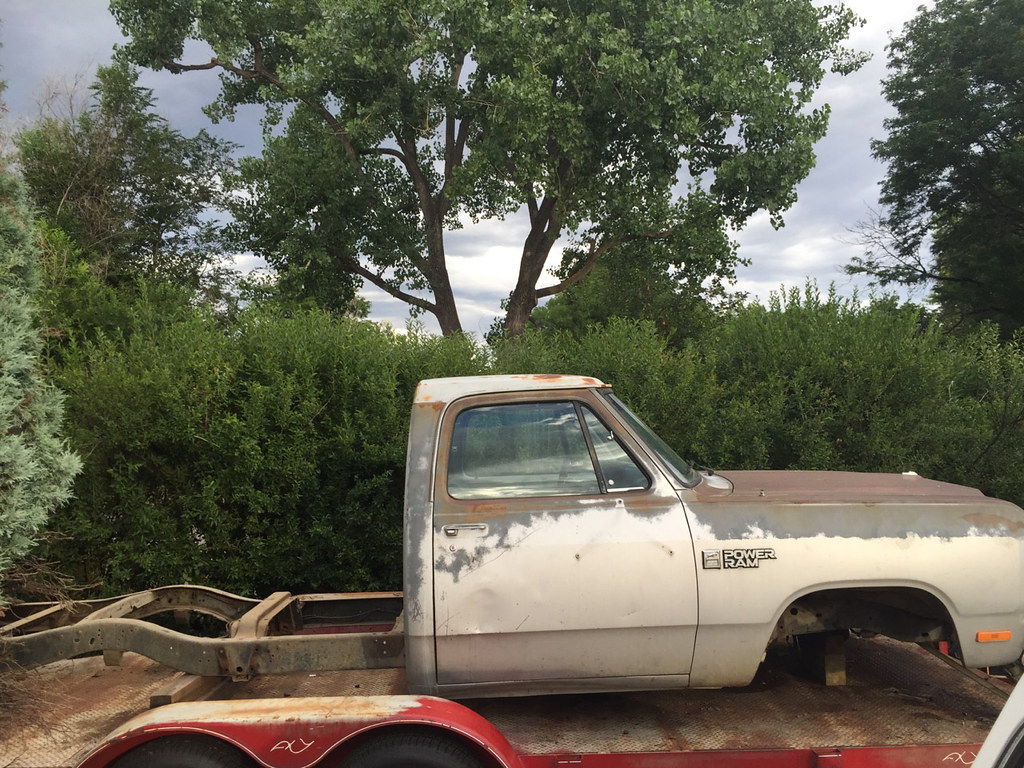
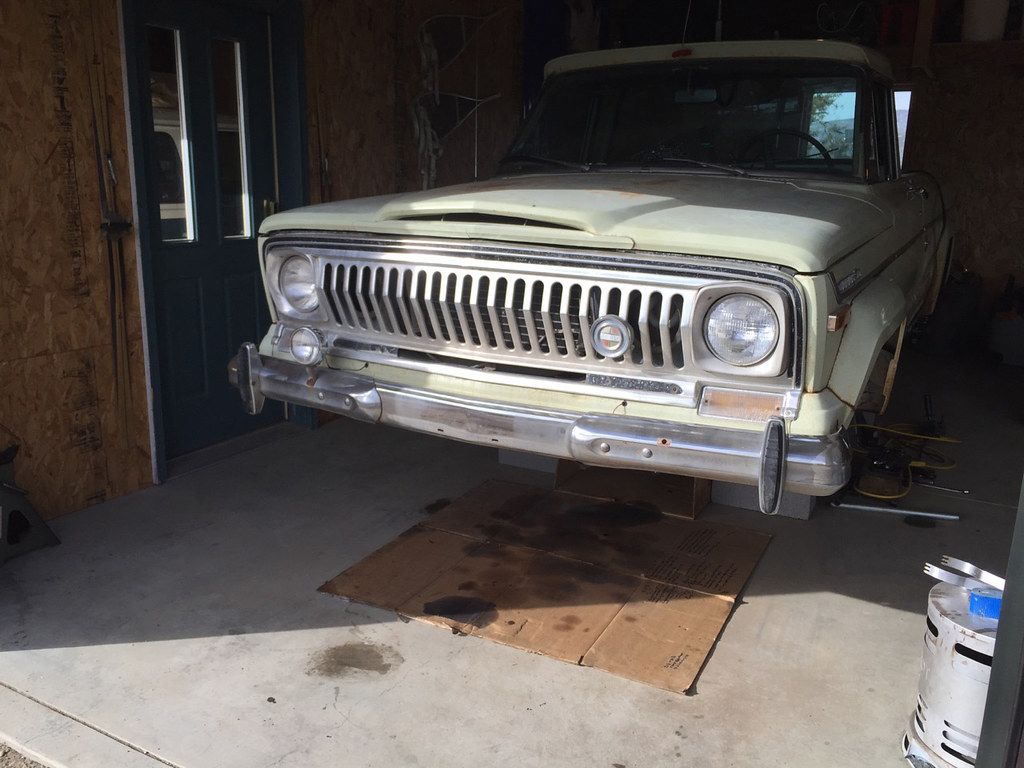
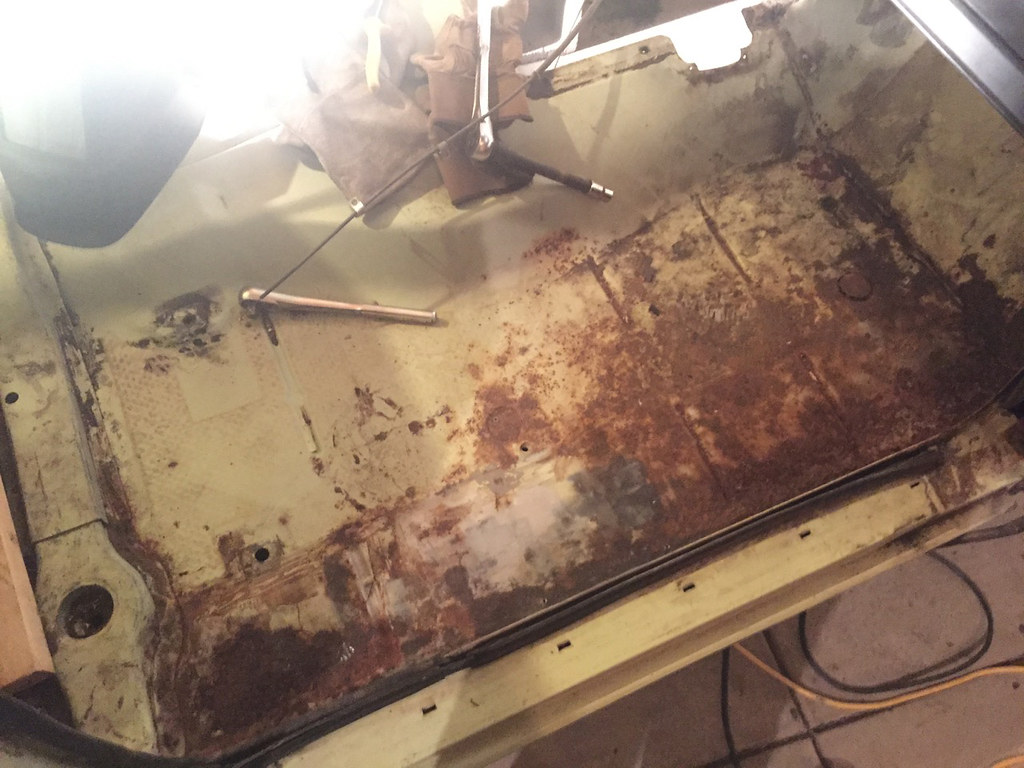
    My name is Finn. I'm from Denver. About a year ago, I bought a '70/'71 J-4000 Gladiator. It was built in July 1970, which places it as a '71 model year, but it still had a few Kaiser things left, like Gladiator stickers on the tailgate.
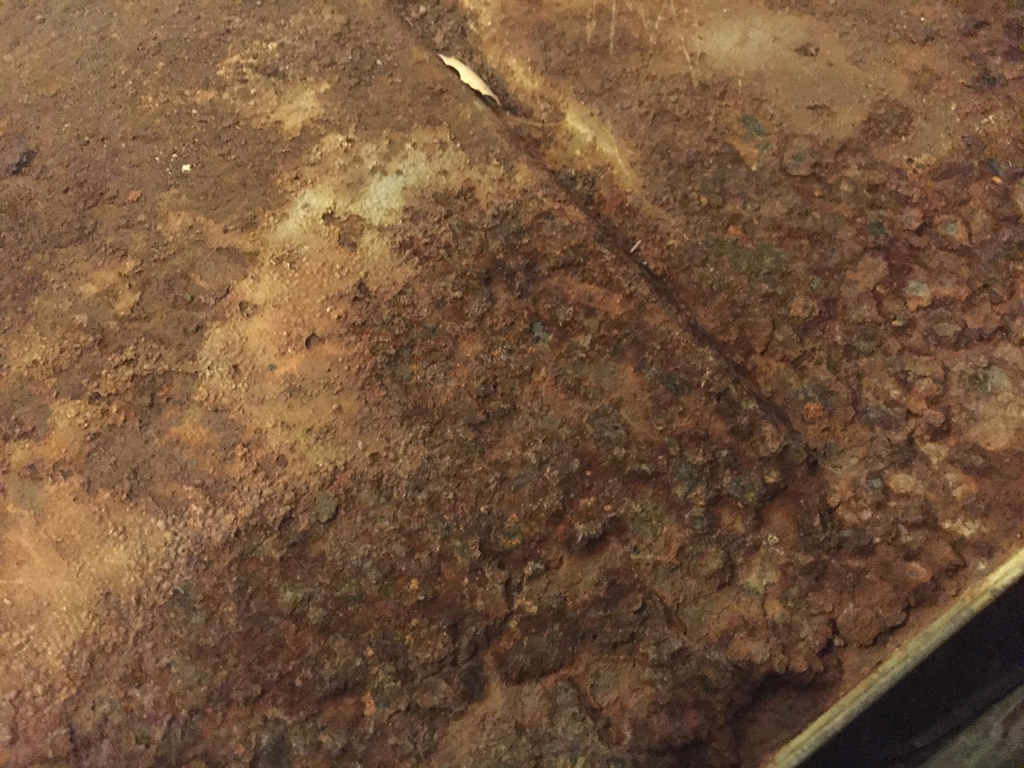
    The milage is likely to be only 55,000 -- that's what the previous two owners claimed. The condition of the truck seems to support that. But it also supports that it has been in the Colorado sun for nearly fifty years. Not much was "wrong" with it. It drove, stopped (kinda), played music. I was looking for a DD rig though, and I wanted it to be a little more quiet, comfortable and modern.
    I've had my share of DD'ing old factory rigs. I drove a 1967 Jeepster as a DD for three years, and about the only modification it had was lovely zebra carpet.
    Don't ya love PO's?
    There are some pictures at my first post here:http://www.ifsja.org/forums/vb/showthread.php?t=179622

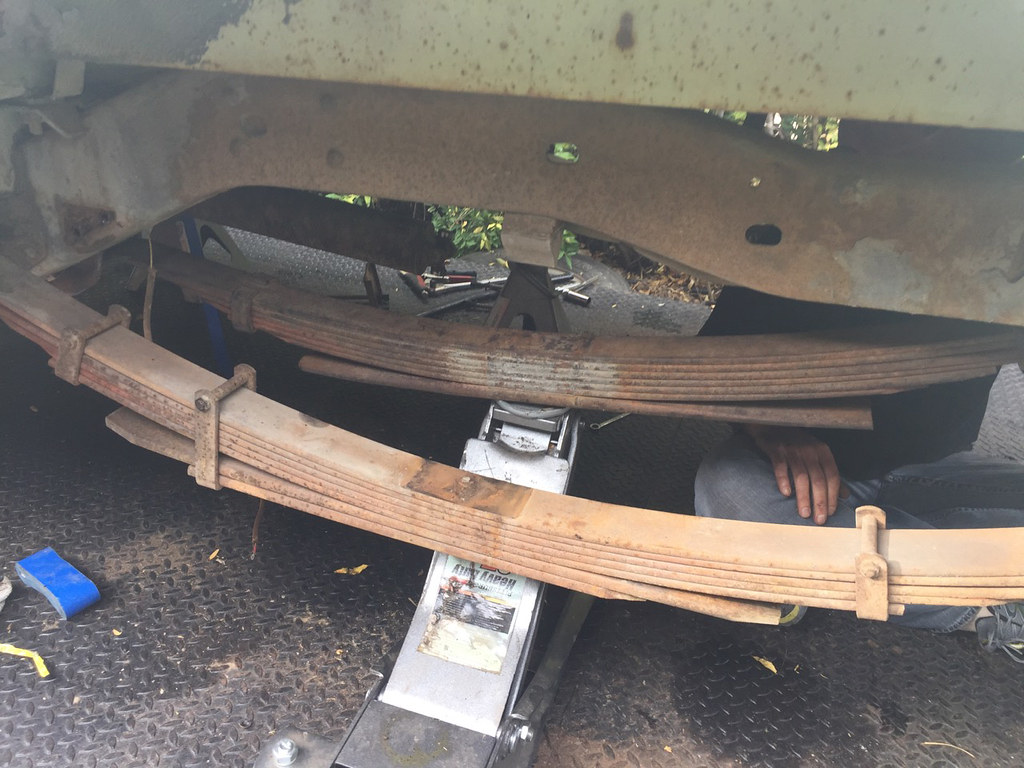
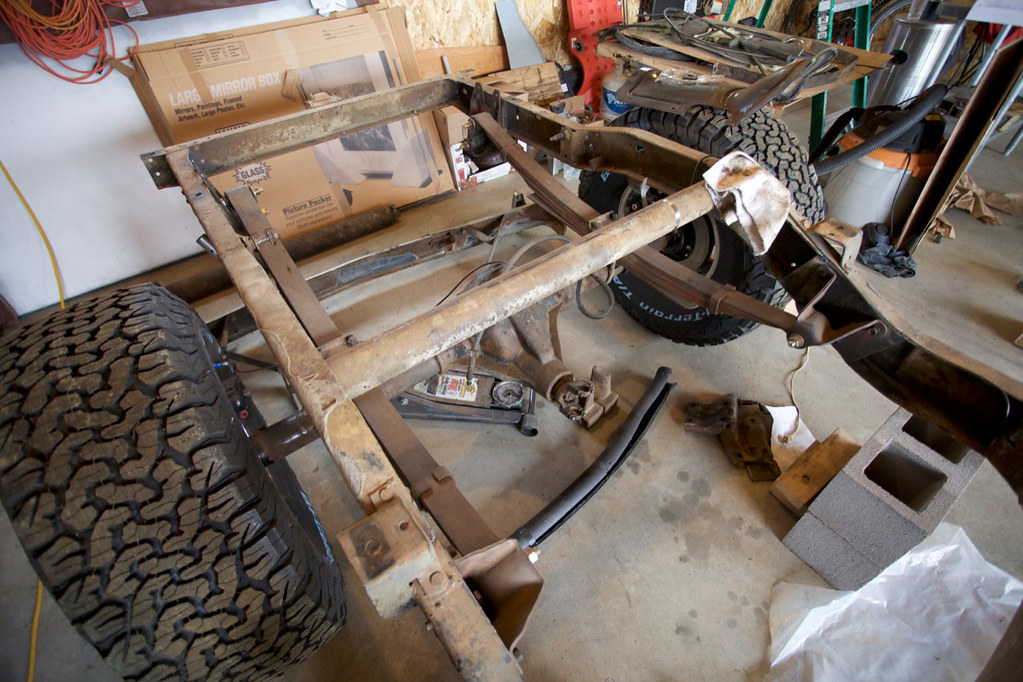
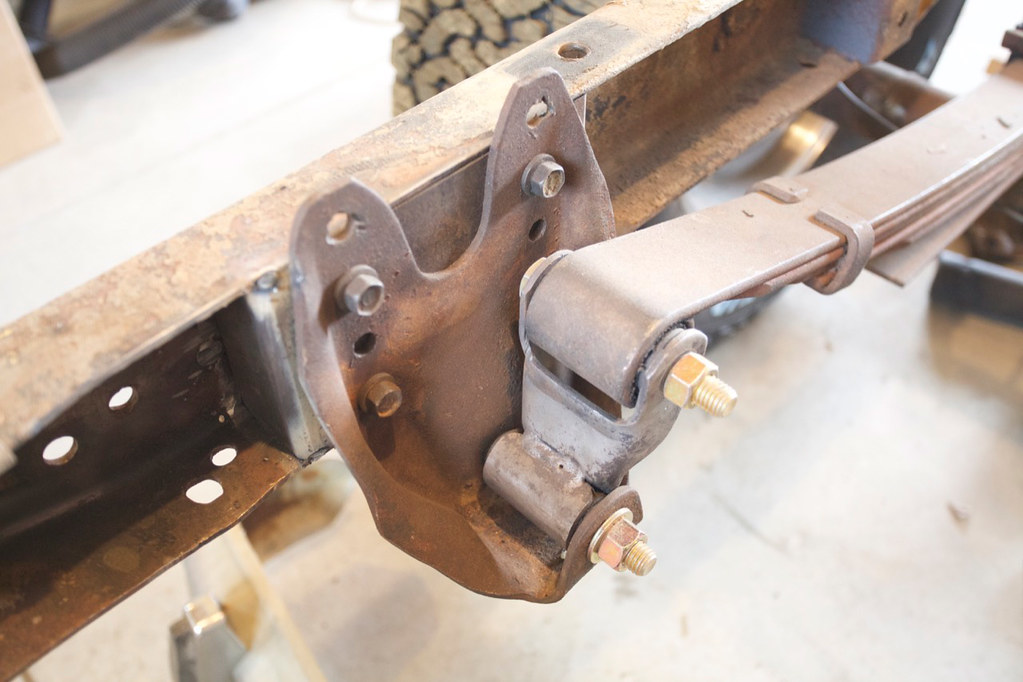
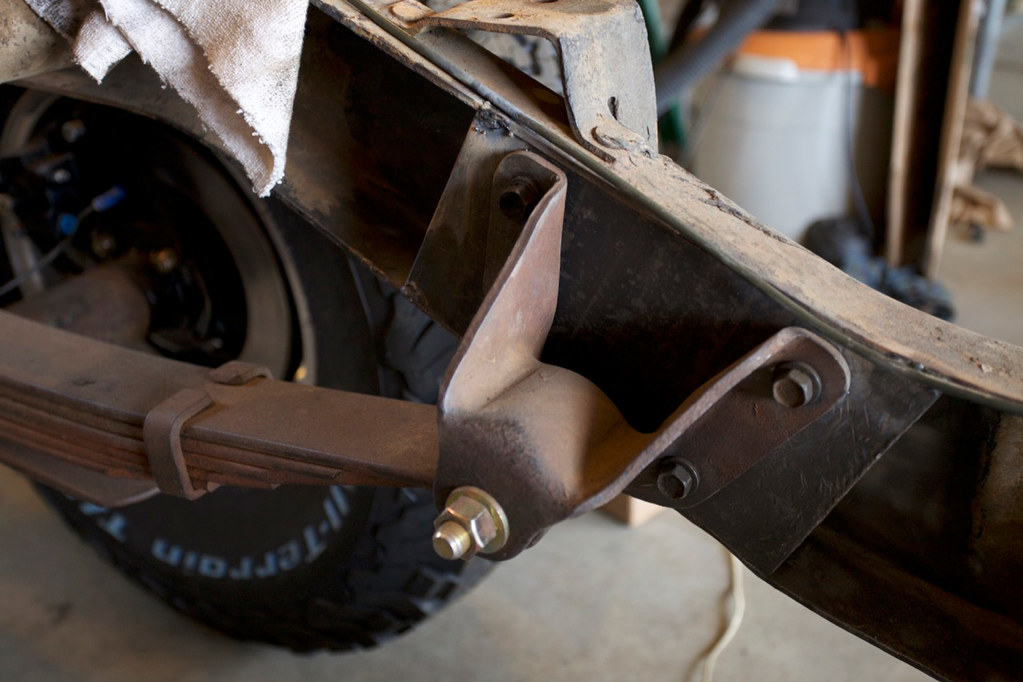
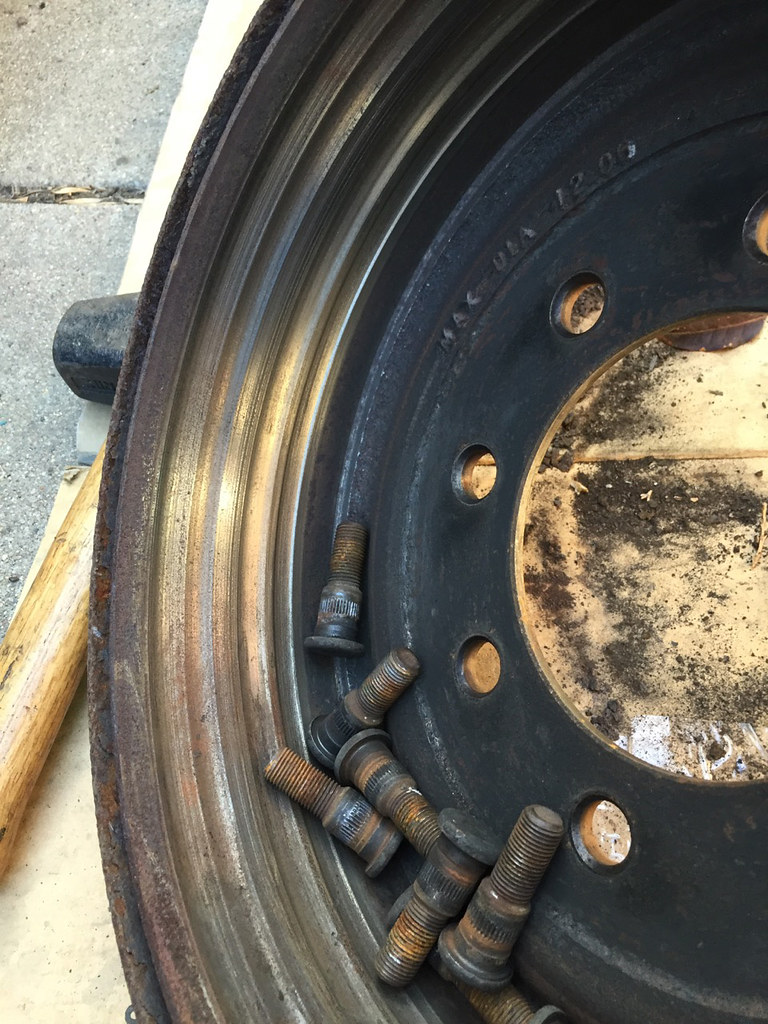
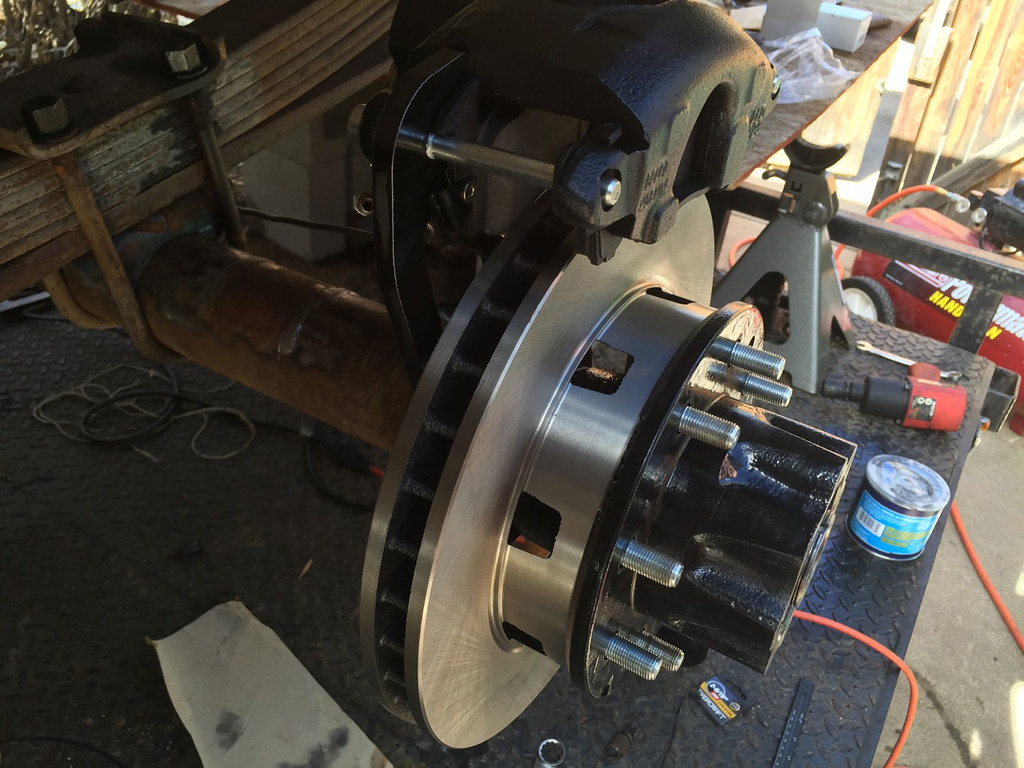
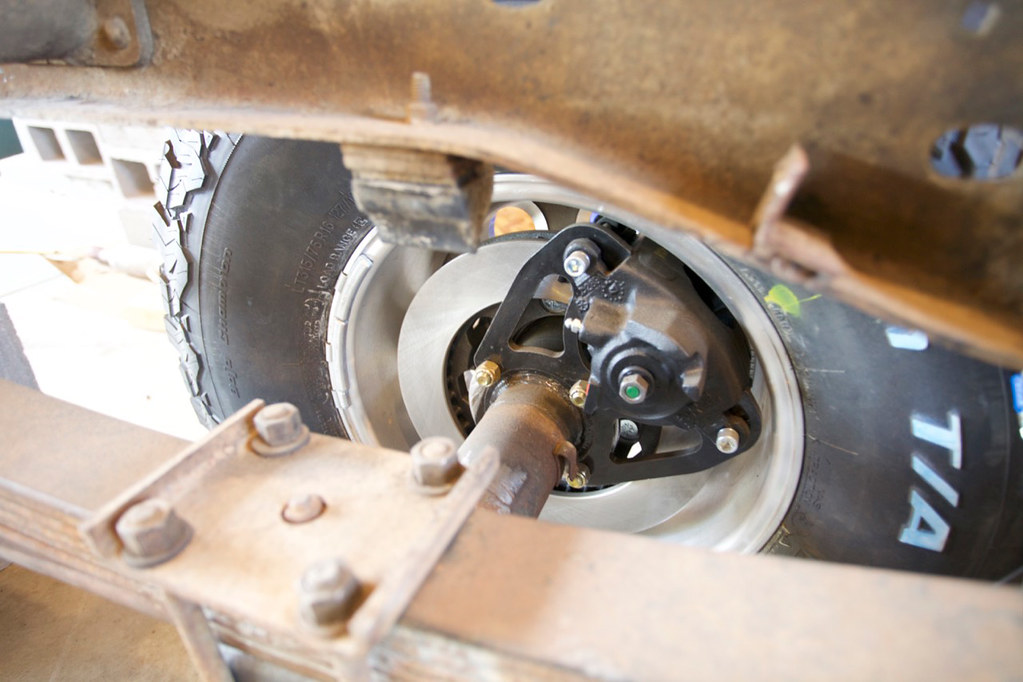
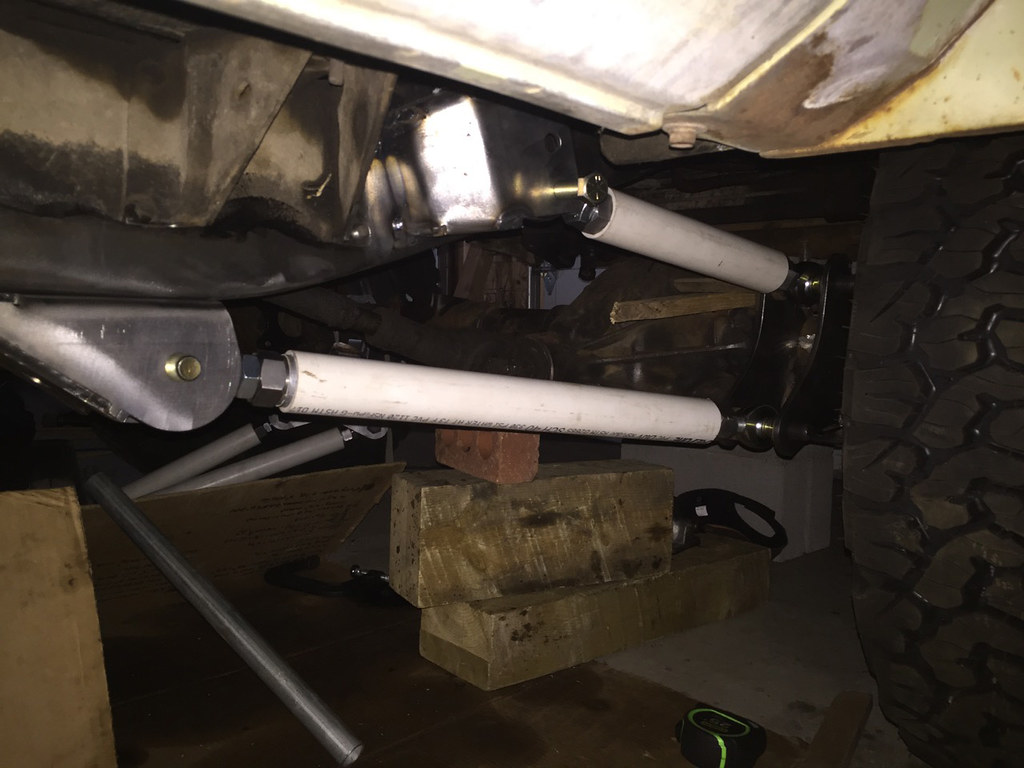
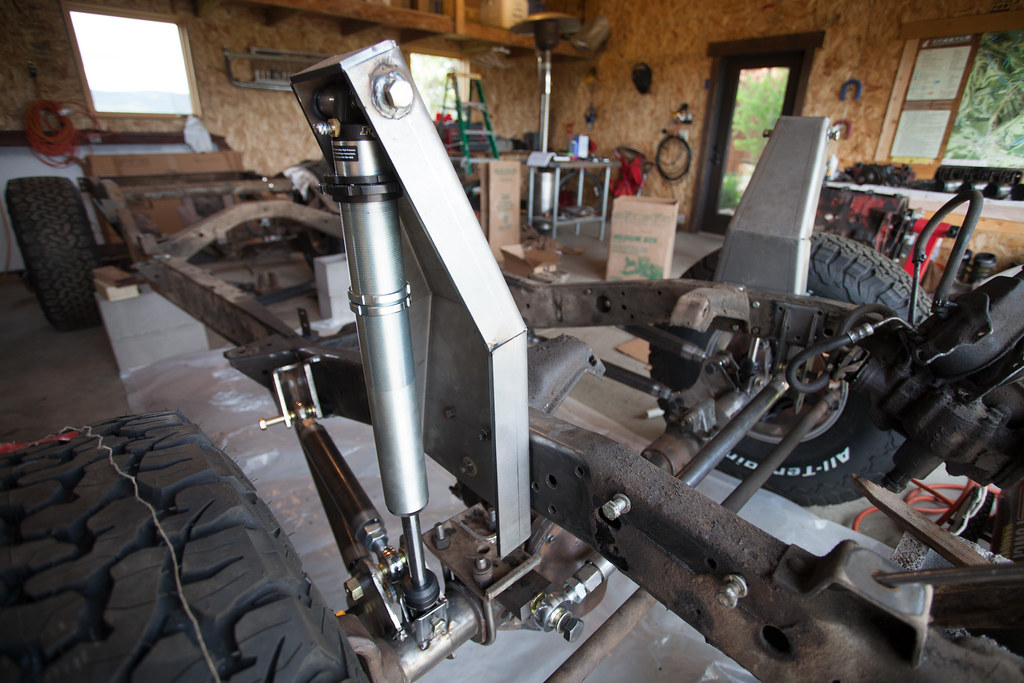
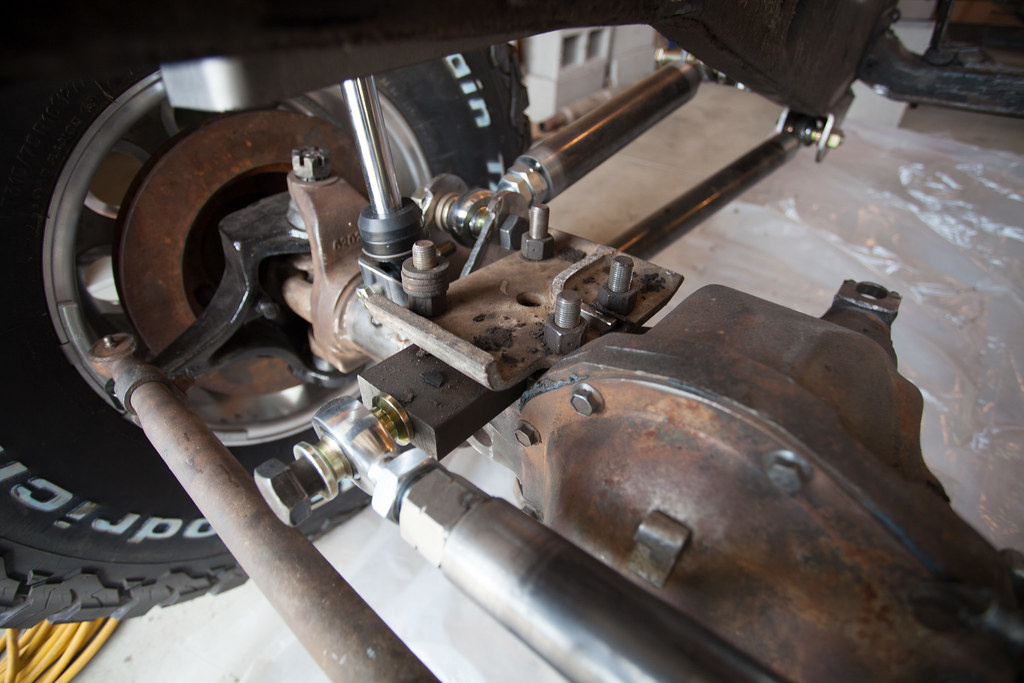
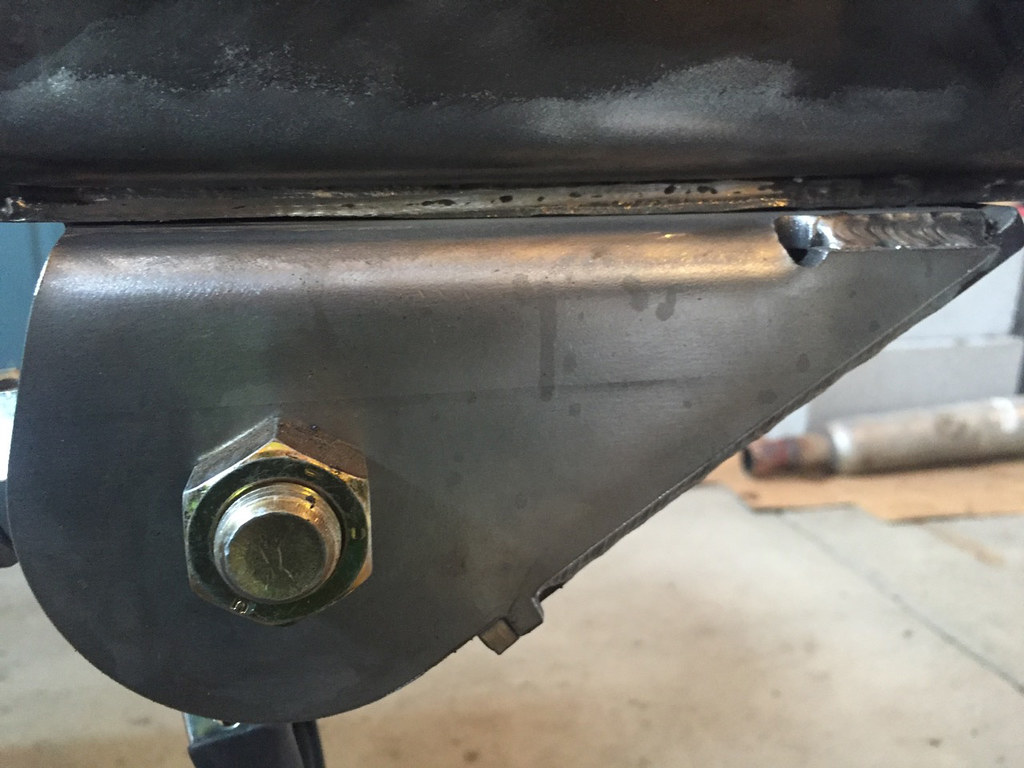
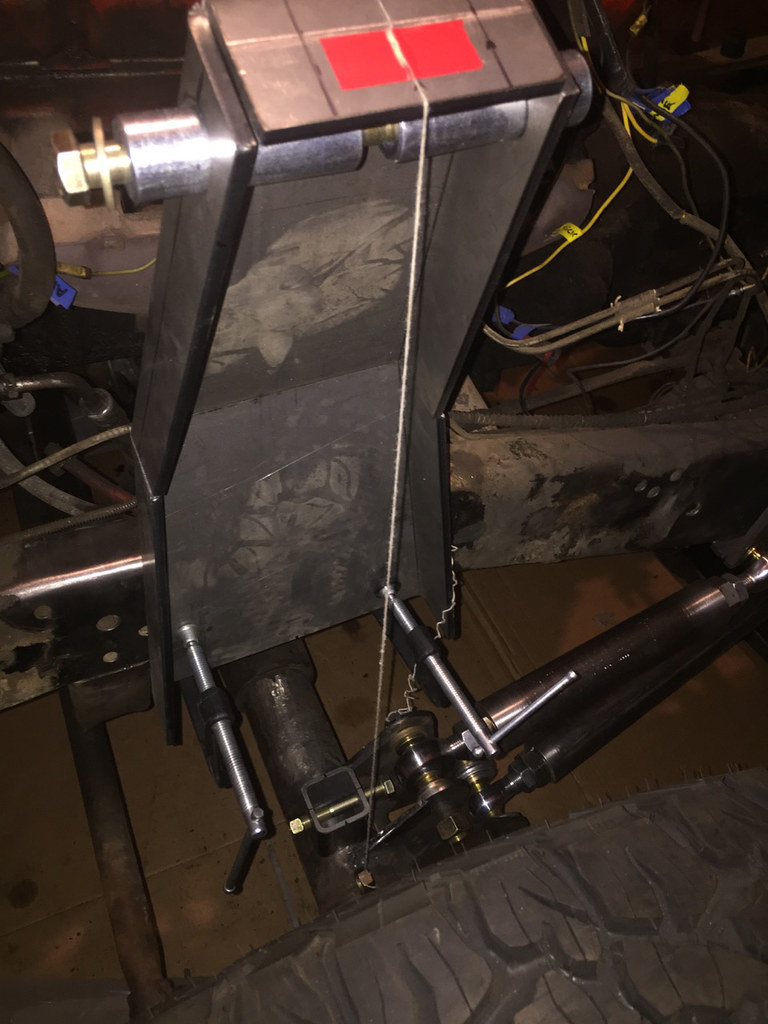
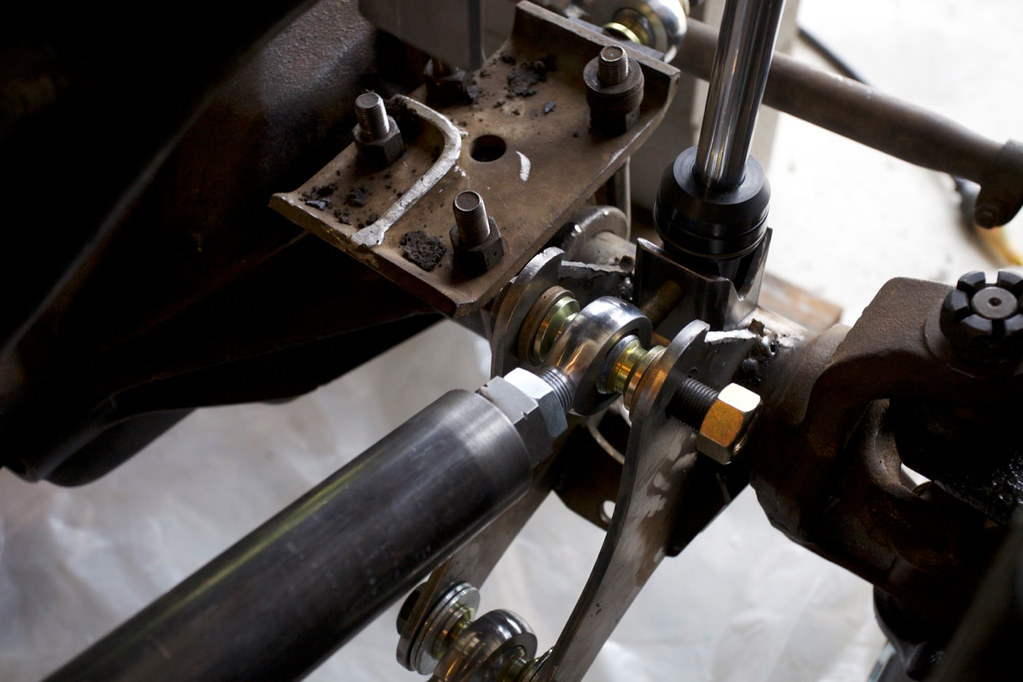
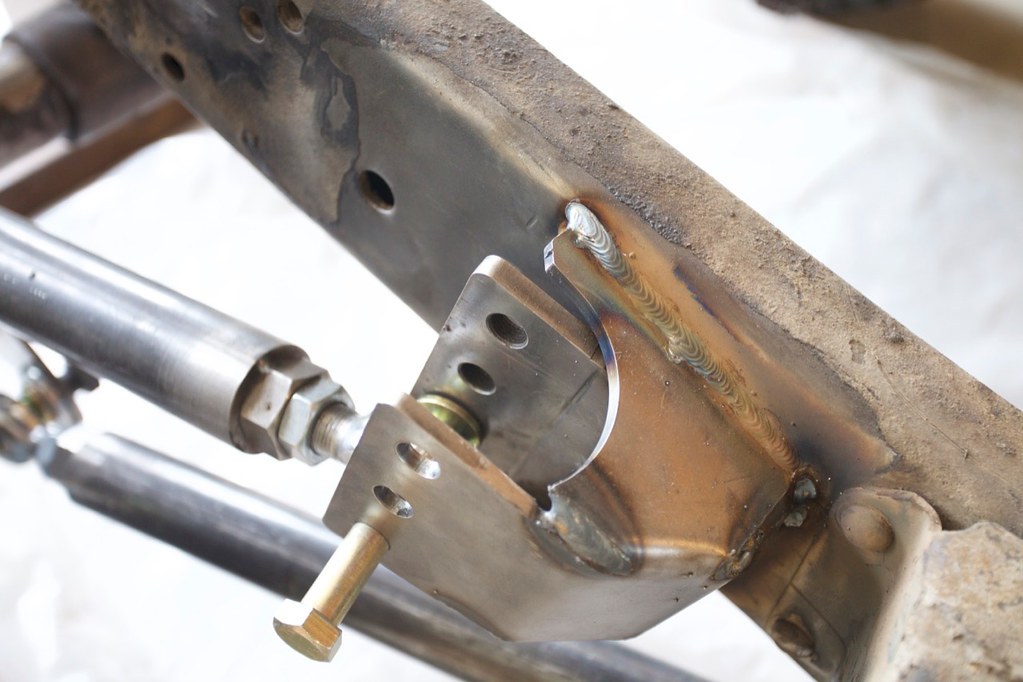
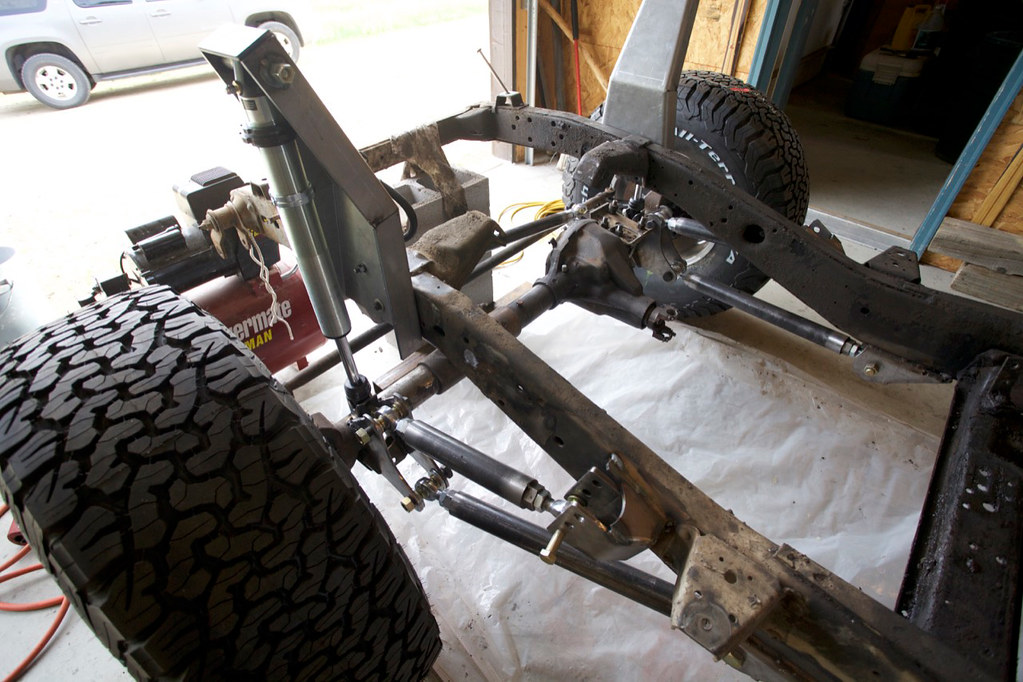
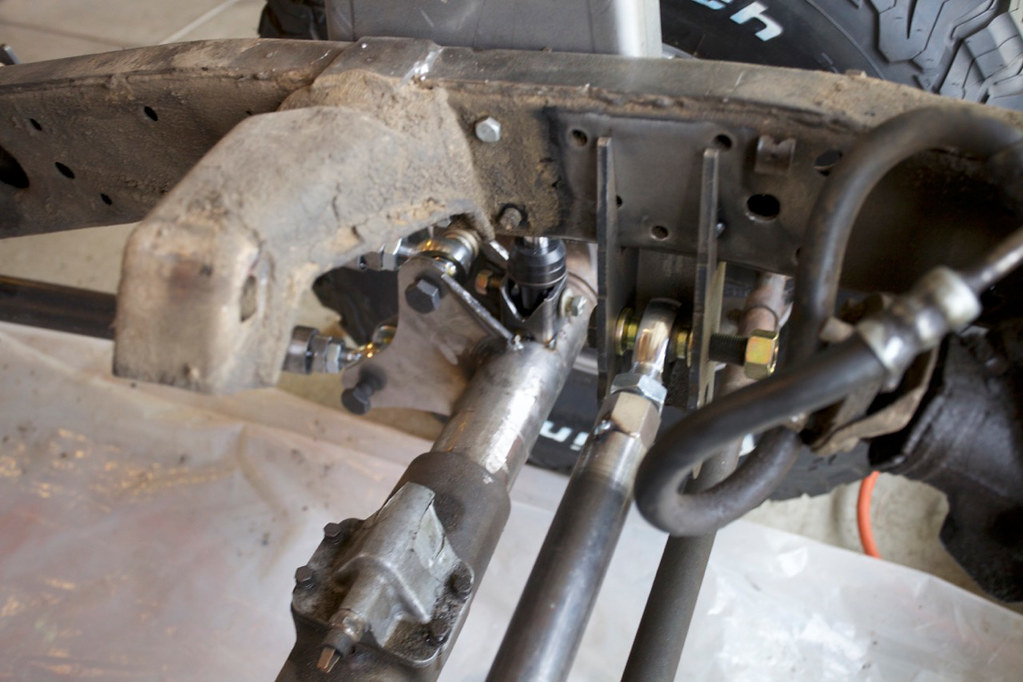
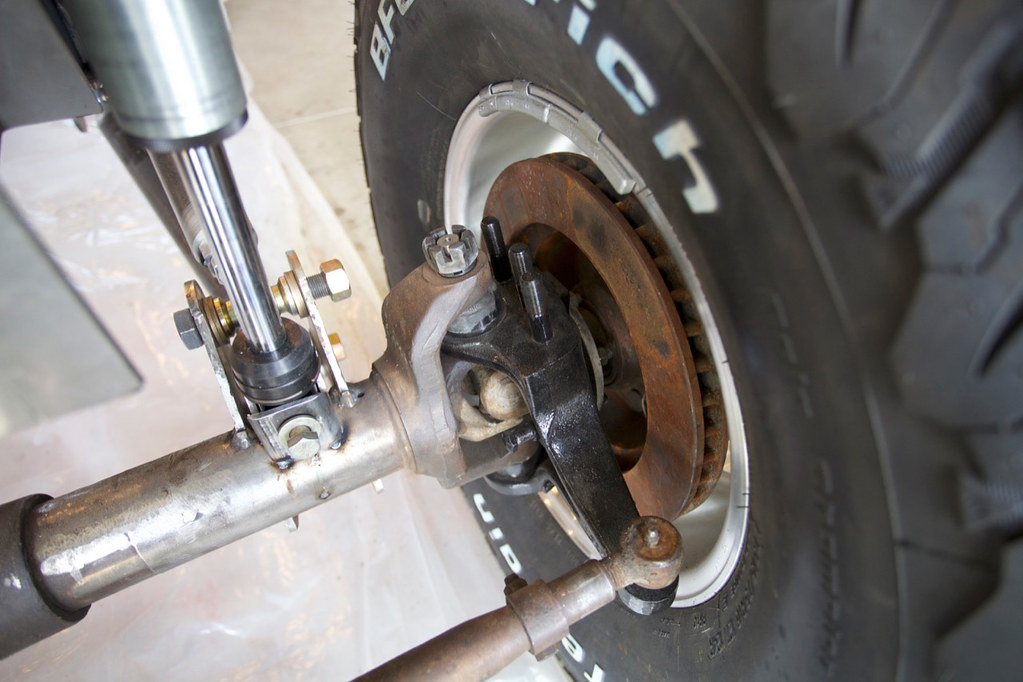
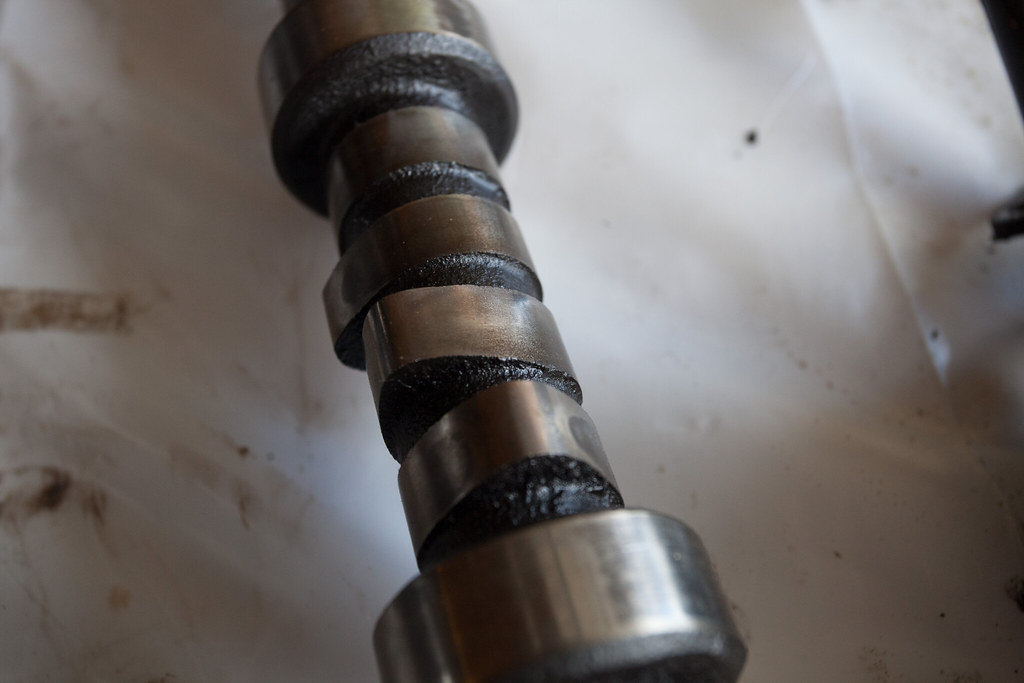
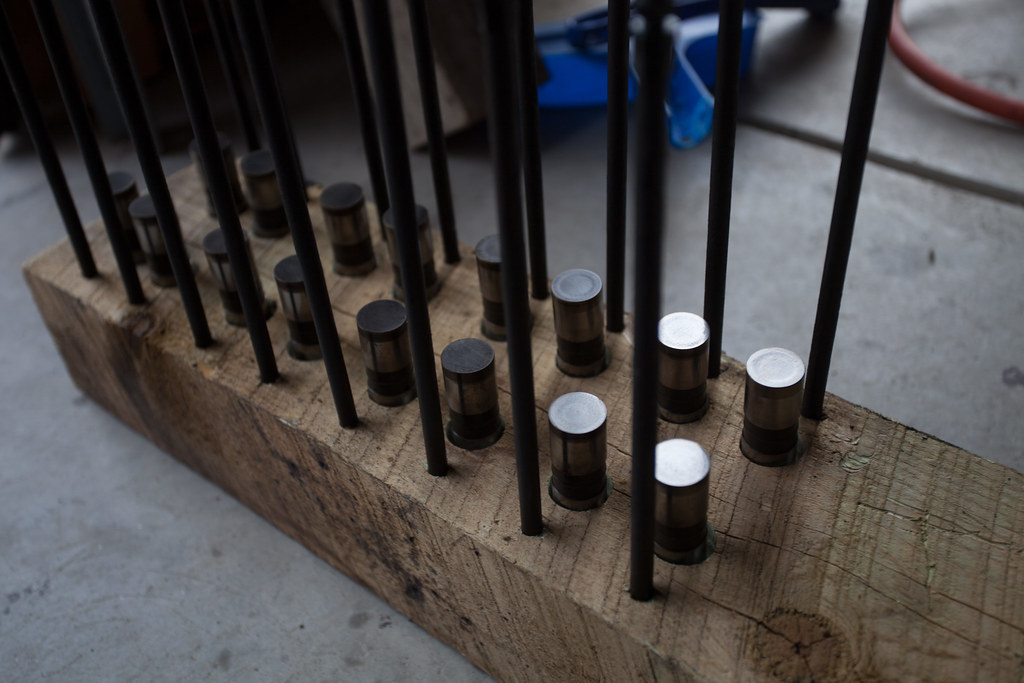
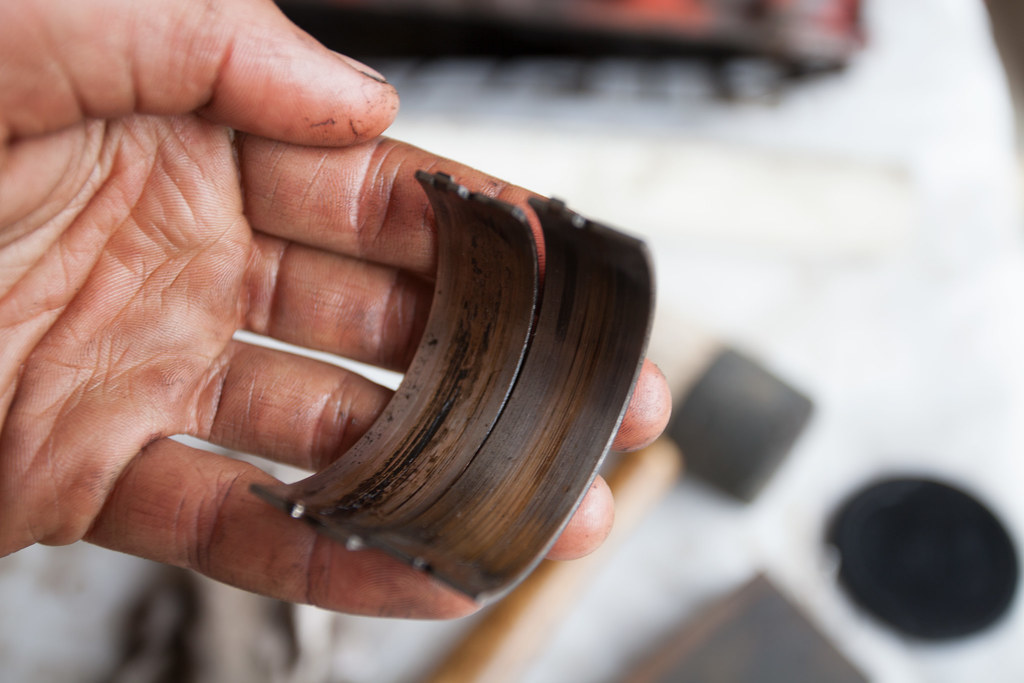
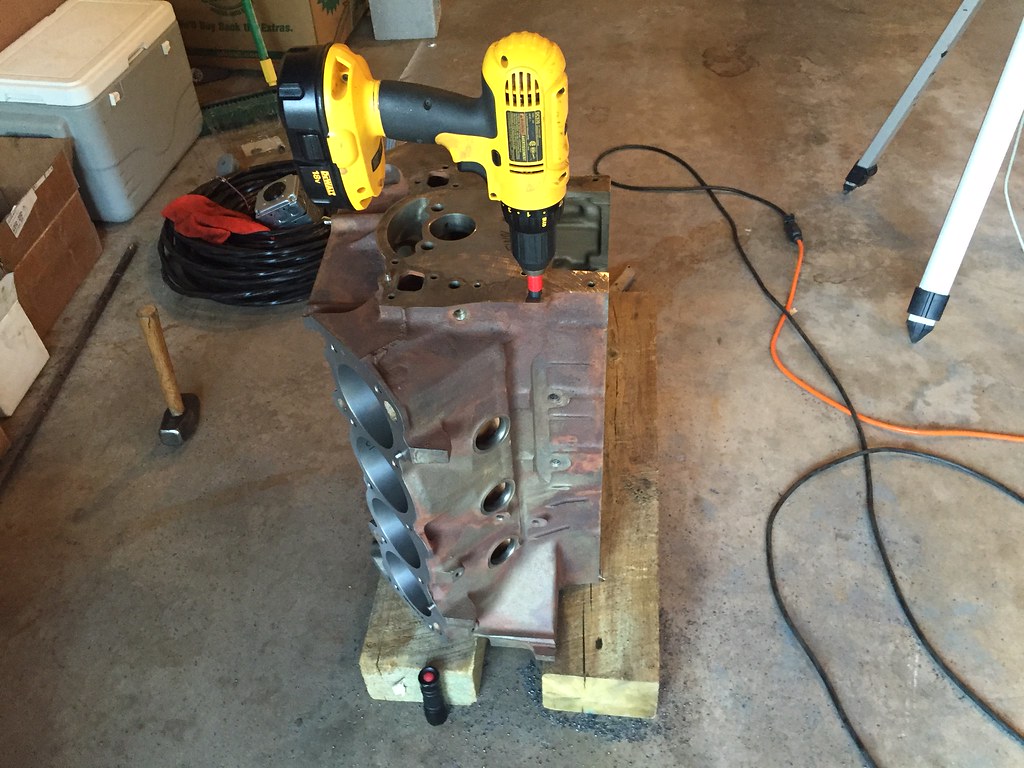
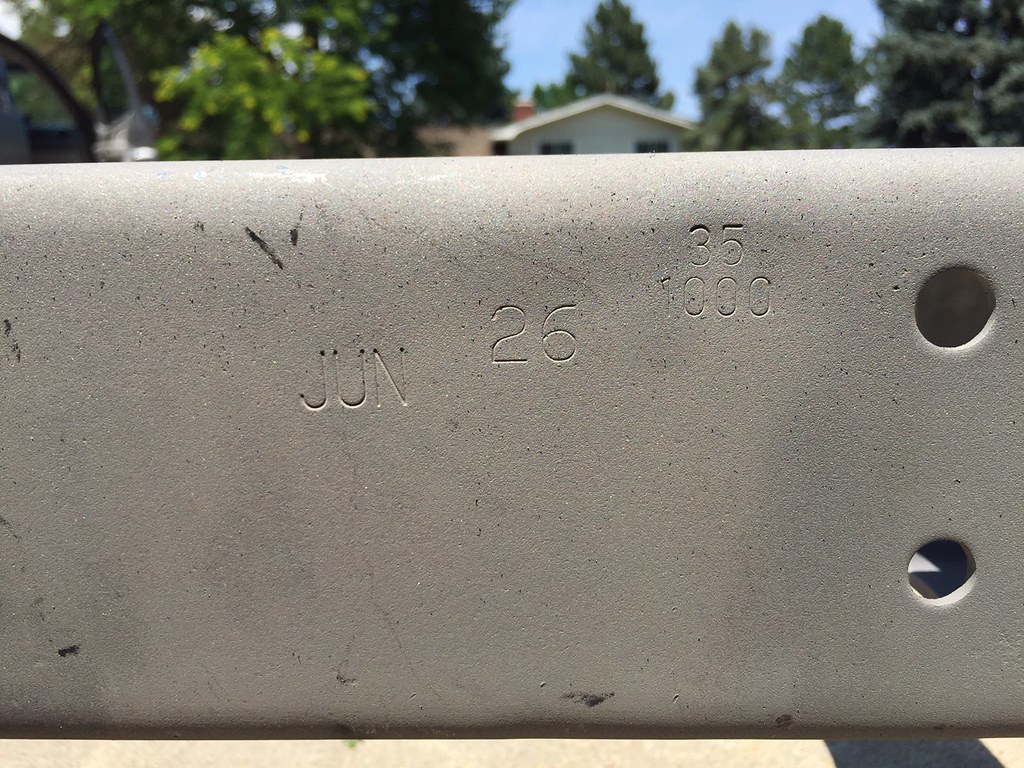
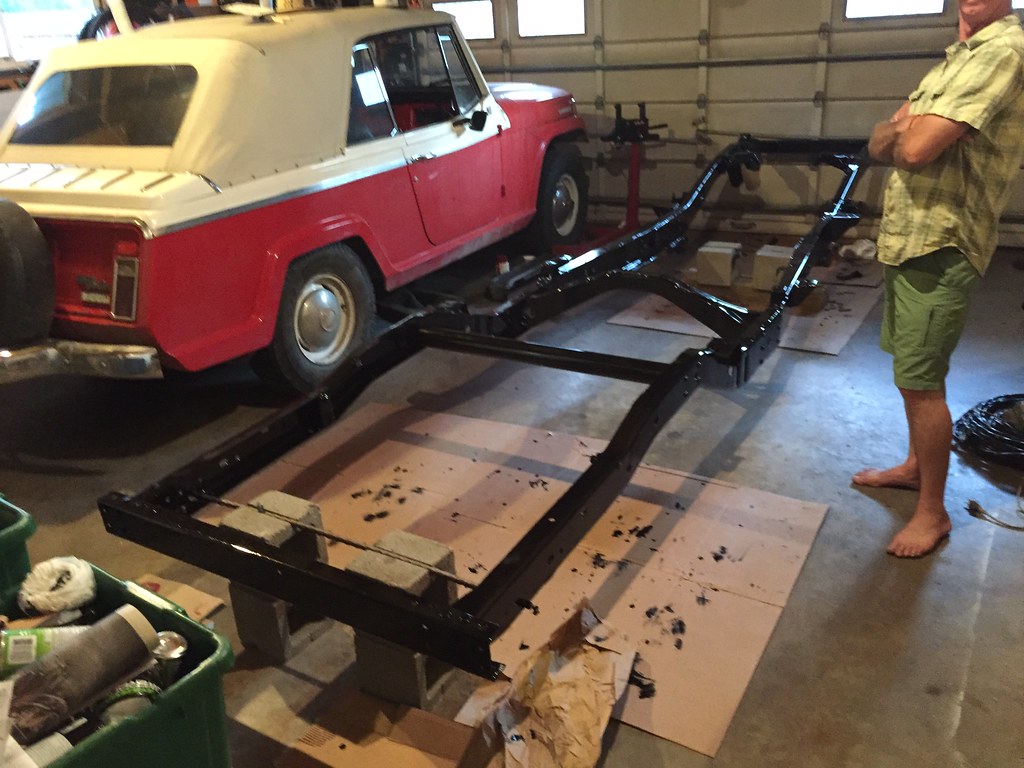
    Last July, looking over the truck I justified new axles. I had no problems with a 44 up front and 60 in the rear, they pretty much needed to be rebuilt completely. Pretty much every wear item, and alot of items that shouldn't have been worn, needed replacement. The splines for the Selectro hubs were stripped, and on my truck the front hub is integrated with the drum. So I needed to find good drums with Selectro hub splines. Nope. And it was my understanding that the rear break parts were near impossible to find too. And the rear axle was off center for no reason except for clearing the gas tank. (Yes, Jeep could have engineered it to be easier to clear rocks off-road, but this truck was never intended as a rock crawler.) And, I'm in the mountains a lot, and I really wanted discs. Drums get scary on some of our passes. And three gears in a TH-400 doesn't exactly give you the most options for gearing down. So, I looked into which other (Big Three) trucks have the same axle widths as a FSJ (wide-track only) Only Dodge was close. It was hard to tell what the Jeep's WMS-WMS was, and I forget what I measured. I think factory was about 65". Dodge came in at 67" while Chevy and Ford trucks were 69". So, Dodge it was. However, until '81 I believe, Dodge used a unique front knuckle arrangement with a "unit bearing." Essentially, parts are hard to get -- which is why I was changing axles in the first place. Cool thing is 82-89(maybe more?) have a 34" front frame rail spacing, just like FSJs! So, I went out and got an '85 Dodge W350, non running. When I got home, I found some funky bump on the axle and I got to learn about CAD. Joy. Oh well. Buyer error. IF you're following my path, get an '84-'81. They have real lockouts.
    So, the stock Dodge CAD setup is a vacuum control. Vacuum controlled things scare me a lot, and it relied on vacuum switches in the NP208 that I wasn't going to use, so I decided to make it cable operated. There is a product called 4x4 Posi Lock made specifically for this Dodge axle, but at ~$150 I was too cheap. Plus, it has an ugly handle.
    I happened to find this writeup of exactly what I wanted to do: http://www.jeepforum.com/forum/f12/h...ite-up-595515/
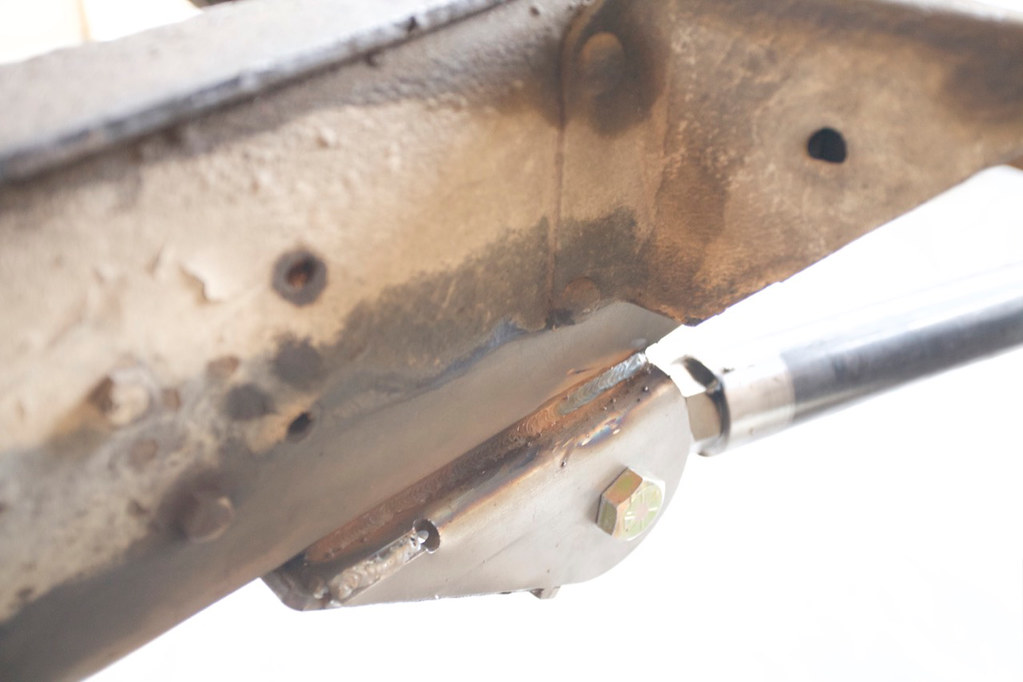
    So, I followed the instructions for the most part, however I decided to remove (rip) the vacuum motor, and control the shift fork from there, as opposed to drilling a hole through the opposite side of the housing. The net result of this is that the writeup gives you a shift handle that is "in" for disengaged 4WD, whereas mine is "out". It was a "prettier" solution to me design wise, so I decided that I could live with the handle "out" most of the time.
    Here's what I did.

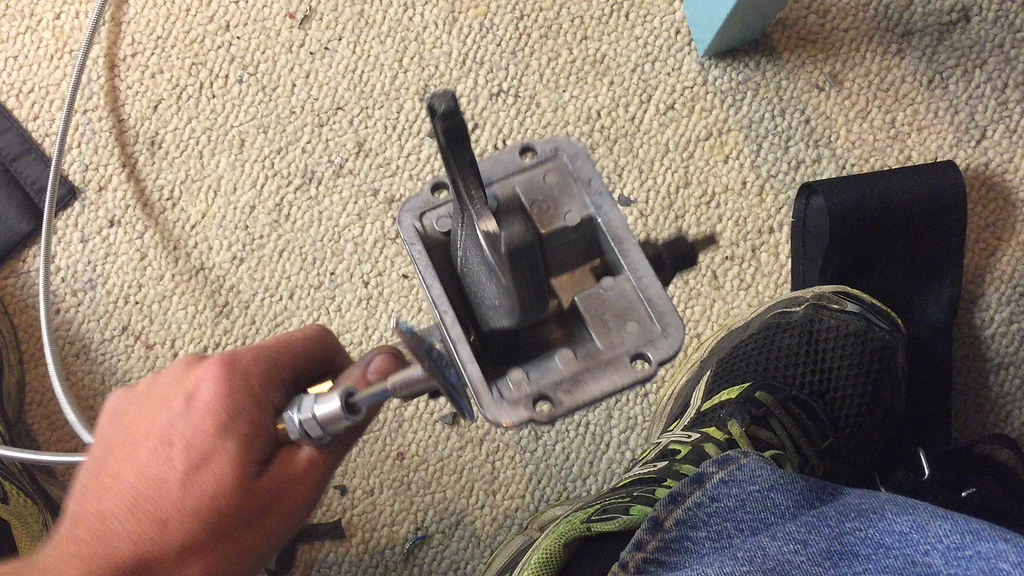
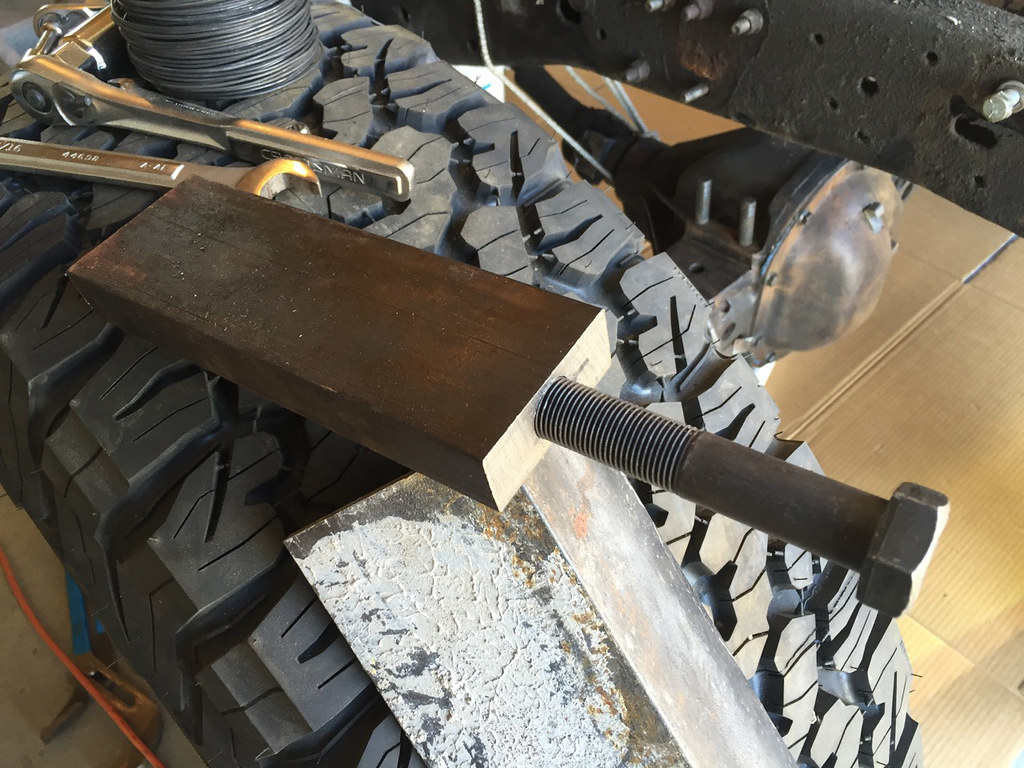
    I'm drilling out the end of the former vacuum motor. Nice jig. I know. It worked.

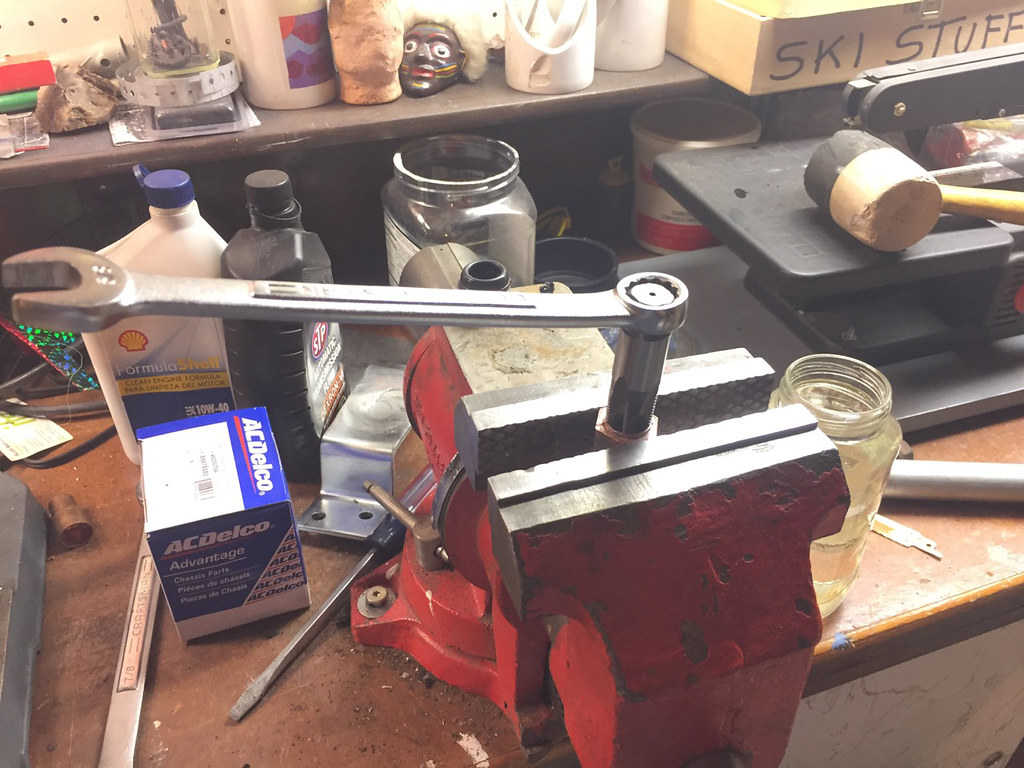
    Thread the same piece. (I don't have a T-handle for taps this big. It's 3/8 NPT I believe)
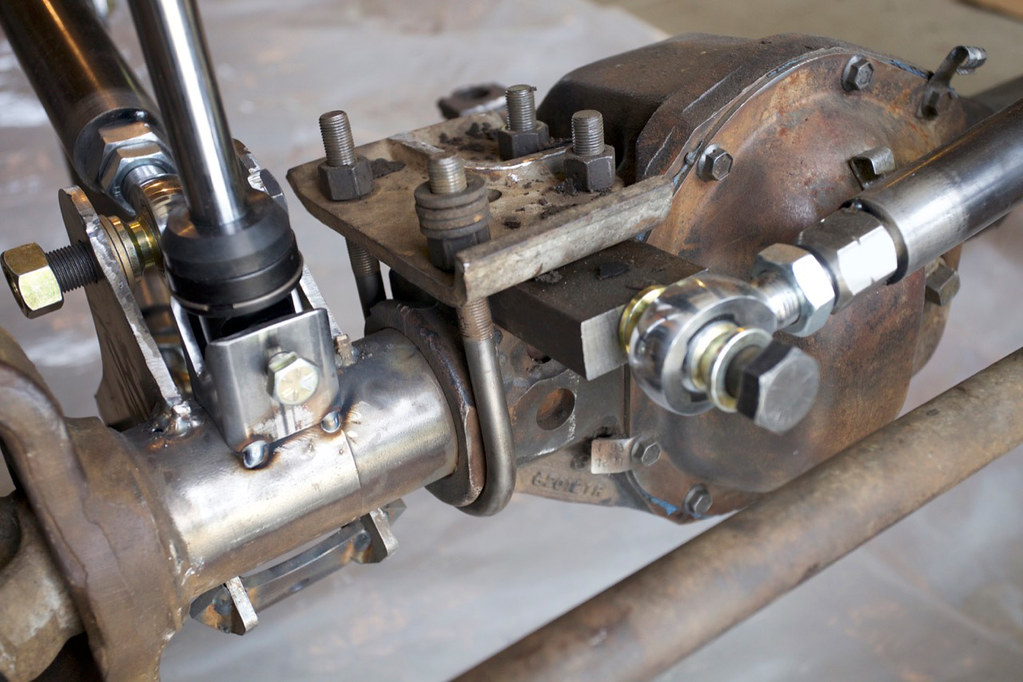
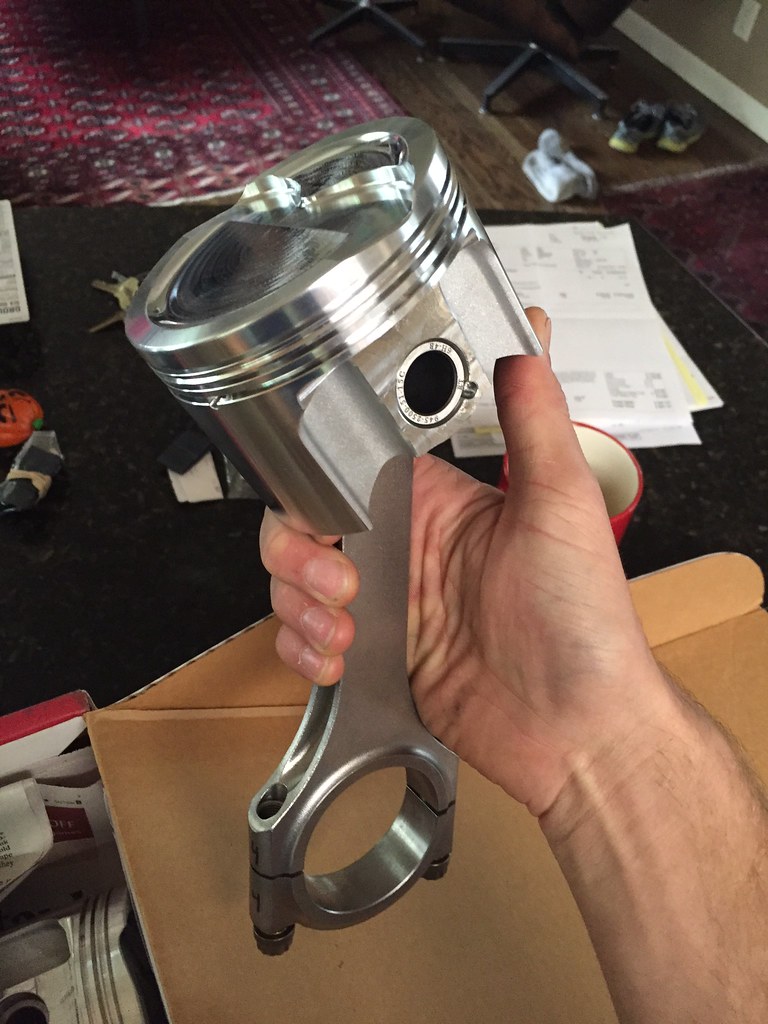
    Drill a hole down through the shift actuator. The fork runs on this shaft.

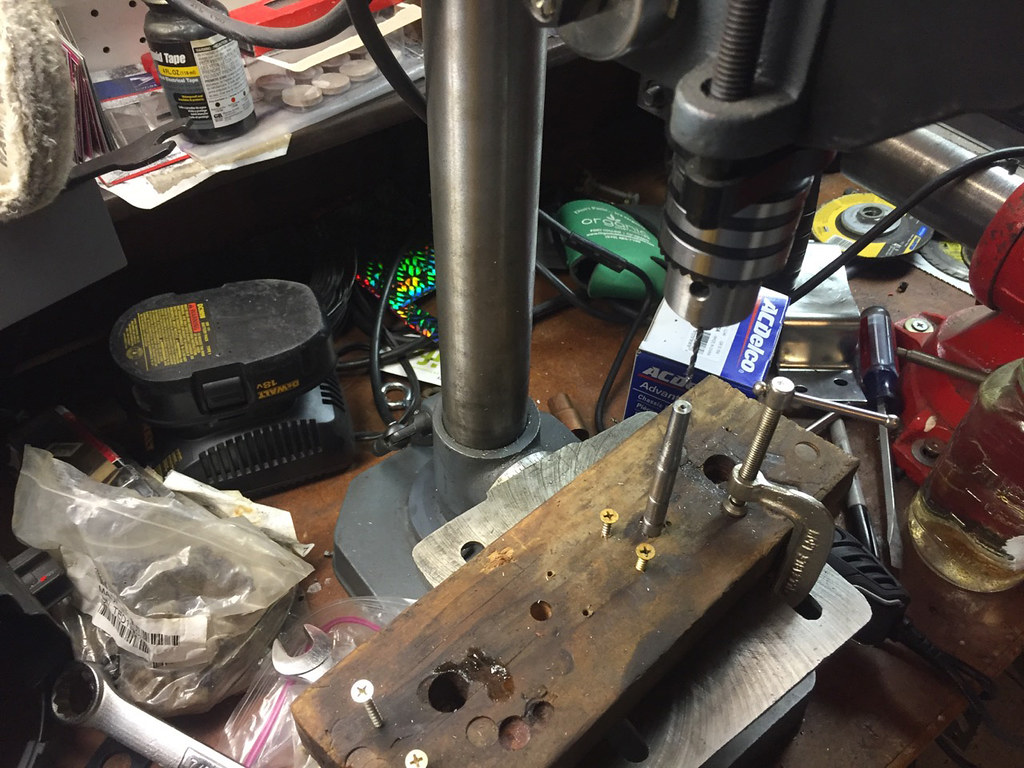
    I also drilled a hole perpendicular to this one for two set screws to hold the inner part of the lock cable into the shaft. It was too small for me to thread.
    And ta da. Now it works with a cable.


    (Edited whole thread to salvage photos from Photobucket Suicide)
    Last edited by CameraFinn; 01-01-2018, 05:19 PM.
    Finn

    You know it's a good morning when the gas gauge works for the whole drive.

    1970 Wagoneer Project (Dad's)
    1970.5 Gladiator J-4800 Camper Special Custom Cab - 55,000 Miles
    1967 Jeepster Convertible - 8071 Deluxe - 65,000 Miles
  • CameraFinn
    232 I6
    • Oct 15, 2015
    • 56

    #2
    Onto the Springs

    Here is the Dodge after stripping:

    So, I got a rebuilt front D-44 HD and a matched 60 rear for ~$100 in the end. Not a bad deal.
    Next, I figured out what tire size I wanted to run. Well when you try to put a 12.5" tire in the rear of a J-4000 and keep it within the fender well, it doesn't work. It hits the spring. Hard. If you bolt it up, the tire sidewall has to flex about a 1/2" to get the tire on. AKA you can't drive an inch.
    Here is what it looks like with the ride hight mocked up, and the tires on.

    So, because our frames are pretty unique amongst trucks, and get very wide at the rear, I decided to move the springs inboard. I'm not sure if anyone has ever done this, but it wasn't bad. We (Dad and I. Father son project) cut the rivets out of the mounts from the Dodge and used them on the truck. The Jeep springs are by far a superior design, with a brass busing and a grease fitting, however the brass bushings were cracked, so I would have needed new ones. In addition to that, the rear springs for the Jeep are a unique length, and I didn't want to have to have custom springs made if I ever decided to change the rate for the rear. So, I used the springs from the Dodge. I replaced the bushings, and we set them up about the same as they were, only now on the inside of the frame.
    Old spring VS. new spring placement:

    Because the frame isn't boxed, we had to box the frame in that area. We decided that we would add a little strength there, so we got a few pieces of 8 inch C-chanel and ground them to fit into the frame.
    Here are a few pictures from today, now that the bed is removed: (Ha, yes we did all of this with the bed still on. There was no room to take it off where we were, and we needed to know if the wheel was centered in the arch.)(Also, the mounts are only tacked into place. I need to go back and weld them in.)


    Last edited by CameraFinn; 01-01-2018, 05:30 PM.
    Finn

    You know it's a good morning when the gas gauge works for the whole drive.

    1970 Wagoneer Project (Dad's)
    1970.5 Gladiator J-4800 Camper Special Custom Cab - 55,000 Miles
    1967 Jeepster Convertible - 8071 Deluxe - 65,000 Miles

    Comment

    • CameraFinn
      232 I6
      • Oct 15, 2015
      • 56

      #3
      Rear Drums to Disk

      There was a long pause, and in February, I started back up on the truck. When I opened up the front axle, it did look rebuilt, just as the PO said. The rear end was a different story. The drums were pretty "worn."

      The cost to replace everything in the drums was only 100 fewer dollars than converting to discs, so I switched to discs. It wasn't hard at all. It uses "84 K20 front rotors, and the infamous "78 El Dorado rear calipers. I got the brackets for the calipers from Cutthroat4x4. They are thick pieces of steel. I did have to file them some to get them to fit onto the flange on the axle, but that was OK with me. Better to have zero slop than alot.
      I didn't take any pictures of the conversion apparently, but I'm not sure how relevant it is here anyway, being a Dodge axle and all. There are lots of good how to-s on the web about this subject. It's not hard to do intuitively either.
      I have yet to hook up the E-Brake. I'll post something else on that when I do that. Everyone seems to use the El Dorado calipers.
      In this picture I haven't pushed the caliper on fully yet. On one side it slid on pretty easily, but on the other the pads seem to be thicker or something. It took lots of encouragement to get it onto the disc.


      Last edited by CameraFinn; 01-01-2018, 05:33 PM.
      Finn

      You know it's a good morning when the gas gauge works for the whole drive.

      1970 Wagoneer Project (Dad's)
      1970.5 Gladiator J-4800 Camper Special Custom Cab - 55,000 Miles
      1967 Jeepster Convertible - 8071 Deluxe - 65,000 Miles

      Comment

      • CameraFinn
        232 I6
        • Oct 15, 2015
        • 56

        #4
        The Front Suspension

        In March, we moved to the front. Because the Dodge axle has a cast in perch on the axle, the spring to caster & pinion angle was set. Well, unfortunately, the geometry of the spring mounts in the Jeep was vastly different from the Dodge, and we determined that the spring would need to be "s" shaped. We went to a custom spring shop to make sure we weren't crazy, and they agreed with us that it wasn't really doable with a normal spring. They might be able to make one, but at the cost they quoted, suddenly a multilink front end became comparable. So, out went the leafs, and in went much thinking. I did lots of research about 3/4/5 link systems. I decided I liked the 5 link best. There are four locating arms that run longitudinally with the truck, and one transverse pan hard bar. The two links on each side are close to each-other when looking down on them. This let me have decent geometry without a massive lift. Normally, on a three link, guys will run the single top arm to the trans crossmember. This would not work with so little lift. Plus, one top arm sounds scary. (I don't think I even have four inches. Hard to tell though with how sagged the front end was originally. The front end rides about even with what the original rear height was.) This five link setup is stock on newer 2500 Rams, and I believe also on TJs/JKs.
        Here is a picture of the truck after we pulled the stock axle out:


        I considered selling a kit to make FSJs levitate. It looked pretty cool. But then I decided that wheels are probably the way to go for the police and all. So I mocked up the links in PVC first:


        I chose to use 2" OD X 0.25 Wall DOM tube for all four arms, and 1.50" OD x .25 Wall DOM for the pan hard bar. All Heim joints are from RuffStuff, as is the DOM (yes it was much cheaper there + shipping than my local steel yards.) and the frame mount for the top link. The Heims are 7/8X7/8. The top link on the frame end has spacers to reduce it to 5/8, and all the other bolts are 3/4. The axle mount and lower frame mount are from Ballistic Fabrication.
        The springs/shocks are 12" travel Fox Factory 2.0 Emulsion coilovers with 12" 350lb/in and 14" 450lb/in springs. In order to get a relatively long coilover in with very little lift, I needed a very large shock tower. I needed about 25" from eye to eye on the coilover to be between 50/50 & 60/40 Droop/Bump travel. Few (one) companies made the 18" tall tower to accomplish that, and none of them fit in the wheel well. I mocked up a tower in cardboard that would do the job:


        Then I drew up the tower on the computer and sent it over to Ben, a friend and the owner of Focused Light in Arvada Co. He's a great guy with an awesome metal fabrication company. They cut the towers for me out of 1/4" steel, and then sent them out to be bent. In two and a half weeks, they were back in steel.


        The Panhard bar was another interesting challenge. The steering on these rigs, as I'm sure all of you know is transferred with a drag link laterally. To minimize bump steer, the Panhard bar needs to be at the same angle and be the same length as the drag link. The problem rose again from the cast in perch. It added lots of width to the differential housing casting, eliminating the extra room where a Panhard mount would normally be welded to the axle. I decided to use the cast in perch AS the panhard mount. I got a 1"x2.5"x18" (2.5" wide is stock Dodge spring width) bar of steel, cut it to 7.5" in length, and had an 11/16" hole drilled down into it. Then I threaded the hole to accept a 3/4x16 TPI bolt.
        Like so:


        Then, I bolted that piece of steel in place of the old leaf spring:


        I need to grab a shorter bolt, and add a bolt where the bolt that holds the spring pack together would be, but other than that, I think it should work.
        I also made mounts for the axle side of the coilover. They can be seen clearly two pictures ago.


        I had trouble with porosity I couldn't solve while welding the lower frame mounts. Then I noticed the factory Jeep weld was essentially hollow. Crazy porous. So I ground it down. This was about the last 1/4 of the factory weld:


        Built on Friday afternoon?

        Anyway, after I ground all of the factory weld out, I had no more problems welding.
        Lining up the shock tower with the shadow of a plumb bob:


        Link Axle Mount:


        Top Frame Link Mount (It needs a shorter bolt)


        Another Picture


        Panhard Frame Mount Tacked In


        Passenger Side Axle


        Lower Frame Mount Welded


        It's late. I'm going to bed. I'll post more in the morning.
        Last edited by CameraFinn; 10-19-2017, 08:17 PM.
        Finn

        You know it's a good morning when the gas gauge works for the whole drive.

        1970 Wagoneer Project (Dad's)
        1970.5 Gladiator J-4800 Camper Special Custom Cab - 55,000 Miles
        1967 Jeepster Convertible - 8071 Deluxe - 65,000 Miles

        Comment

        • Frank Ziebert
          327 Rambler
          • Dec 04, 2016
          • 620

          #5
          Very interesting write up. Thanks for sharing.
          1970 J2000(2500) Currently undergoing frame off resto
          Stinger 2005 Jeep Unlimited, Sahara, Rubicon slightly modified

          Comment

          • CameraFinn
            232 I6
            • Oct 15, 2015
            • 56

            #6
            Bodywork

            Thanks for the kind words Frank. You were up much later than I.

            The truck was in really good shape, from the outside. There was nothing other than surface rust anywhere. It also appears that it was undercoated at the factory, and the undercoating stuck extremely well. To strip it from the frame, you have to really get on it with a wire wheel on the grinder. When I bought it, I knew that bits of the driver floorboard were rusted through though, and I expected to replace them. When I pulled up the carpets, It was worse than I expected. All of the rust had come from the full-of-leaves cowl vents.
            This was just what I could pull out of the floor with pliers on the driver's side:


            It appeared that someone had treated the 8 inches nearest the door with a rust-stop, but I guess they were too late.
            We got new panels from Z&M for the whole floor. Here is the driver's side after replacement:


            We cut out lots of good factory metal, but there were patches of cancer all the way up on the tranny tunnel, and I didn't want to make a floor that was stitched up with "z's" all over. The front firewall replacement was crazy challenging to get in the right shape.
            I did most of the shaping with a home-made english wheel to get the curves.
            Most english wheels are welding bottle caps, right?


            In addition to that, I had to replace a little bit of the kick panel on the driver's side:


            Not beautiful, but I'm learning to weld on this project.
            The passenger side wasn't quite as bad (no holes all the way through: close though)


            It was easier to fix:


            Then we took the body down to town to get sand-blasted, which is where it is right now.
            I really appreciated Jeep's "Wiring harness" with all of it's PO modifications included:


            Unknotting:


            I think I'll put it back together with a fuse box.
            I took the engine apart yesterday, so I'll post that tonight or tomorrow.
            Have a good day y'all.
            Last edited by CameraFinn; 01-01-2018, 05:38 PM.
            Finn

            You know it's a good morning when the gas gauge works for the whole drive.

            1970 Wagoneer Project (Dad's)
            1970.5 Gladiator J-4800 Camper Special Custom Cab - 55,000 Miles
            1967 Jeepster Convertible - 8071 Deluxe - 65,000 Miles

            Comment

            • Kaiserjeeps
              360 AMC
              • Oct 02, 2002
              • 2810

              #7
              I am following this too. Great stuff! I have a 71 J4000 here I will be getting running. But I am putting a Buick 350 instead of the 360 back in with a little help from Frank and his donor truck.
              Looking forward to more.
              Melford1972 says...
              I’d say I feel sorry for you, but I really don’t, Mr. “I-stumble-into-X-models-the-way-most-people-stumble-into-Toyota-Carollas.” 🤣
              -----------------------
              I make wag parts
              1969 CJ-5 41 years owned
              1969 1414X Wag in avocado mist
              1970 1414X Wag in avocado mist
              1968 M715 restomod
              2001 Dodge 3500
              2002 Toyota Tundra
              2006 Toyota 4runner was Liz's, parked


              Building a m715 over at the m715zone
              Beloved wife Elizabeth Ann Temple Murdered by covid on Oct 19th 2021

              Small violin, large amp

              Comment

              • xabn82
                232 I6
                • Jan 01, 2016
                • 155

                #8
                I have a 1973 J4000 and it came with a 1976 J20 donor truck. Was gonna put my 73 body on the 76 frame then put a 5.7L with 4L80E. All of these seems time consuming. I love that front end on that truck.
                1973 J4000

                Comment

                • Full Size Jeeper
                  304 AMC
                  • Jul 20, 2014
                  • 2475

                  #9
                  Very nice truck, thanks for the pics of the floor pans. will be doing ours soon.
                  1978 Wagoneer

                  401/turbo 400 trans. Quadra-Trac BW1339 (with Low) 4" Rusty's lift with 31" Summit Mud Dawgs

                  Mods:
                  Fuel Tank, Red Holley Fuel Pump, Razor Grill (profile pic out dated), Rebuilt steering box

                  Comment

                  • CameraFinn
                    232 I6
                    • Oct 15, 2015
                    • 56

                    #10
                    KaiserJeeps: I think that 71 J-4000 will be good with a 350 under the hood. They make lots of torque. Mine even drove all right with the sad state of the engine. Buick had very advanced port design (for the 1960's). They are expensive to build though.

                    xabn82: There sure are reasons that LS swaps are common. They're great, cheap, and powerful engines. I wanted to use the 4L80E in this build too, but I don't have the cash to do it right now. Plus, this one came with the BW Overdrive. So I'll wait till I blow up the OD, and the spare OD I've got, and then I think I'll be onto the 4L80E. It's a shame the 6L80E is near impossible to controll without an entire LS drivetrain though. It's a good transmission, and it's nice to be able to run passes with only the engine brake.

                    Full Size Jeeper: The floor pans weren't too bad. I'd never welded before this project. The sheet metal wasn't too bad. We spent a good amount of time getting the panels to fit really well, and then we stitch welded the whole thing. Anywhere where there was a big gap, we used a copper backer plate and it filled well. It's not a pretty weld, but it's solid; I think that's okay in the floor. The body shops we took it to for quotes didn't think it looked that bad either. They said they would just lead (or putty -- whatever they use now) the seam in after to get it flat. I won't be doing any bodywork though. I'm sure that's still way above my abilities.
                    Finn

                    You know it's a good morning when the gas gauge works for the whole drive.

                    1970 Wagoneer Project (Dad's)
                    1970.5 Gladiator J-4800 Camper Special Custom Cab - 55,000 Miles
                    1967 Jeepster Convertible - 8071 Deluxe - 65,000 Miles

                    Comment

                    • CameraFinn
                      232 I6
                      • Oct 15, 2015
                      • 56

                      #11
                      Engine Disassembly

                      Getting the engine out with no body was pretty easy. We took the drivetrain apart from the back forward so we didn't have to support the transmission. Everything came apart easily, not much to say about it. I was surprised though to find that the TH-400 had an adapter to go to the BOP pattern. The pattern on the transmission didn't look like a Chevy-90-Degree either. Does anyone know what it is? Is it just "TH-400" pattern, and GM made adapters to put it behind whatever?
                      Anyway, we popped the engine out:
                      [

                      (It was late and I was tired)

                      While I was taking it apart, a few things made me think it'd been rebuilt at some point. One of which was the cam, which still has fresh grinding marks on it:


                      Some of the lifters were barley worn too:


                      Additionally, the timing gear is supposed to have nylon teeth, but it was a solid steel gear. The timing chain was stamped "Morse." I doubt Morse made GM's timing sets. The rod bearings were Clevite, which is not "standard" according to the service manual. I can't remember what company the book named. It started with an "M" and was a model "400." I'll go look at the book today and post back what it was.
                      The 7 & 8 rod bearings were pretty bad, but weren't spun:


                      Also, unless this was done at the factory, it seems that someone had numbered the rods:


                      There was a serious amount of carbon though:


                      Does anyone know if these bottom three water passages in the head are supposed to be blocked by the gasket, or was this the wrong gasket?


                      As excited as I was about the prospect of installing these new-to-me multi piece piston rings, I think I should probably go with the standard type on the rebuild.
                      Detonation anyone?
                      Last edited by CameraFinn; 10-19-2017, 08:49 PM.
                      Finn

                      You know it's a good morning when the gas gauge works for the whole drive.

                      1970 Wagoneer Project (Dad's)
                      1970.5 Gladiator J-4800 Camper Special Custom Cab - 55,000 Miles
                      1967 Jeepster Convertible - 8071 Deluxe - 65,000 Miles

                      Comment

                      • CameraFinn
                        232 I6
                        • Oct 15, 2015
                        • 56

                        #12
                        Some Progress

                        I dropped the block, crank, rods and pistons off at the shop today to get some work done on them. The block will be bored out some to get rid of a gouge in the wall of #1. I bet the decks will need to be milled flat too. I'm hoping the bearing surfaces on the crank are good enough and don't need to be ground, but some of them felt a little rough. We'll see what the shop says.
                        Also, the sand blaster finished up with the body, so it will go to the painter tomorrow.
                        It feels nice to be making some progress.
                        Finn

                        You know it's a good morning when the gas gauge works for the whole drive.

                        1970 Wagoneer Project (Dad's)
                        1970.5 Gladiator J-4800 Camper Special Custom Cab - 55,000 Miles
                        1967 Jeepster Convertible - 8071 Deluxe - 65,000 Miles

                        Comment

                        • CameraFinn
                          232 I6
                          • Oct 15, 2015
                          • 56

                          #13
                          More (Slow) Progress

                          Another Hiatus.
                          A few updates.
                          Body: the painter did such a bad job with the body work and paint that it had to be re-done. He didn't block anything, not to mention there was so little paint in some areas that it had surface rust. We tried to get him to fix various things, but it got worse every time. It's at someone else now. The new guy is doing a good job, going quickly, and keeping me updated.
                          It's current state:


                          Engine:
                          Buicks have notoriously bad oiling systems. One way to help mediate this is to increase the size of some passages. Running a 12 inch bit through your engine block by hand is a little scary. It came out well.


                          Also, shiny new parts!


                          I've assembled the short block so far. Hopefully I can get the long block done this weekend.


                          Frame:
                          In one of the early posts I made a joke about the frame being made on a Friday because the welds were so bad.
                          Well, June 26th 1970 was indeed a Friday:
                          (Frame after sandblasting)


                          Painted:


                          So that's where I'm at. Oh, exciting stuff. I ripped apart a 67 Electra in August to get the SwitchPitch 400, and I'm almost done rebuilding it too. Interesting to note that Jeep used Nailhead TH-400 transmissions behind Buick engines with an adapter instead of just using Buick TH-400s. I bet they were on sale.
                          I really hope I can get it done by Christmas. Being in school has slowed this down a bit.
                          Last edited by CameraFinn; 10-19-2017, 09:36 PM.
                          Finn

                          You know it's a good morning when the gas gauge works for the whole drive.

                          1970 Wagoneer Project (Dad's)
                          1970.5 Gladiator J-4800 Camper Special Custom Cab - 55,000 Miles
                          1967 Jeepster Convertible - 8071 Deluxe - 65,000 Miles

                          Comment

                          • Maxgroup
                            232 I6
                            • Jun 15, 2015
                            • 33

                            #14
                            Looks very nice. I just love the pic of the freshly painted frame......

                            Comment

                            • bkilby
                              350 Buick
                              • Jan 10, 2016
                              • 1083

                              #15
                              Your 1970 frame has a front track bar? Stock or did someone add it?
                              1974 Cherokee S. It's driving but needs more work. As usual!

                              Comment

                              Working...
                              X