
 Tweet
Tweet
I just repalced the rear main seal on my '87 360, with a lot of help and encouragement from HARDCORE pacer, and it wasn't that bad. For those of you that are thinking of doing it, here are some pics.
First of all, I took off the starter and then removed the oil pan. I actually removed the 727 tranny inspection cover, thinking that I could get more room for the back 2 bolts, but it didn't matter. I did need to unbolt both sides of the exhaust from the manifolds to get enough room to drop the pan. My Waggy has a BJ's 6" lift, 33's and I did the whole repair without lifting the Jeep at all. I found that there was enough room for me to slide under the diff while on a creeper.
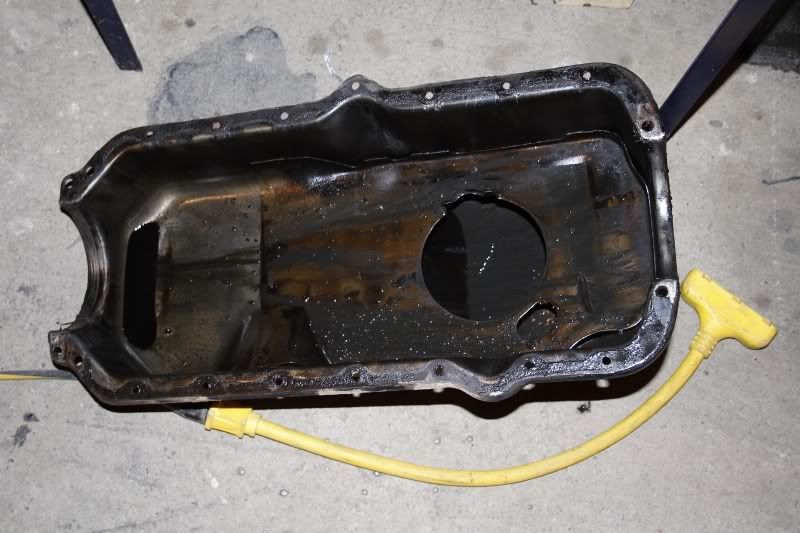
Then I needed to clean off the old gasket material from the pan and the bottom of the block. For the pan, I used a metal brush wheel on a drill, and for the block, I used a scraper that I had sharpened up on the grinder. I then cleaned out all the crud in the oil pan with varsol and then finished it up with brake cleaner.
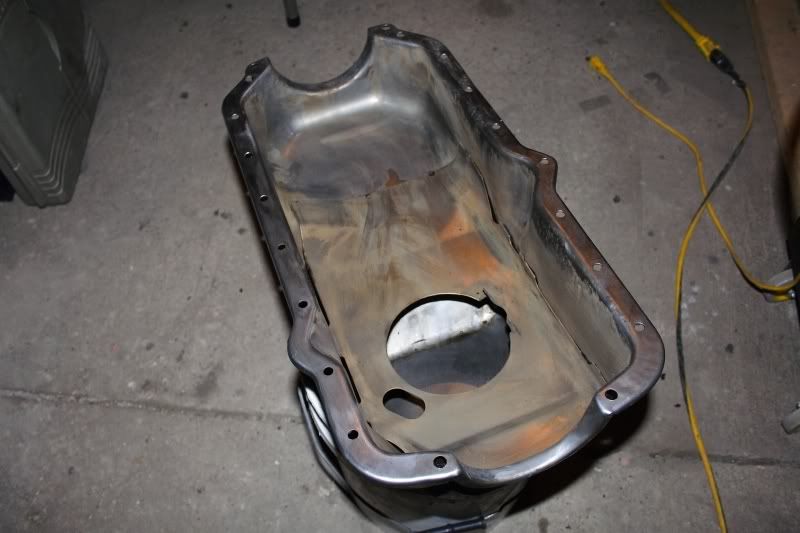
I also pounded straight the flanges on the pan so that it would seat properly against the block.
Now it was time to remove the rear main cap. It was a bit of a PITA because it's torqued down to 100lbs. pressure, as stipulated in the TSM. I was told to be careful to keep the dirt off the half of the main bearing that I removed and made sure that it was clean and oiled when I put it back on.

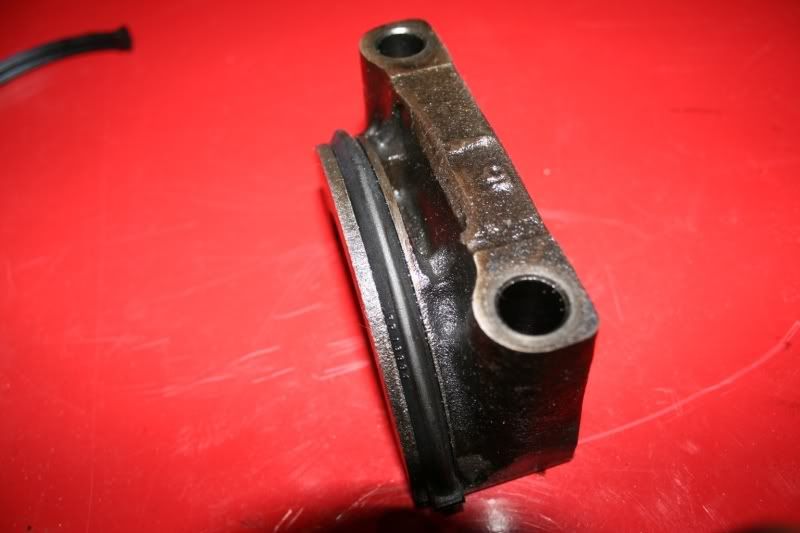
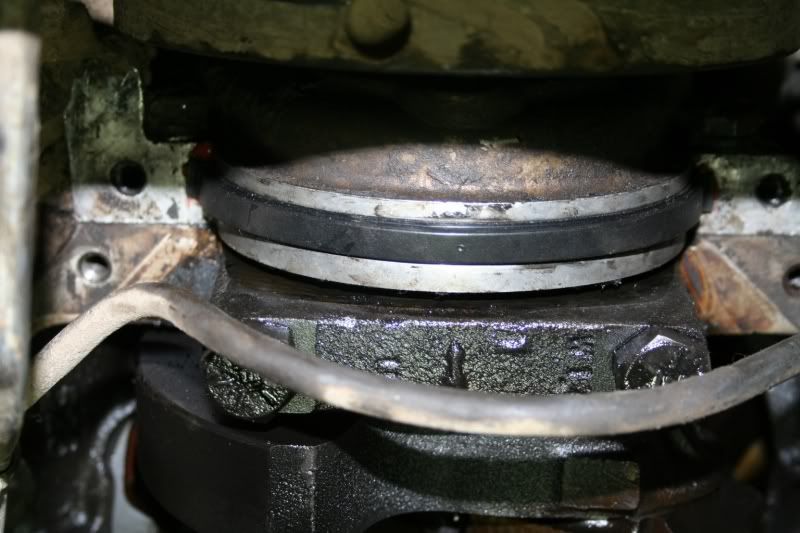
Here's a pic with the main bearing cap removed. You can see the rear main seal just below the lip on the crank. I've already tapped it out from the other side.

Now the TSM states that you need to loosen the other main bearing caps, but EXTREME pacer said that he'd done it many times successfully without touching any of them, other than removing the rear. It was a real PITA to get at the seal to tap it out with a long skinny punch and I was beginning to doubt Craig's instructions when it suddenly came loose. Once it was moving, it came out rather easily. I then reversed the process and installed the new seal the same way that it had come out. Be careful installing the new seal as if it is not snug against the crank, you can easily carve off some of the seal when pushing it back in. Don't ask me how I know that.
Now, it was time to replace the other half of the rear main seal, which is rather easy when it's off the motor. Additionally, there is the pan seal that has to go on the outside of the cap. The TSM instructs to put some RTV at the ends of the pan seal as it looks like it is too short when you first put it in. Once it's torqued down, it's fine.
Thje one confusing thing I read on the pan gasket box was about putting some RTV on the chamferred edge but not on the flange between the main cap and block. I finally figured it out from the diagam in the TSM and it was here.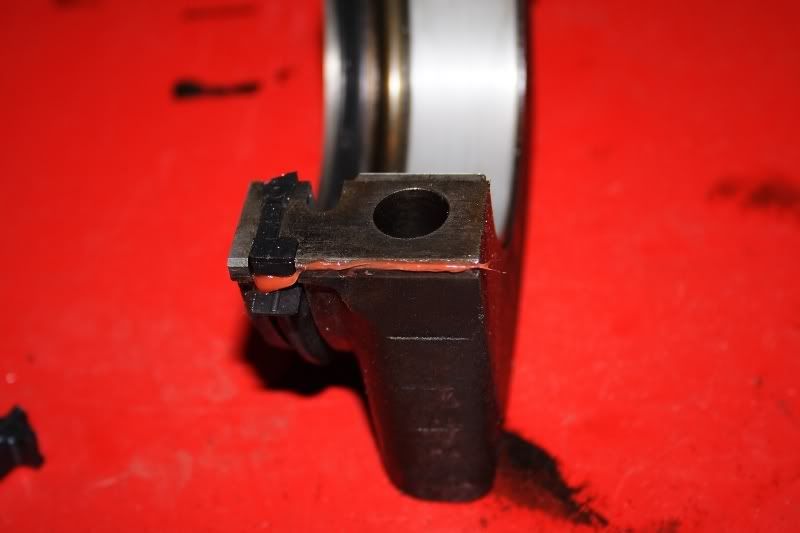
Next was to remove and install the new front pan seal, which was covered in RTV and was a little difficult to remove.
Finally, made sure that the bearing was clean and oiled, installed the main cap and torqued it to 100 lbs, first doing both bolts to 25lbs, then 50, then 75 and then finally 100. Then I ran a bead of high heat RTV gasket maker on the block, placed the cork gasket halves on top of that, and then ran a bead on the oil pan. Another tricky part was getting the pan back on the engine without getting RTV over everything. I put in the pan bolts just finger tight, left it for 24 hours to set up,and then torqued the large 6 bolts down to 11 ft/lbs. and the smaller ones until I saw the cork gasket starting to squeeze out. I filled it with 5 quarts of oil after changing the filter and started it up.
All in all, it would have probably taken me 3 -4 hours to get it done if I didn't have to leave to get some actual work done, but it wasn't that bad a job. I'm not a mechanic but I did rebuild my NP208 last year and it works.
The cost of doing this yourself is about $40.00 CAN and your time. Great payoff of stopping the puddles on the floor, for a few hours and $40.00.
Greg
First of all, I took off the starter and then removed the oil pan. I actually removed the 727 tranny inspection cover, thinking that I could get more room for the back 2 bolts, but it didn't matter. I did need to unbolt both sides of the exhaust from the manifolds to get enough room to drop the pan. My Waggy has a BJ's 6" lift, 33's and I did the whole repair without lifting the Jeep at all. I found that there was enough room for me to slide under the diff while on a creeper.
Then I needed to clean off the old gasket material from the pan and the bottom of the block. For the pan, I used a metal brush wheel on a drill, and for the block, I used a scraper that I had sharpened up on the grinder. I then cleaned out all the crud in the oil pan with varsol and then finished it up with brake cleaner.
I also pounded straight the flanges on the pan so that it would seat properly against the block.
Now it was time to remove the rear main cap. It was a bit of a PITA because it's torqued down to 100lbs. pressure, as stipulated in the TSM. I was told to be careful to keep the dirt off the half of the main bearing that I removed and made sure that it was clean and oiled when I put it back on.
Here's a pic with the main bearing cap removed. You can see the rear main seal just below the lip on the crank. I've already tapped it out from the other side.
Now the TSM states that you need to loosen the other main bearing caps, but EXTREME pacer said that he'd done it many times successfully without touching any of them, other than removing the rear. It was a real PITA to get at the seal to tap it out with a long skinny punch and I was beginning to doubt Craig's instructions when it suddenly came loose. Once it was moving, it came out rather easily. I then reversed the process and installed the new seal the same way that it had come out. Be careful installing the new seal as if it is not snug against the crank, you can easily carve off some of the seal when pushing it back in. Don't ask me how I know that.
Now, it was time to replace the other half of the rear main seal, which is rather easy when it's off the motor. Additionally, there is the pan seal that has to go on the outside of the cap. The TSM instructs to put some RTV at the ends of the pan seal as it looks like it is too short when you first put it in. Once it's torqued down, it's fine.
Thje one confusing thing I read on the pan gasket box was about putting some RTV on the chamferred edge but not on the flange between the main cap and block. I finally figured it out from the diagam in the TSM and it was here.
Next was to remove and install the new front pan seal, which was covered in RTV and was a little difficult to remove.
Finally, made sure that the bearing was clean and oiled, installed the main cap and torqued it to 100 lbs, first doing both bolts to 25lbs, then 50, then 75 and then finally 100. Then I ran a bead of high heat RTV gasket maker on the block, placed the cork gasket halves on top of that, and then ran a bead on the oil pan. Another tricky part was getting the pan back on the engine without getting RTV over everything. I put in the pan bolts just finger tight, left it for 24 hours to set up,and then torqued the large 6 bolts down to 11 ft/lbs. and the smaller ones until I saw the cork gasket starting to squeeze out. I filled it with 5 quarts of oil after changing the filter and started it up.
All in all, it would have probably taken me 3 -4 hours to get it done if I didn't have to leave to get some actual work done, but it wasn't that bad a job. I'm not a mechanic but I did rebuild my NP208 last year and it works.
The cost of doing this yourself is about $40.00 CAN and your time. Great payoff of stopping the puddles on the floor, for a few hours and $40.00.
Greg
 . Apparently this has happened several times before and the plug just keeps getting bigger. None of my sockets even fit the head anymore.


Comment