
 Tweet
Tweet
I'm going out now to pull some cab mount springs out of one of my parts rigs, I'm definitely putting em in my 74 J20 so I don't end up with the cracks you have.
-
Current fleet
Abner-73 He started it all in 1979 (plow truck now)
Bufurd-69 Fixed up to take Abners place as DD
Delta-70 Built for fun, 455 Olds, T-18, D-20, 4:10 gears
Humpty-74 J-20 4BT, NV4500, 30+MPG
07 JK Wife bought new...
13 Grand Cherokee Trail Hawk, wifes new ride -
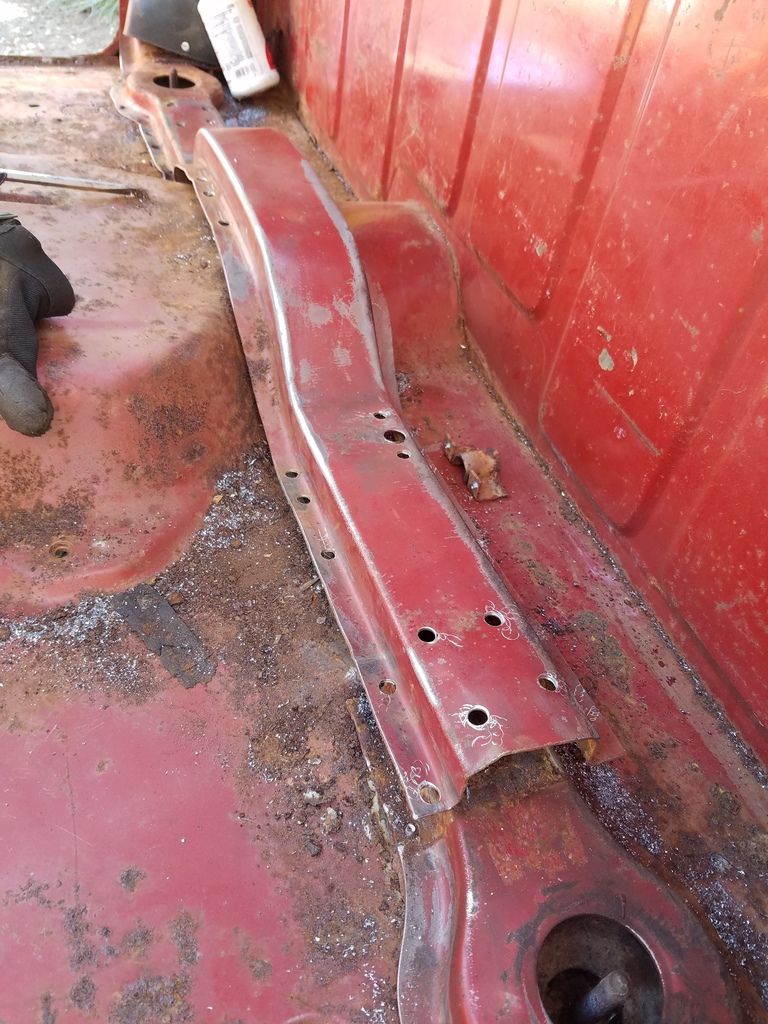
any idea how to pull out that cross member?1977 J20 w/ the 360 V8 with 304 heads formerly known as "401"....
Edelbrock Performer, Street Demon Carb, HEI DistributorComment
-
No.... To get them seatbelt bolts out of crossmember? I thought it was spot welded to floor....
Are your cabmounts (the spring thing) does the mount bolt thread into a captured nut down in there? Reason I ask is on my cab there is so I had to mount the spring underneath. The earlier trucks had a just a hole for the bolt to go through, so from the top it was bolt, heavy washer, spring, then put a nut on bottom from under truck. Because the nut on mine is part of the truck, I just did the same but from the bottom, which may be better because the spring in the cab can make a little noise. I said all that in case it wasn't making sense if yours has the nut in the crossmember. Current fleet
Abner-73 He started it all in 1979 (plow truck now)
Bufurd-69 Fixed up to take Abners place as DD
Delta-70 Built for fun, 455 Olds, T-18, D-20, 4:10 gears
Humpty-74 J-20 4BT, NV4500, 30+MPG
07 JK Wife bought new...
13 Grand Cherokee Trail Hawk, wifes new rideComment
-
Guess I'll have to wire wheel the rust off to find those welds... yay1977 J20 w/ the 360 V8 with 304 heads formerly known as "401"....
Edelbrock Performer, Street Demon Carb, HEI DistributorComment
-
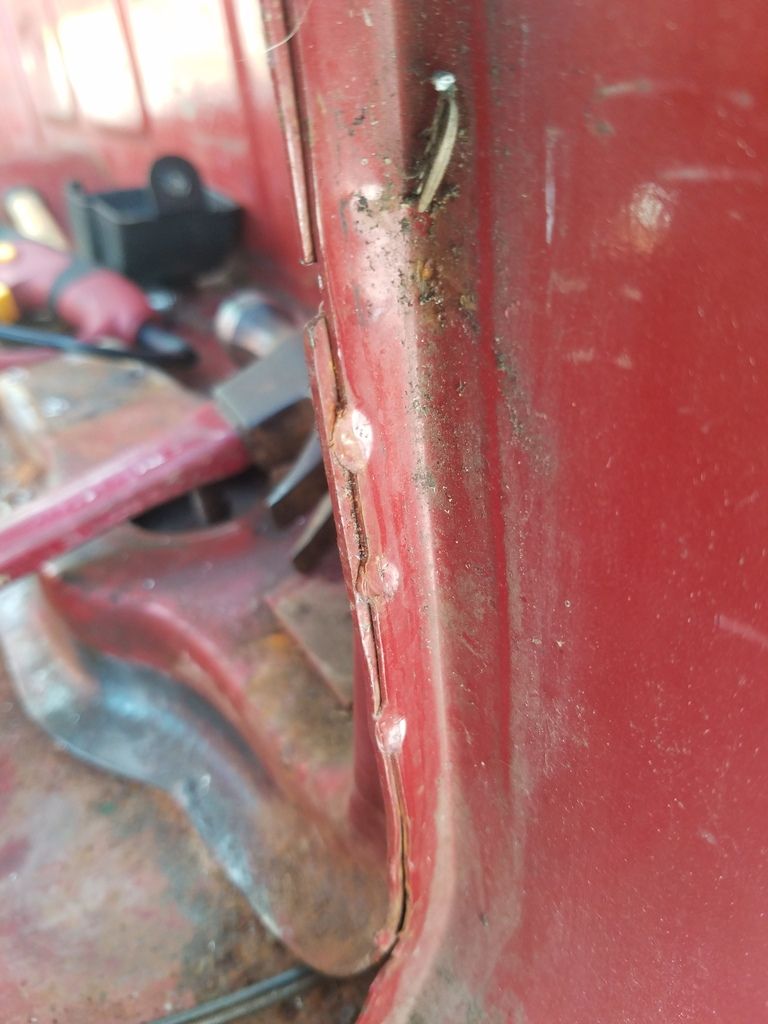
Good lord this has turned into a beast of a different color. Getting the "full" size rear pans instead of the "half" size that stops at that cross member means you've got to remove that cross member AND those b-pillar floor braces that the seat belt spool mounts to... and they are all spot welded like mad, friggin everywhere. On top of that (and I doubt this is factory) but someone decided to weld random places on that cross member to the floor... and of course there's also the PFM factor of how two pieces of metal that get rusty in close proximity to eachother can decide they are one piece, so even after I had drilled out all the spot welds, ground out the added welds and pried like mad from every angle I still couldn't get the damn thing to come up. The section that was giving me the most difficulty was the passenger side, and the floor was visibly pulled up an inch or more from all the prying, so I decided to just cut that part out around the cross member, and clean it up later. That whole section of floor is getting patched anyways, so, making sure I wasn't going to cut through anything I cared about,
piece of the floor still attached..
I've got work tomorrow so I'll get back to this when I can1977 J20 w/ the 360 V8 with 304 heads formerly known as "401"....
Edelbrock Performer, Street Demon Carb, HEI DistributorComment
-
What did you use to drill out you spot welds?
Comment
-
blair 3/8" spotweld cutter setOriginally posted by SnowShoe
edited because picture was HUGE
It's a pretty damned good tool, so far I've only used the one cutting head and I believe I have 2 (maybe three) more. It's definitely getting dull but I've got some needle files somewhere and I'm gonna give it the ol' college effort. Also, the skip-proof pilot is BS, it'll still walk on you like any other drill without a good center punch, and it seems to favor being held perfectly square to the surface. My drill has a bubble level in it that I've always thought was gimmicky... now I'm glad to have it. Not that it helps at all in tricky spots..
The floors are kicking my ass. There's some spots where the steel is so soft it's like lead and then you hit a weld and it's like a rock. I'd be using the grinder a helluva a lot more but I'm trying to keep pissing the neighbors off to a minimum. I'm doing all of this street side so I'm pretty sure anyone could call the 5-0 and place a "public nuisance" complaint... but it's not like my hammering, drilling and prying is all that much quieter... I'm just glad we've got so much construction in the neighborhood, there's always a jack hammer or some guys framing up something within earshot.. auditory camouflage..
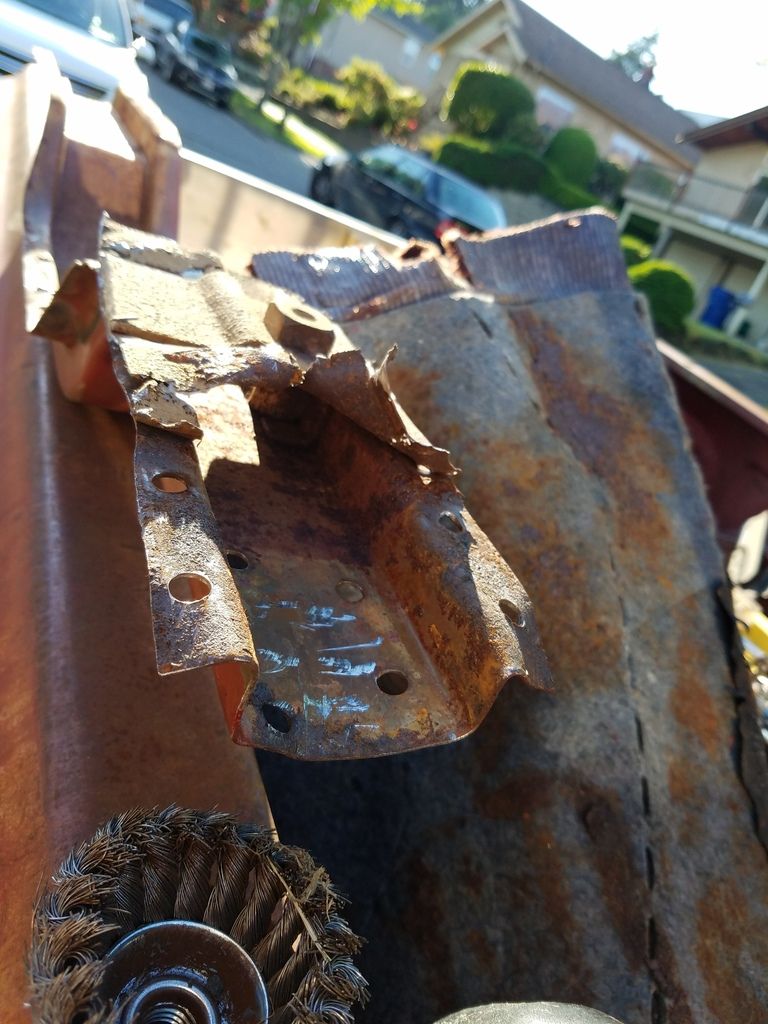
I keep running into things that make me scratch my head and say wtf...
here's an example: I'm looking at these "spot welds" on the b-pillar and thinking "these don't look like any spot welds I've seen before..."
and then I see these and keep wondering wtf... but screw it, center punch and ready the drill, i figure..

standard center punch and 20oz hammer swung at.. let's call it a light medium strength, enough to leave a decent dent with a center punch, maybe just light enough to hit it twice...

right friggin through, like it was aluminum foil... all the spot welds I've seen so far have been TOUGH SOB's, seriously their ruining my center punch... I dunno wtf these are but I imagine this side will be easier than the other, since all of it's spot welds are legit, and huge...
Did I mention I broke my favorite BFSD? I should pick up some legit cold chisels. Any recommendations? I'm not shy about going to harbor freight from time to time but I reckon their chinesium ain't gonna cut it..
Last edited by WrenchMonkey; 06-05-2017, 05:50 PM.1977 J20 w/ the 360 V8 with 304 heads formerly known as "401"....
I should pick up some legit cold chisels. Any recommendations? I'm not shy about going to harbor freight from time to time but I reckon their chinesium ain't gonna cut it..
Last edited by WrenchMonkey; 06-05-2017, 05:50 PM.1977 J20 w/ the 360 V8 with 304 heads formerly known as "401"....
Edelbrock Performer, Street Demon Carb, HEI DistributorComment
-
Thanks for your response...I've been having a bit of trouble getting my floor pans removed and replaced. I'll have to try the cutters you are using.
Comment
-
So I found a 29 gallon air compressor (that was inop) and am trying to frankenstien my CH air compressor to use the 29 gallon as an auxiliary tank (my pump is GOOD, but it's only 4.5 gallons) it's time to got to the air hammer, needle scaler, basically I've decided DAMN THE NEIGHBORS, FULL SPEED AHEAD!
Bonus points to anyone who knows the military history reference. But yeah, doing everything by hand, hammer and breaking screwdrivers... no thanks. I really don't have time for that.1977 J20 w/ the 360 V8 with 304 heads formerly known as "401"....
Edelbrock Performer, Street Demon Carb, HEI DistributorComment
-
Update! But first, some housekeeping: I'm currently using postimage.org which allowed me to upload all of these pictures at one time and provided me with links for ALL of them, in one large box with a copy to click board button, so you don't have to copy, post, copy, post and best of all, so far it's free, and no advertisements... it's everything I've always wanted with the only exception being the Img tag it adds it also a url and I'd like to turn that off but it's a very minor thing in the long run.


As one of the pictures demonstrates drilling out the spot welds is only so achievable, It's not always possible to find/see where they are, plus there's some oridinary welds from underneath (which may not be factory, in my case) so my mini Mjolnir and some pry bars were my primary method of breaking through those welds, by busting through them or around them depending on their toughness.
The disc I've been using on my grinder is http://www.homedepot.com/p/RIDGID-4-...TL45/204202513
and I've got to say it's been chewing through the metal pretty good, and it's nice not to have to replace those damn abrasive discs so much. HOWEVER, I recommend long sleeves, the sparks and slivers of metal this thing shoots back are slightly more substantial than typical, the crook of my elbow and lower biceps still have dozens of scab/tiny burn wounds (I'm really not sure which). With the normal wheels I've never given a damn about some hot sparks but this is a slightly different game and yes, you can ignore it for awhile but eventually it feels like you've been rolling in fiberglass so fair warning. BTW, the trade-off here is also speed, this wheel cuts faster than standard abrasive discs. A sawzall IS faster, you just have to be that much more careful what ELSE is underneath your floor pan!
I've been off the truck for a couple days due to the holidays and finding some additional sheet metal for the firewall, since the foot bed (particularly on the passenger side) is pretty rotted too.
I used a needle gun (harbor freight "compact" version) to chew out the rust on the floor support beams, todays plan is to go back, wire wheel what I can and then I'm going to soak some paper towels in OSPHO and lay them on top of all the rails overnight. Our highs during the day is 80+ currently so I'm trying to avoid the acid evaporating off before it can work by applying it with the paper towels.
After that a decent coat of Rust Stop before I weld the floors in (avoiding places I intend to weld, of course).
I've not yet decided if I'll truck bed those rails or not. That's a wait and see subject.
Because someone may ask, I'm using white charcoal art pencils for some of my lines, and I chose to cut and leave some odds places based on how bad the rust was and what I could leave in place to support the new metal. It's NOT the most logical or best set up but I tried to leave no less than an inch or more metal in all directions while also getting rid of all the worst rust.
OH, and you may notice my rear view mirror unmounted itself from all my hammering and beating... might be a good idea to unmount yours before it does it for you...Last edited by WrenchMonkey; 07-06-2017, 10:36 AM.1977 J20 w/ the 360 V8 with 304 heads formerly known as "401"....
Edelbrock Performer, Street Demon Carb, HEI DistributorComment
-
Nice work and I do mean WORK!!! this is a great post, many will appreciate.
Thanks please keep'em coming.
Comment
-
Here's where I'm at, approximately at the moment.


The roof was super rusty, pitted to hell and honestly I'm surprised I didn't find any complete holes.. After knocking off the biggest rust areas with grinder/wire wheel I used OSPHO to convert rust (iron oxide) into the inert black spots you see, iron phosphate (also known as "mill scale"), which is paintable (although NOT weldable, in some places I'll have to clean up the phosphate to get a good weld).
There are many other products out there and this is my first time with ospho, it seems to do a fairly good job, reasonably quickly. It's a little expensive but I'm thinking about using it on the exterior to convert much of the rust in the bed and panels black (and reduce further rot).
I may get towards welding today but I've got a couple tiny projects to work on in the meantime, https://www.amazon.com/Durston-Manuf.../dp/B000VHZHBO is a nice tool but for 30 dollars I can't justify a magnet on a stick with a piece of copper/brass on one end..
I know I won't be winning any design awards for this one but this is what I've fabricobbled together from what I've got. I soldered 3 piece of 1/8th brass together, found a 30lb magnet for 3 bucks and used 2 beat up sawzall blades to connect the two, and some various rivets, small piece of all-thread and a nut for the adjuster. This picture is the mock-up... whilst I could leave it in it's ugly glory I am about to take the extra two minutes to buzz off the teeth and corners before final assembly. It would work without the polish... but I might mistake it for junk and through it out..
 1977 J20 w/ the 360 V8 with 304 heads formerly known as "401"....
Edelbrock Performer, Street Demon Carb, HEI DistributorComment
-
"finished" plug welding tool. I think it'll work, time will tell 1977 J20 w/ the 360 V8 with 304 heads formerly known as "401"....
Edelbrock Performer, Street Demon Carb, HEI DistributorComment
-
So that tool I fabricated was next to useless, but good learning experience I guess.
I went on vacation and the truck got towed while I was gone, some city ordinance about not parking on the street for 3 days... which is literally every car on the road all the time but lets only abide by laws when we can take care of "eye sores"... anyways I hope my old neighbors house burns down for the heartburn and 500 dollars that cost me...


So long story short this was a much bigger endeavor than I originally thought (ie "I'll just plop um in and weld it down, no big deal") starting from how painful and difficult it was to remove that crossmember to how much of a pain it was to reinstall it and everything inbetween. Hopefully I'll never have to do this to anything else and next time I'm just going to cut out the worst bits and weld in new metal, replacing the whole floor was mostly unnecessary and if it aint broke don't fix it...
Butt welding is a true pain in the keister and anyone who does this for a living has my undying respect, it takes some serious skill to cut anything to fit THAT good. Too many dimensions and bends, curves, ect for me. Certain places I had to tack down a corner, heat the metal to glowing and beat the ever living hell out of it with a ball peen and mini mjolnir to get the bend or curve I needed in the right places.Last edited by WrenchMonkey; 10-13-2017, 05:18 PM.1977 J20 w/ the 360 V8 with 304 heads formerly known as "401"....
Edelbrock Performer, Street Demon Carb, HEI DistributorComment


Comment