Engine Bay ammeter bypass w/ Pics

Collapse
X
 
  • Filter
  • Time
  • Show
Clear All
new posts
  • araknid75
    232 I6
    • May 11, 2009
    • 37

    Engine Bay ammeter bypass w/ Pics

    Well, I did the Ammeter bypass today...took about 40 minutes...cost about $28 bucks (I went for the Heavy duty 100 amp fuse). I did this with pics just b/c I had a camera available.
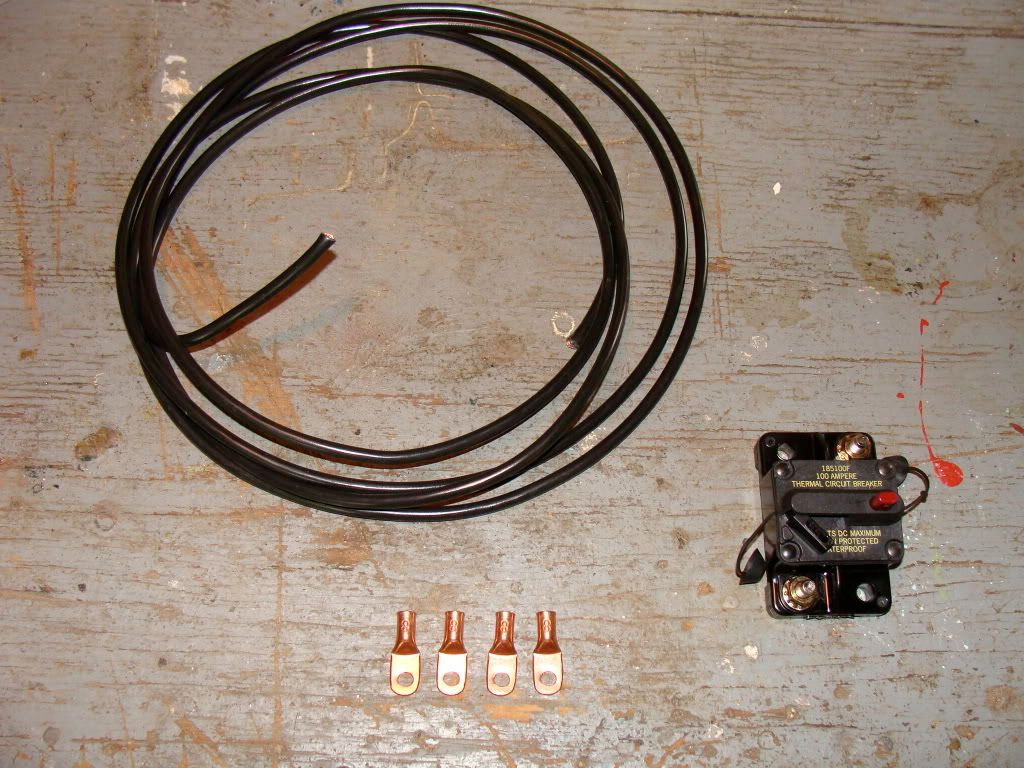
    Items:
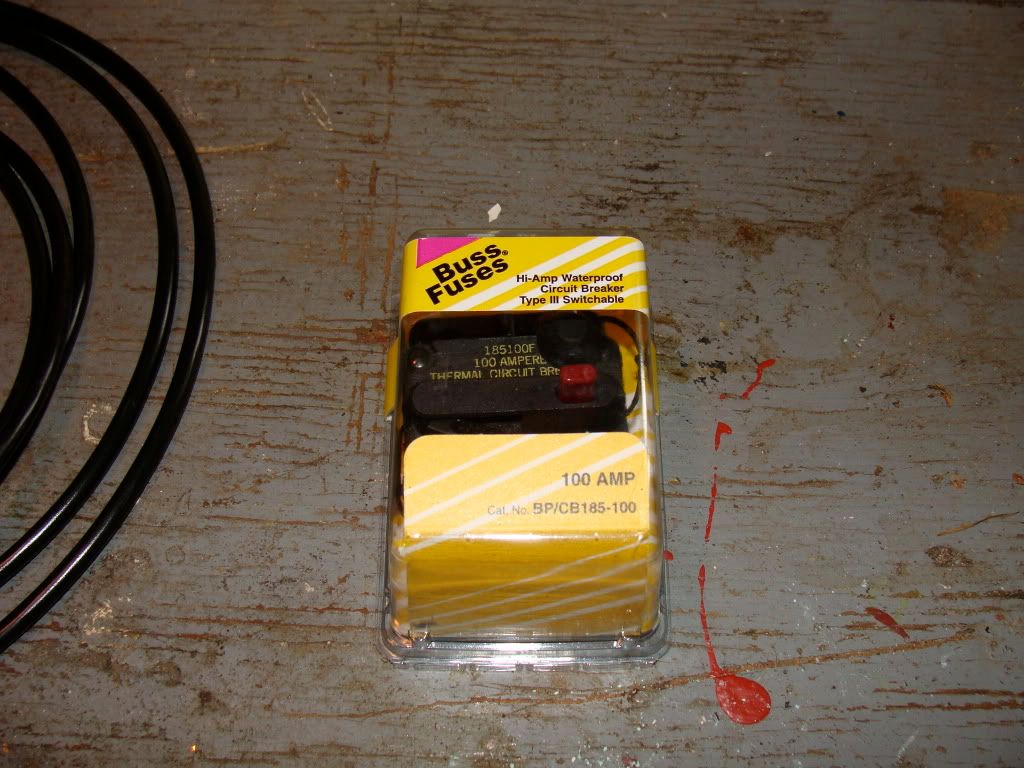
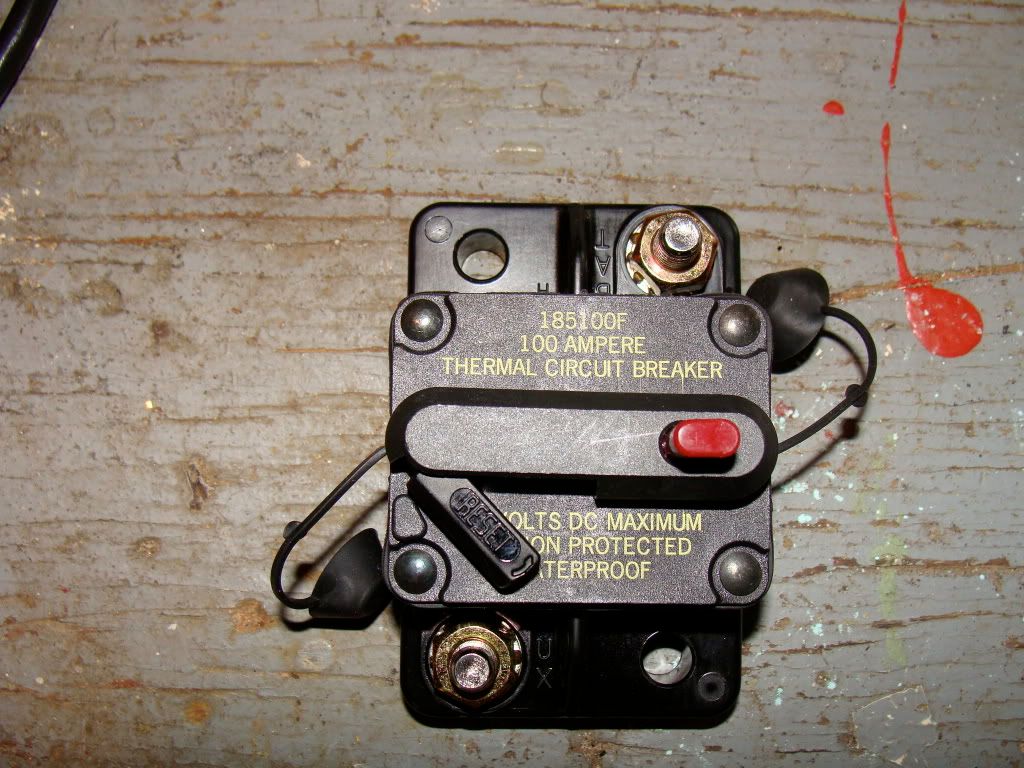
    100 amp self tripping/reset (like in your house) waterproof fuse-$19-Autozone (use a 100 Amp fuse for a mostly stock electrical
    system with a stock alternator because 50 is not enough and 200 is too
    much).
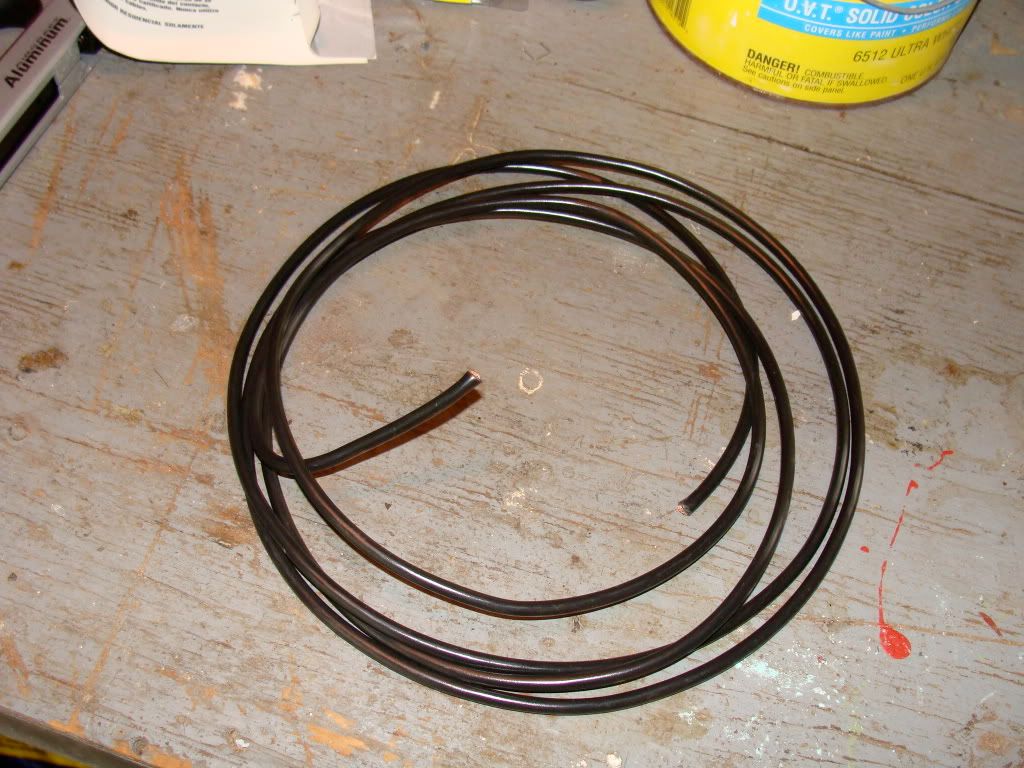
    3 feet of 8 gauge wire-$5 Napa (Autozone only sold 10g and higher)
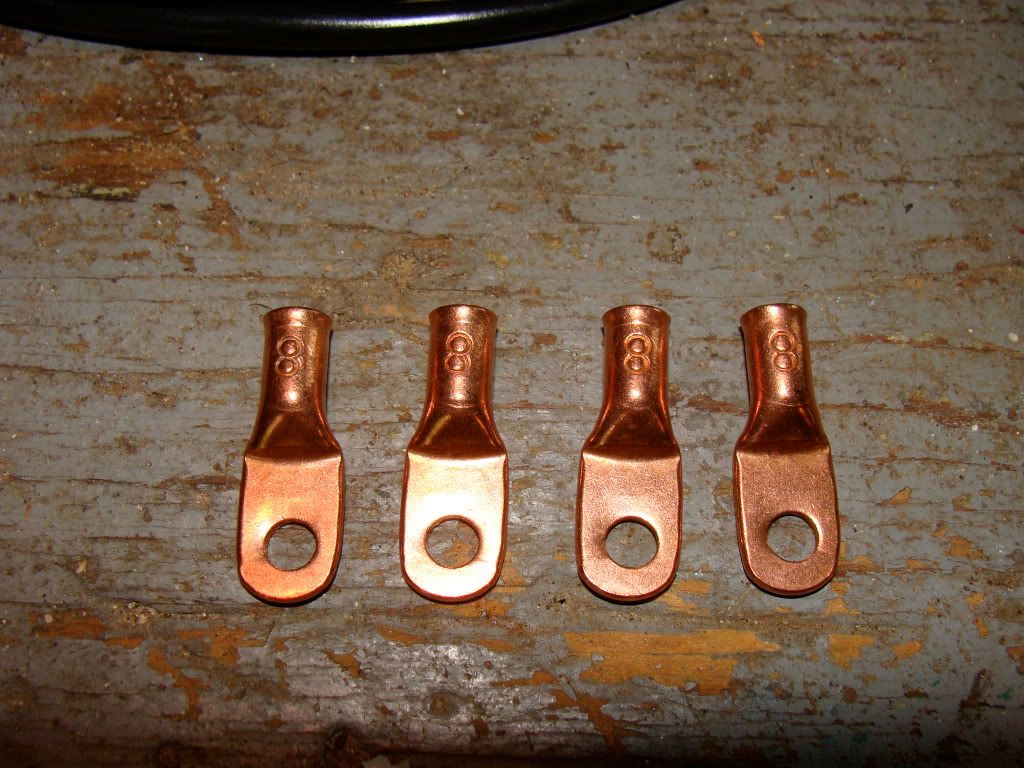
    copper connectors-$4 Napa


    miscellaneous screwdrivers, wrenches, electrical tape, wire cutters, etc.

    Step 0-before you do anything else....Disconnect your battery

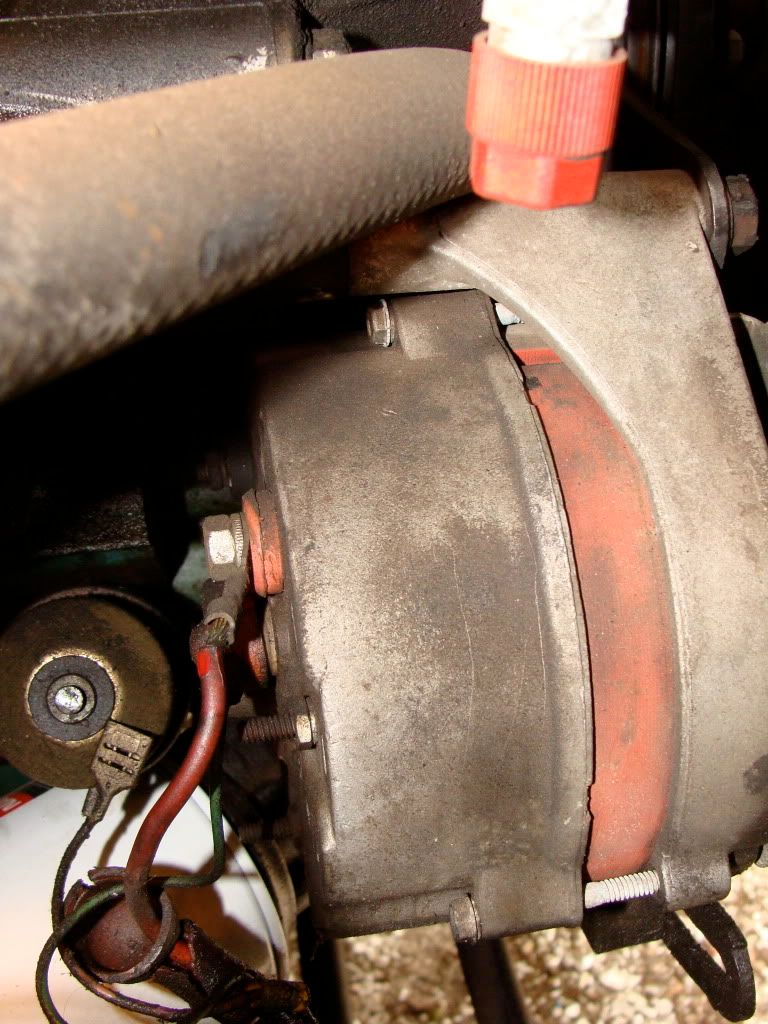
    Step 1- find your alternator....


    Step 2-Disconnect the RED wire from the "batt" post on the back of the
    alternator. Don't touch the plastic plug that plugs into the side (back) of the alternator. It has a green/yellow wire typically.


    Step 3-insulate the connector well - electrical tape with heat
    shrink tubing over that - and zip tie that wire back up the harness to
    keep it out of the way. Once again, don't change anything on the plastic plug that plugs into the side (back) of the alternator.

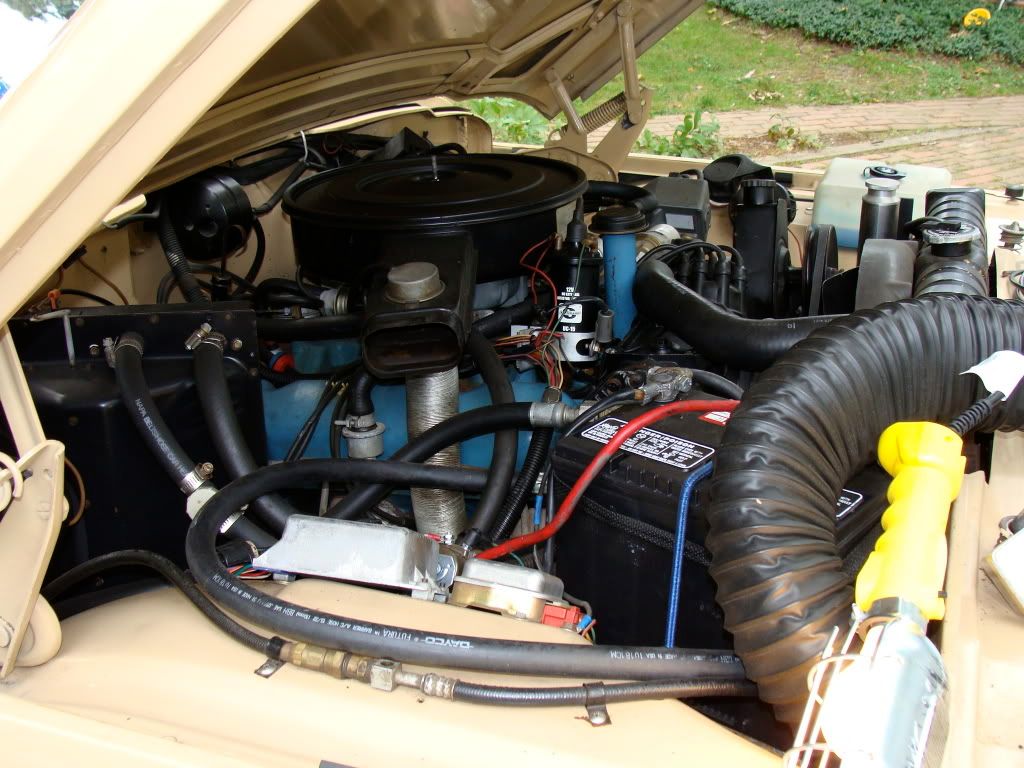
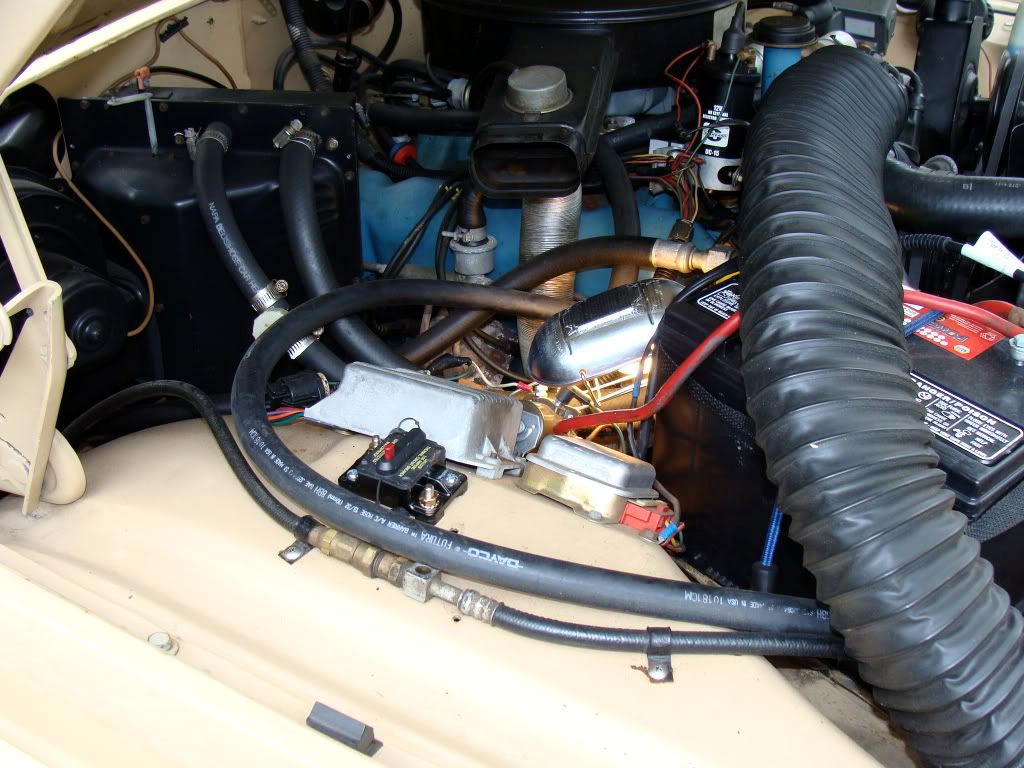
    Step 4-find your solenoid (battery connection)


    Step 5-Mount your Fuse on the fenderwell near the solenoid. In this case two nuts/screws with washers worked for mounting. I used one existing hole and drilled another.


    Step 5-measure the distance form the alternator to the fuse you mounted on the fender well (in this case two nuts/screws with washers worked for mounting) and from the Fuse to the solenoid + battery connection. About 2.5-3 feet (alt to fuse) depending on the route you take and 8-12inches (fuse to Solenoid) This fuse even tells you which connector goes where.

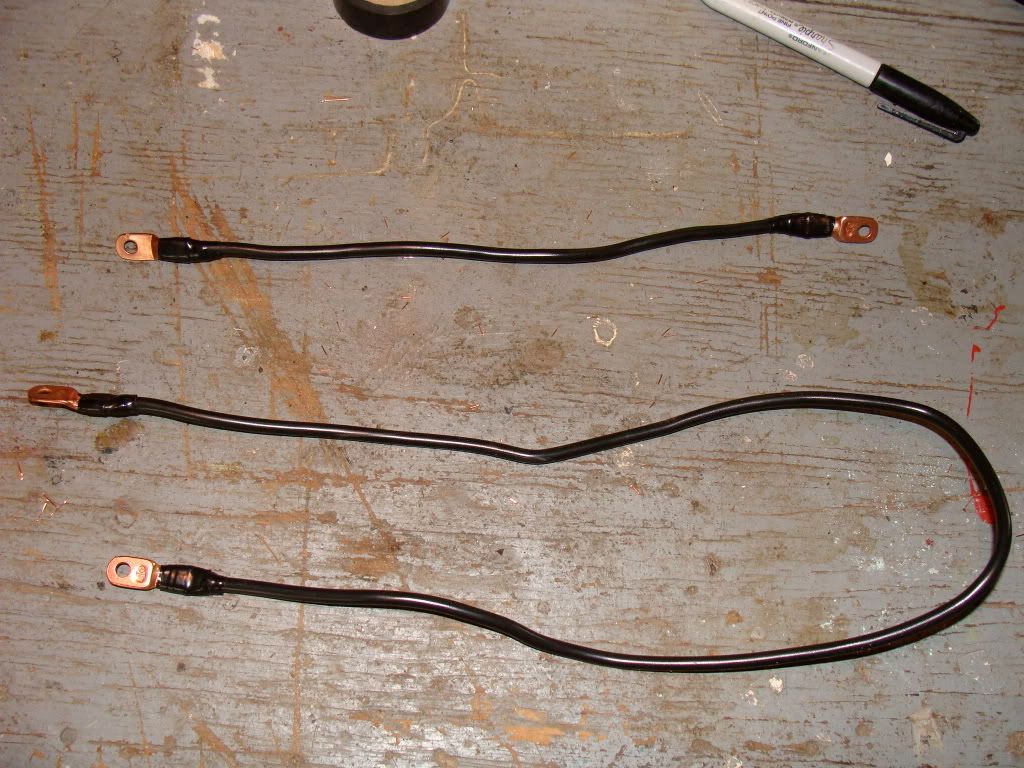
    Step 7-construct your wires-crimp leads onto the wire and wrap with elec tape


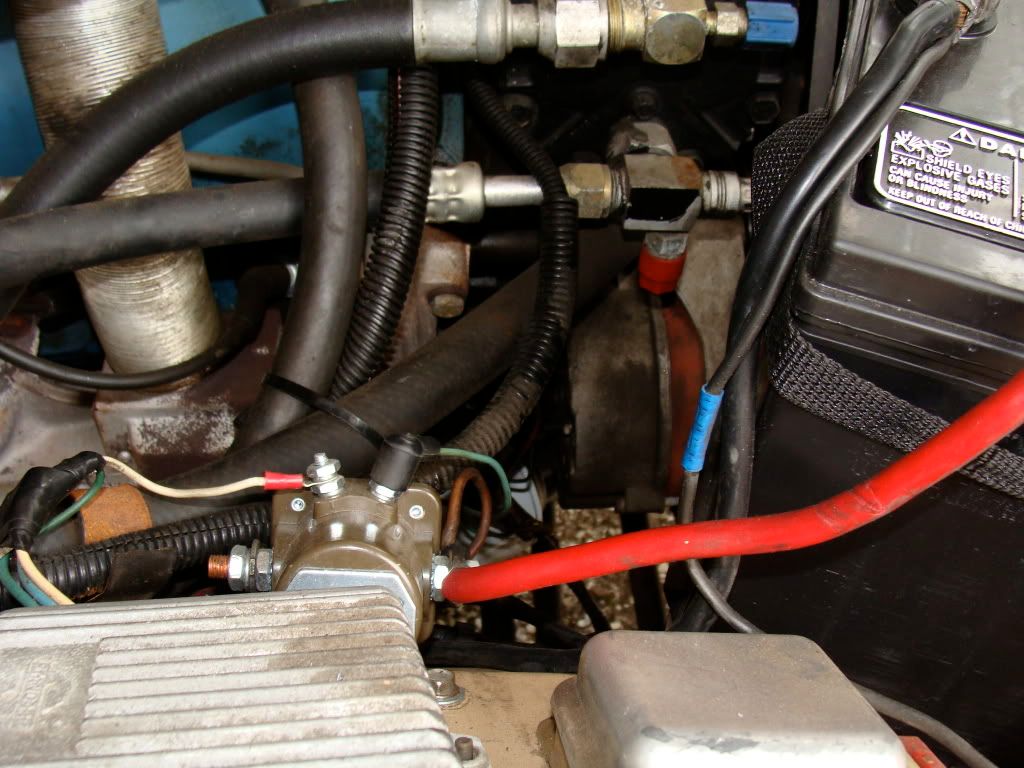
    Step 8-Route the 8 gauge wire from the post on the back of the
    alternator (YELLOW ARROW) to the fuse holder on the firewall keeping it clear of the exhaust manifold (GREEN ARROW).


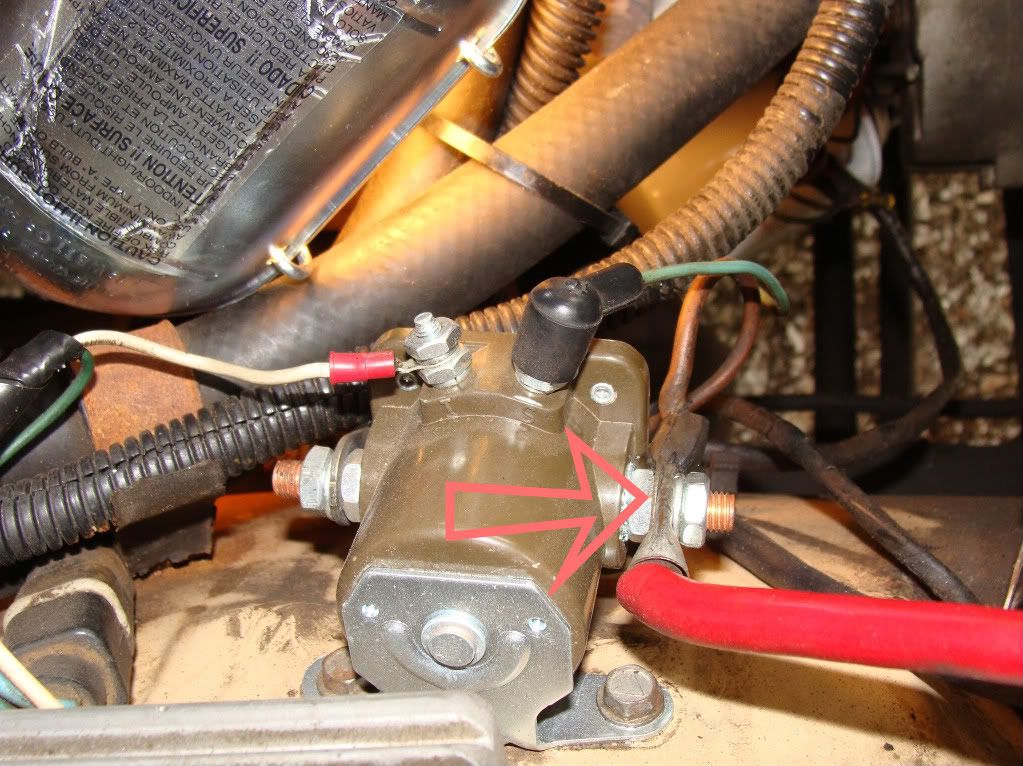
    Step 9-Route a wire from the other side of the fuse holder
    to the battery side of the starter solenoid (RED ARROW)


    The dash will get powerfine with the original alternator output wire disconnected and if it is insulated and protected well you don't need to worry about a short through the ammeter (ie. what we did in step 3)

    Now all I need to do is hook a voltmeter up in parallel and we are cooking with gas.

    Hope this helps anyone who has an FSJ and started out without a clue
    Last edited by araknid75; 06-28-2009, 08:41 PM.
    -1977 Cherokee Chief S, 401 mildly built, thorley headers, Magnaflow muffler with dual out exhaust, BJ's 4" offroad lift, 33X12.5R15 Goodyear Wrangler MTRk's, Front discos, offroad bumper and warn winch, Bumper hi-lift jack mount, KC offroad lights
    -04 Rubicon, 4" Rubicon Express SA lift. 33" MTR's, Superwinch, misc. armor.
  • Fiodh. Argus
    350 Buick
    • Jan 01, 2005
    • 1280

    #2
    hey that's a great write up, really clears things up! Thanks for taking the time to shoot the photos.

    nice work.
    Drew
    77 Cherokee WT

    Comment

    • jMedia
      350 Buick
      • May 27, 2009
      • 846

      #3
      Just curious..

      just curious because I am new...
      what is the intent behind doing this?
      Joshua
      1988 Grand Wagoneer "Elwood"(thanks krek)
      Constantly changing, never done

      Comment

      • babywag
        out of order
        • Jun 08, 2005
        • 10286

        #4
        Originally posted by jMedia
        just curious because I am new...
        what is the intent behind doing this?
        Older Jeeps have an ammeter gauge in the instrument cluster.
        Neglect & age sometimes lead to an electrical fire that can wreak havoc with the entire wiring harness, or worse yet turn into a car-b-que
        Tony
        88 GW, 67 J3000, 07 Magnum SRT8

        Comment

        • reddawn222
          232 I6
          • Sep 28, 2007
          • 101

          #5
          Araknid75,

          Very timely post and most appreciated. I am doing the CS130 alternator upgrade today and was planning to go behind the gauge panel. I like this approach to bypassing the ammeter with upgraded wiring, a stout breaker and everything is addressed in the engine bay.

          The pictures help dispel the nagging doubts I was having.

          Thanks!
          Gary

          1983 Cherokee WT, 360/727/208
          TBI fuel injection, CS130 alternator
          401 engine in the garage

          Comment

          • janie
            • Aug 11, 2001
            • 8270

            #6
            The ammeter bypass can never be addressed enough. Excellent write up and pic's. Thank you.
            He is your friend, your partner, your defender, your dog. Faithful and true to the last beat of his heart. You owe it to him to be worthy of such devotion.

            Comment

            • Geminiroq
              258 I6
              • Apr 06, 2007
              • 441

              #7
              Wow...this is the first I heard of this.

              Great write up!

              This is definently a must upgrade!

              Thank you....

              Comment

              • Asphalt Cowboy
                258 I6
                • Apr 07, 2009
                • 435

                #8
                Originally posted by babywag
                Older Jeeps have an ammeter gauge in the instrument cluster.
                Neglect & age sometimes lead to an electrical fire that can wreak havoc with the entire wiring harness, or worse yet turn into a car-b-que
                Which "older " Jeeps fall into this description? Is my '79 Wag at risk?
                1979 Wagoneer
                360/TH400/ Q-Trac/D44's
                31-10.50's on Truck Rallies

                1965 Gladiator (model unknown)
                230 Tornado
                T98, D20
                D44 front D53 rear
                slightly rusted, heavily neglected
                Mouse in the defroster has
                been evicted.

                I might curse because roses have thorns,
                Or I might rejoice because thorns have roses.

                Comment

                • araknid75
                  232 I6
                  • May 11, 2009
                  • 37

                  #9
                  Originally posted by reddawn222
                  Araknid75,

                  Very timely post and most appreciated. I am doing the CS130 alternator upgrade today and was planning to go behind the gauge panel. I like this approach to bypassing the ammeter with upgraded wiring, a stout breaker and everything is addressed in the engine bay.

                  The pictures help dispel the nagging doubts I was having.

                  Thanks!
                  That's a great upgrade...I didn't really feel like going behind the gauge panel either but now I have no way to monitor my electrical system, if you still want to monitor your electrical system you will still need to hook up a Voltmeter in parallel. I need to do this next...
                  -1977 Cherokee Chief S, 401 mildly built, thorley headers, Magnaflow muffler with dual out exhaust, BJ's 4" offroad lift, 33X12.5R15 Goodyear Wrangler MTRk's, Front discos, offroad bumper and warn winch, Bumper hi-lift jack mount, KC offroad lights
                  -04 Rubicon, 4" Rubicon Express SA lift. 33" MTR's, Superwinch, misc. armor.

                  Comment

                  • araknid75
                    232 I6
                    • May 11, 2009
                    • 37

                    #10
                    Originally posted by Asphalt Cowboy
                    Which "older " Jeeps fall into this description? Is my '79 Wag at risk?
                    I think the general consensus is if you have a -60/0/+60 ammeter in your gauge cluster it probably needs to be upgraded or bypassed. At the very least because those wires are greater than 30 years old !
                    Last edited by araknid75; 06-29-2009, 06:57 PM.
                    -1977 Cherokee Chief S, 401 mildly built, thorley headers, Magnaflow muffler with dual out exhaust, BJ's 4" offroad lift, 33X12.5R15 Goodyear Wrangler MTRk's, Front discos, offroad bumper and warn winch, Bumper hi-lift jack mount, KC offroad lights
                    -04 Rubicon, 4" Rubicon Express SA lift. 33" MTR's, Superwinch, misc. armor.

                    Comment

                    • janie
                      • Aug 11, 2001
                      • 8270

                      #11
                      Originally posted by Asphalt Cowboy
                      Is my '79 Wag at risk?

                      It is. The ammeter didn't go by the wayside until the 86 model year.
                      He is your friend, your partner, your defender, your dog. Faithful and true to the last beat of his heart. You owe it to him to be worthy of such devotion.

                      Comment

                      • reddawn222
                        232 I6
                        • Sep 28, 2007
                        • 101

                        #12
                        That's a great upgrade...I didn't really feel like going behind the gauge panel either but now I have no way to monitor my electrical system, if you still want to monitor your electrical system you will still need to hook up a Voltmeter in parallel. I need to do this next...
                        Yes, a voltmeter is a future project...in conjunction with a ZMJeeps cluster panel and all new Autometer gauges.
                        Gary

                        1983 Cherokee WT, 360/727/208
                        TBI fuel injection, CS130 alternator
                        401 engine in the garage

                        Comment

                        • vintagetrks
                          304 AMC
                          • May 01, 2009
                          • 2027

                          #13
                          Bypass

                          Does your ammeter still work after the bypass. I actually prefer an ammeter as to a volt meter because you can actually tell when the alt is putting voltage to the battery. I also like your idea of running a volt meter in series. Great write up thank you for taking the time to show us how it's done.
                          New Full Size Jeep Nut

                          I'm just a washed up old has been, Army guy.
                          My opinions are outdated... After all, what have I done lately? I used to be somebody "A SOLDIER!"

                          04 Jeep Wrangler "Lil Ninja" 32's 2in lift swaybar disconnects
                          90 Grand Wagoneer "Big Mama"

                          Comment

                          • bigbird
                            232 I6
                            • Nov 18, 2007
                            • 78

                            #14
                            Had a few questions on the upgrade. Is the fuse needed? I read up on some other writeups and some did not include the fuse they just hooked a large guage wire from the alt to the solenoid. if the fuse is needed what amp is recommened if planning a CS144 upgrade. thanks for the help

                            Comment

                            • duncanstives
                              304 AMC
                              • Mar 27, 2008
                              • 2244

                              #15
                              You could upgrade the ampmeter also... I tend to agree that an ampmeter is better but I would replace it with something better... I would say a cheap digital voltmeter accross a voltage drop resistor but to get .1V drop (enough to measure and get decent resolution with a digital meter) at 12v/60A you would need a .0016 ohm resistor I don't think radio shack carries those... LOL

                              You could use a hall effect sensor I guess...
                              88 Waggy
                              Resting in peace... Um... In piece... Er... IN PIECES

                              Current Status: Under construction. Phase 2.

                              86 Pathfinder Conversions "K-Van"

                              Current Status: Broke

                              Volkswagen rail buggy

                              Current status: Broke

                              95 Jeep ZJ V8

                              Current status: DDing

                              Comment

                              Working...
                              X